The Latest From BostonBiker.org
News, Events, Updates
How To Build A 1000$ Bicycle Trailer For $450
Written by Boston Biker on Oct 24I have always wanted a huge ass bicycle trailer. Something I can pile improbable amounts of stuff on, something I can use to grab dumpster dived treasures, something I could move to a new apartment with. Something that can transport all my dreams! In short something like this.
There is only one problem…I don’t have $975 (plus shipping) to blow on a bike trailer. For that kind of money I could buy a really nice road bike, or you know, eat food and pay rent.
But as so often is the case,where there is a will there is a way. After looking at this picture for a while:
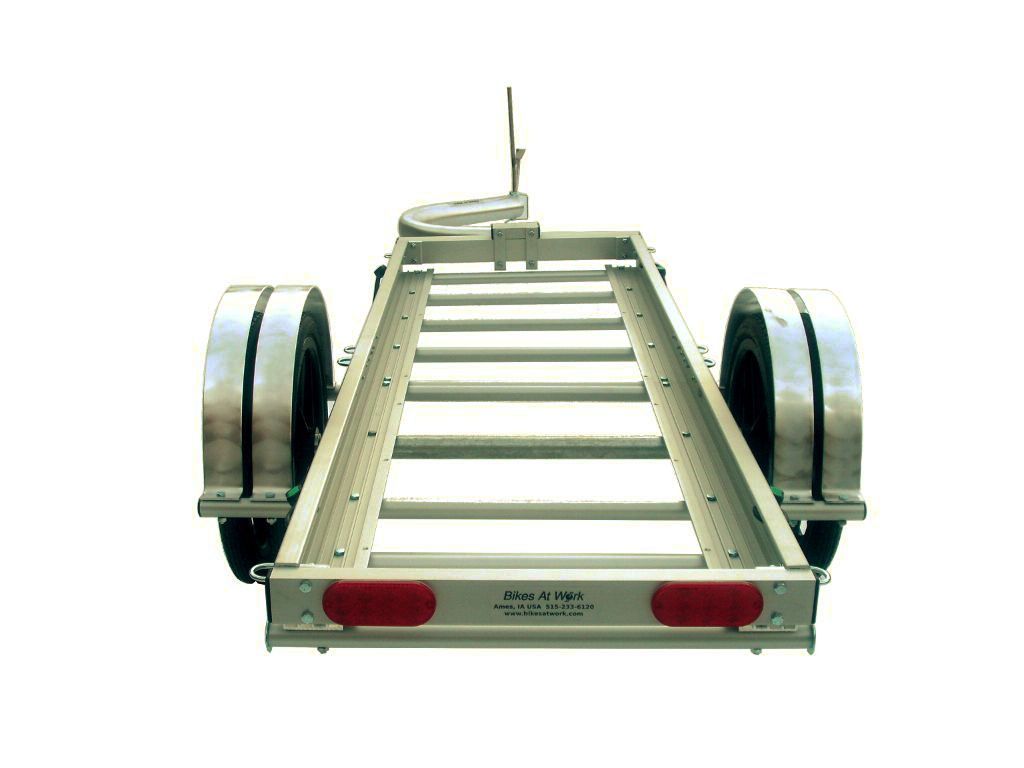
This beautiful trailer can transport 600lbs of anything you wish to put onto it…the only problem is it costs nearly $1000.
I had a dream, a dream that would become this:

5oolbs of carrying capacity for only $450!!!!
Not only was 1/2 the cost, but it was fall off a log easy to construct!
I started off my journey thinking that I could take an aluminum ladder, and mount some wheels on it. And you know what I could have done that, and it would have worked, and it wouldn’t have been too bad. But it would have been a lot less beefy, and I wanted beefy. I wanted something that would carry a stack of 2×4’s, or a bunch of boxes of stuff, or a kitchen table, something with a contained cargo area, and something that would look nice. so I kept thinking.
I knew I wanted it to be aluminium, it would be light, strong, rust proof, and wouldn’t require welding. I wanted it to be an awful lot like that $975 Bikes At Work trailer.
While combing their website for pictures to get ideas, I saw that they actually sold most of the accessories I would need to make a cheaper trailer, if only I could find the perfect trailer bed.
So I went to Google and typed in “extruded aluminium” and low and behold this bad boy popped up on amazon.
 I started reading…aluminum check, strong check, 500lb load limit check, side rails check, and bless my nippers the perfect size…no really like absolutely perfect to interface with all the accessories I was going to buy from Bikes At Work.
If that wasn’t enough, the stars had aligned to provide me with $300 of cash I wasn’t expecting. Making the final cost for this entire thing a scant $150 out of my pocket. It was a sign.
I ordered one and it was here in three days, took about half an hour to assemble. The only changes I made to the design was I removed the trailer hitch (didn’t need that), which involved simply pulling it out and setting it aside.
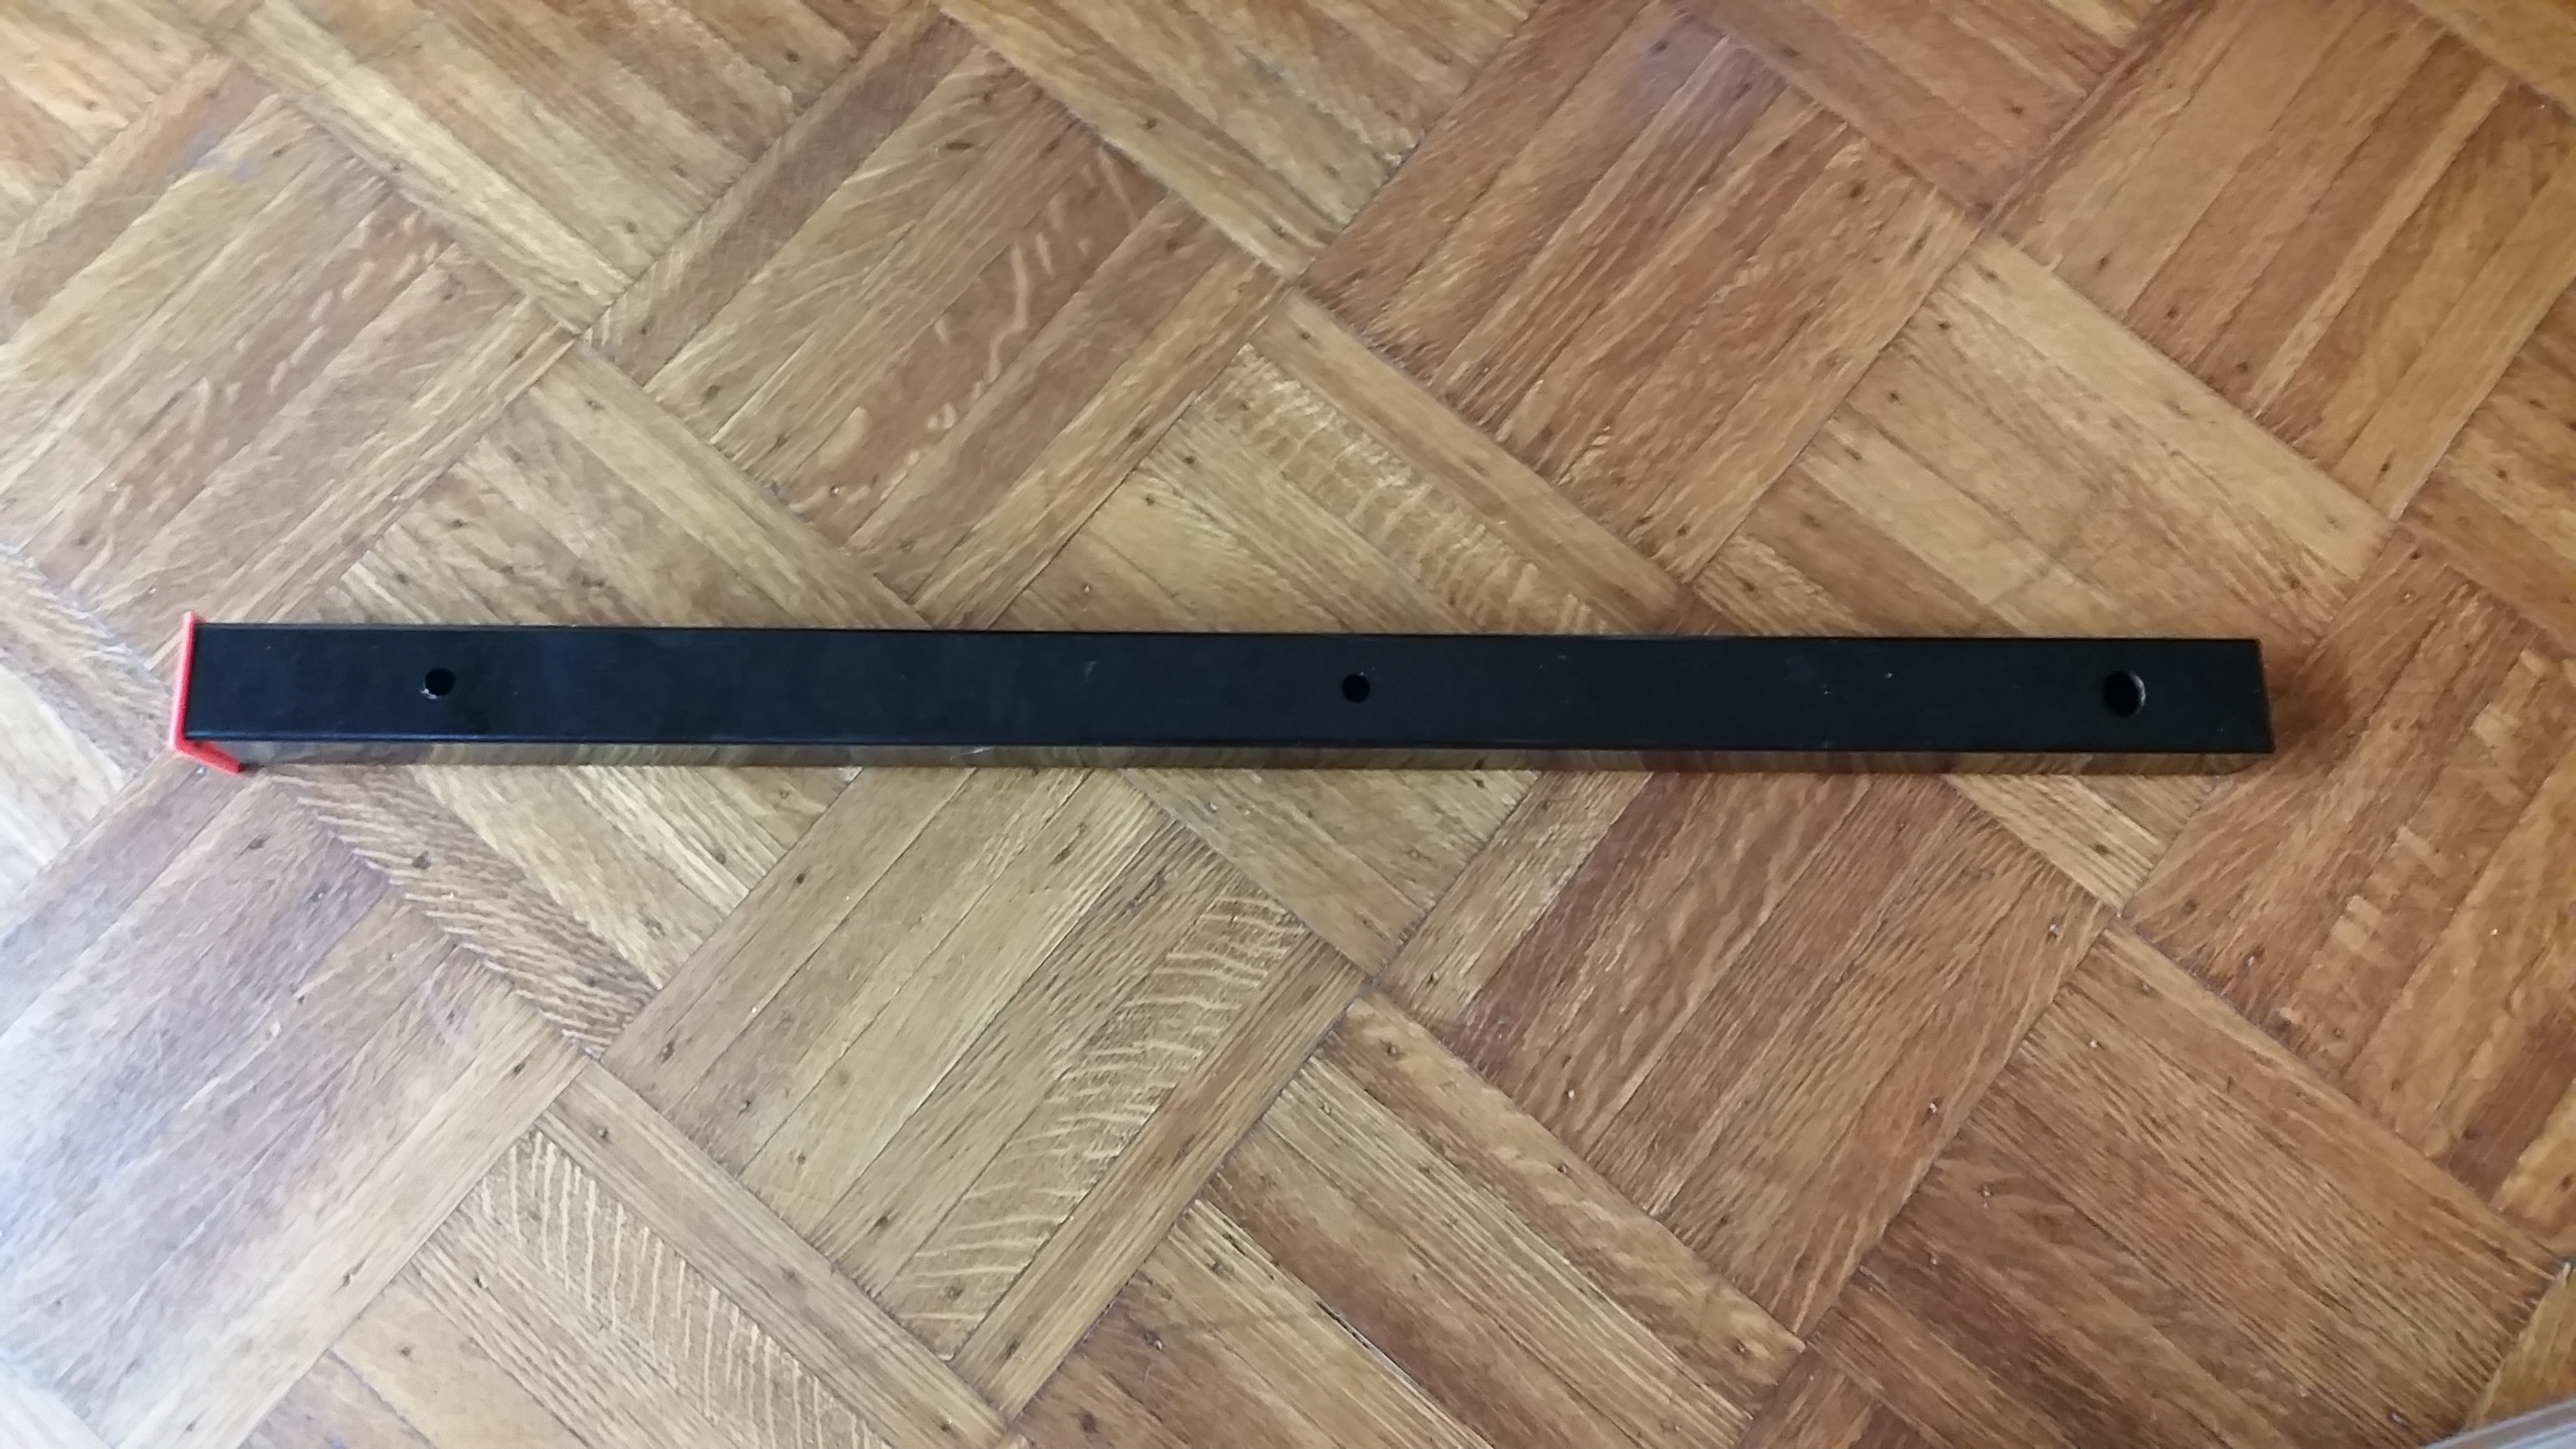
I also moved the included reflectors from the side to the back, as they would do a lot more good back there.


Moving the reflectors was as easy as swapping a two holed piece of aluminum, with a one hole piece. All you need to assemble this cargo rack is a screw driver, and an adjustable wrench, it comes with all the hardware you will need.
Next up was the accessories needed to turn what was supposed to be attached to the back of an SUV, to the back of my bike.
Here is what I ended up buying from Bikes At Work:

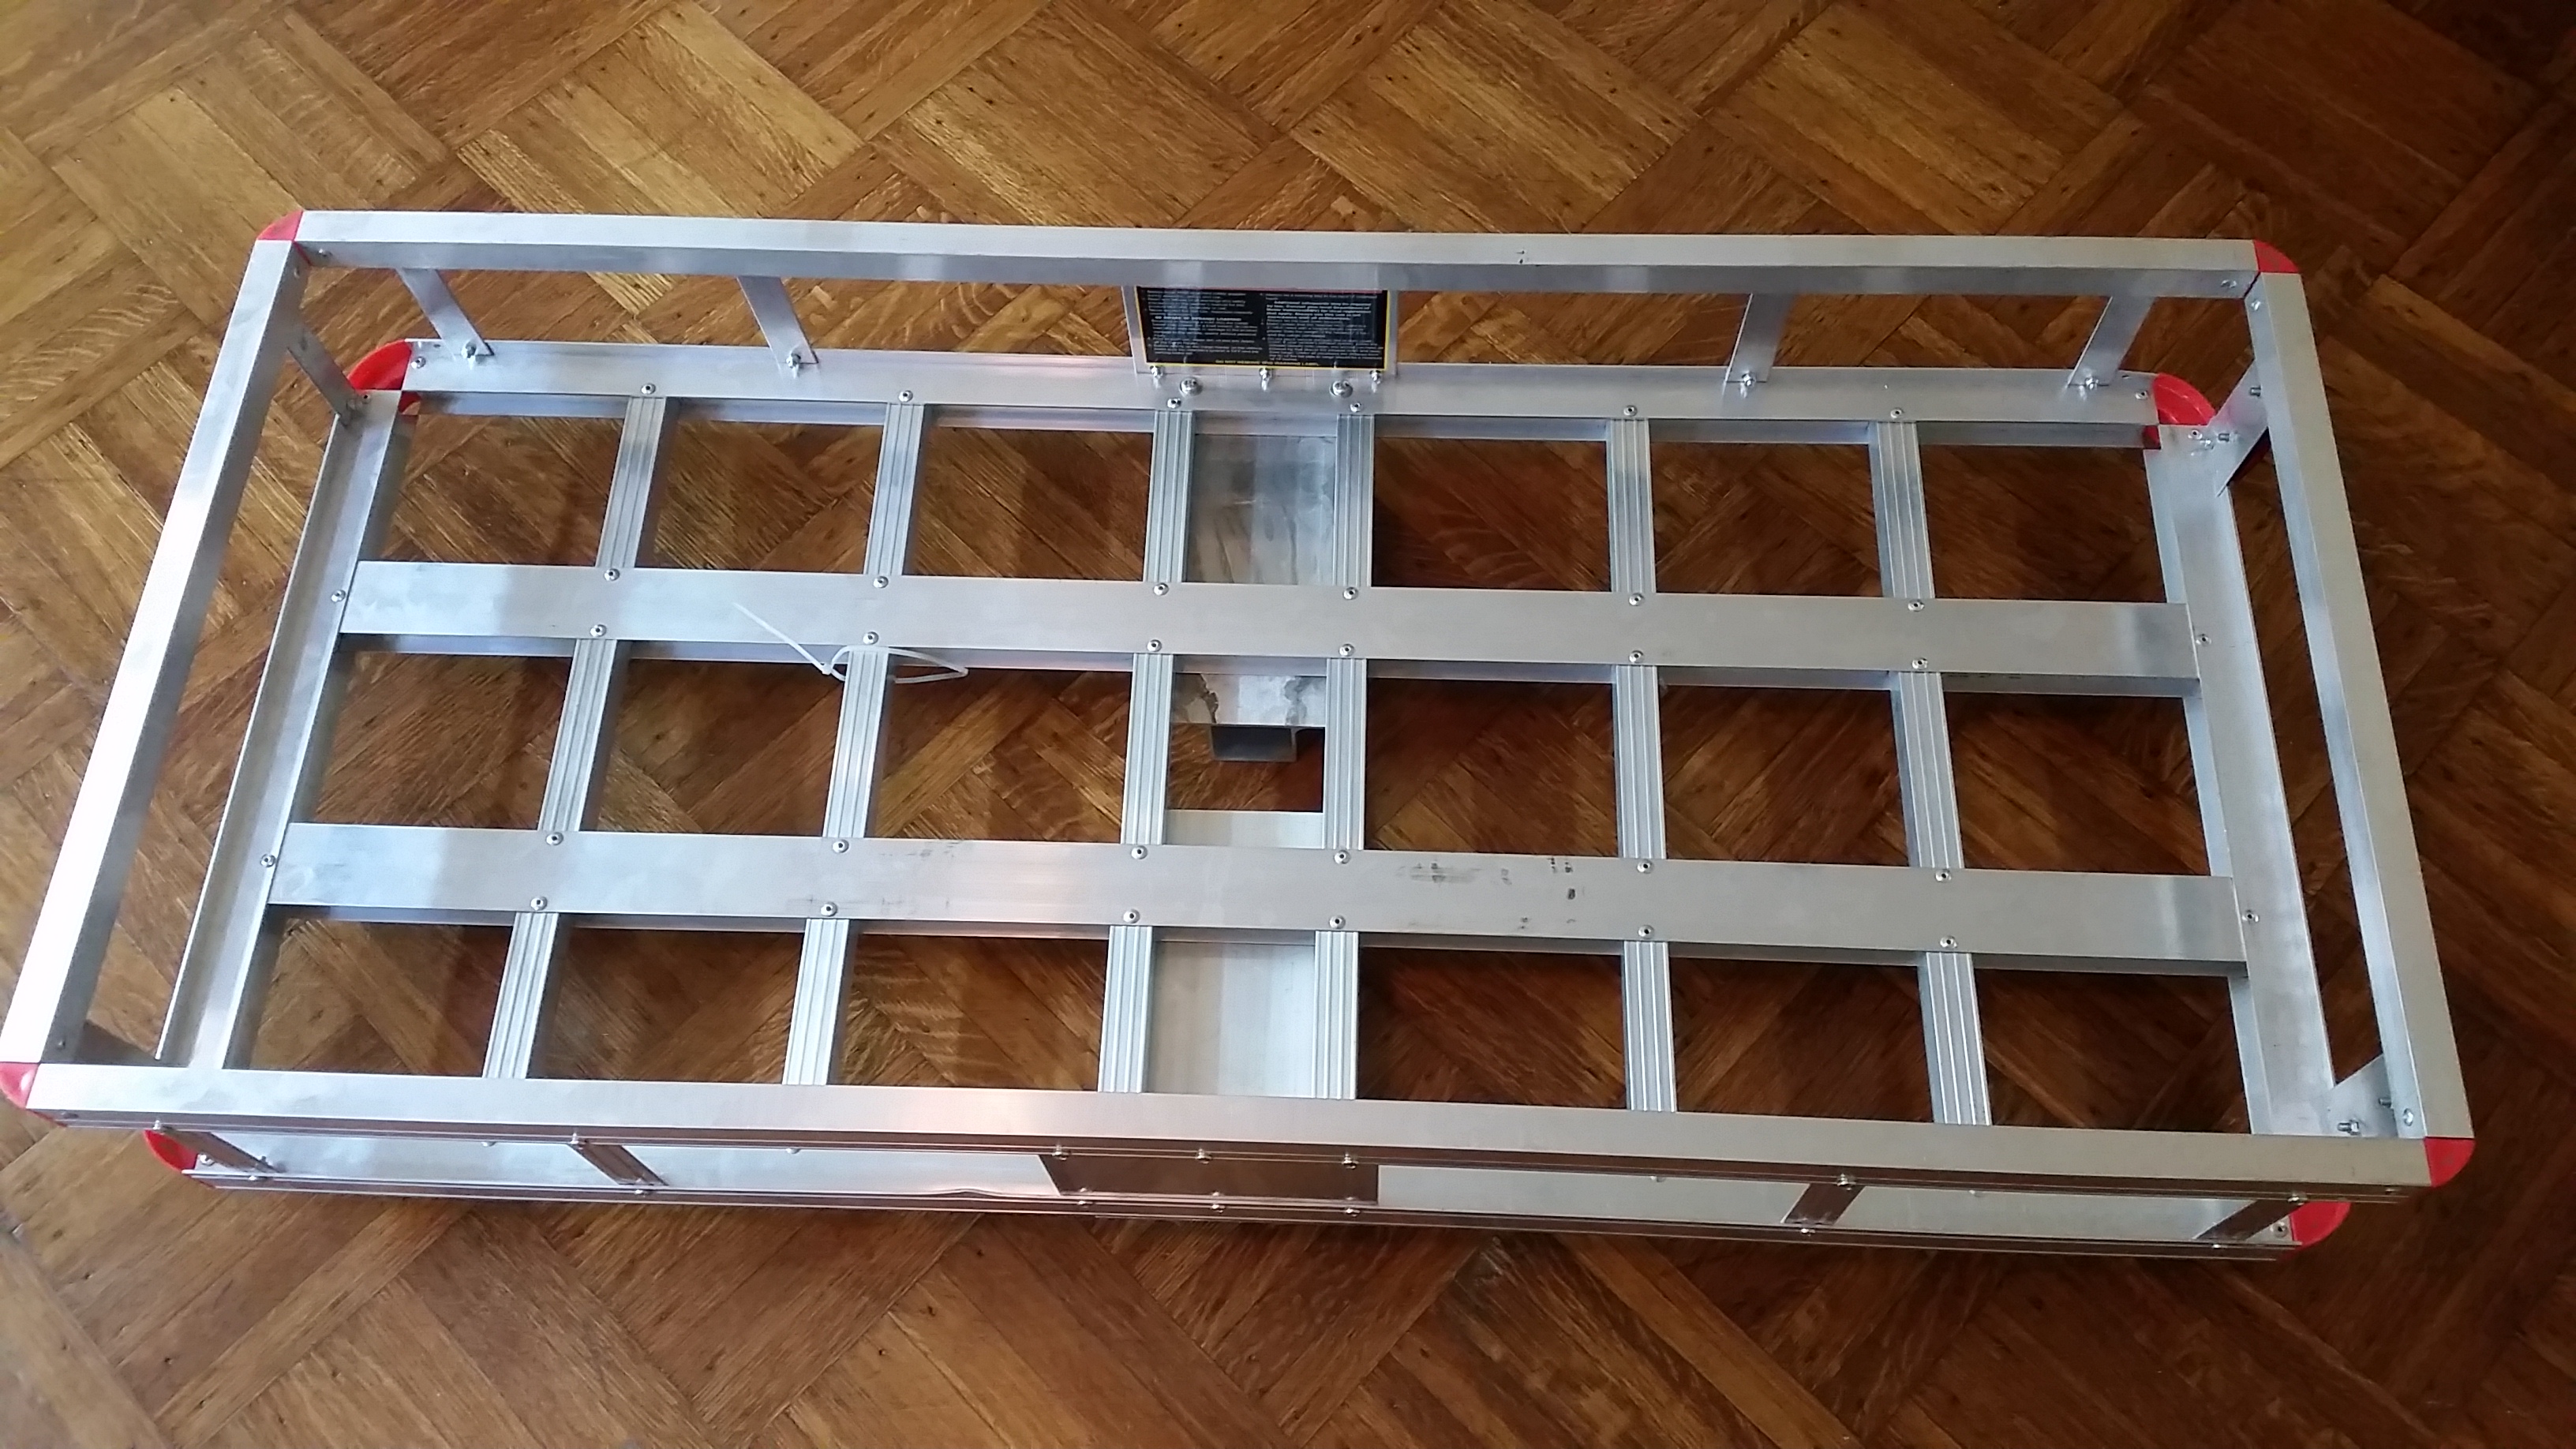
The entire works (this is the box the cargo carrier came in, all these parts were actually packed in a very tiny box)

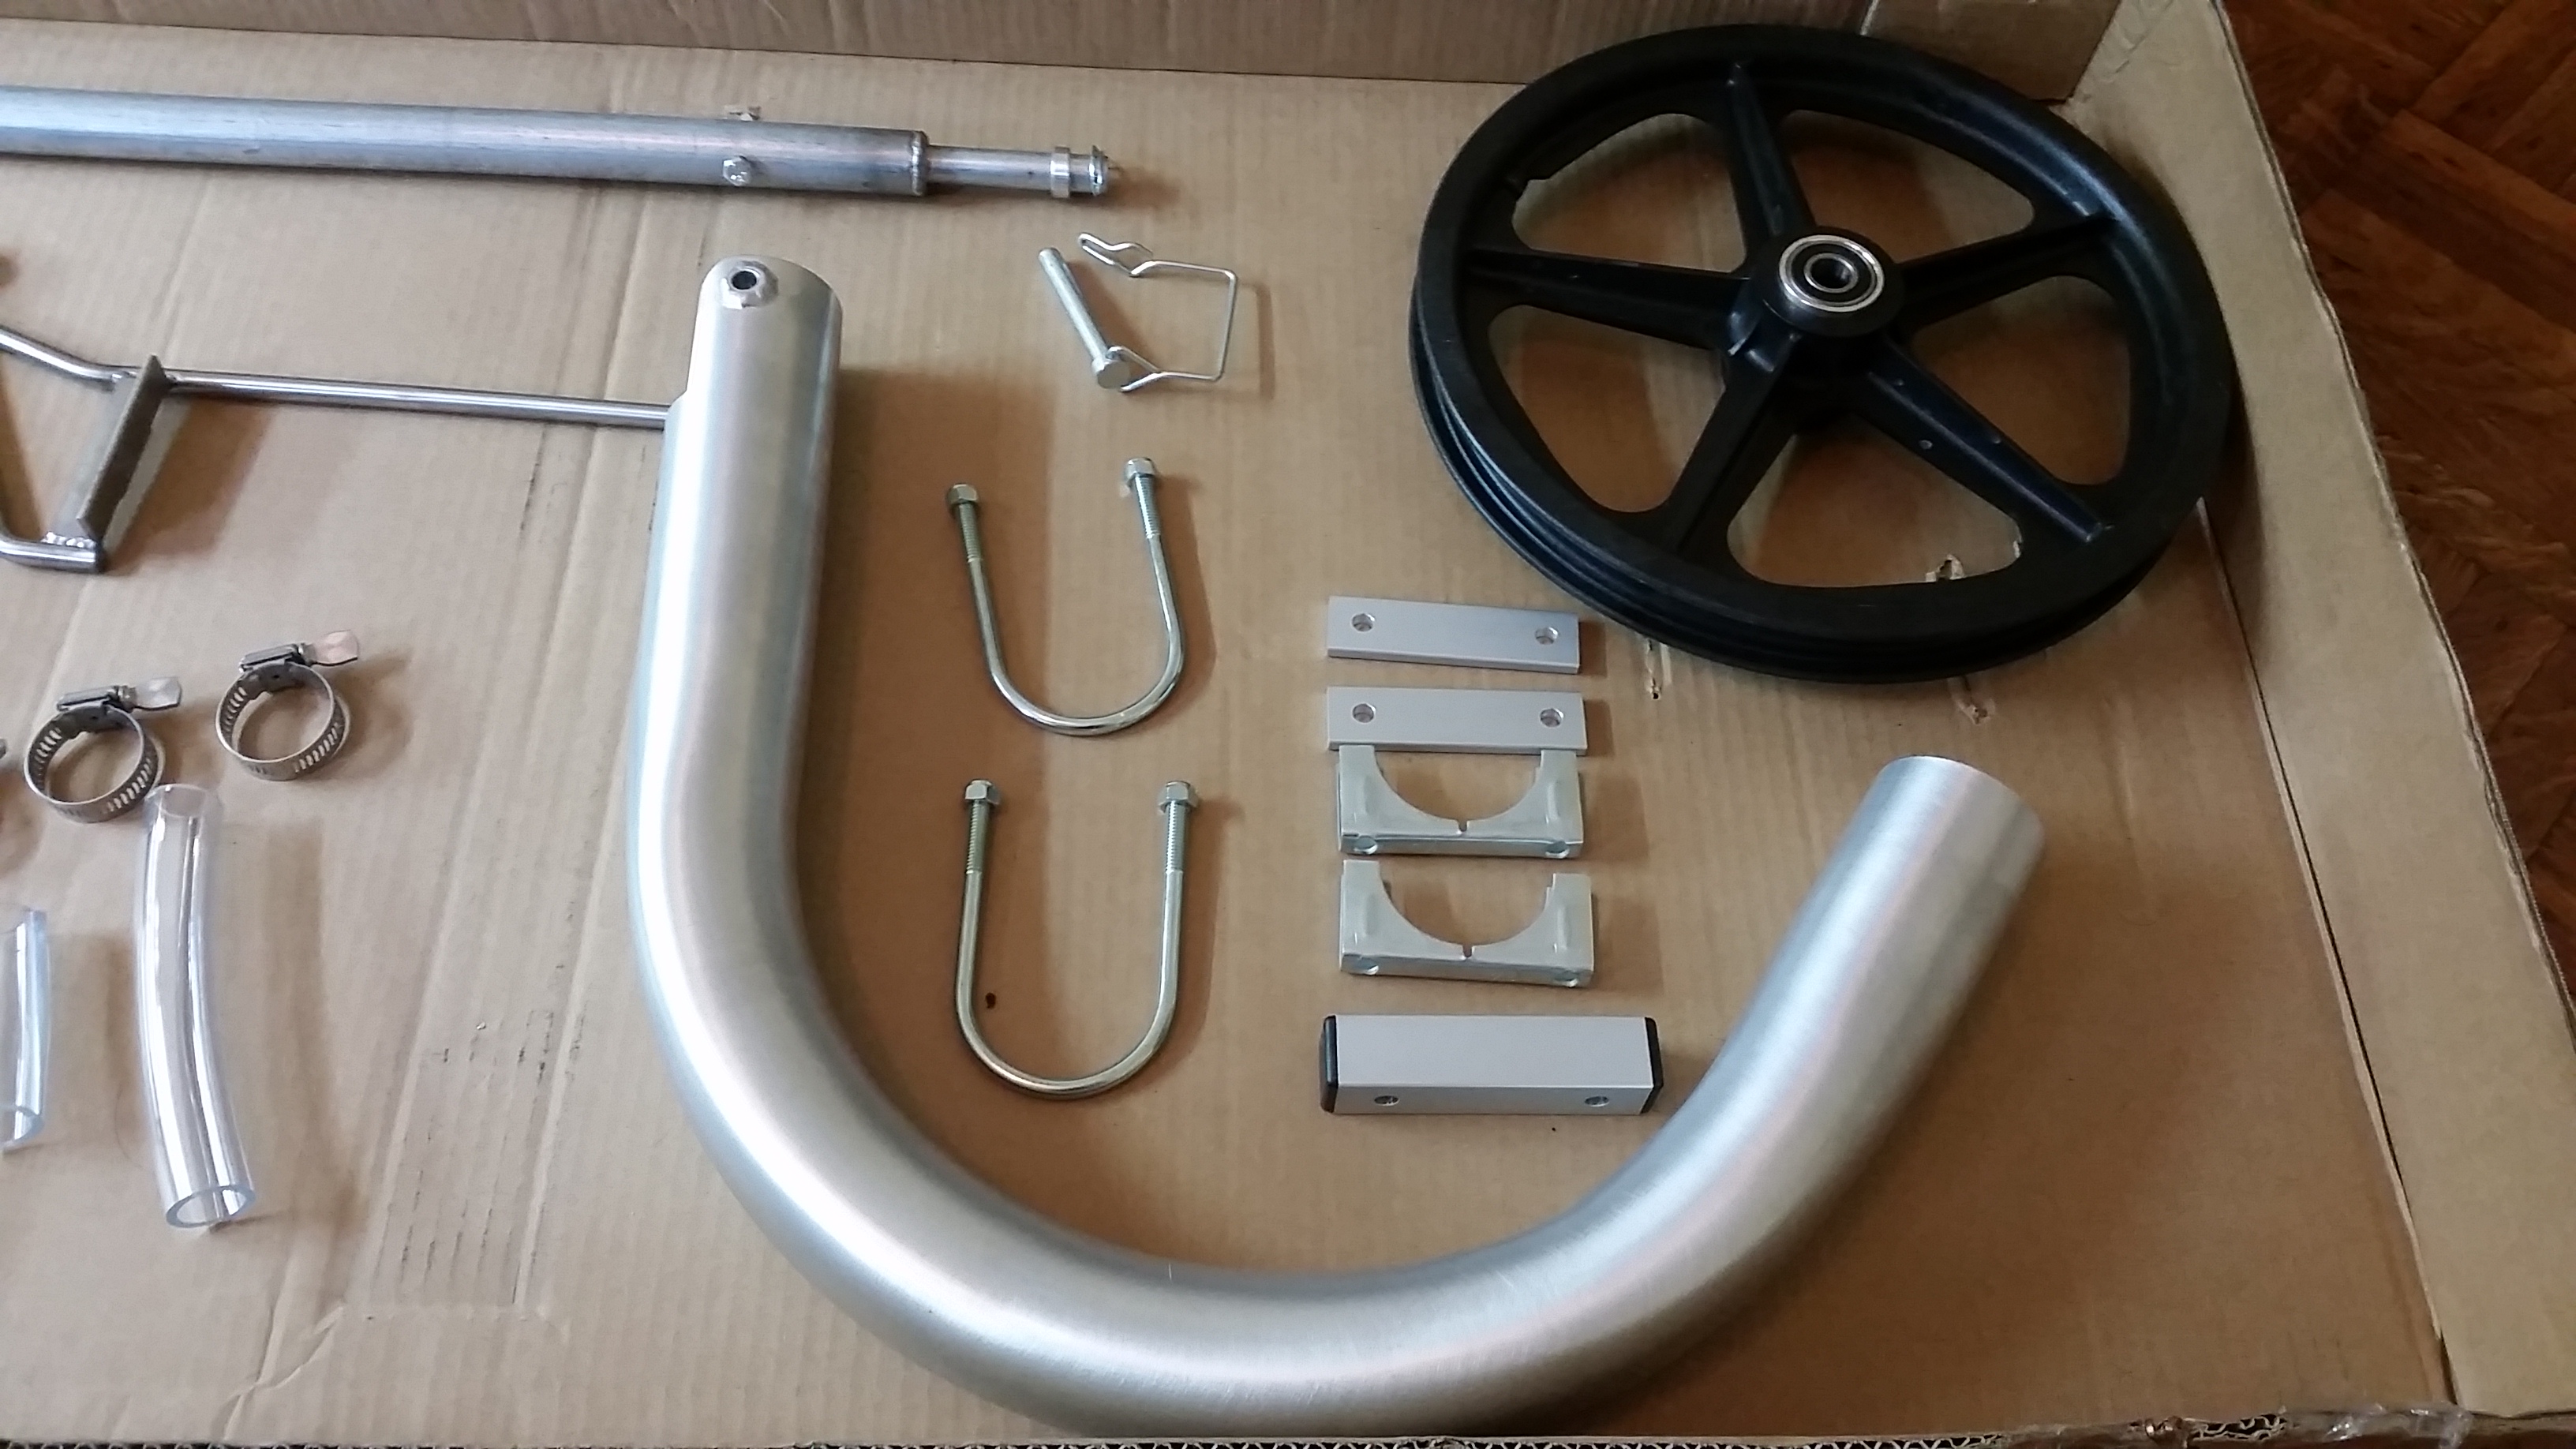
The entire list (buy it all here):
Bicycle trailer axle $60
Bicycle trailer hitch $50
Trailer hitch pin $4
Towbar $120
tubes for tires $7
Tires $26
Rims with bearings $85
With shipping the entire thing came to $370 + $80 for the cargo holder (it was on sale when I got it) = ~$450.
Now the fun part, putting it all together!
First thing I did was bust out my air pump and tire levers and assemble the wheels.
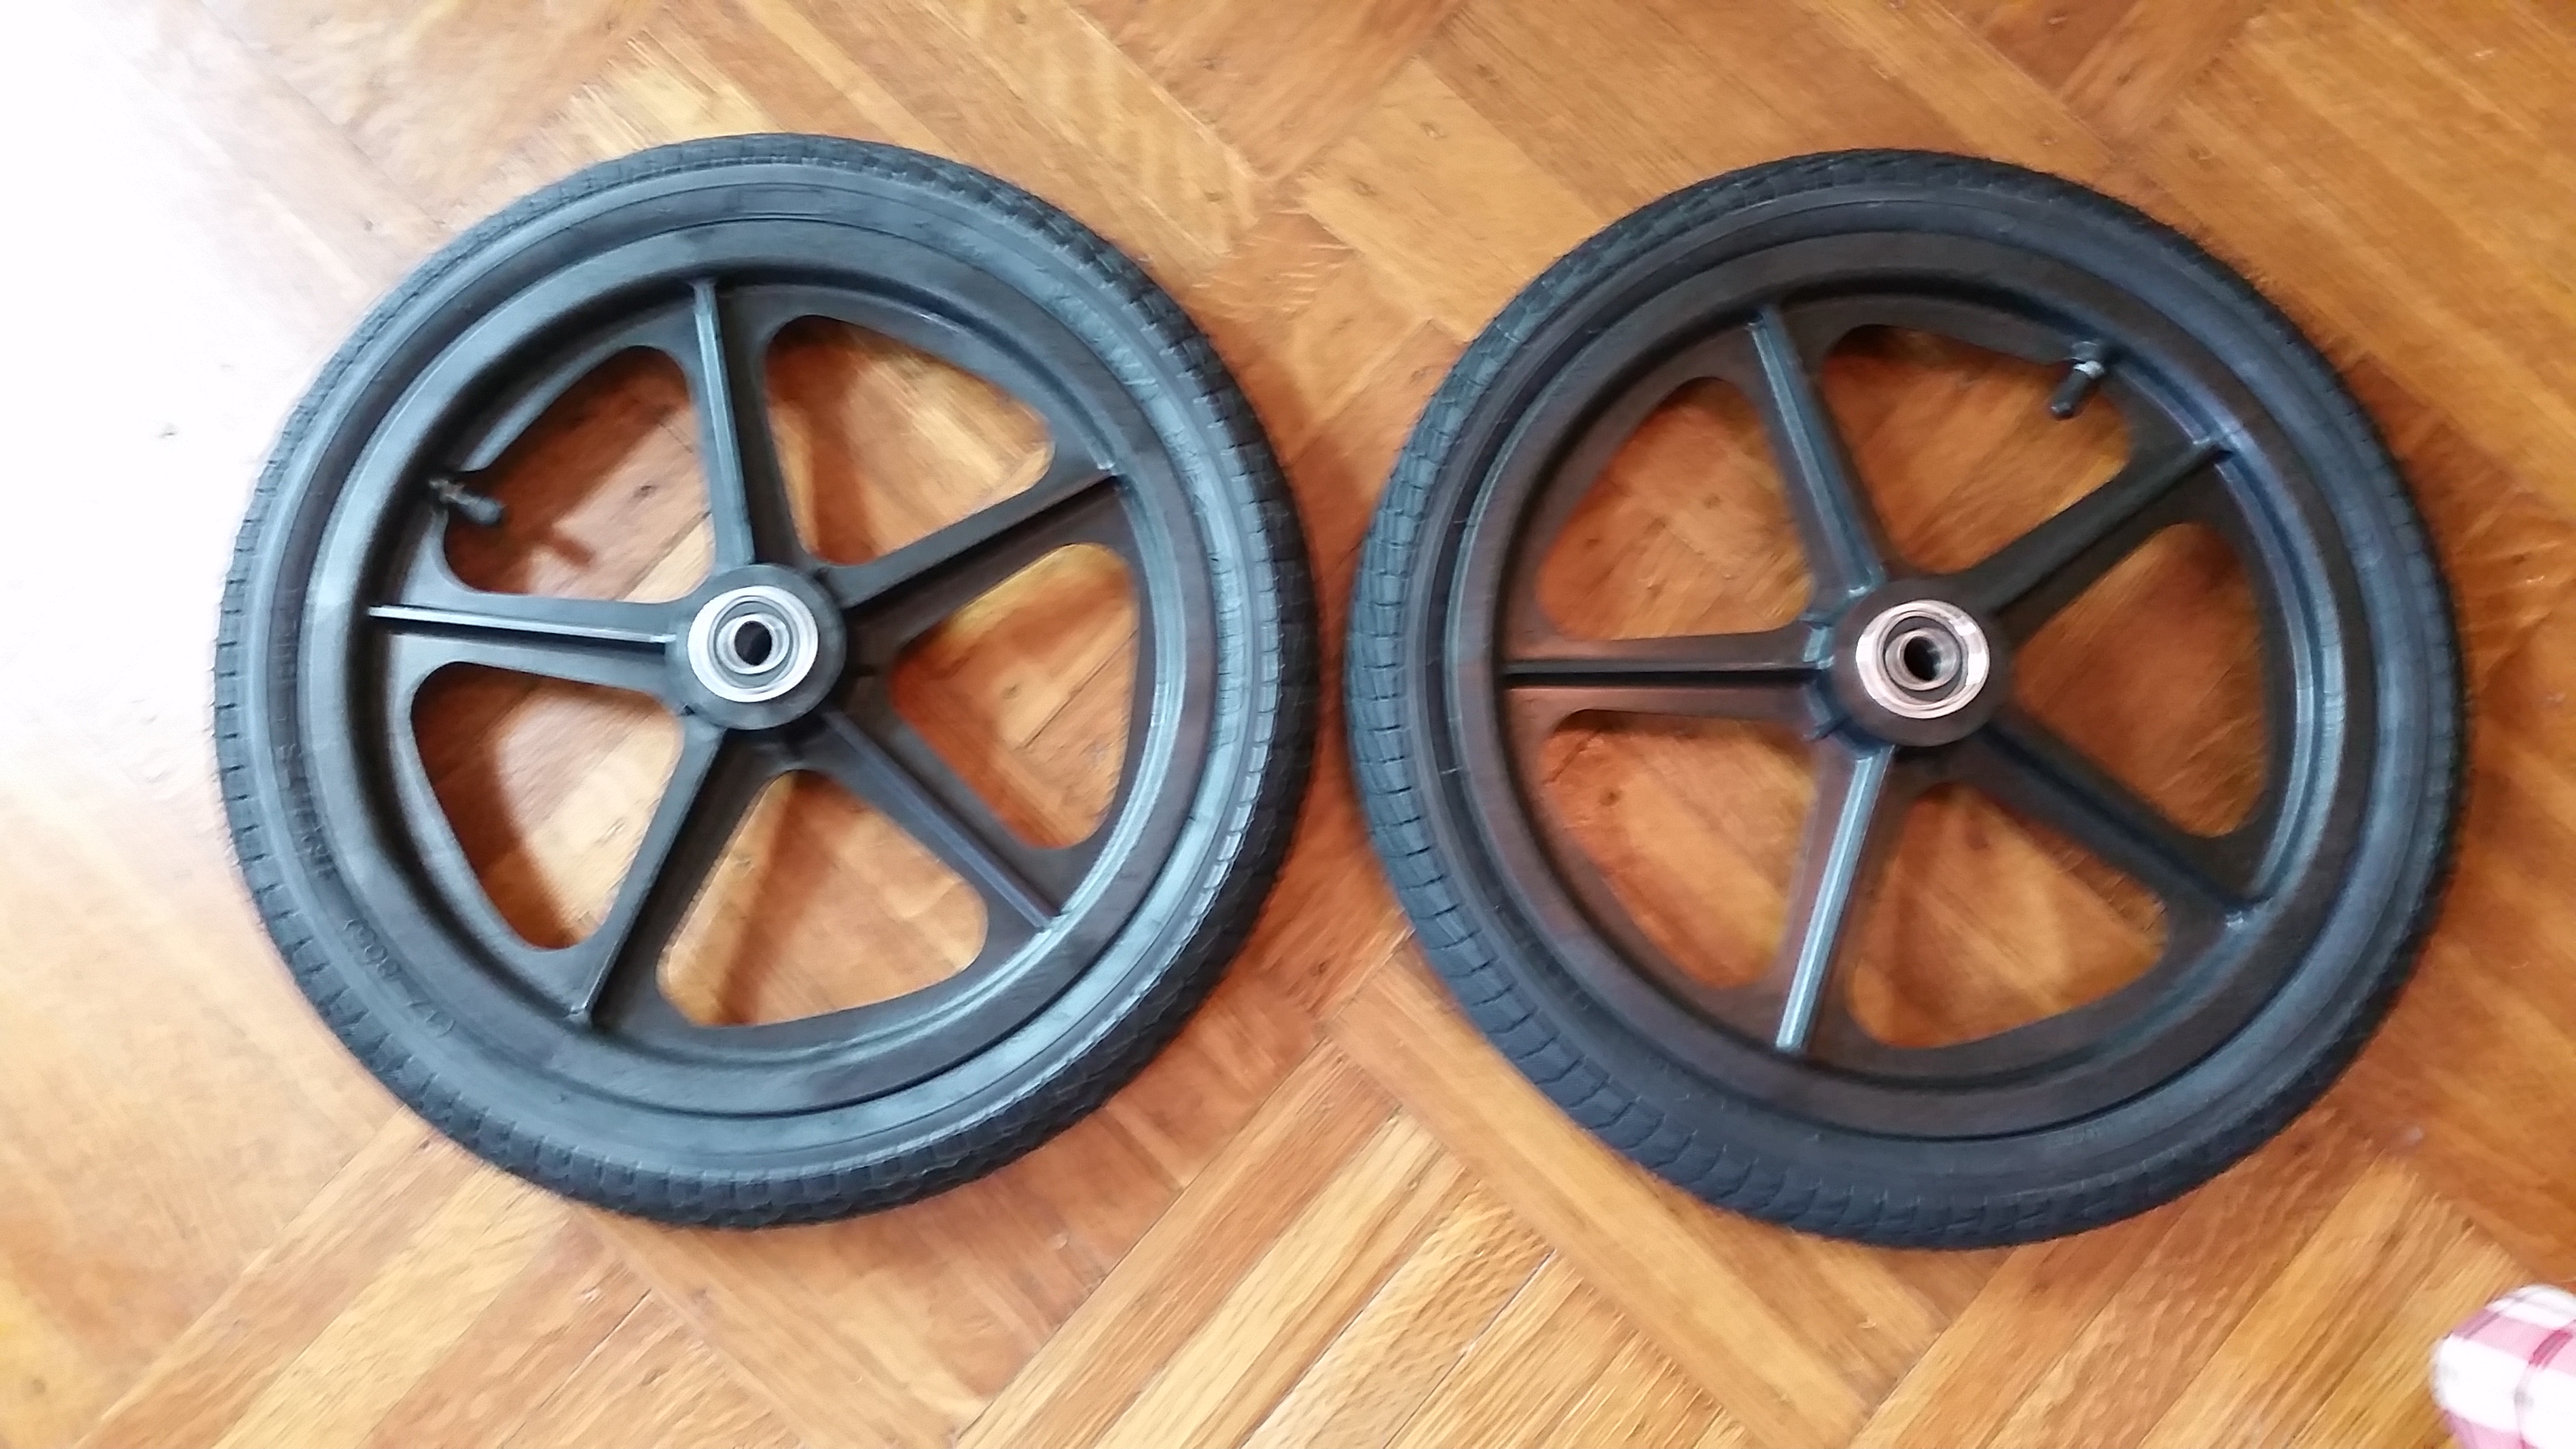
Easy, but if you have never assembled a tire to a rim simply search youtube for many good videos.
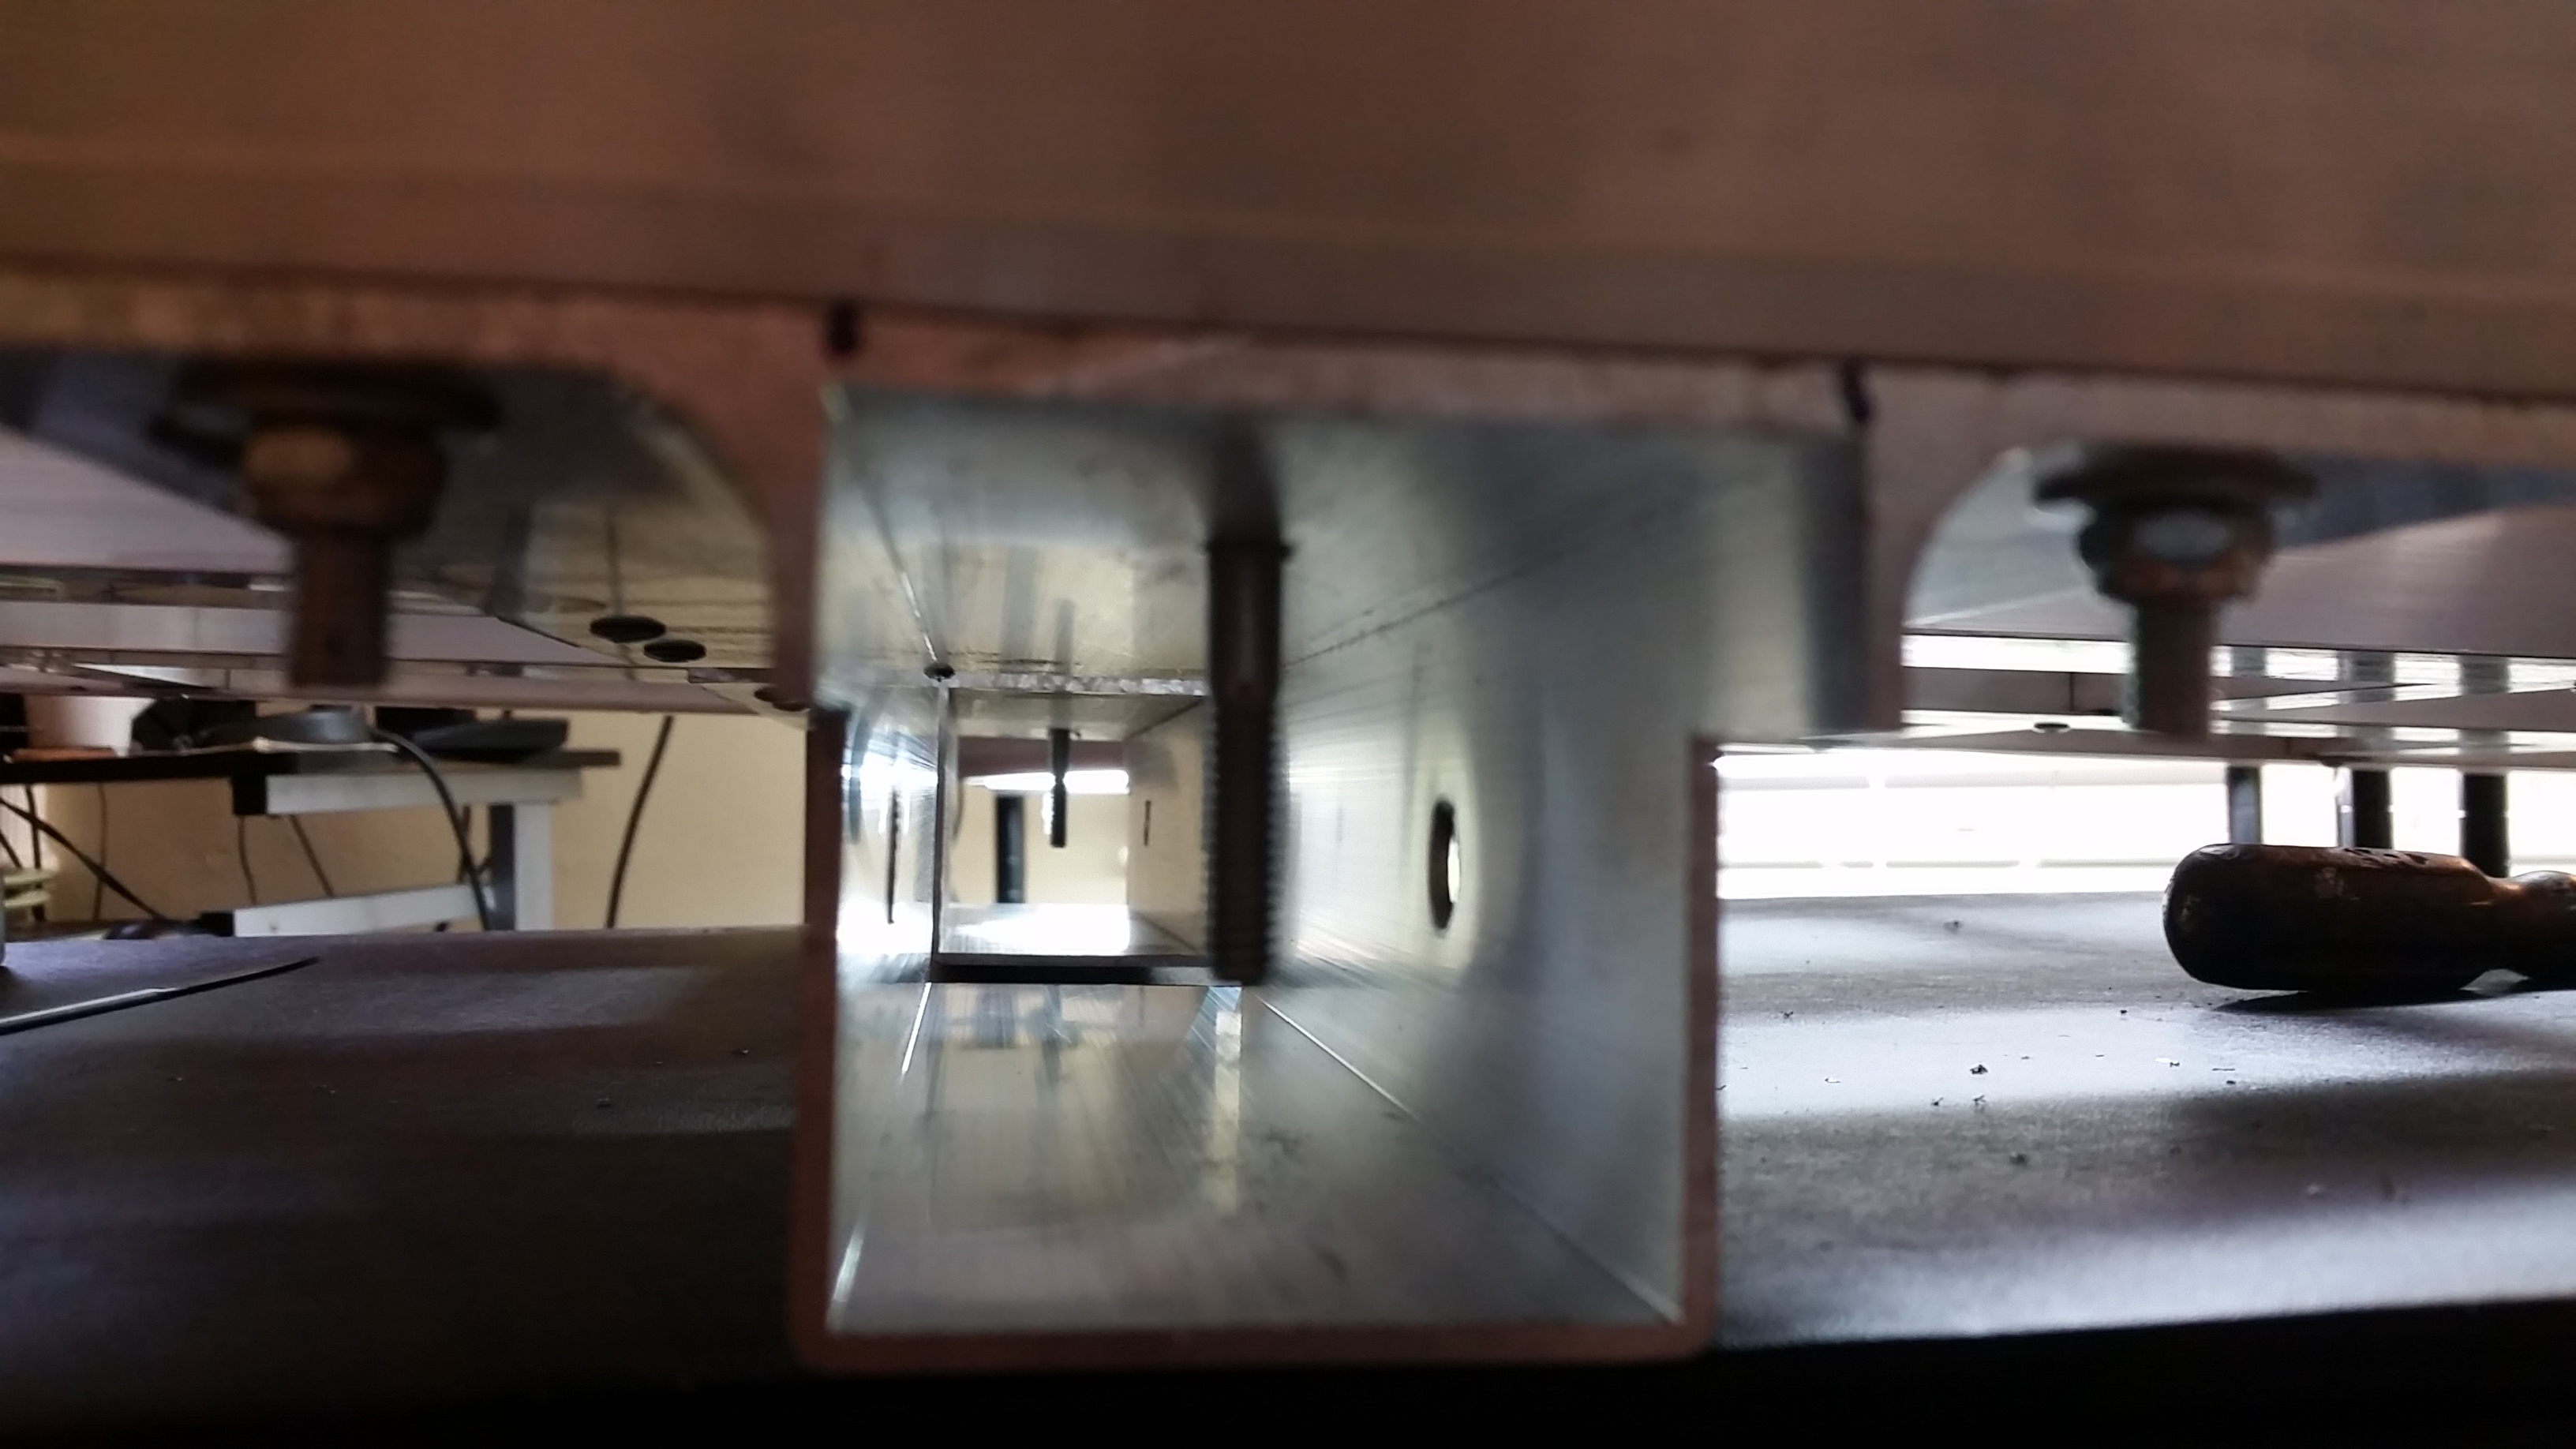
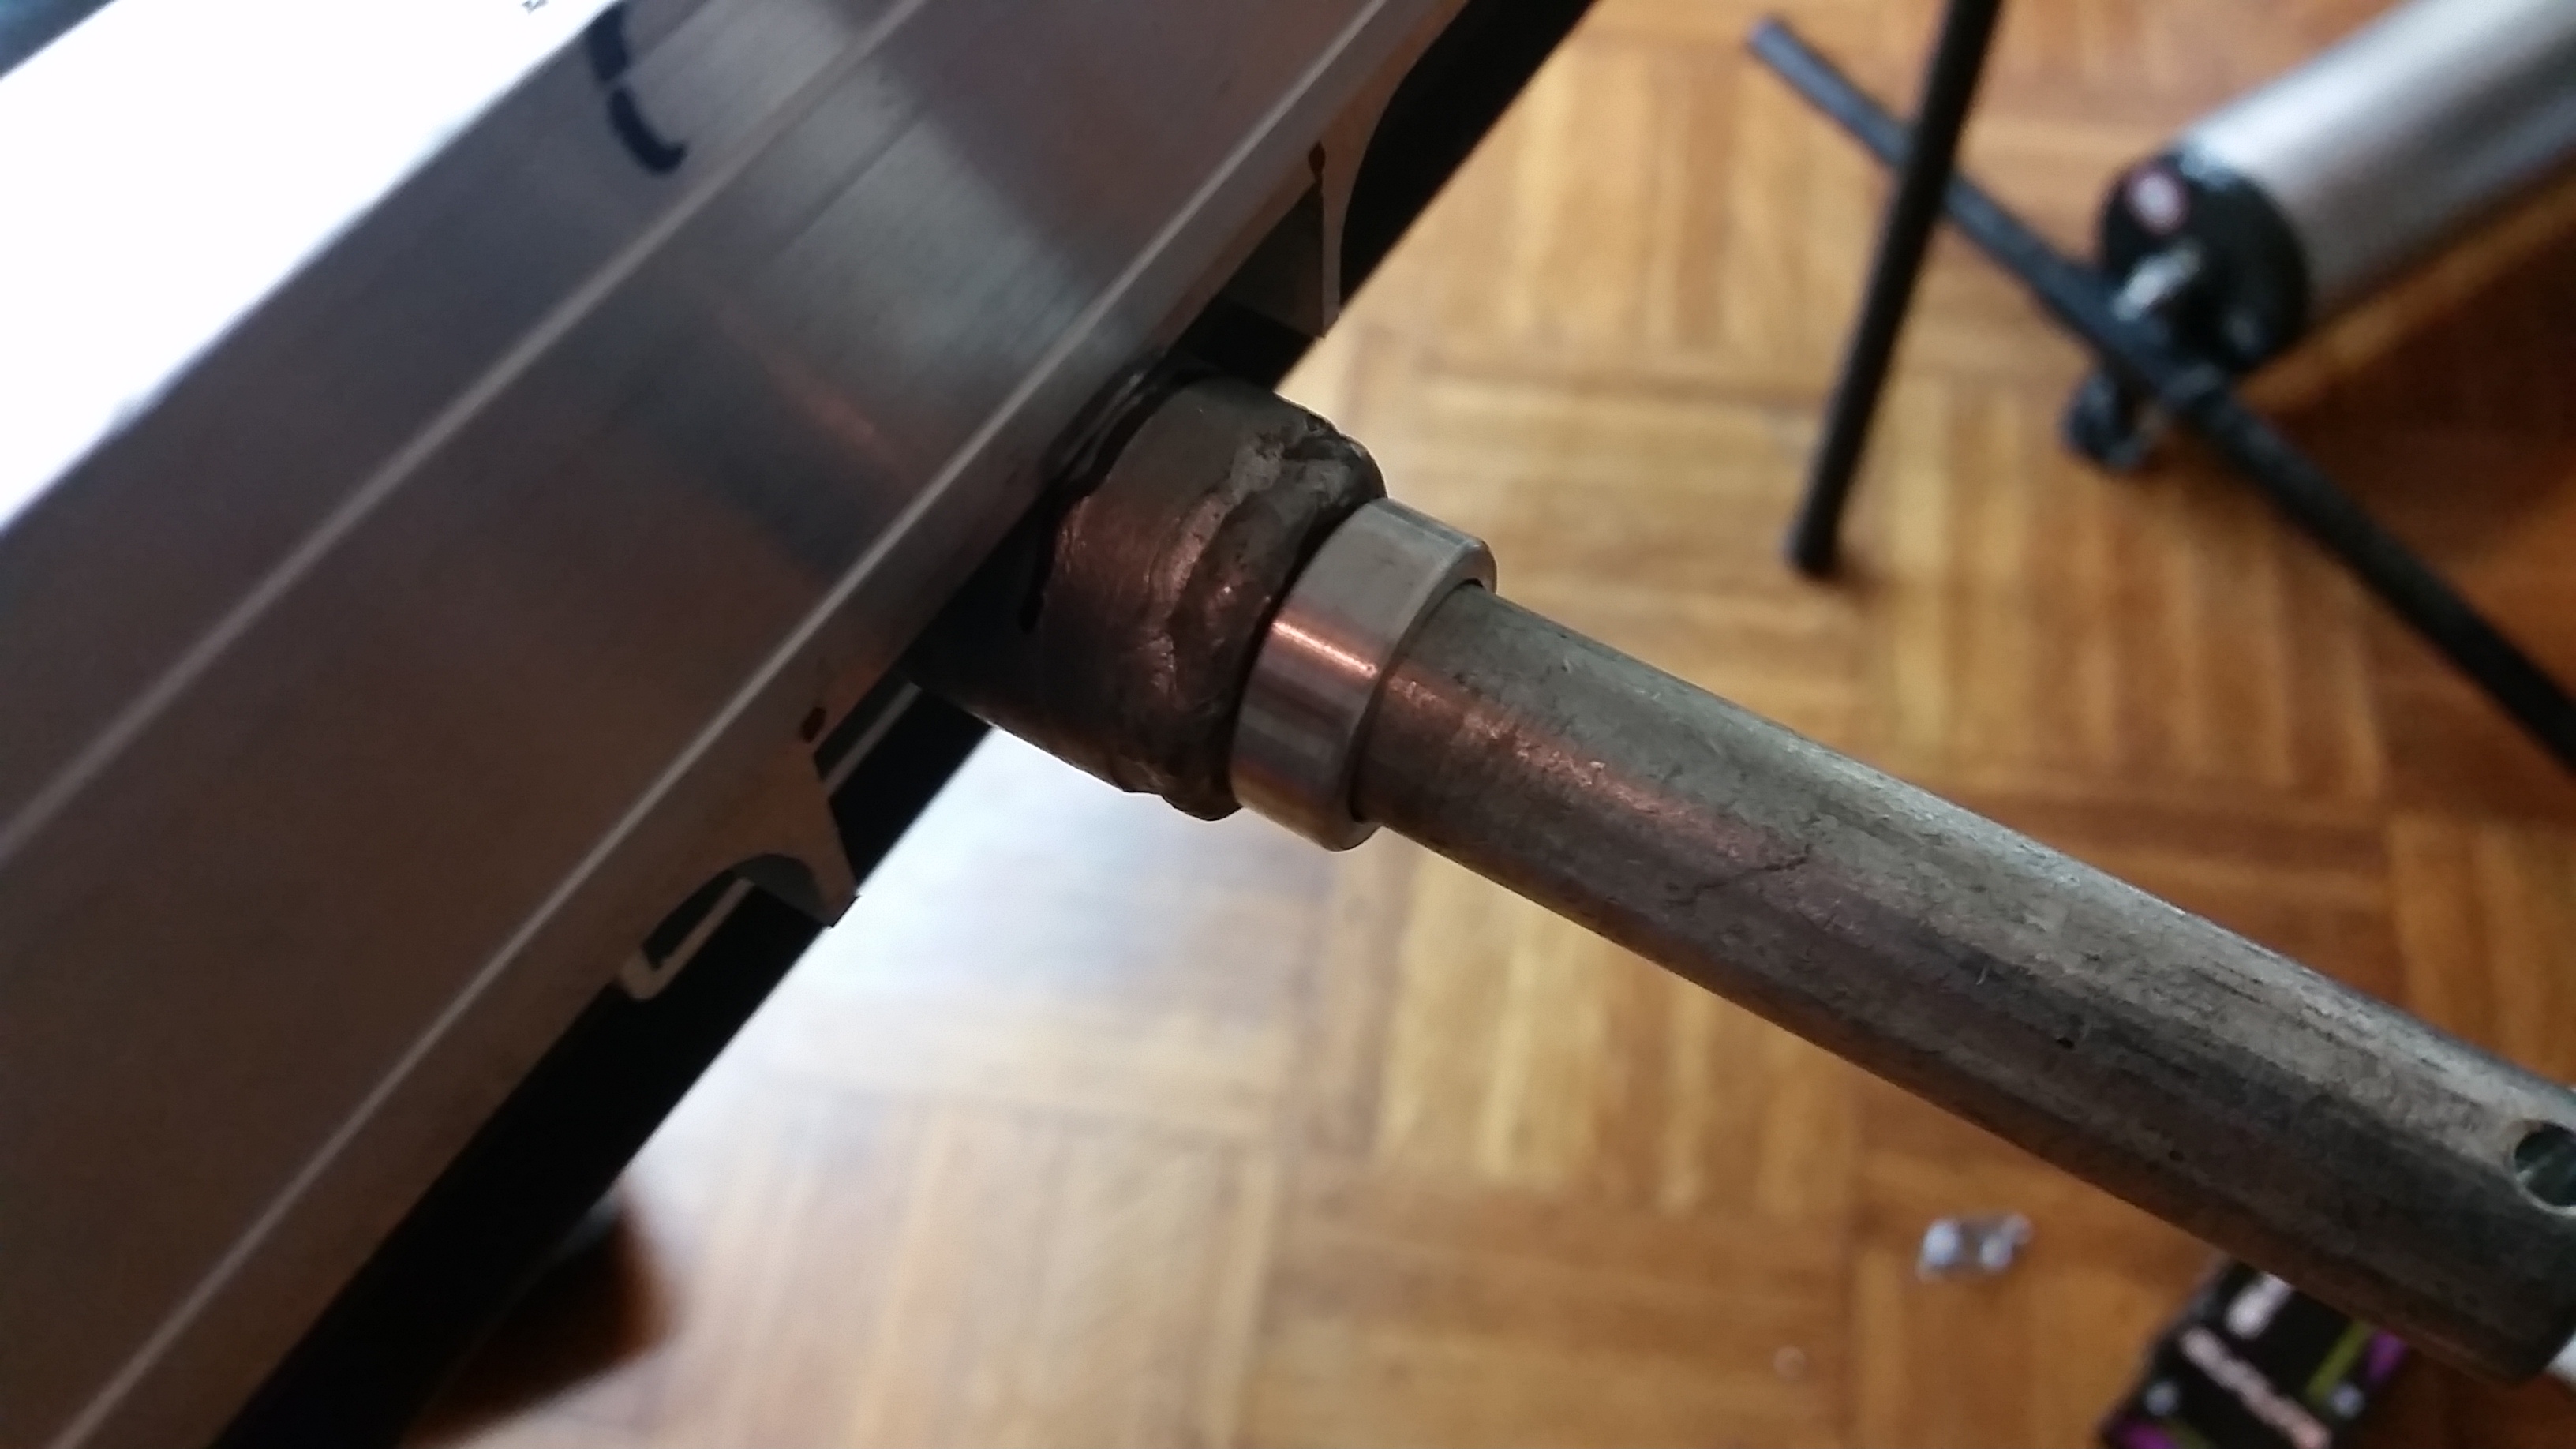
Next I got the axle and measured for the mounting holes to hold it to the base. The axle comes pre-drilled with the two holes and the hardware you will need to mount it, all you need to do is drill the correct sized hole in the base of the cargo holder. Aluminum is soft, and I used a hand drill (not even an electric one) and was done in a couple minutes.
The axle fits perfectly into the hole left from the trailer hitch bar. Simply center, measure, and drill. Its easier if you leave the larger side panels off for this, as it allows you to get in there with the drill easier.

Center the axle (doesn’t have to be perfect, but does have to be the same on both sides so the axle is straight, could have just as easily shoved it to one side)
Move the axle back and forth until the same out sticks out of both sides, mark with a marker.
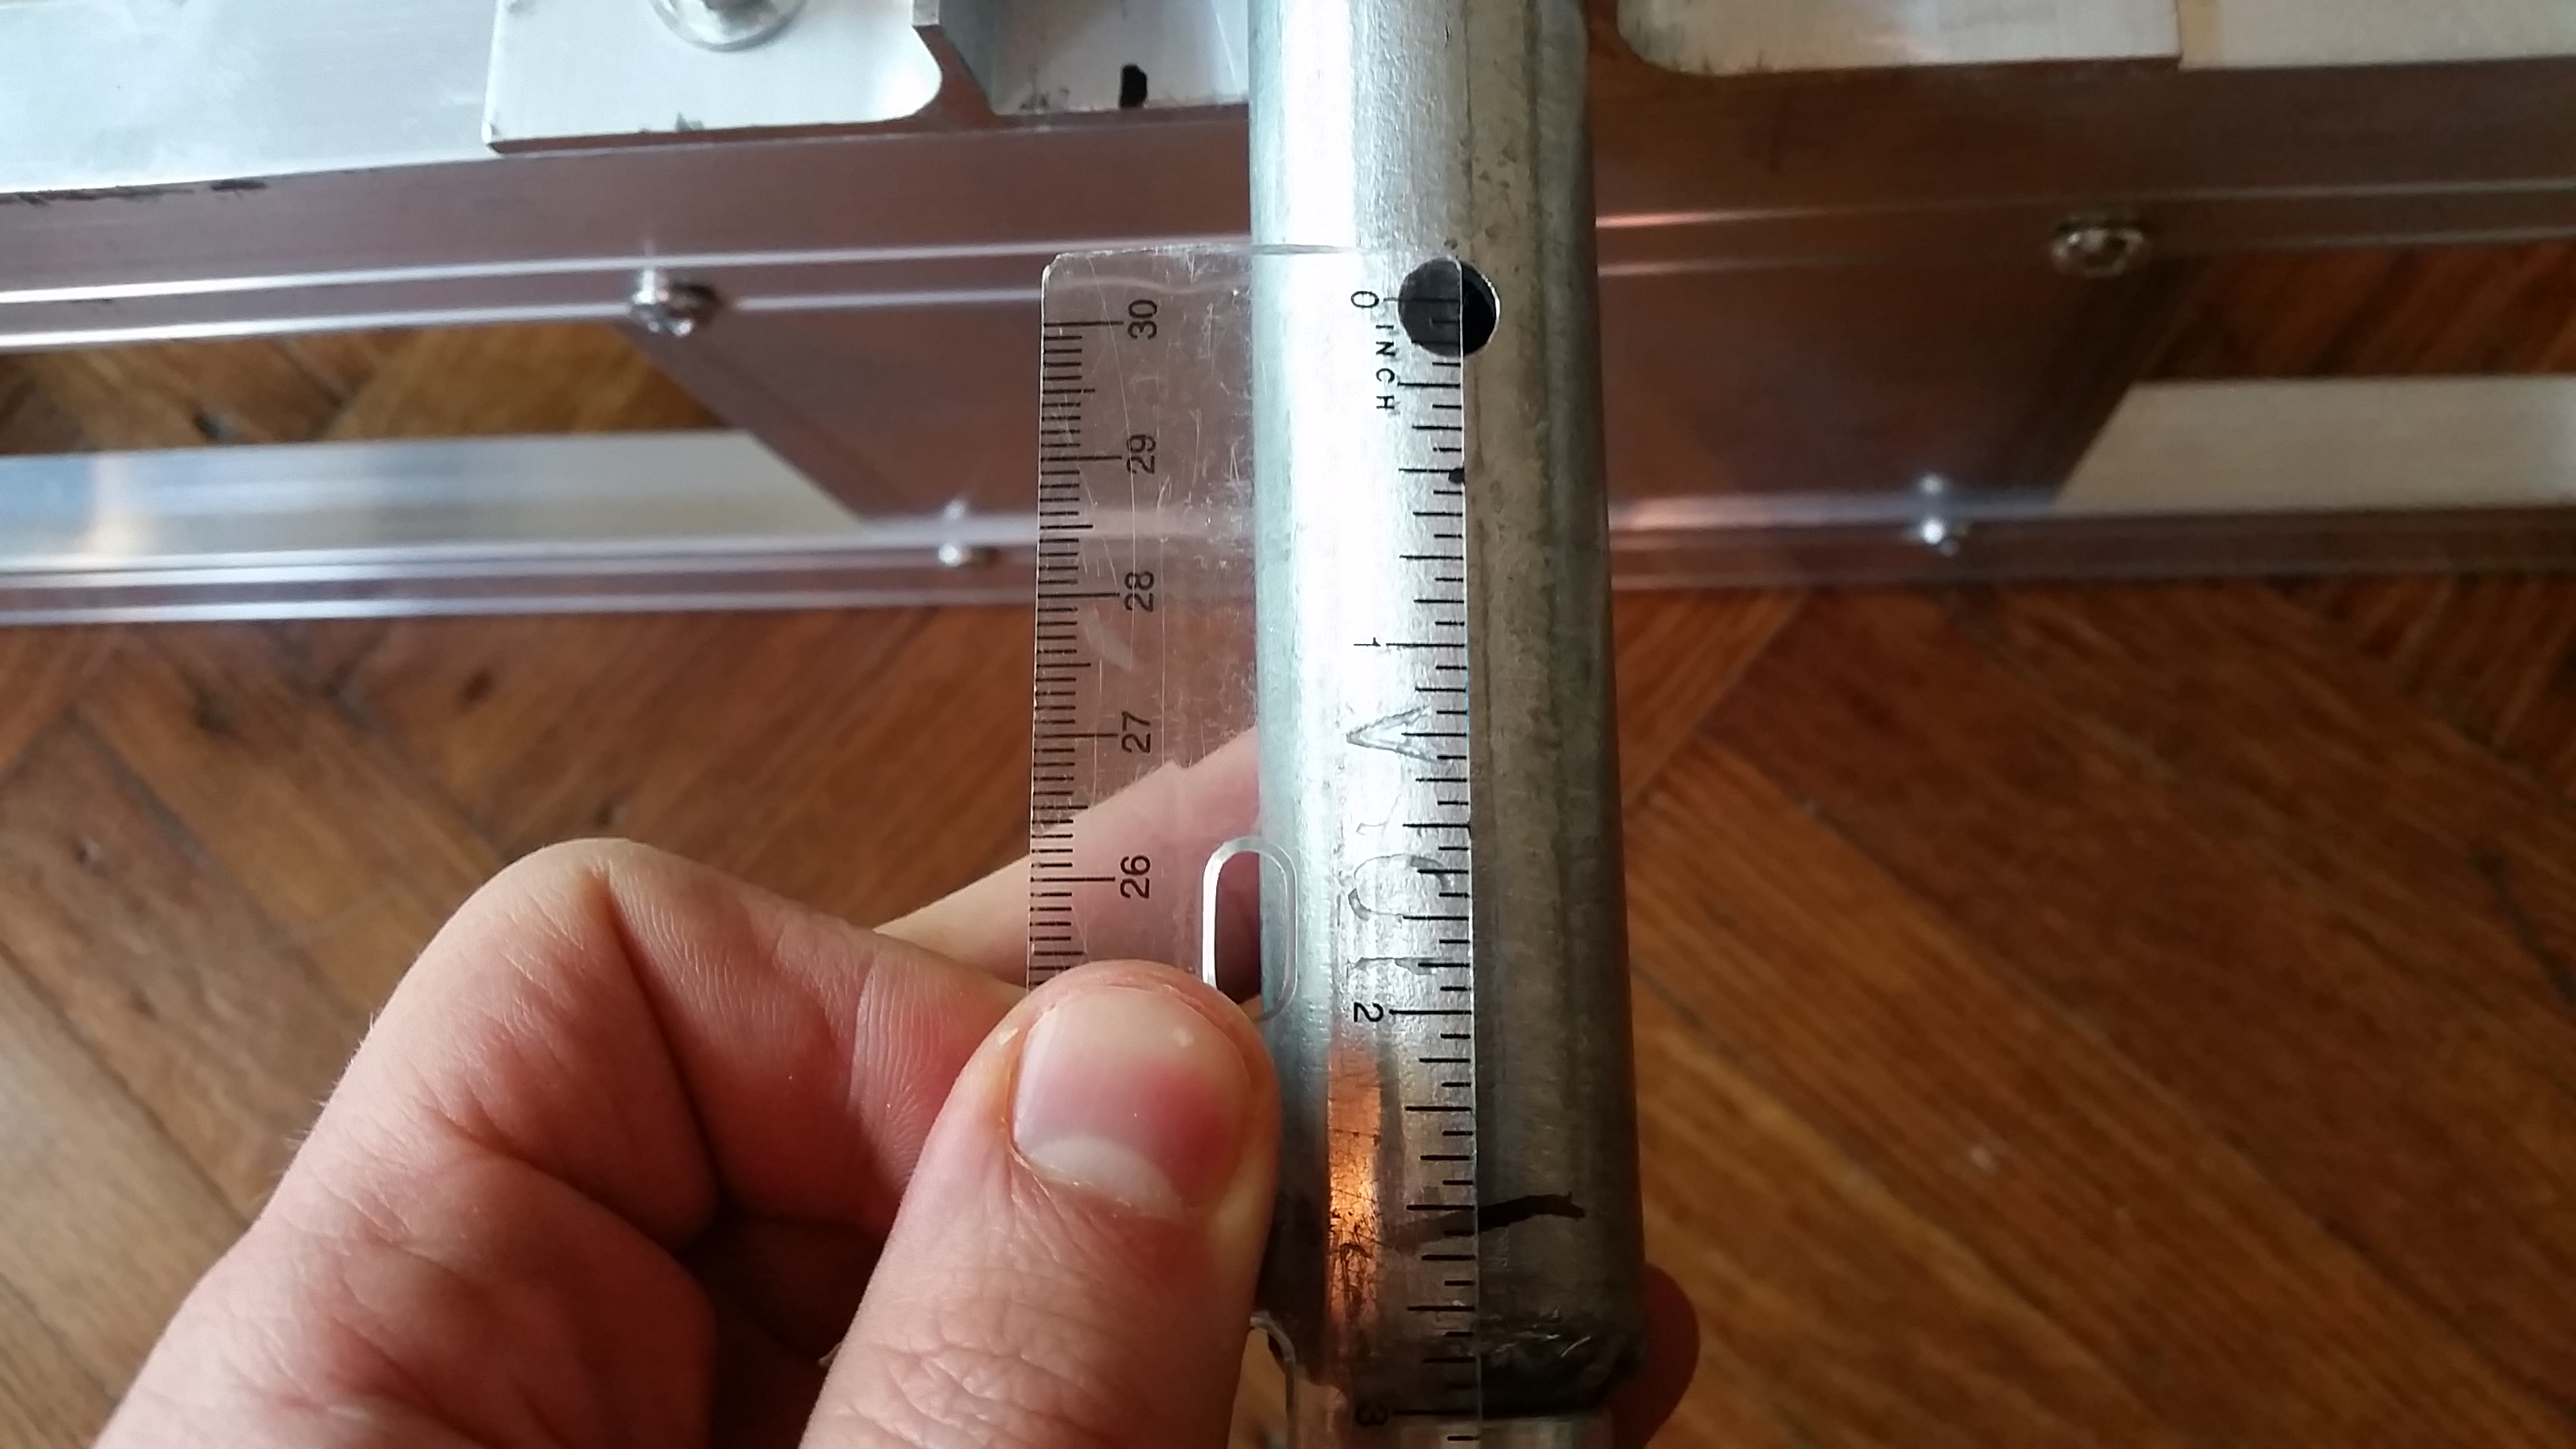
Flip the cargo holder back over, measure how far in the mounting hole goes from that mark.
Measure that far in and drill a hole large enough to hold the bolt that comes with the axle. To be clear you drill the hole in the top of the cargo holder, not the underside, there is no need to alter the underside. Take extra care on this step as its the one of only two parts you are going to alter, measure 4-5 times, drill once. The extra time you spend will keep your trailer with a minimum of extra holes in it.
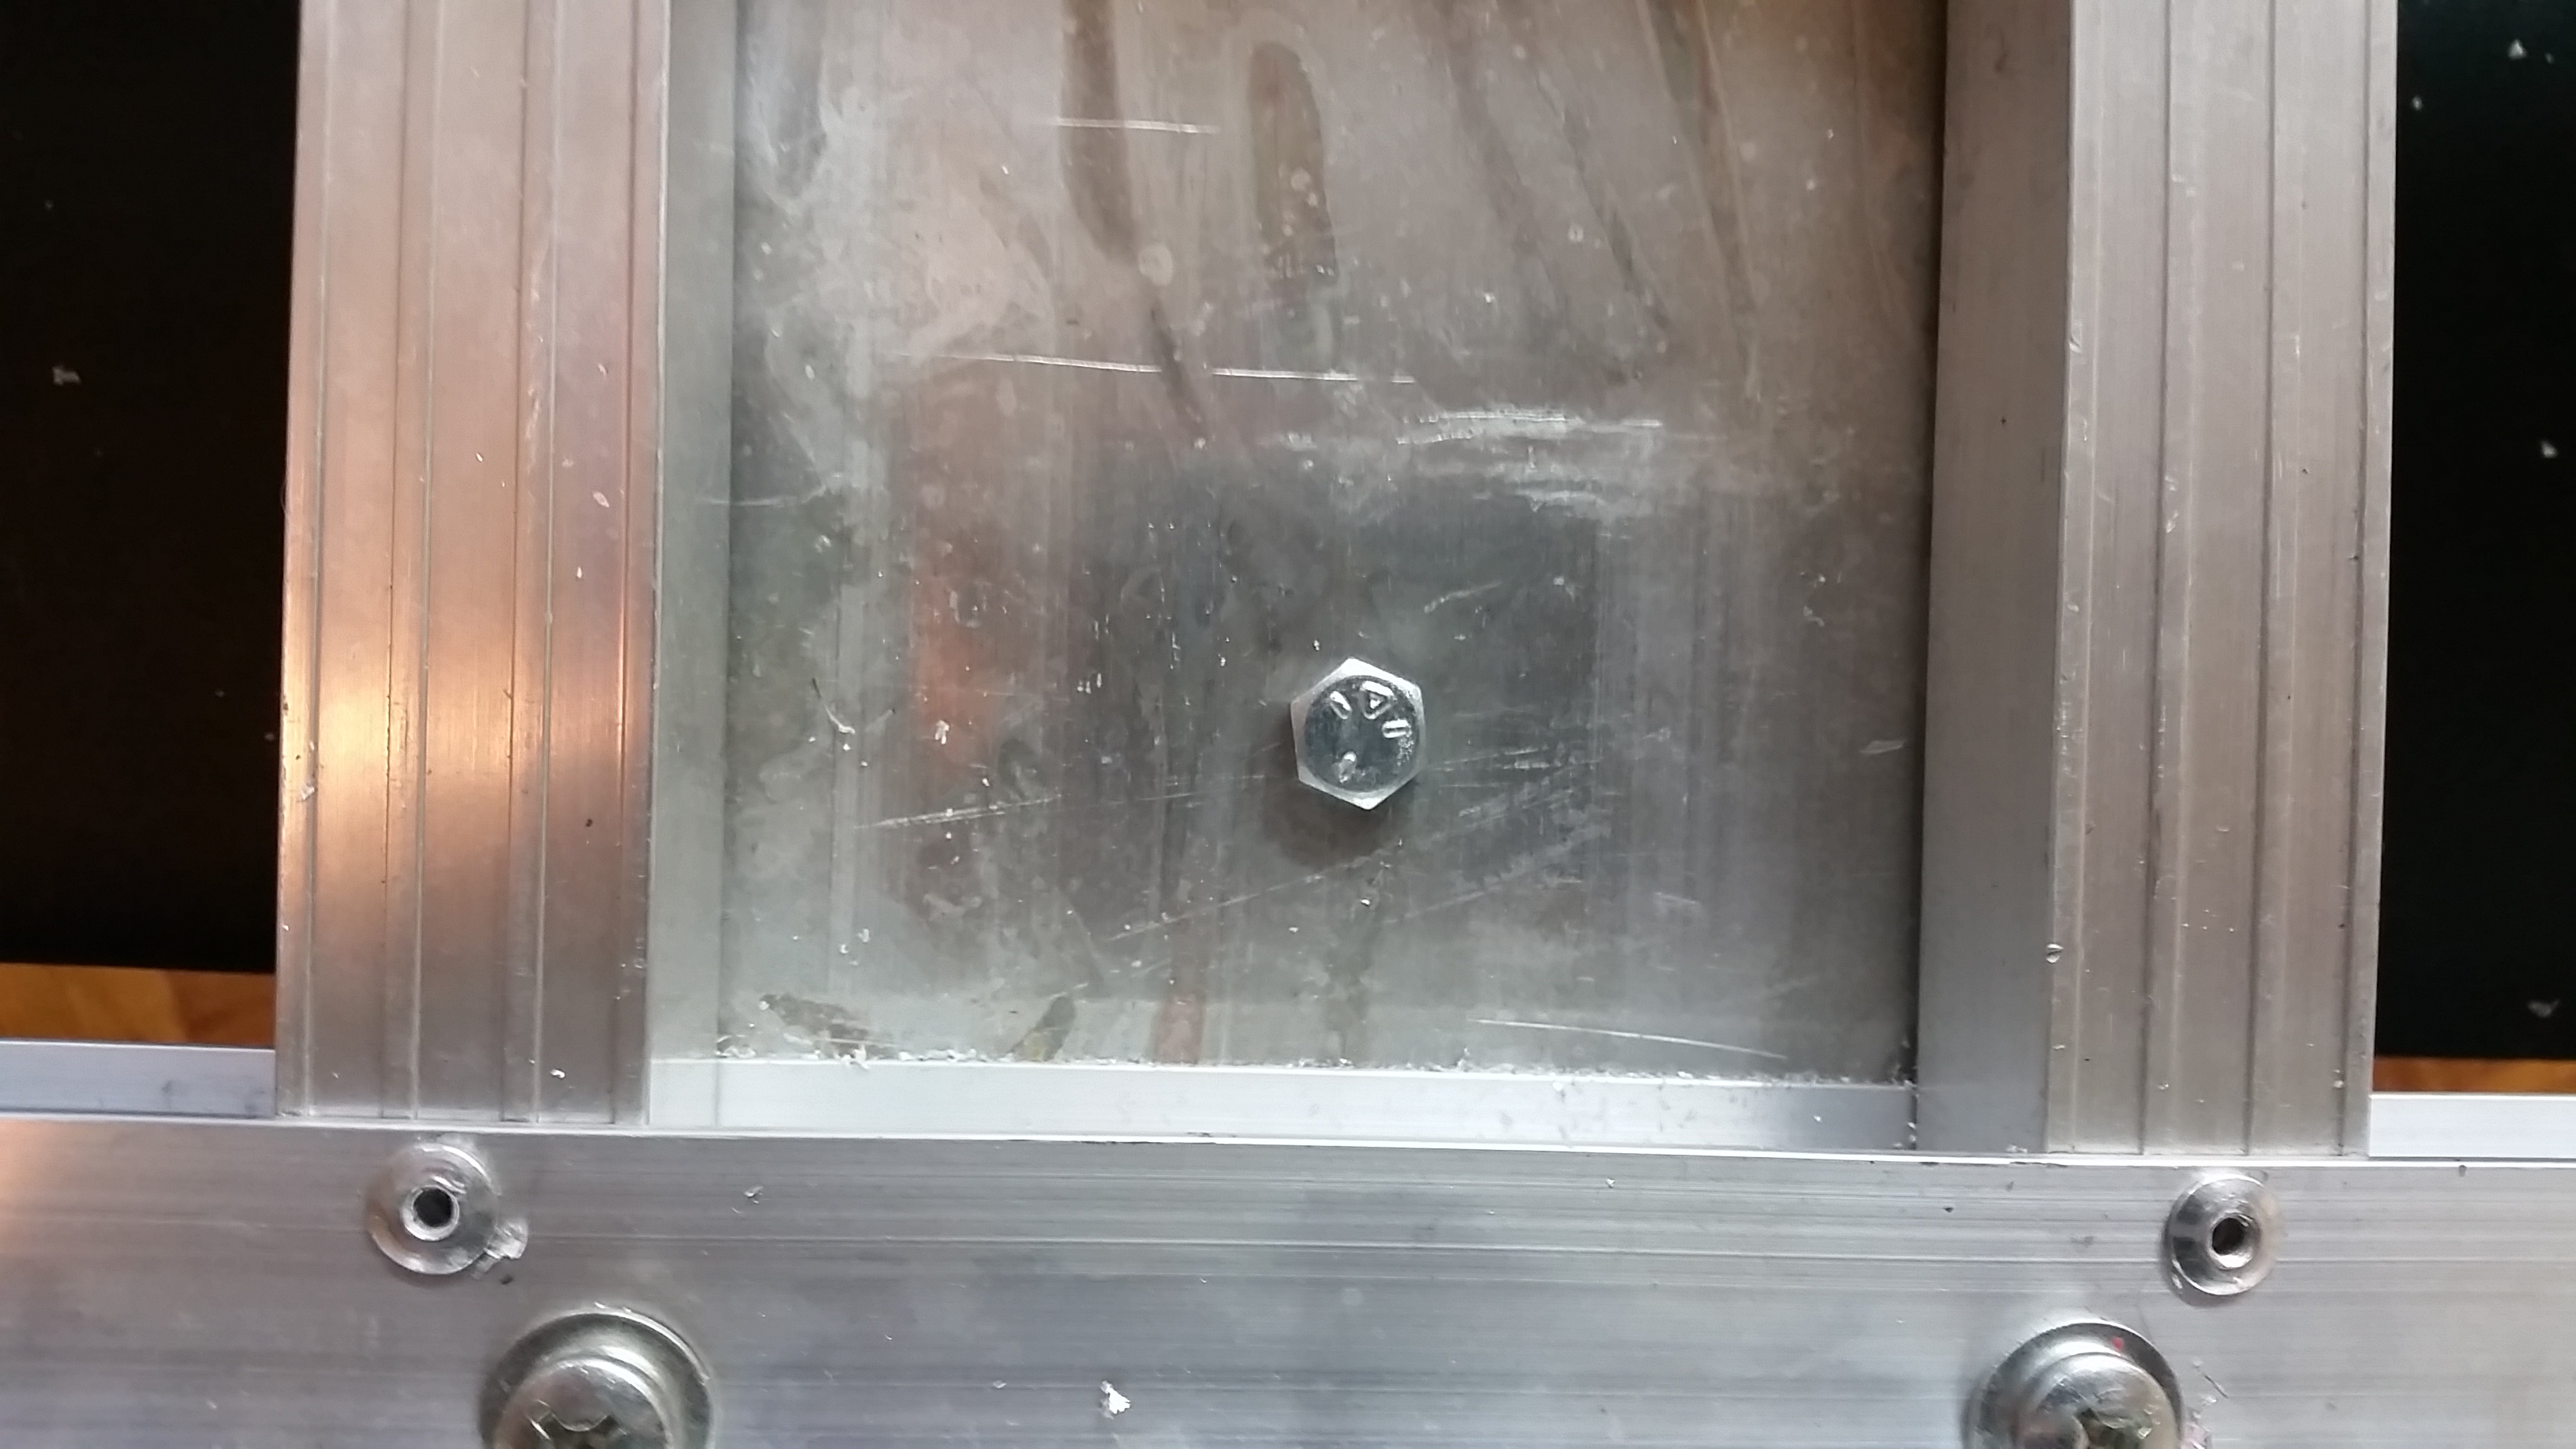 Drop the bolt into the hole. Do the same on the other side.
Next up you need to mount the axle. Put the cargo holder top side up on a table, and look through the hole, line up the bolts with the hole and affix the nuts.
The bolts handing from the top.
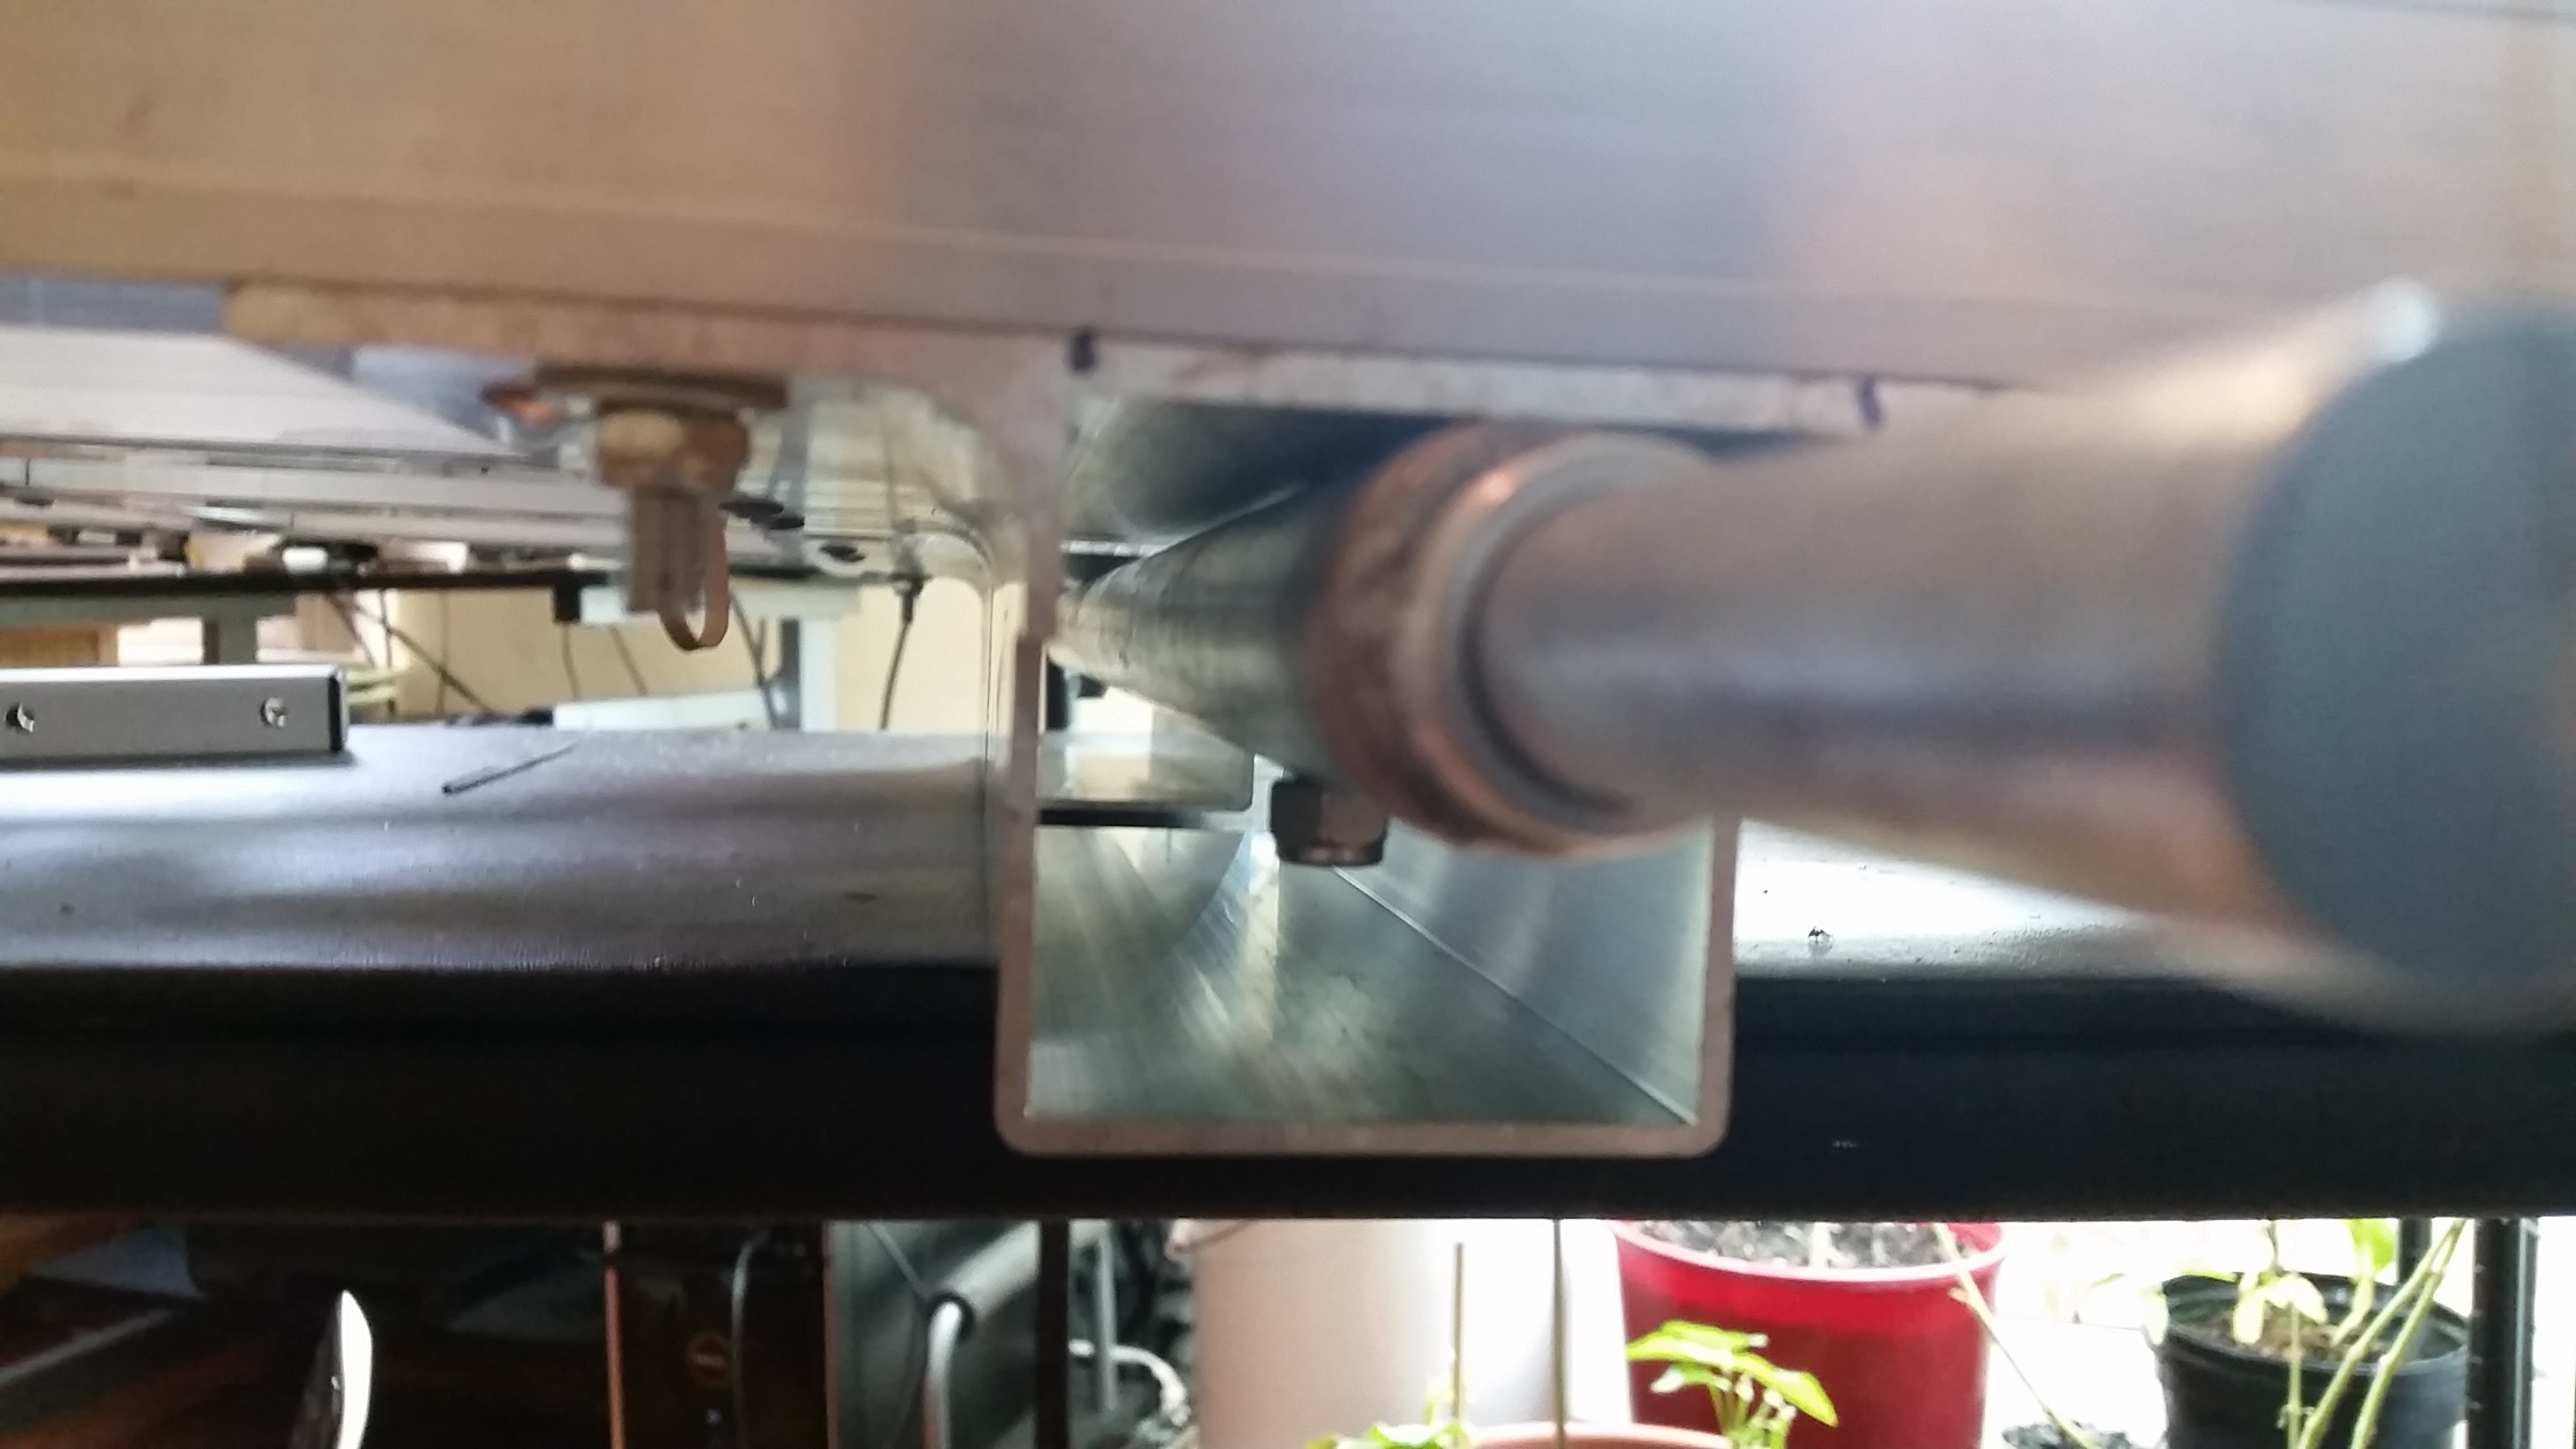
The axle mounted with the nuts attached. I found it easy to hold the nuts with pliers while cranking the nut above with an adjustable wrench
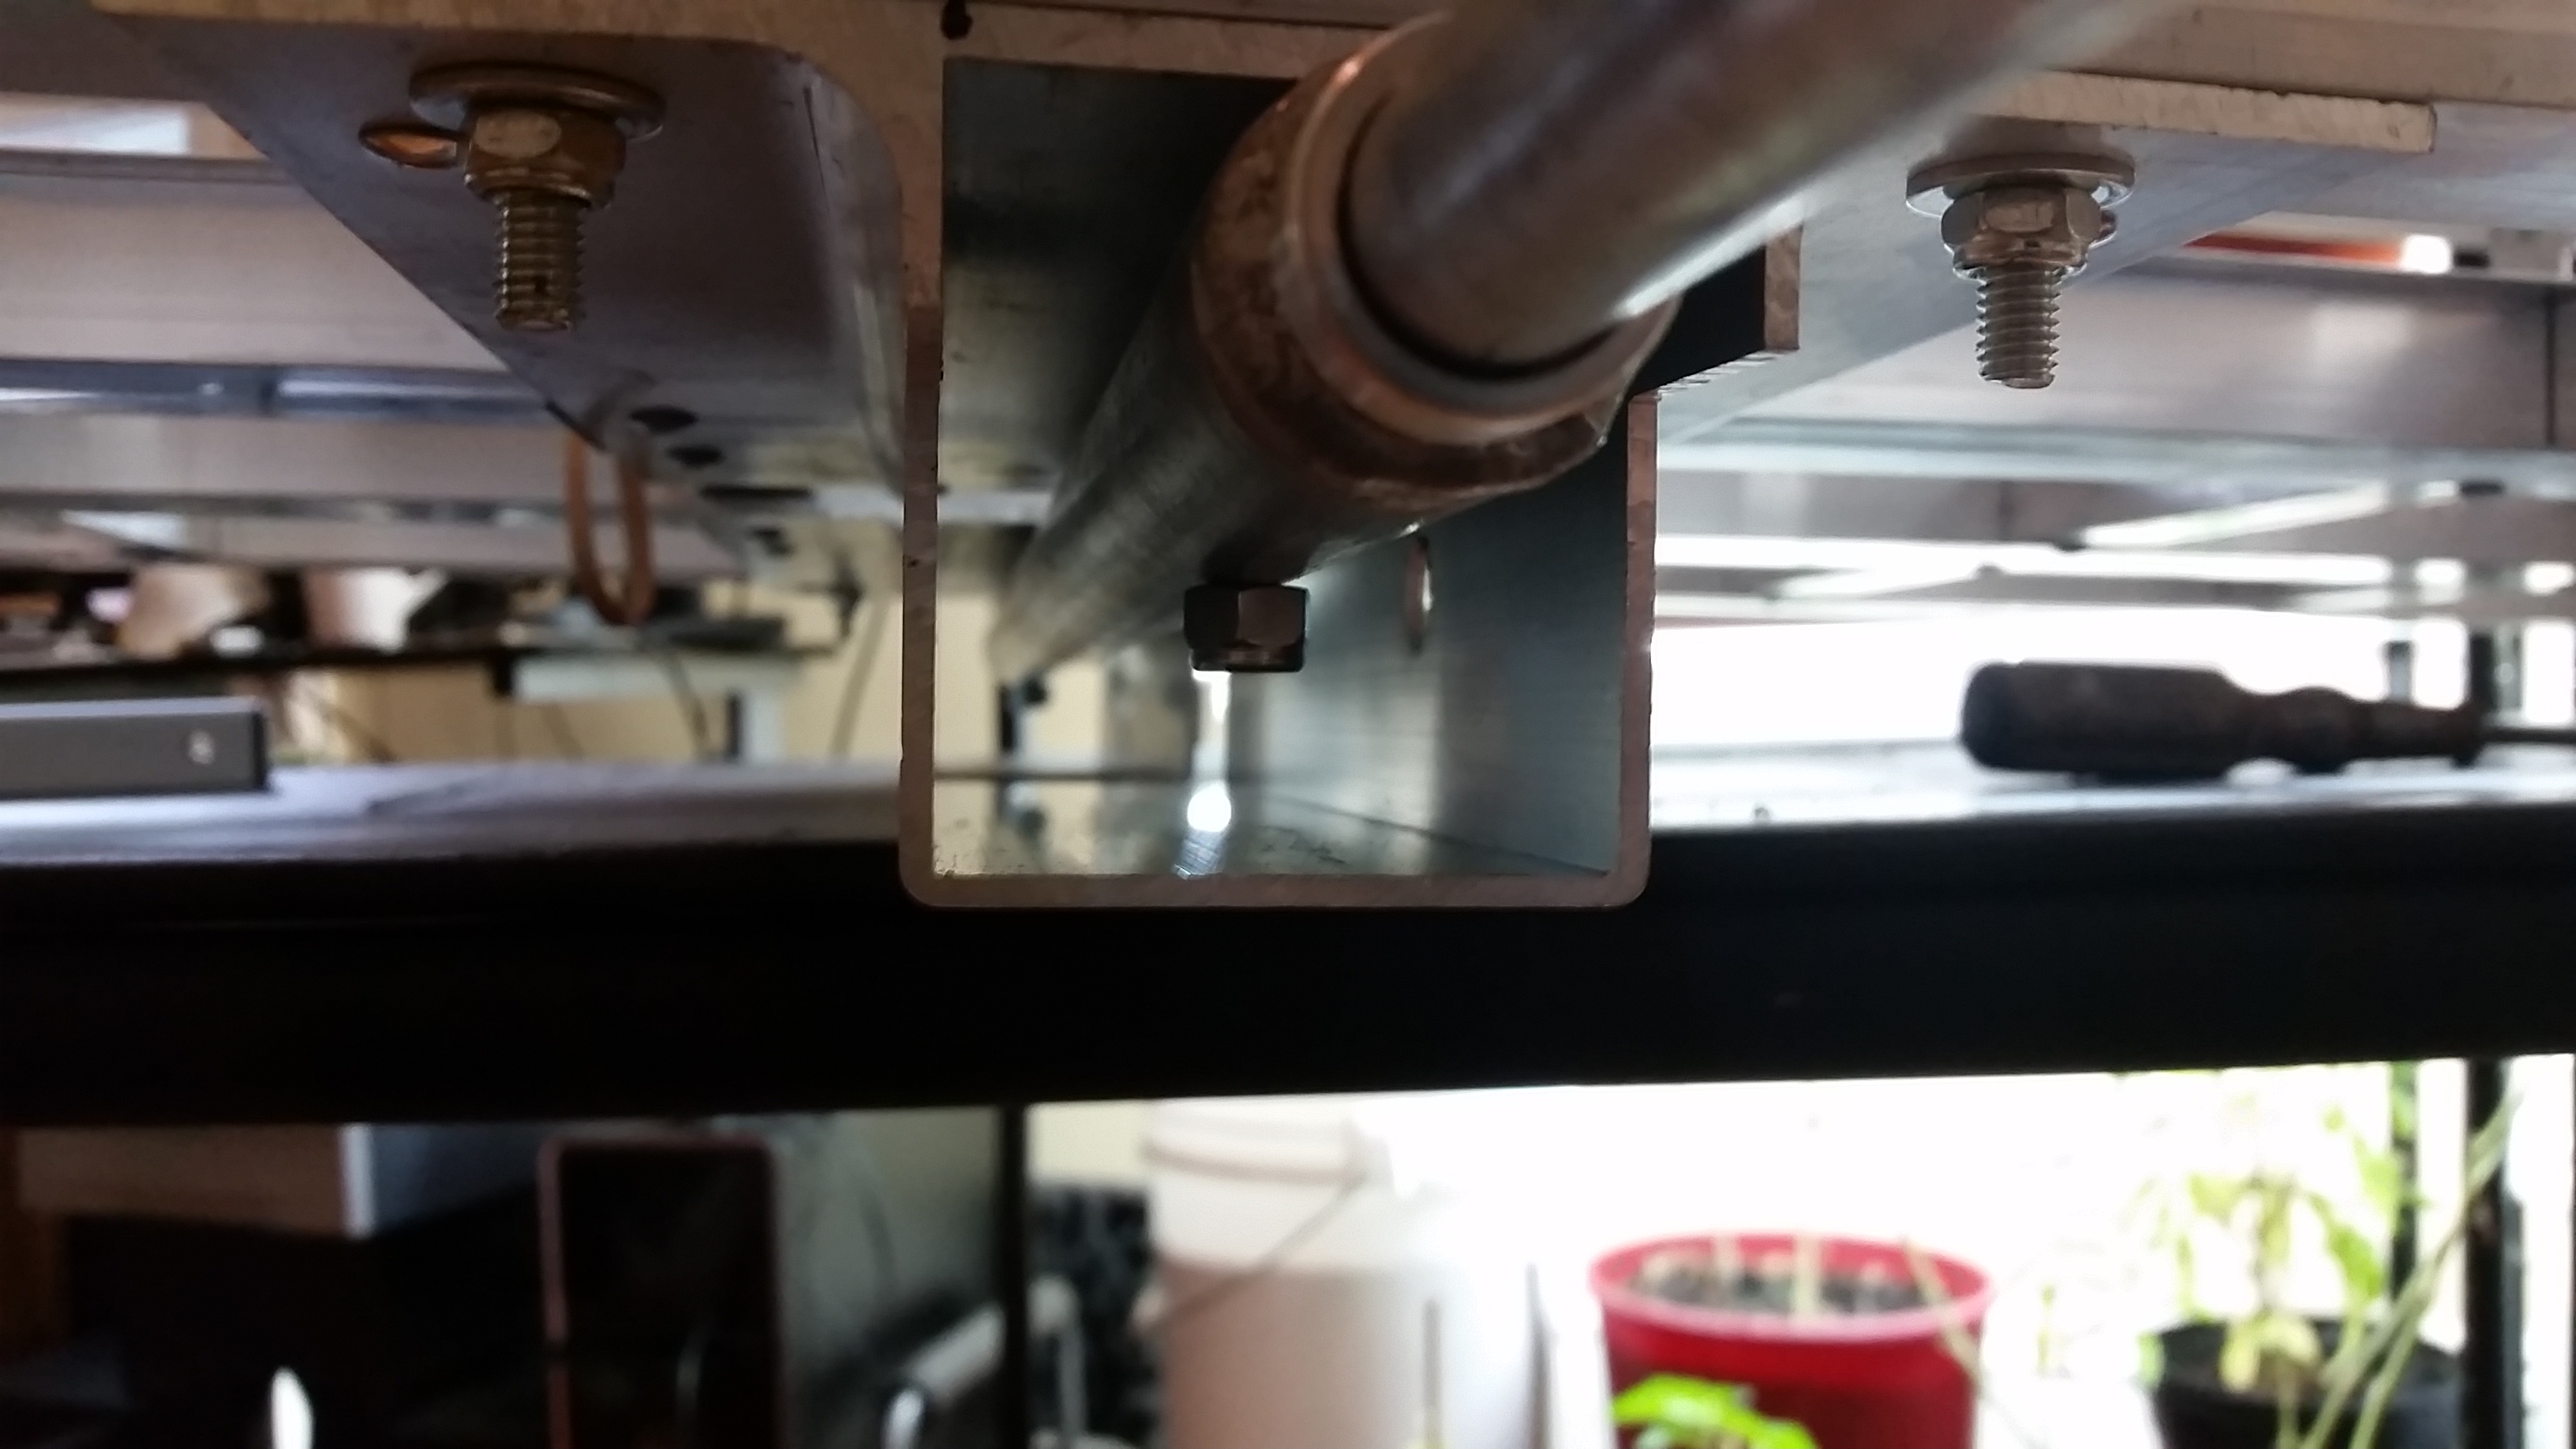
Get them nice and snug. The nice thing about both the cargo holder, and the accessories is they both come with locking nuts that have an anti-vibration rubber gasket in them to keep them from working loose from vibration. Did I mention that you wont need to buy a single nut or bolt for this project, literally every single part you need comes included.
Next up attach the wheels.
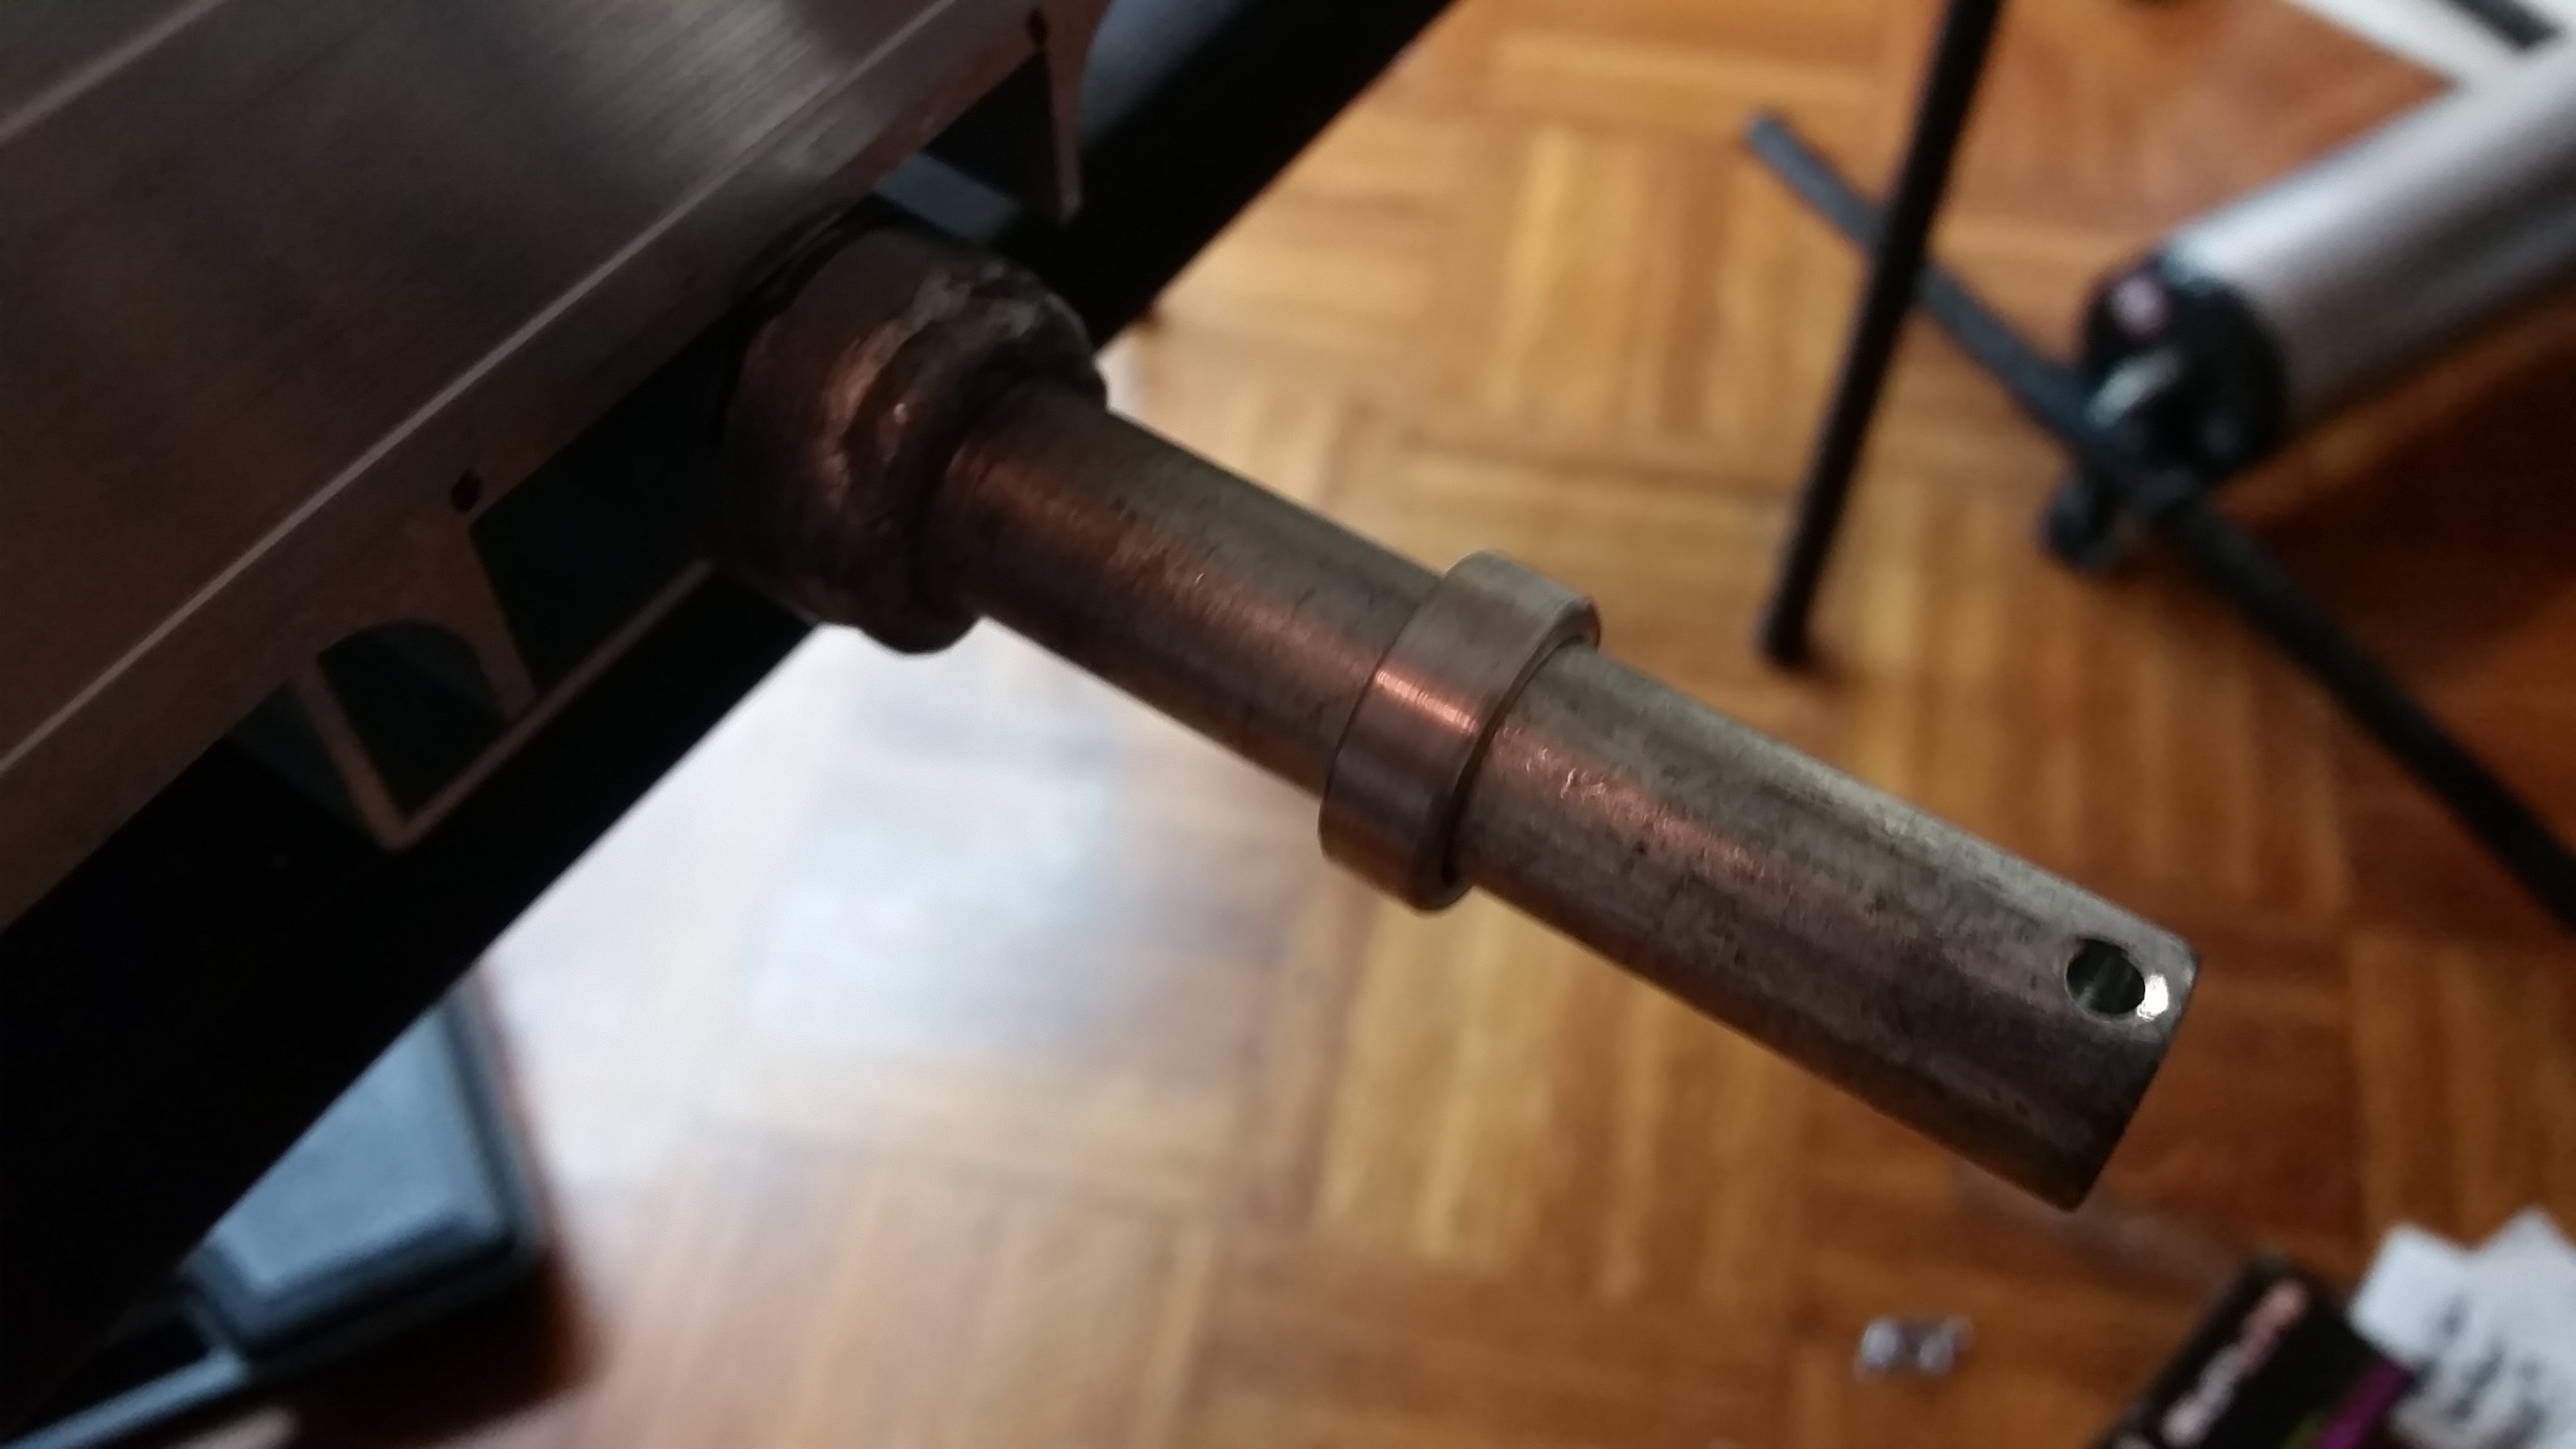
Attach the (included) spacer.
Slide towards the cargo holder.
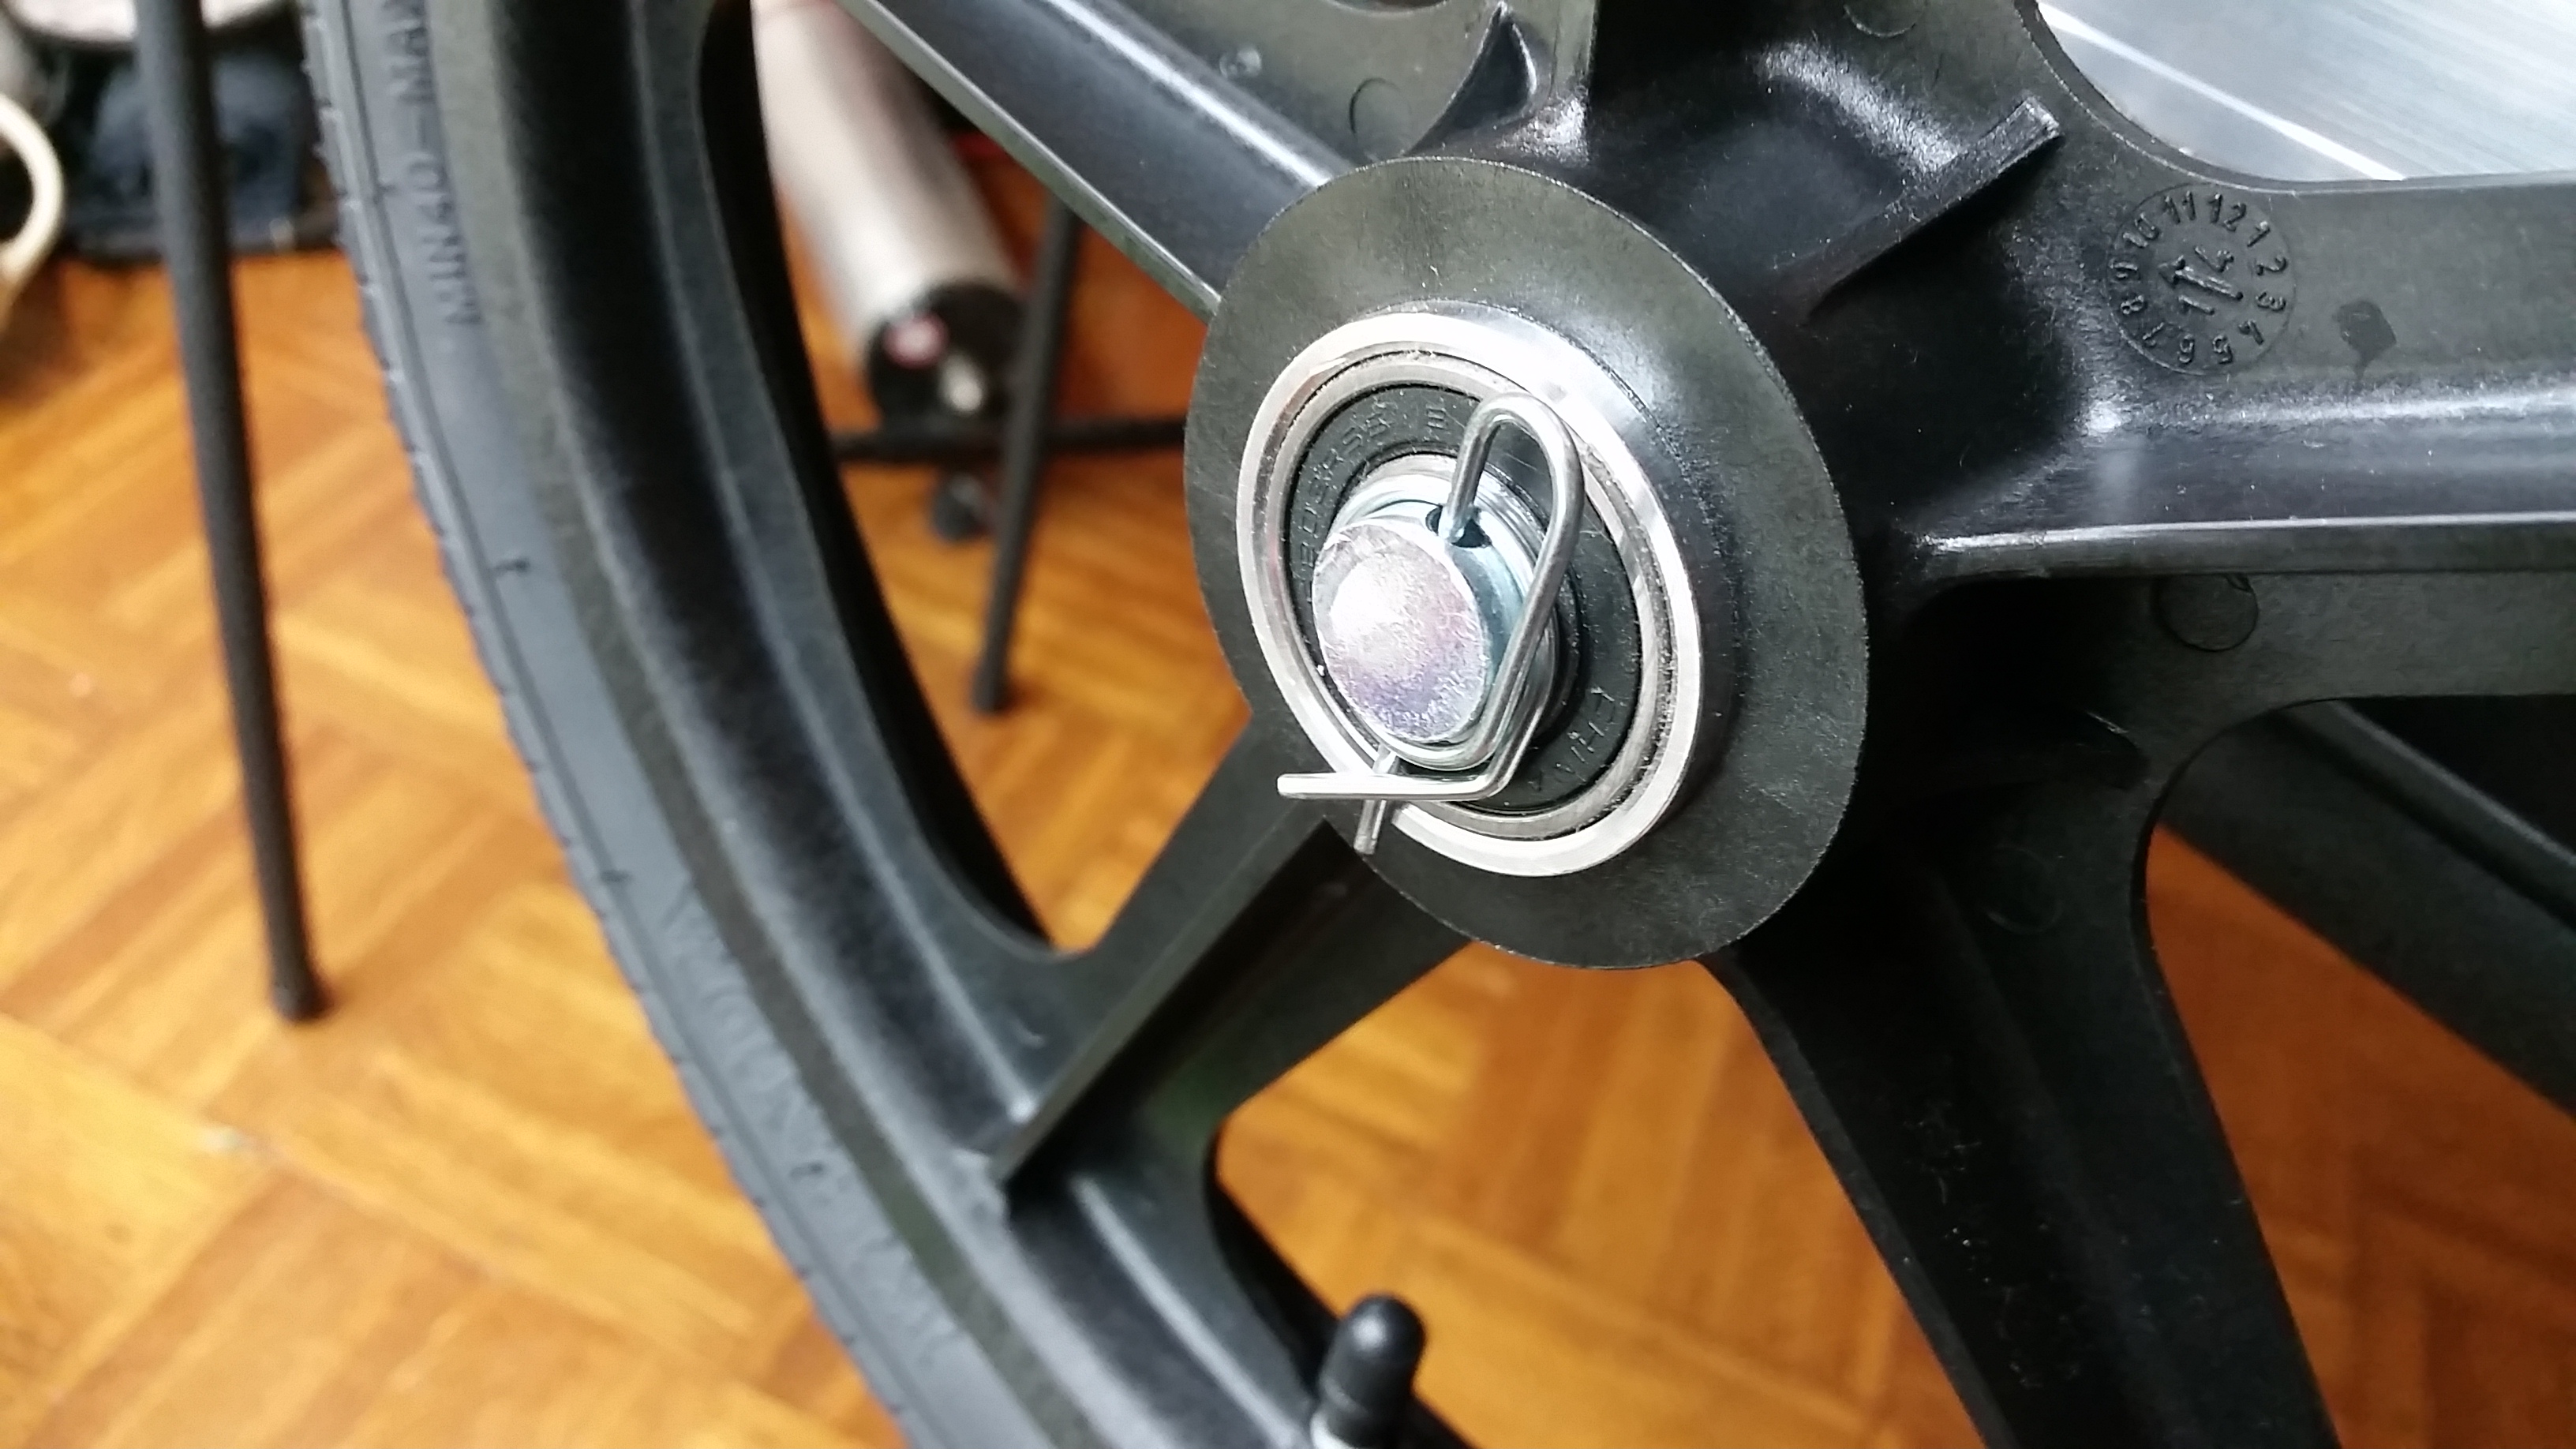 Slide on your assembled wheels (the bearings come already seated, no need to put them in!), and attach the (included) pin that keeps the wheels from sliding off.
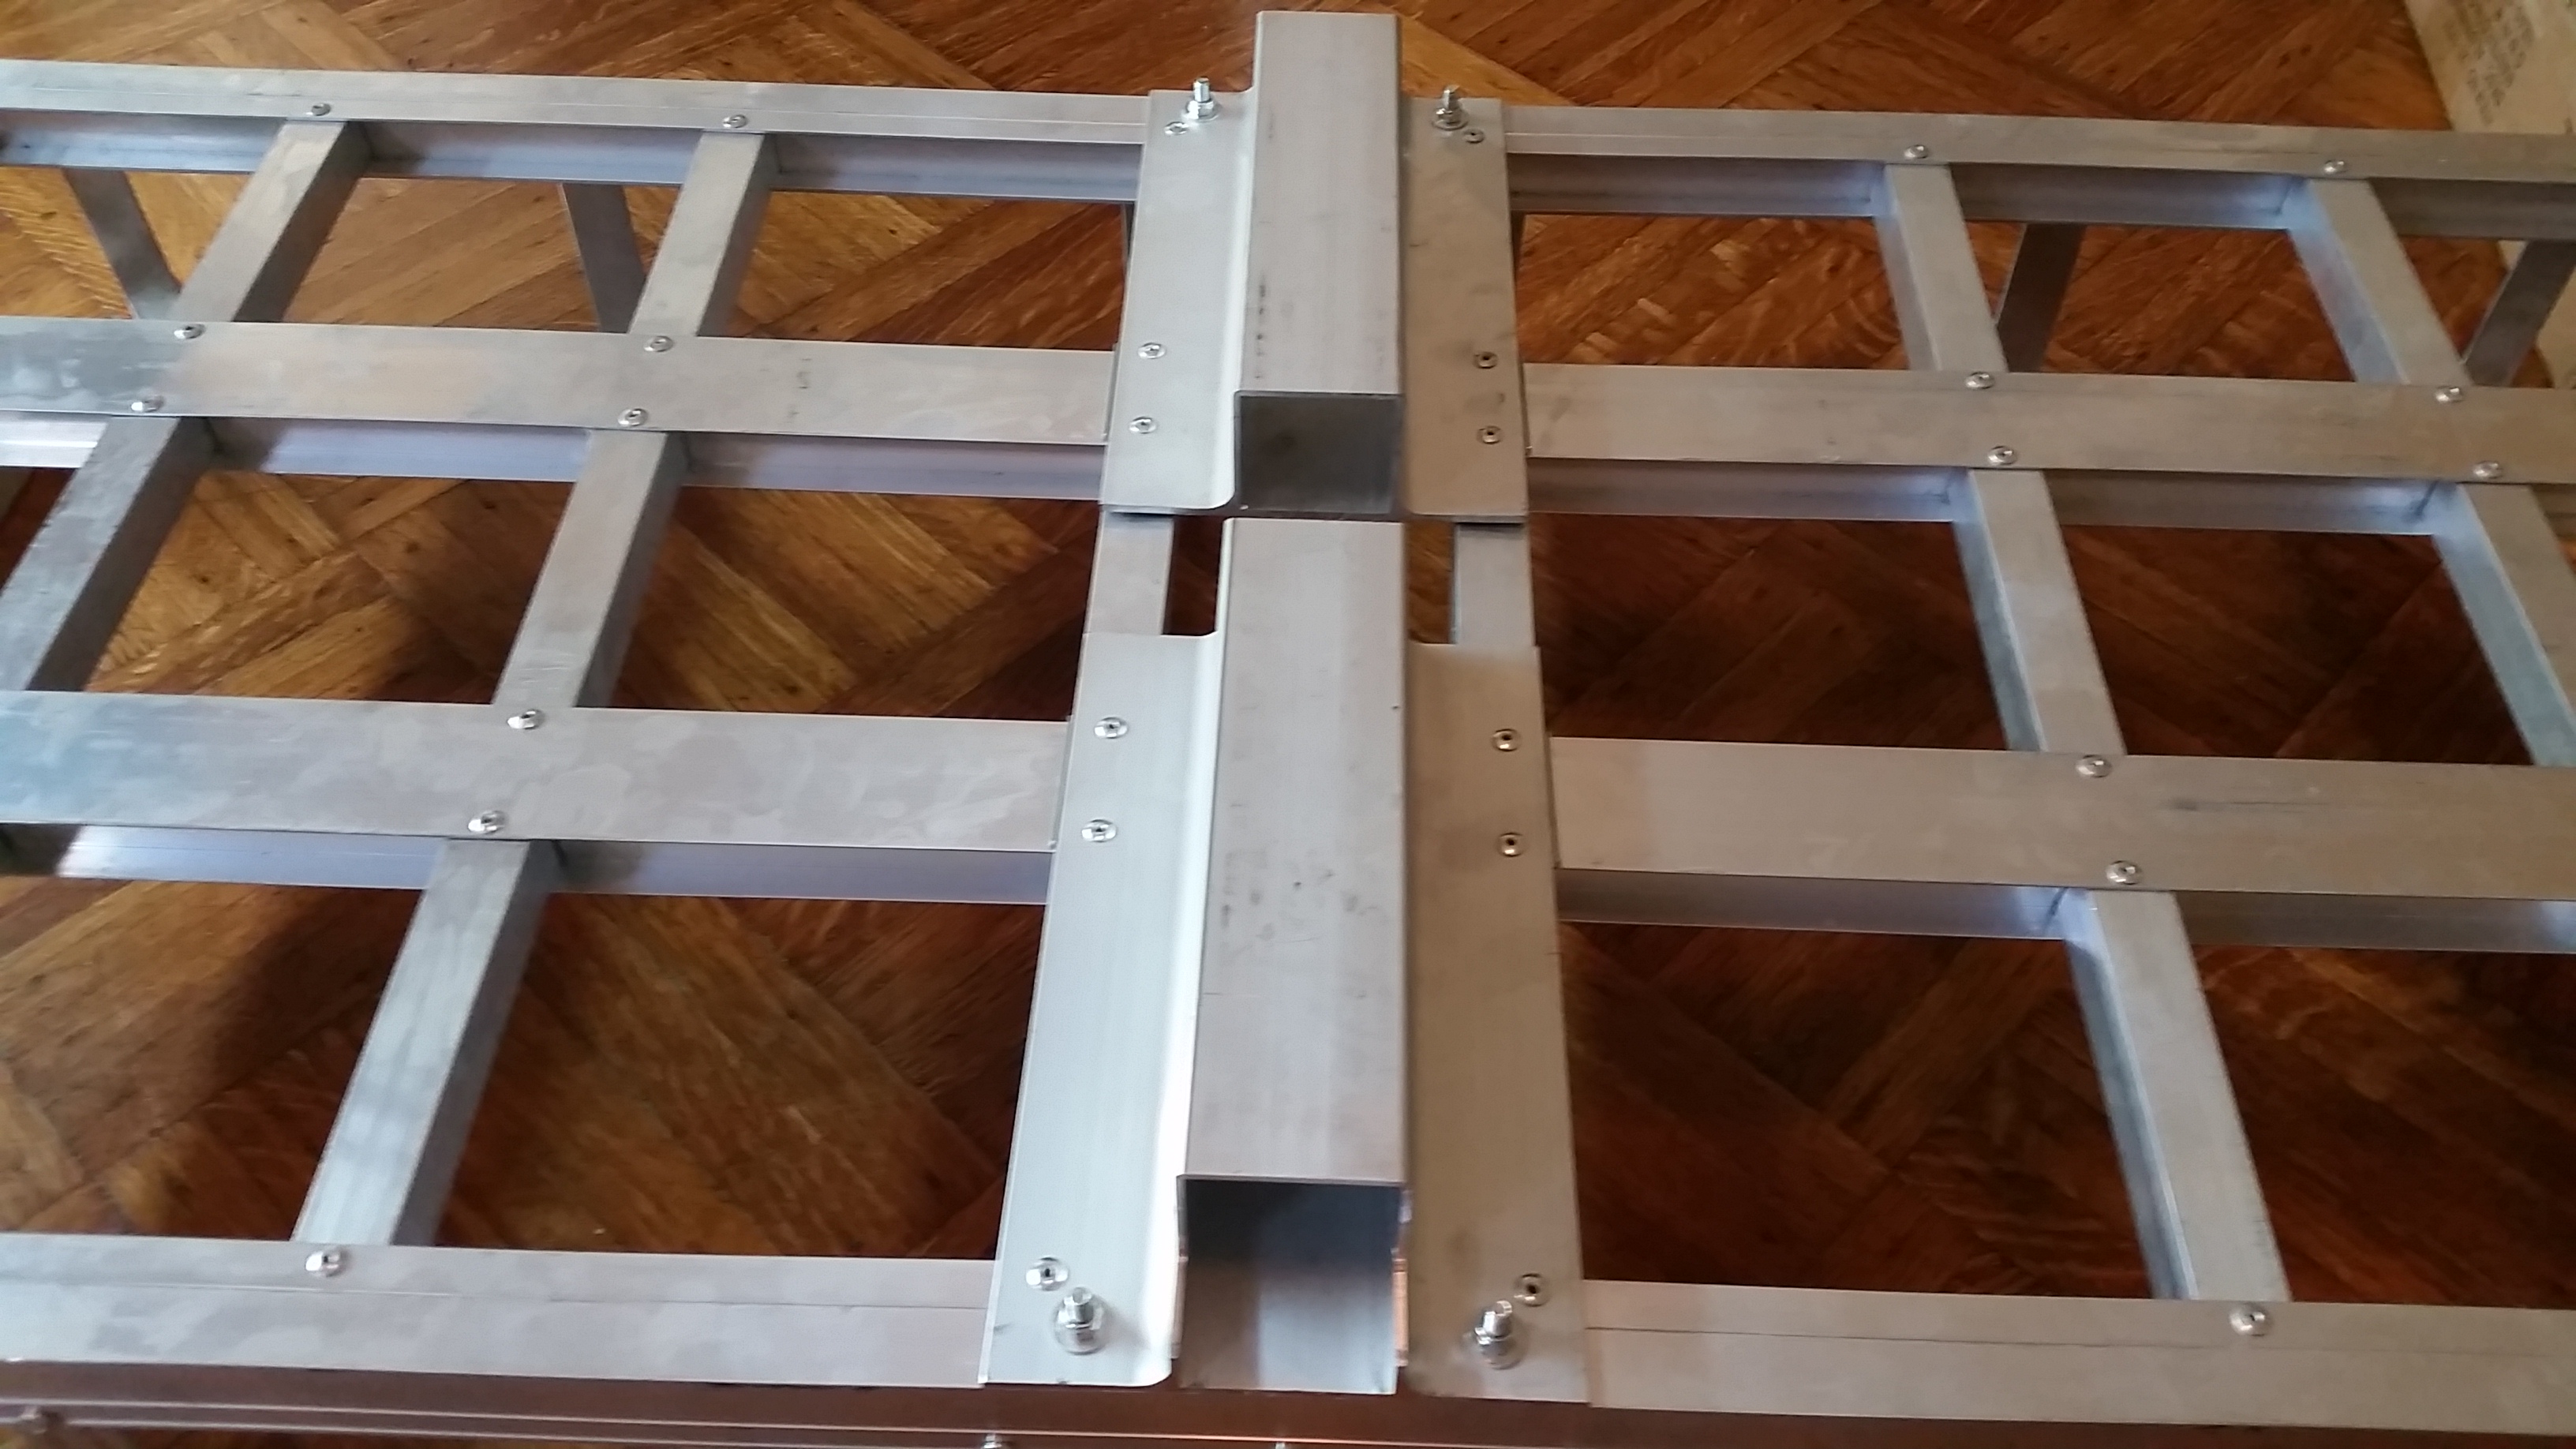
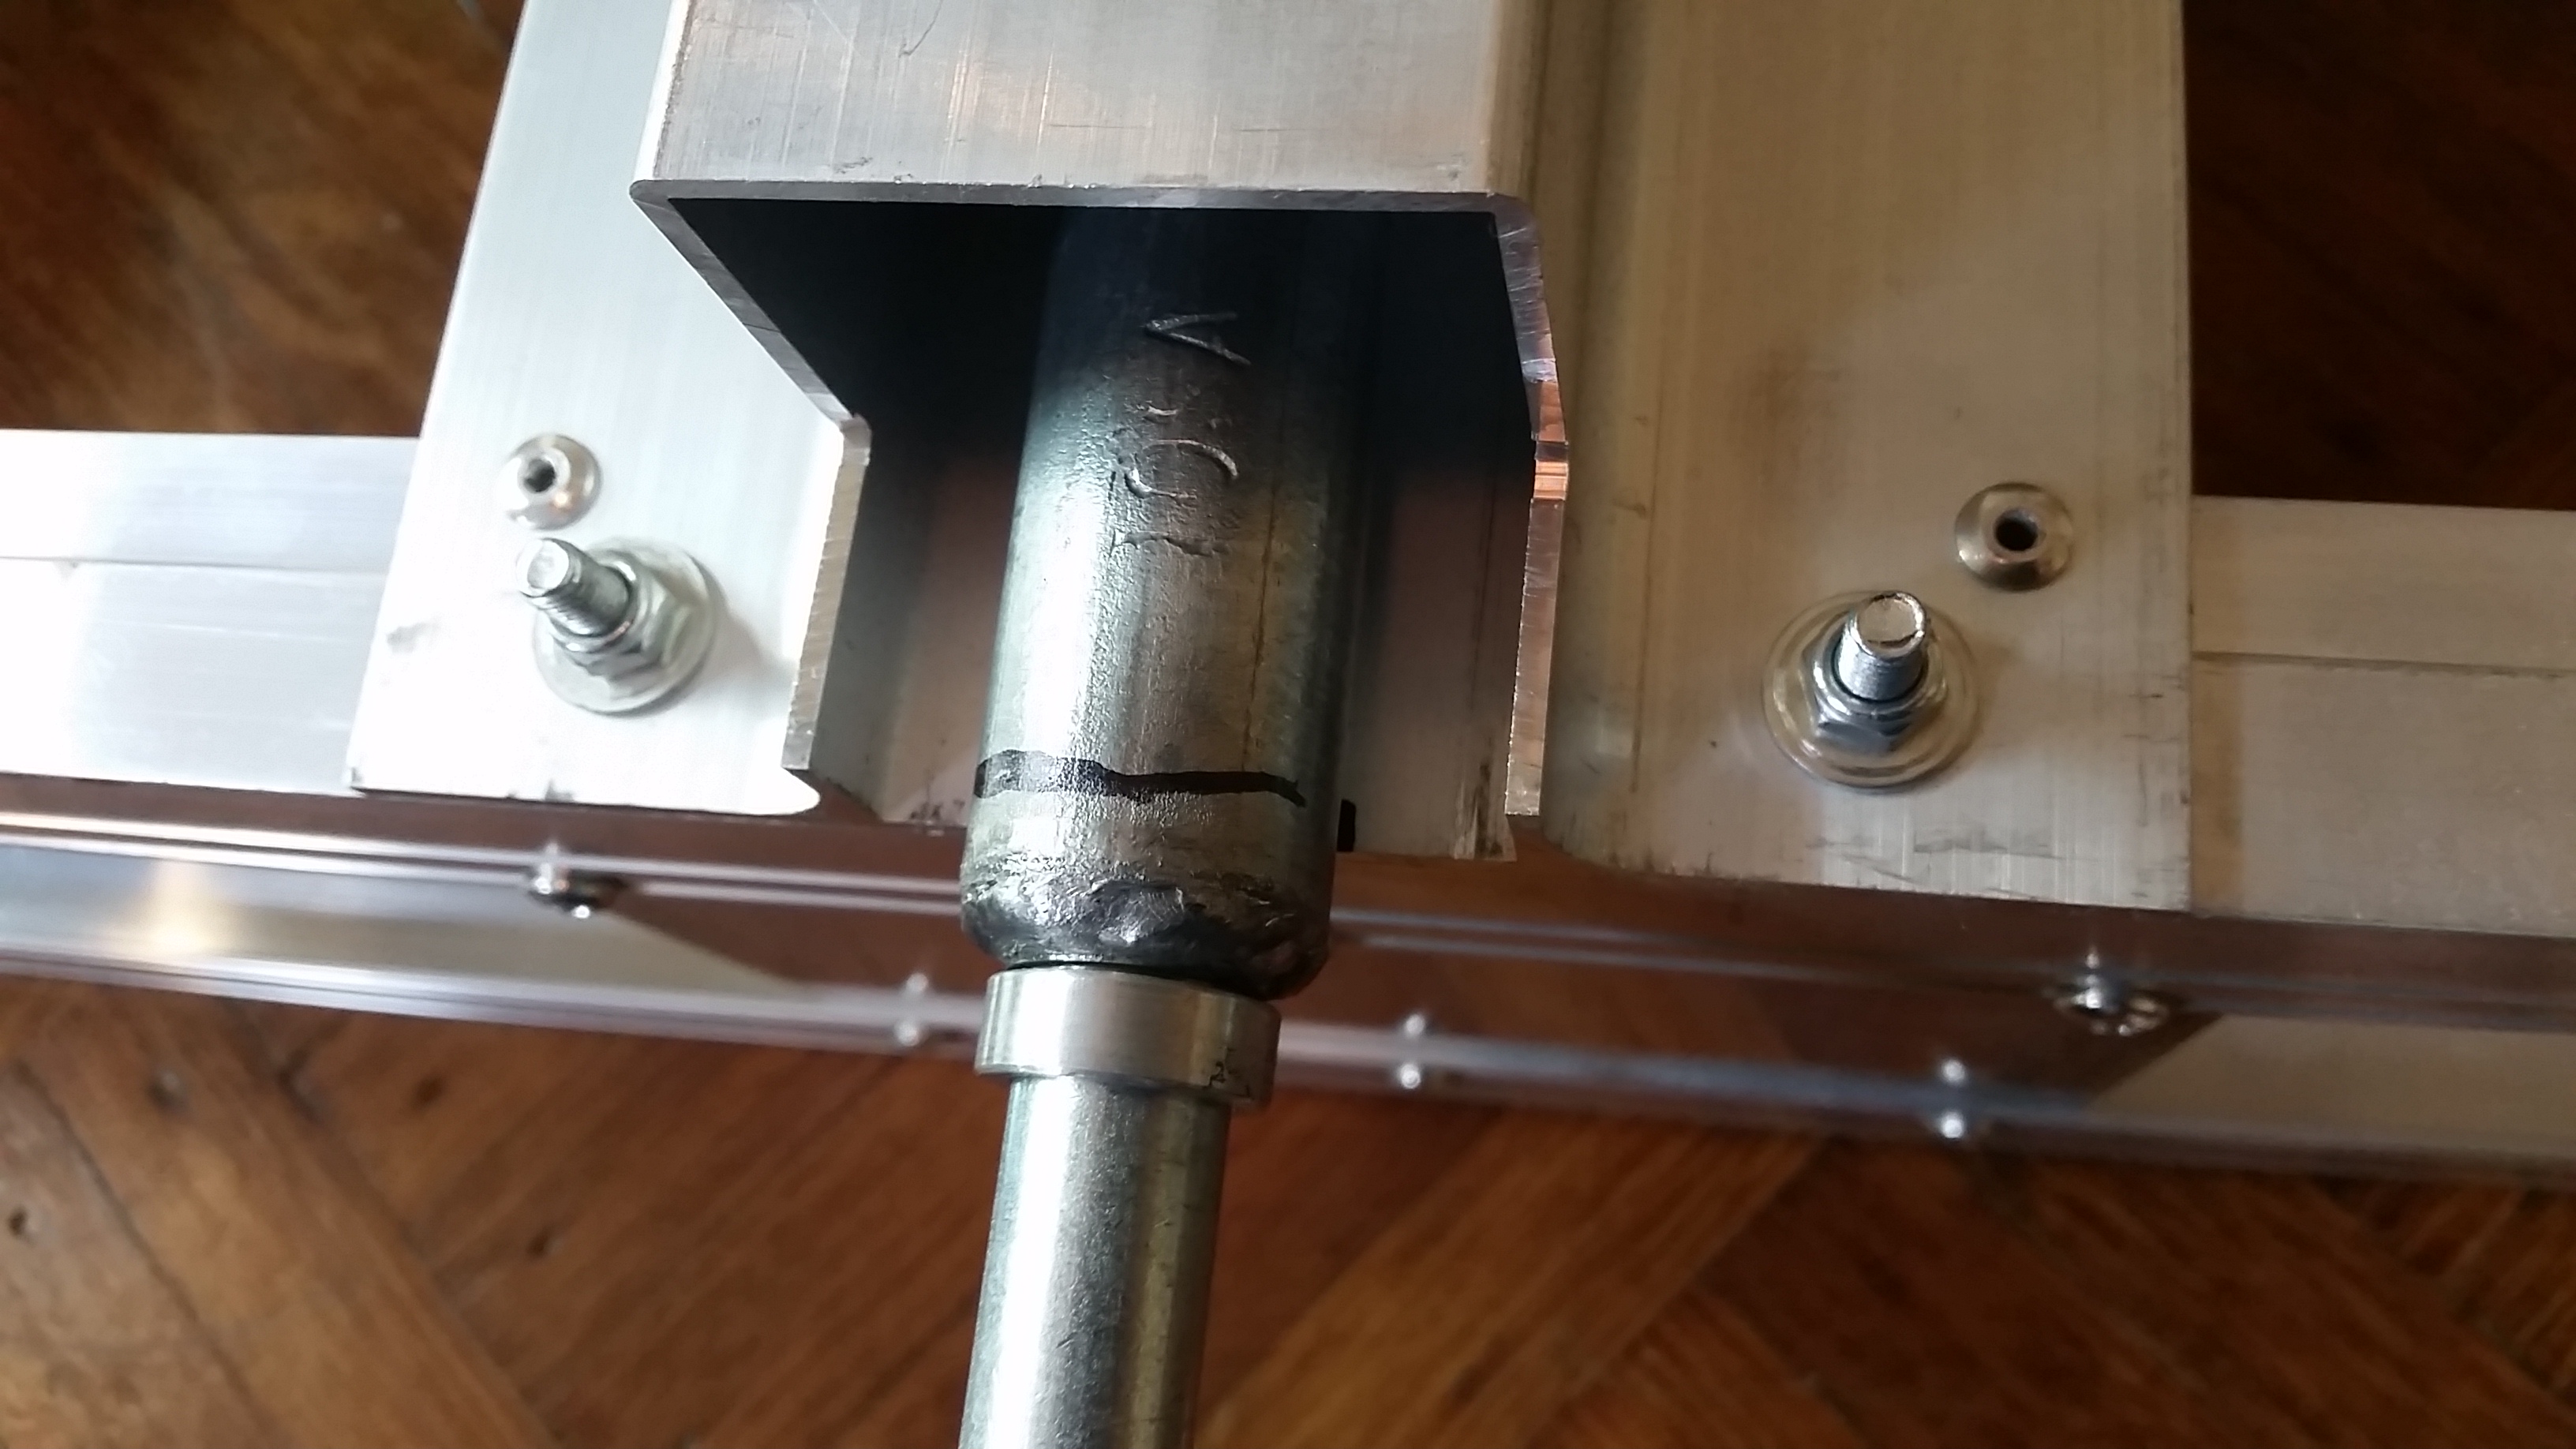
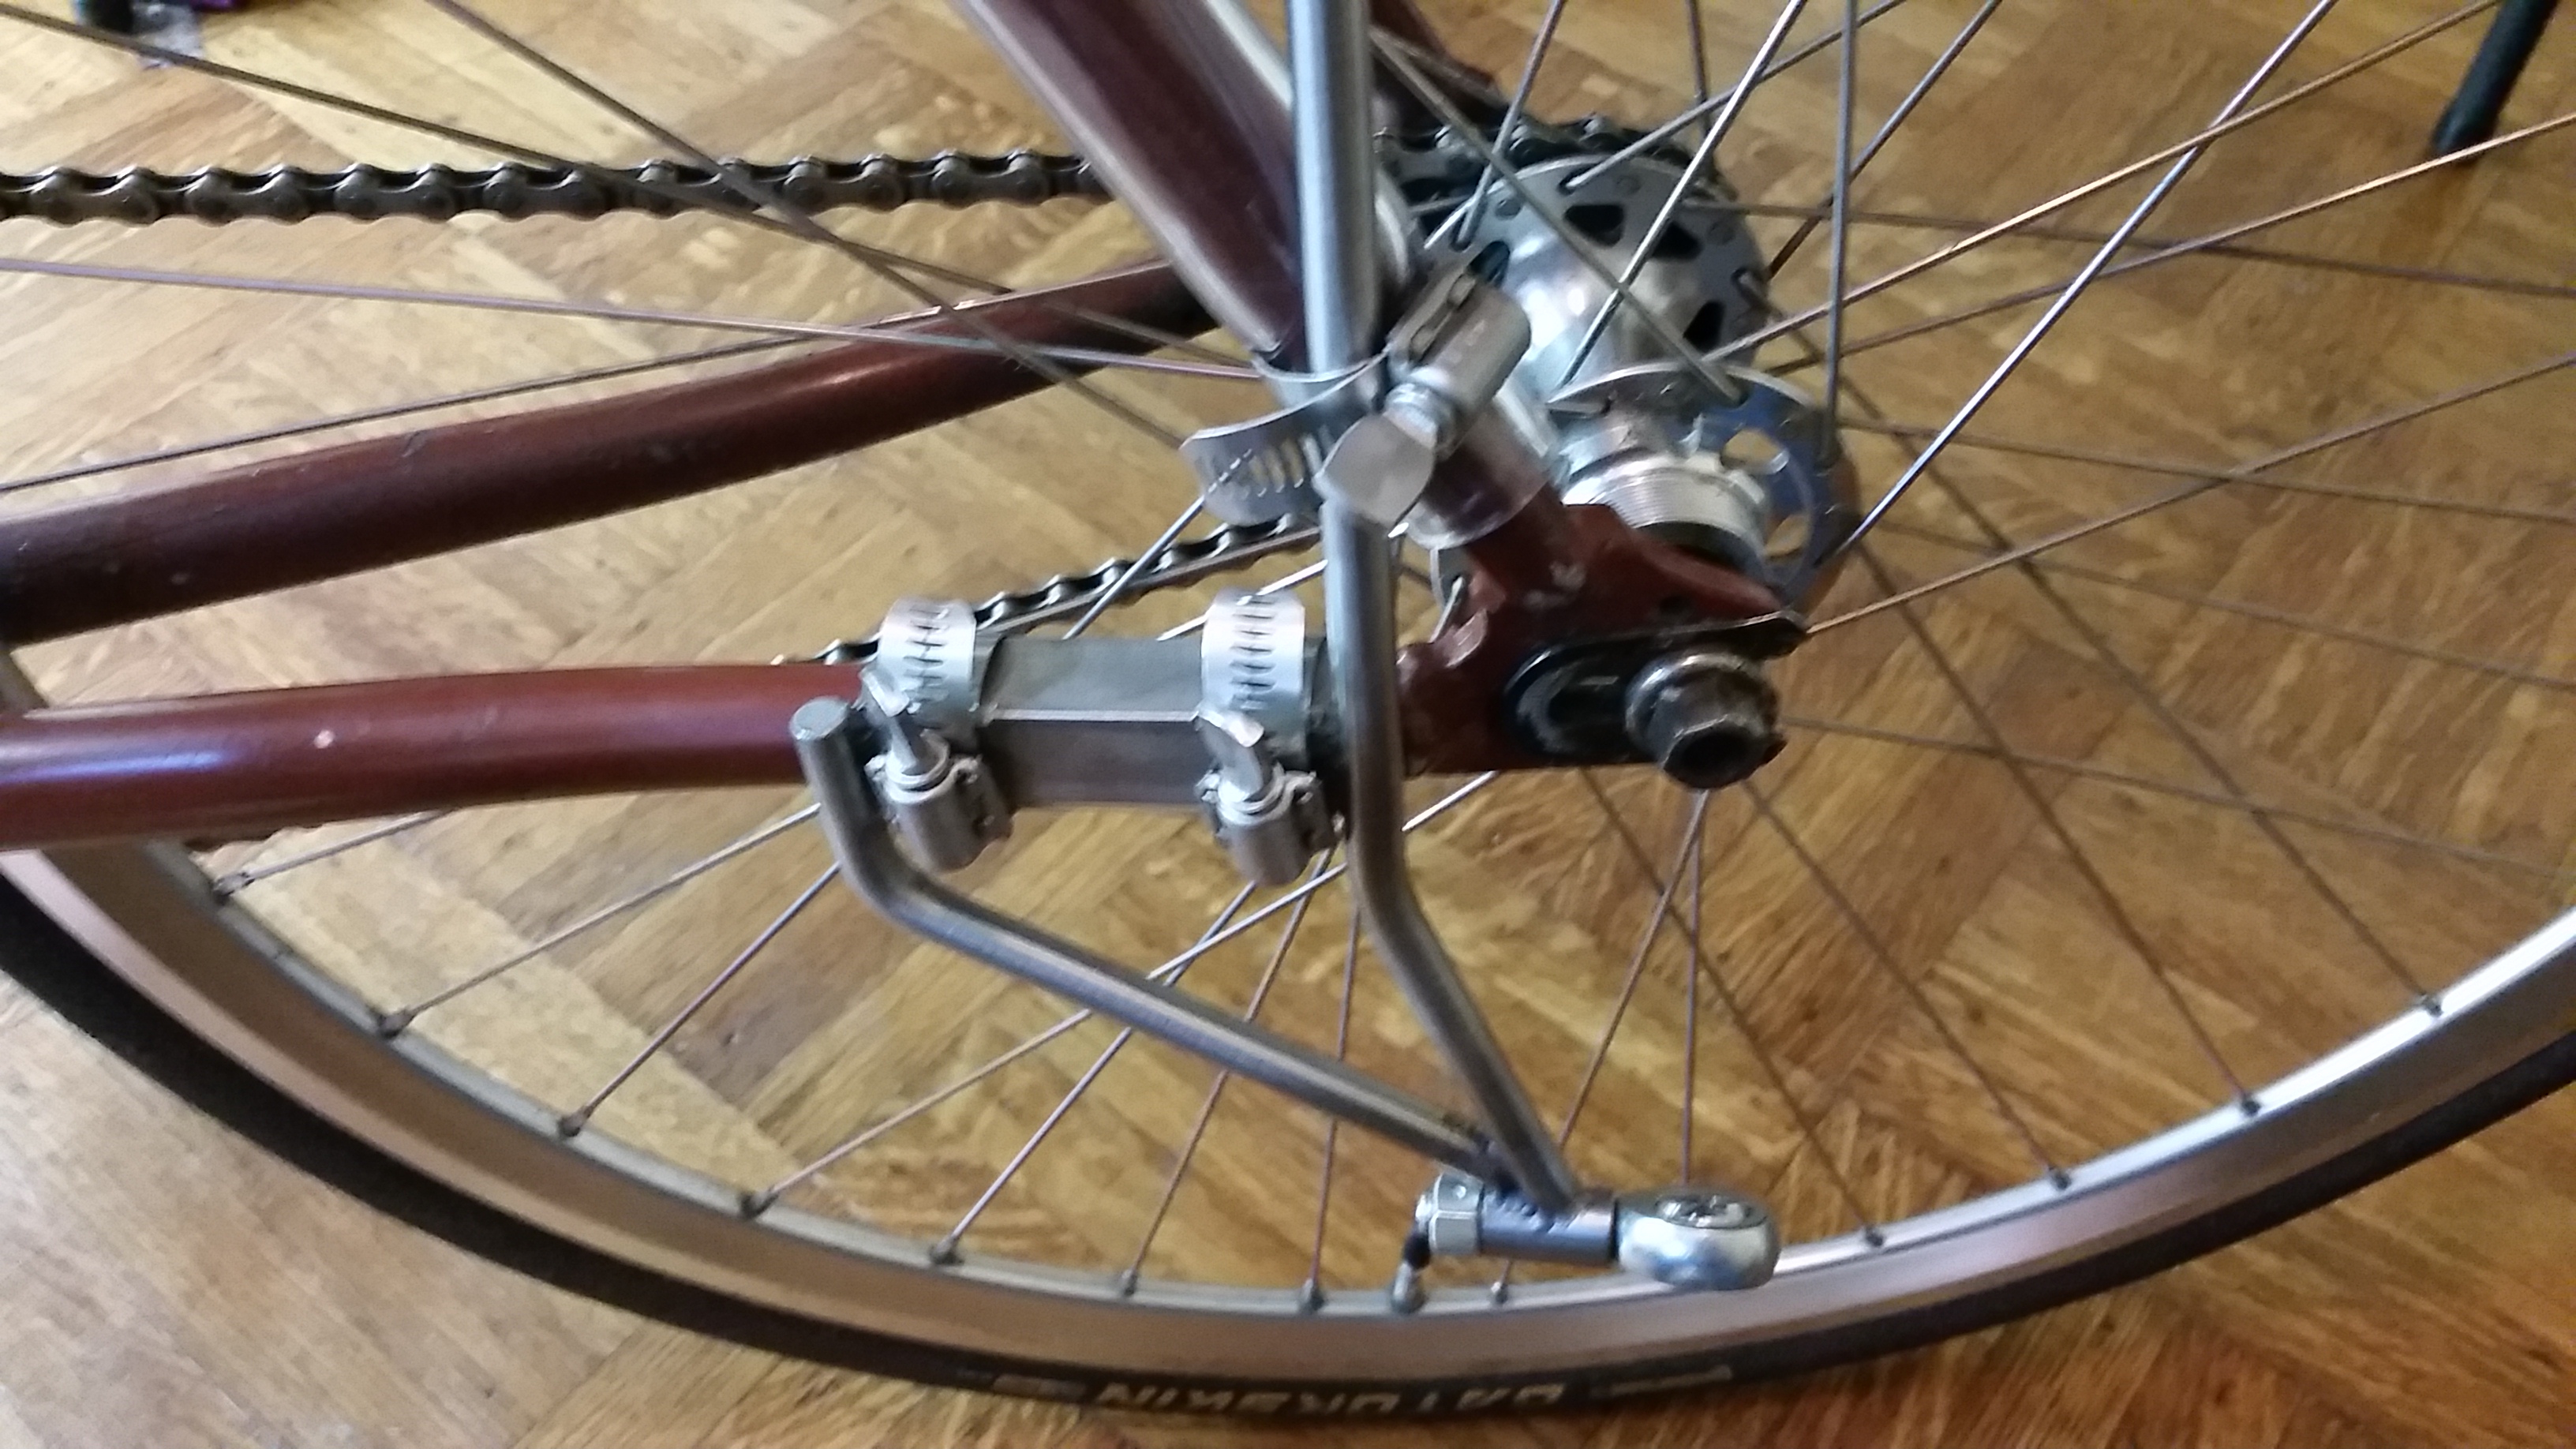
Now the tricky part. The Bikes at Work trailer hitch ALMOST fits perfectly on this rig, but you will need to make some minor adjustments. Specifically you will need to cut four small holes into the end of the cargo holder that will hold the hitch (the end that doesn’t have the reflectors).
I used a dremel with a cutting disk, and while it was loud (where ear plugs) and dusty (use a breathing mask and safety goggles), it only took about 10 minutes and as aluminum is soft as butter was easy too.
The hitch comes with two mounting bars, but the included u-bolts to hold the hitch are not long enough to mount them without the cut outs. The way the cargo trailer is built cutting larger cut outs would have potentially weakened it, which I didn’t want at this important connection.
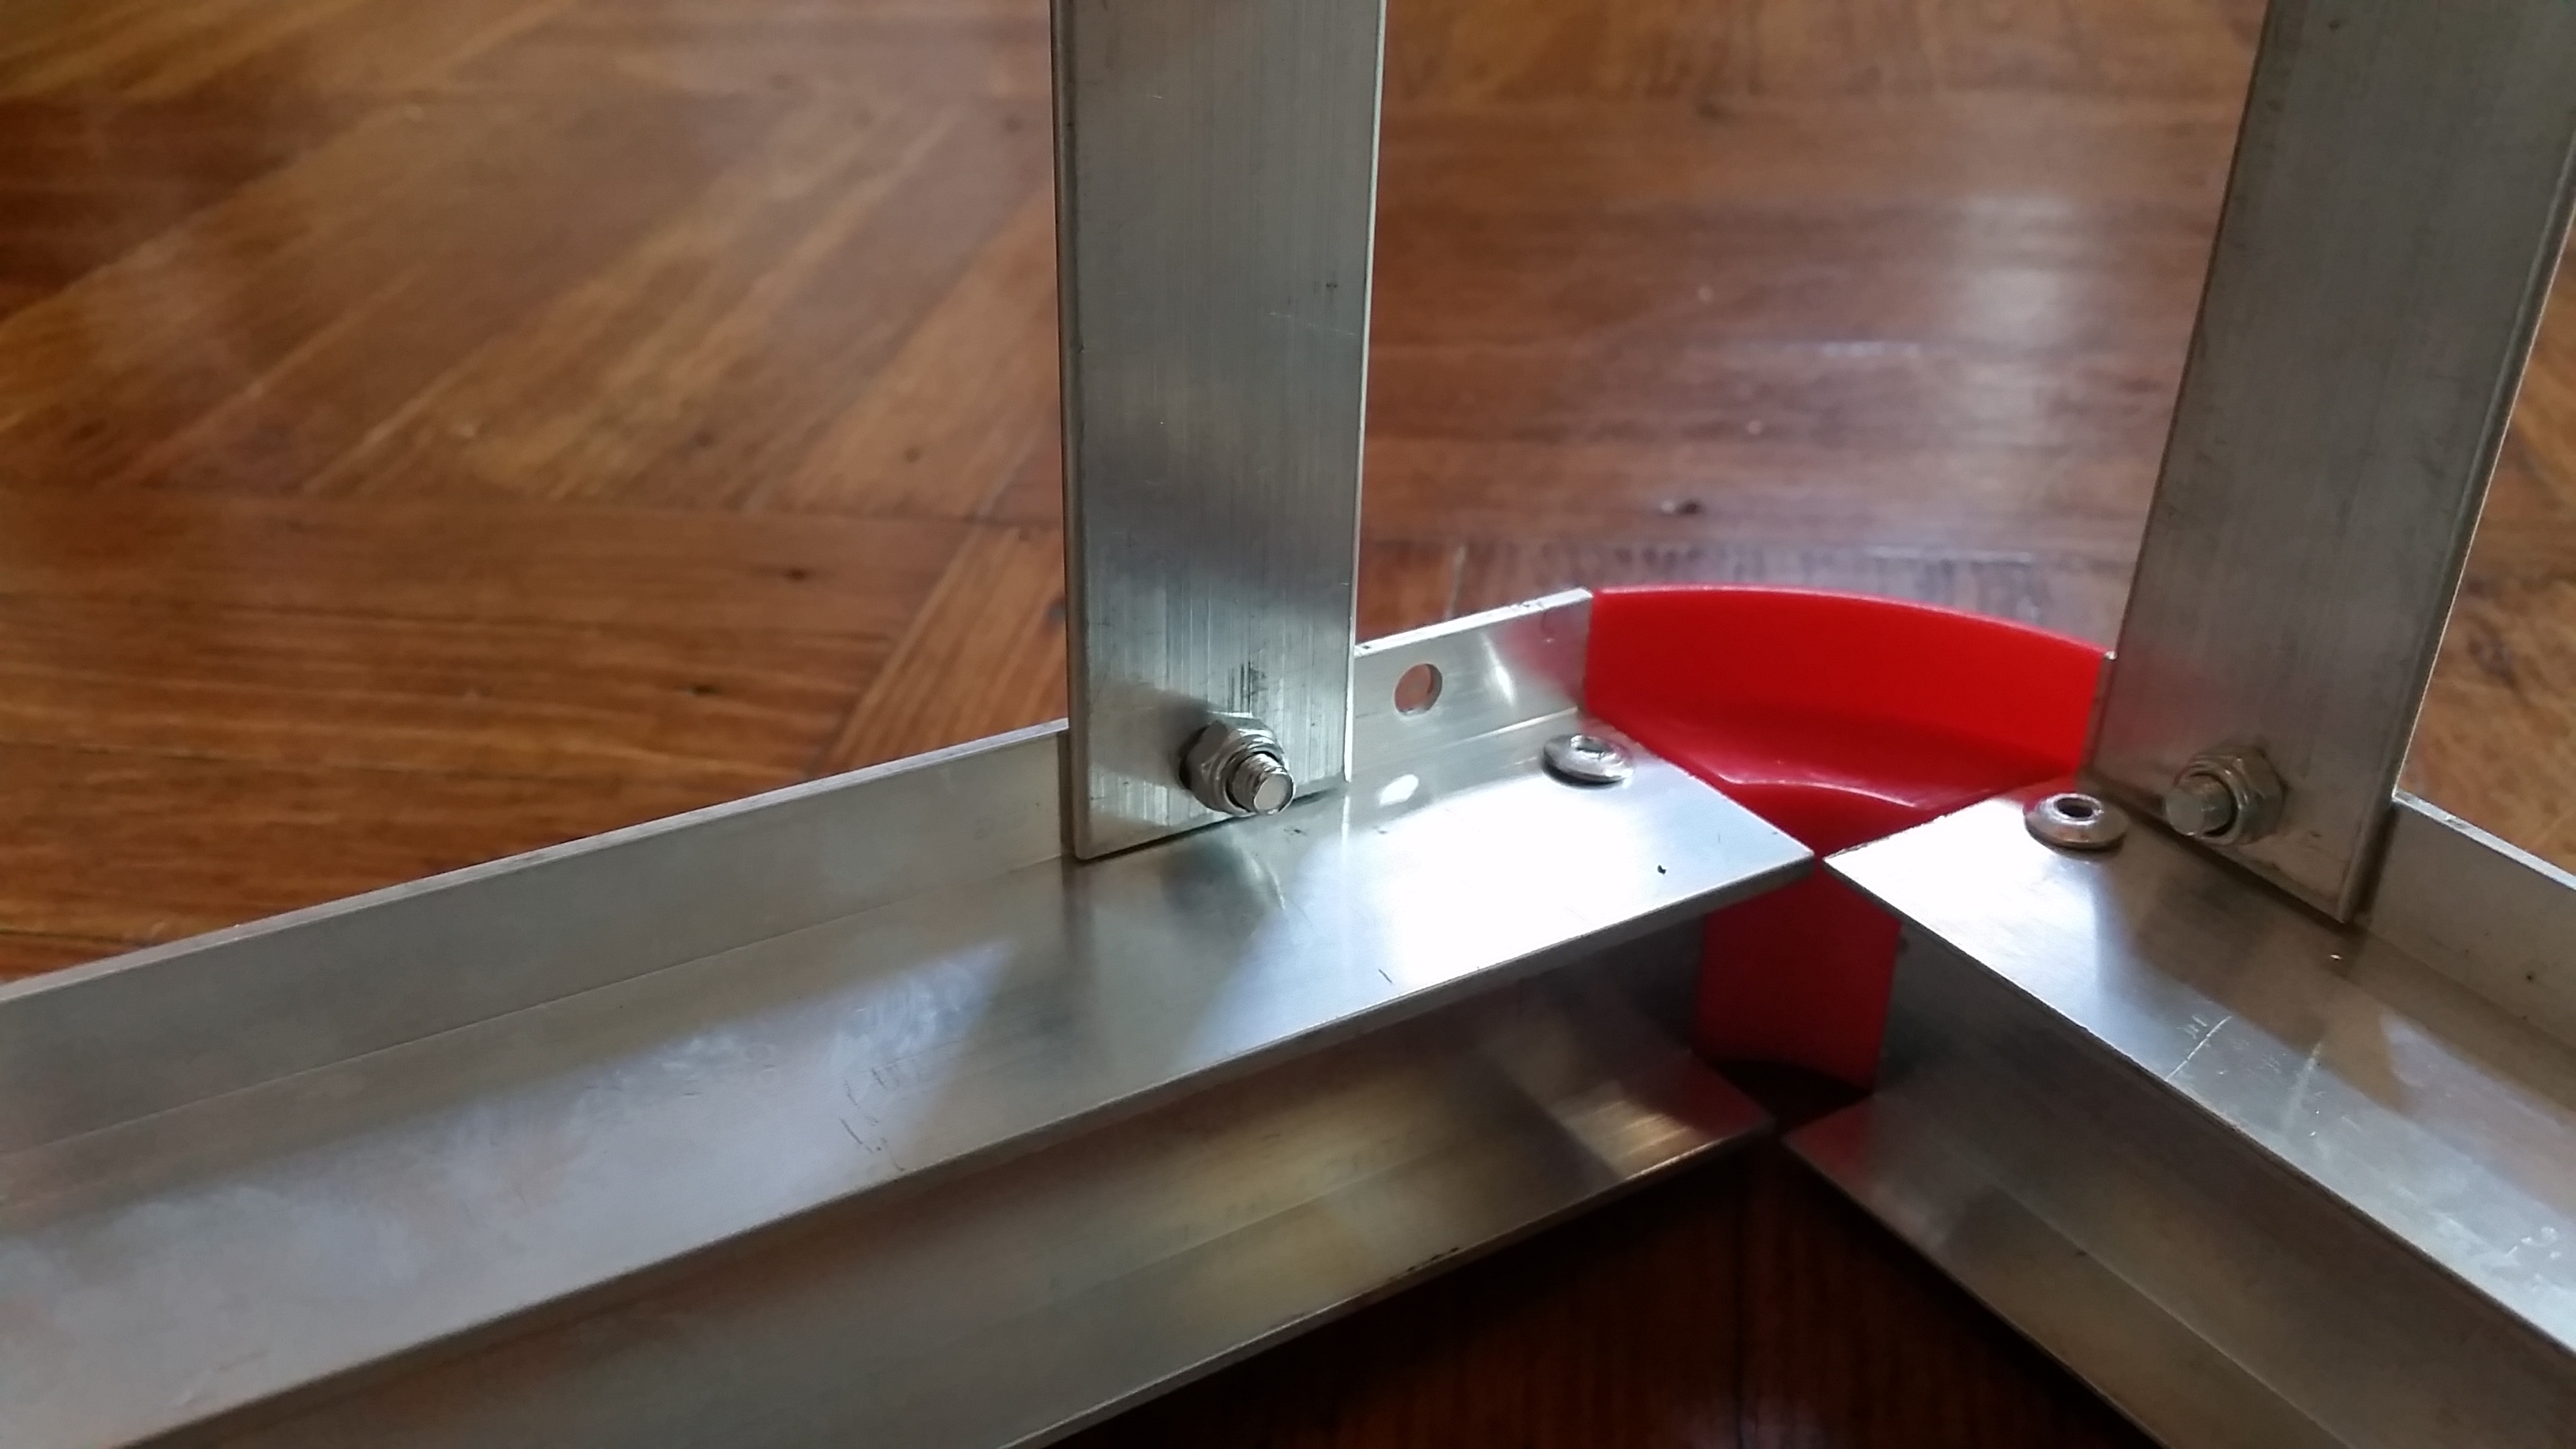
You can see the finished product below.
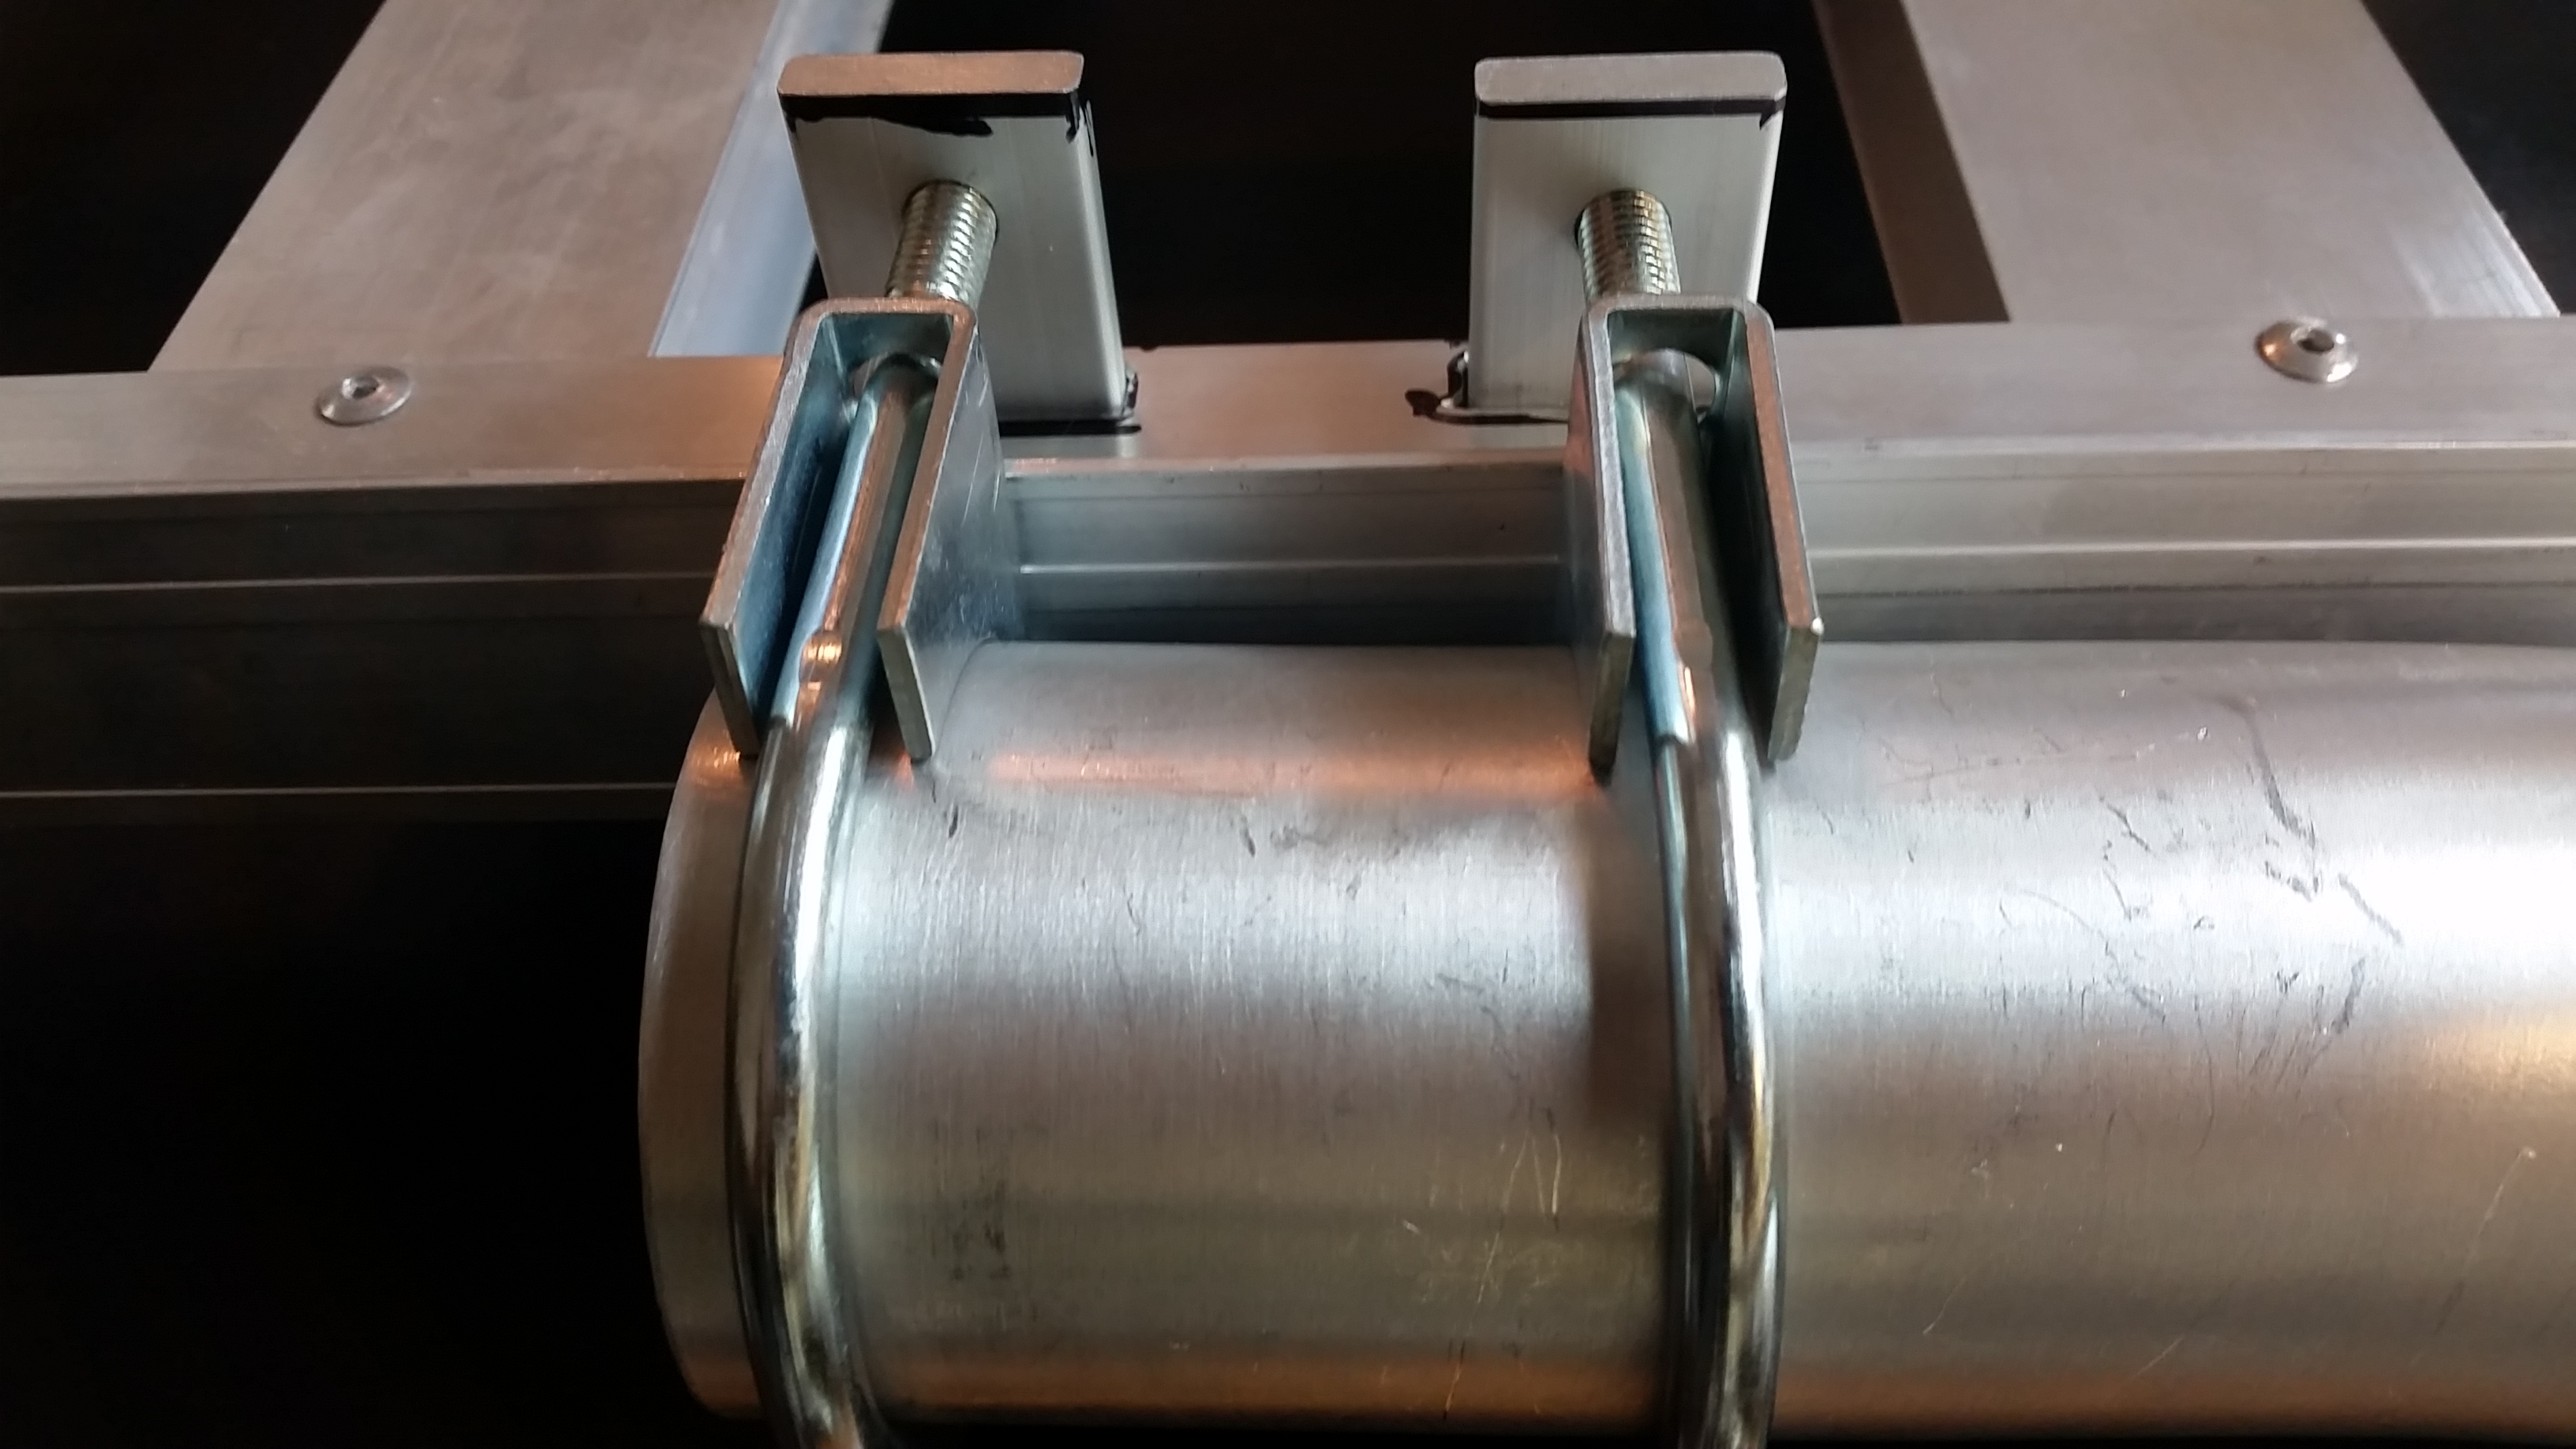
This is what it looks like from the front, you can see the two mounting bars are “inside” the beam. They are actually mounted in a bit of overhang. The square aluminum bar they are mounted into has a flange that sticks out for extra rigidity and I didn’t want to simply make cut outs that went all the way through the flange as I was worried it would buckle, or make a weak point, so I cut the slots as close to the main bar as I could without piercing it. This way they set right up against the main bar, and leave as much as the flange intact as possible.
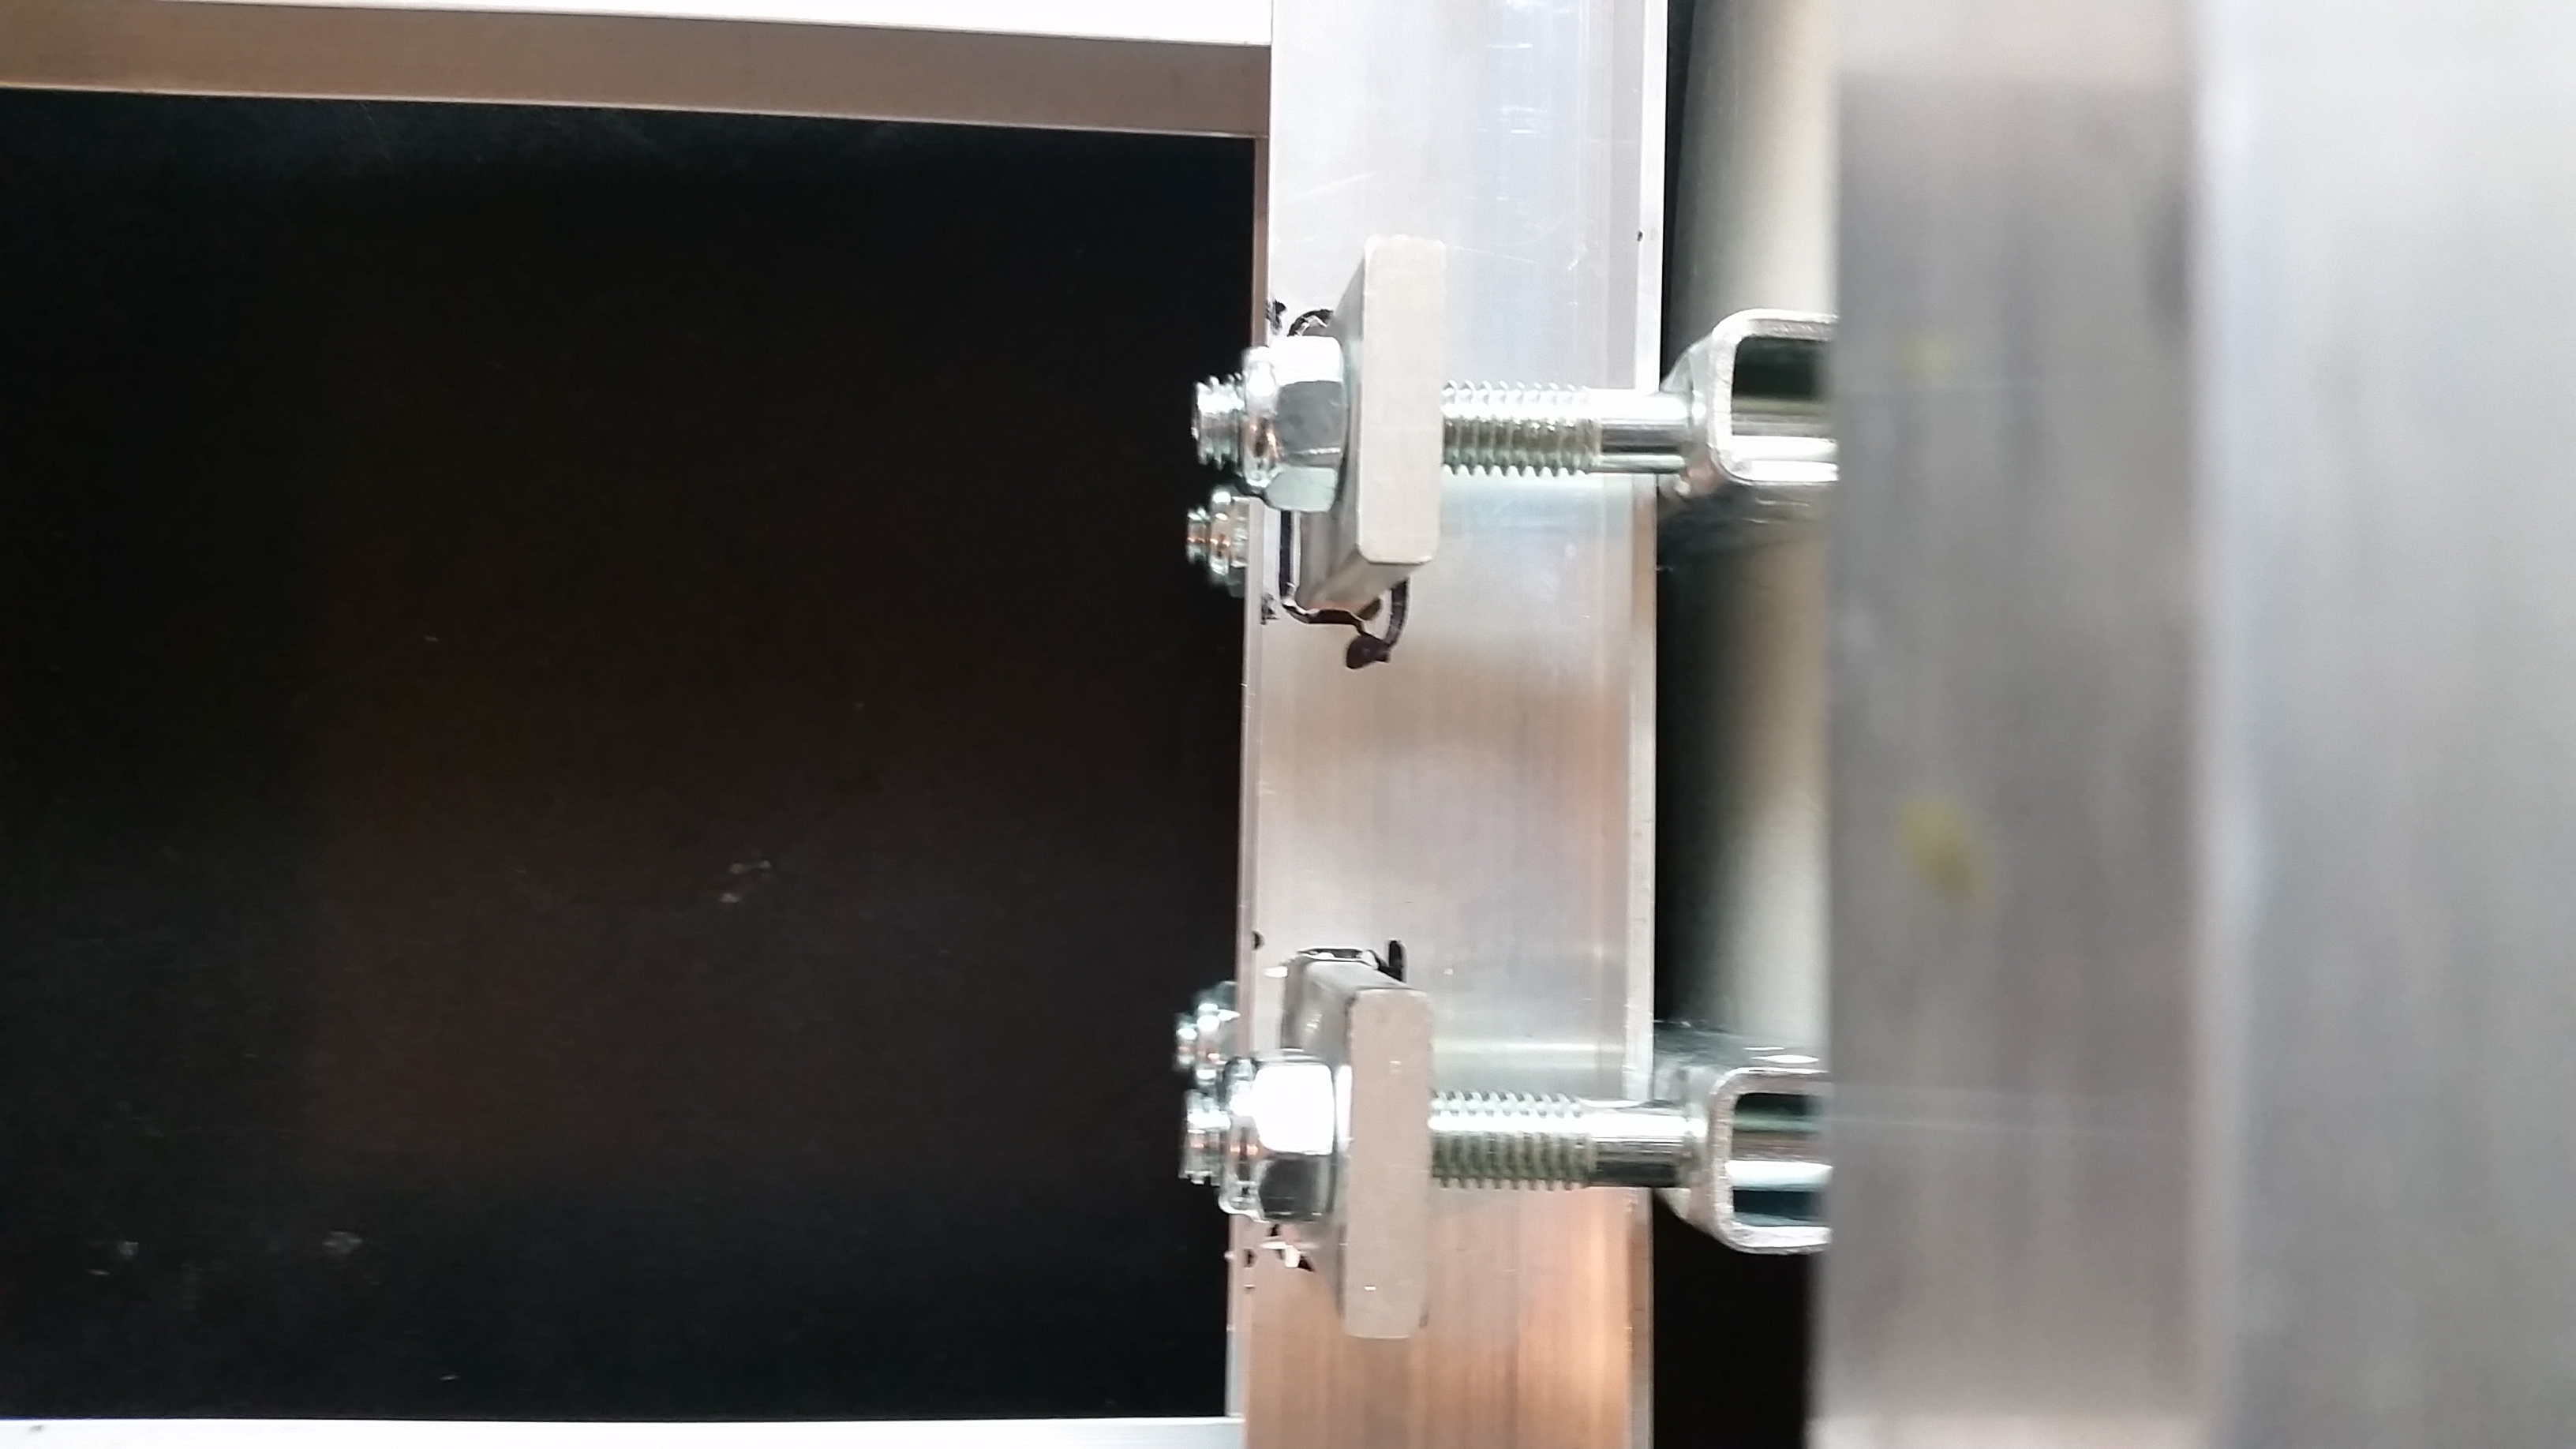
The view from above showing how the bars are mounted back from the edge. The flange actually starts right on the right side of the bars. This allows the forward force from bicycle to be transferred right into the largest strongest part of the bar, rather than into the thing fragile flange system, while at the same time puts minimum strain on those flanges by only cutting out a small slot.

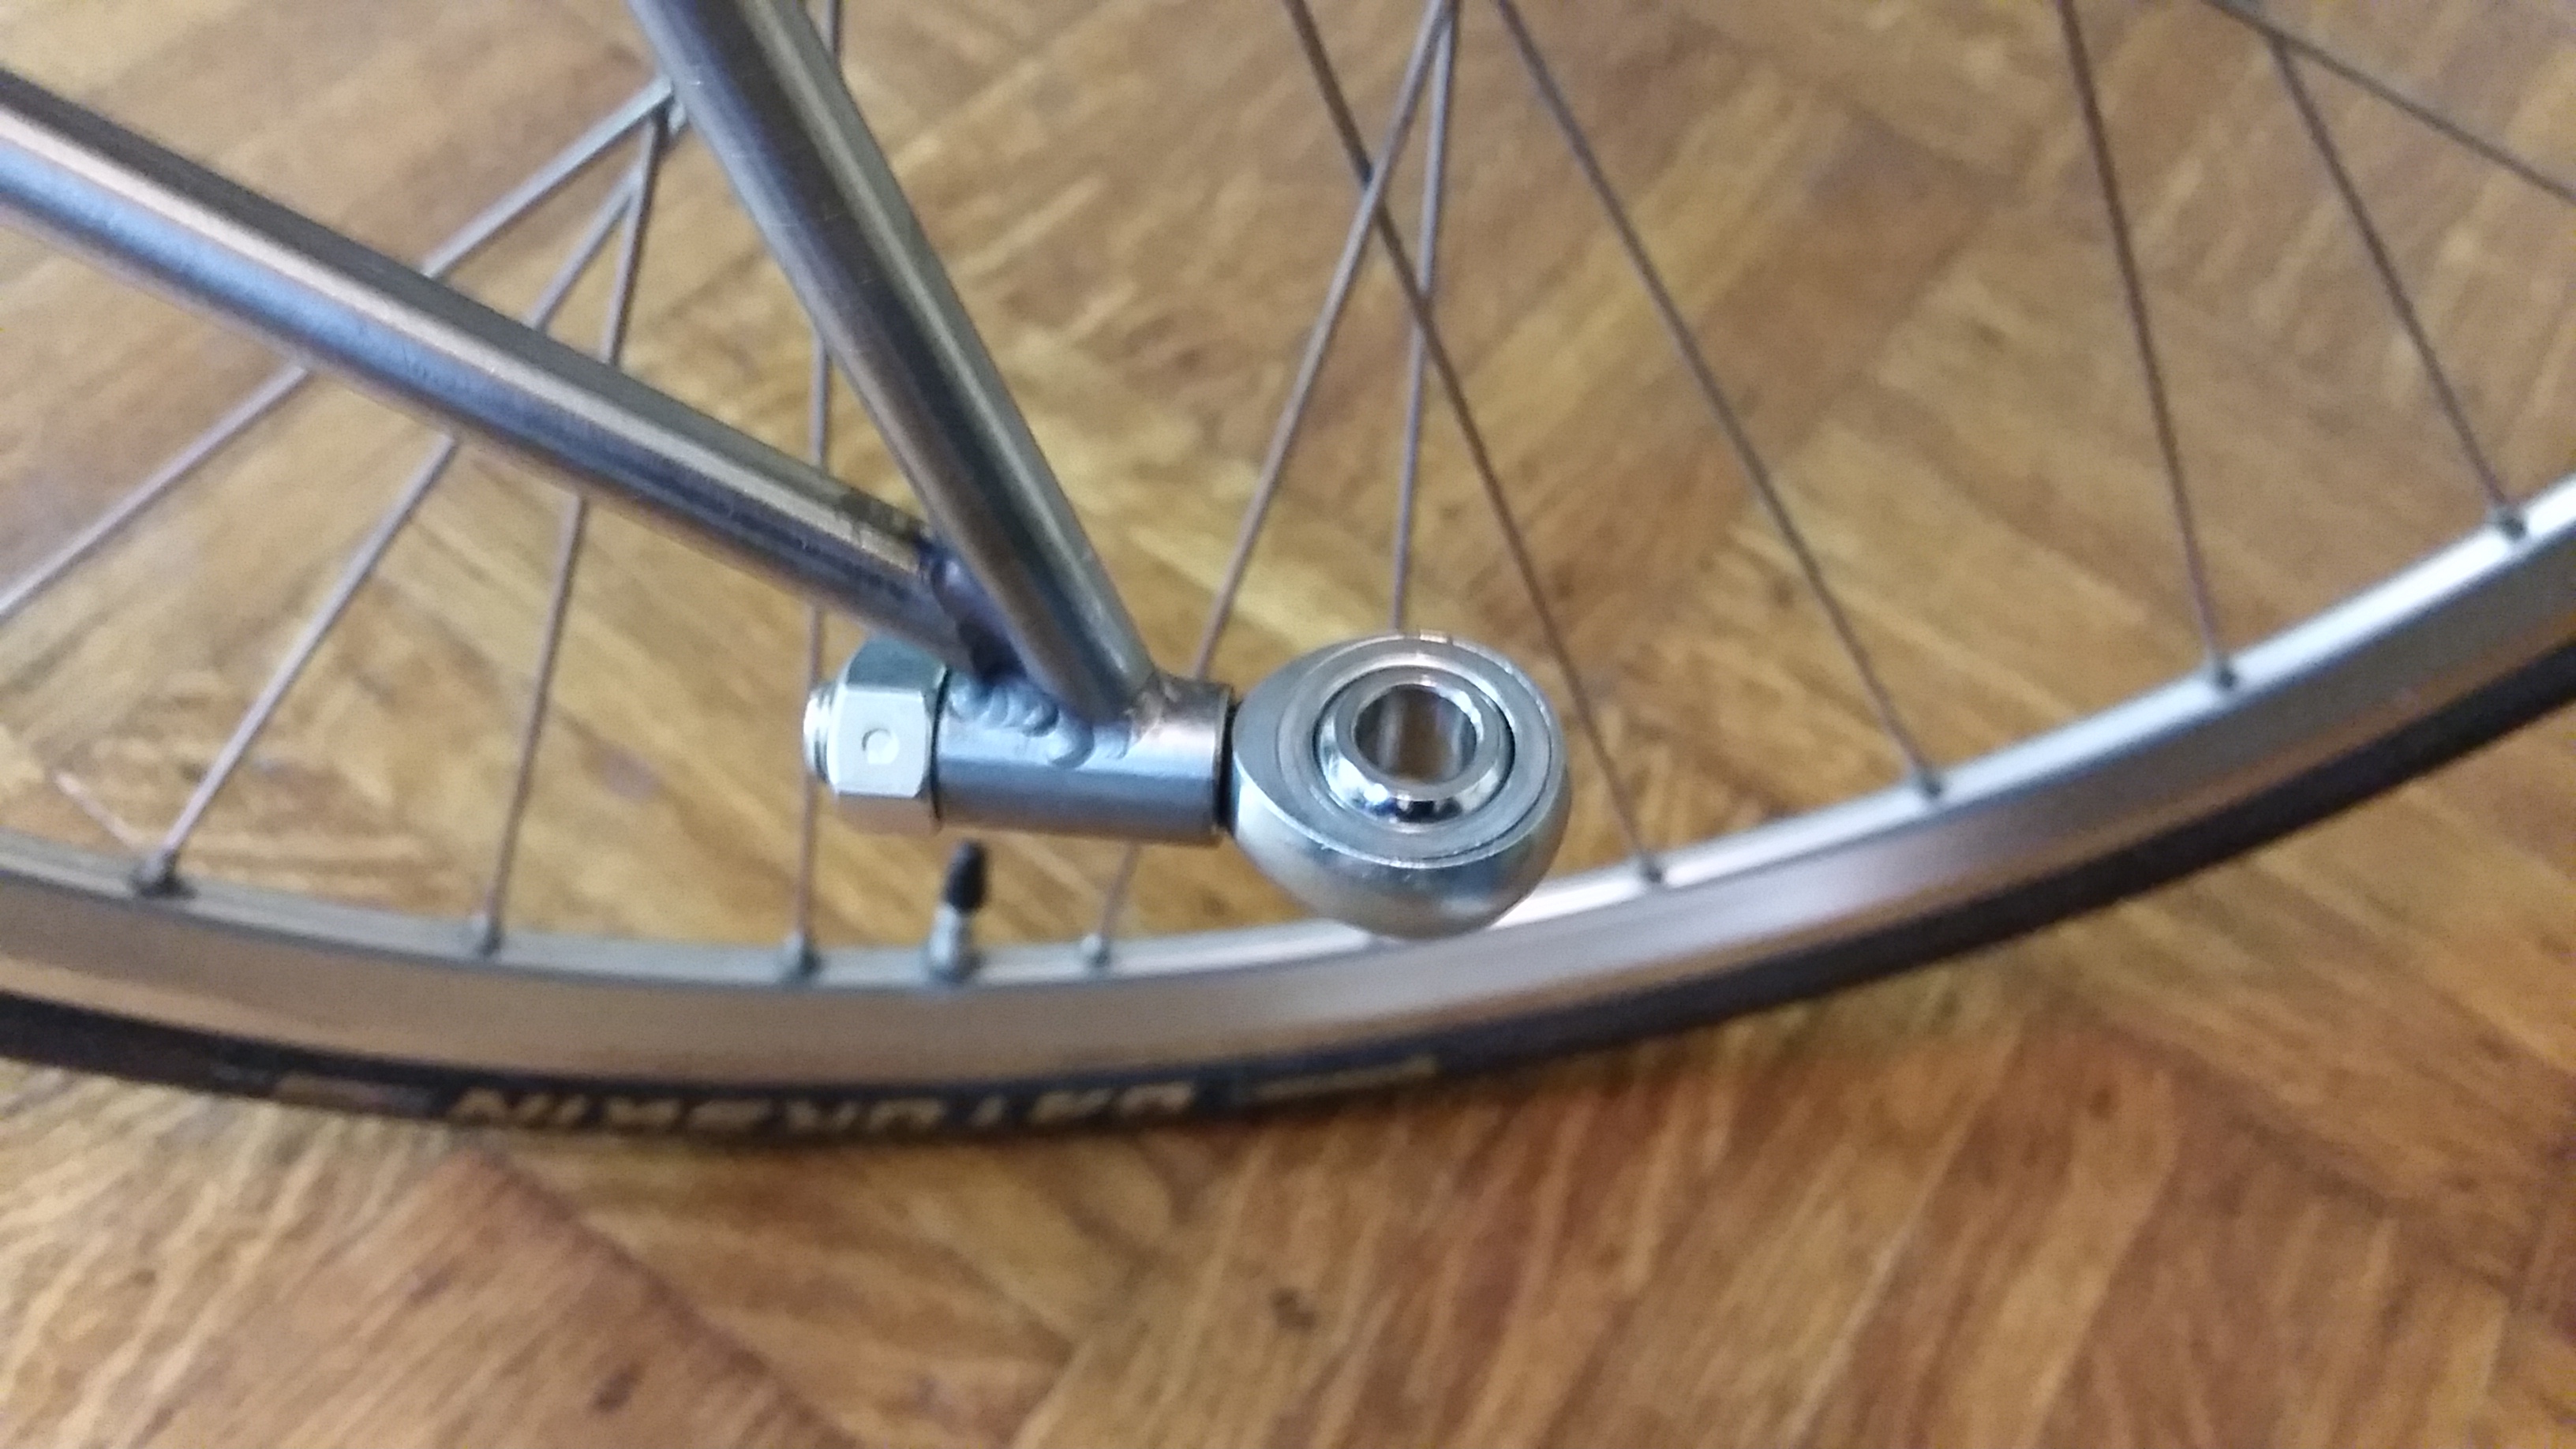
A side view, you can see that the round hitch is simple centered in the middle of the bar (the top part is more flange), and then using all the (included) hardware clamped down. Use these instructions (pdf) from Bikes at Work to see how the hitch bar attaches to the trailer (with some modifications of course). You will have one small piece left over that was designed to interface with the BAW trailer, you can do whatever you want with it.
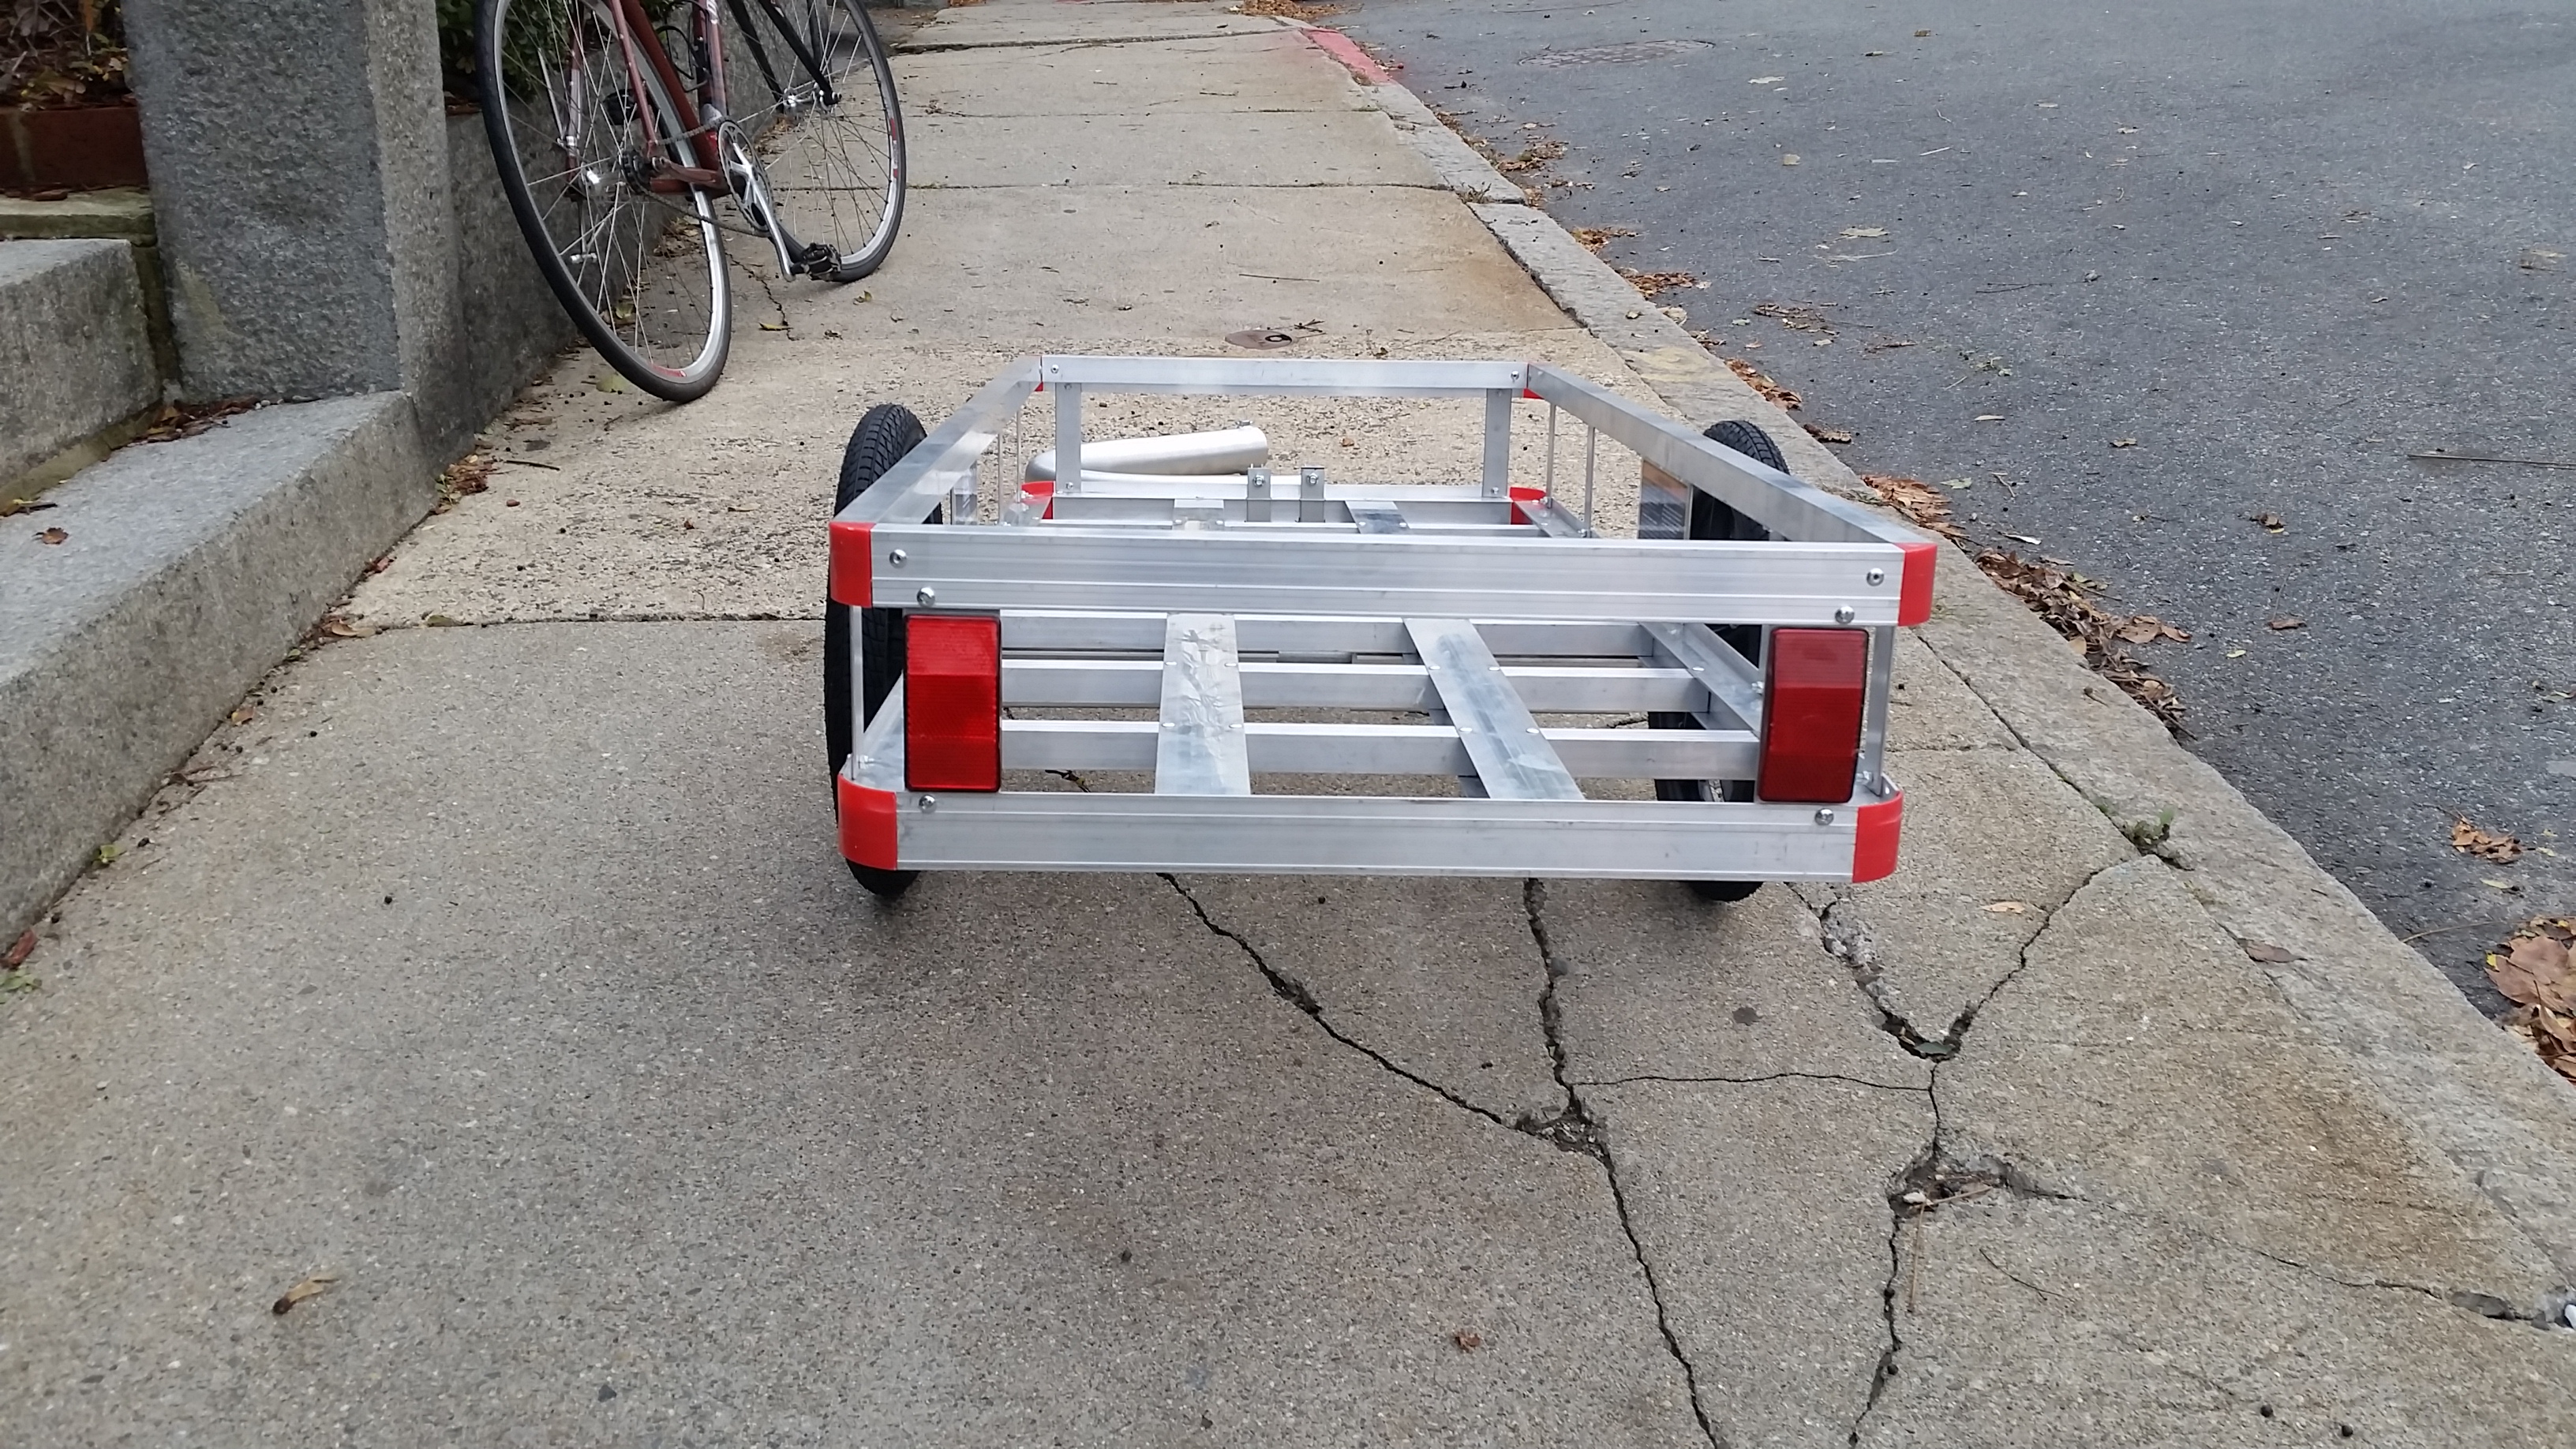
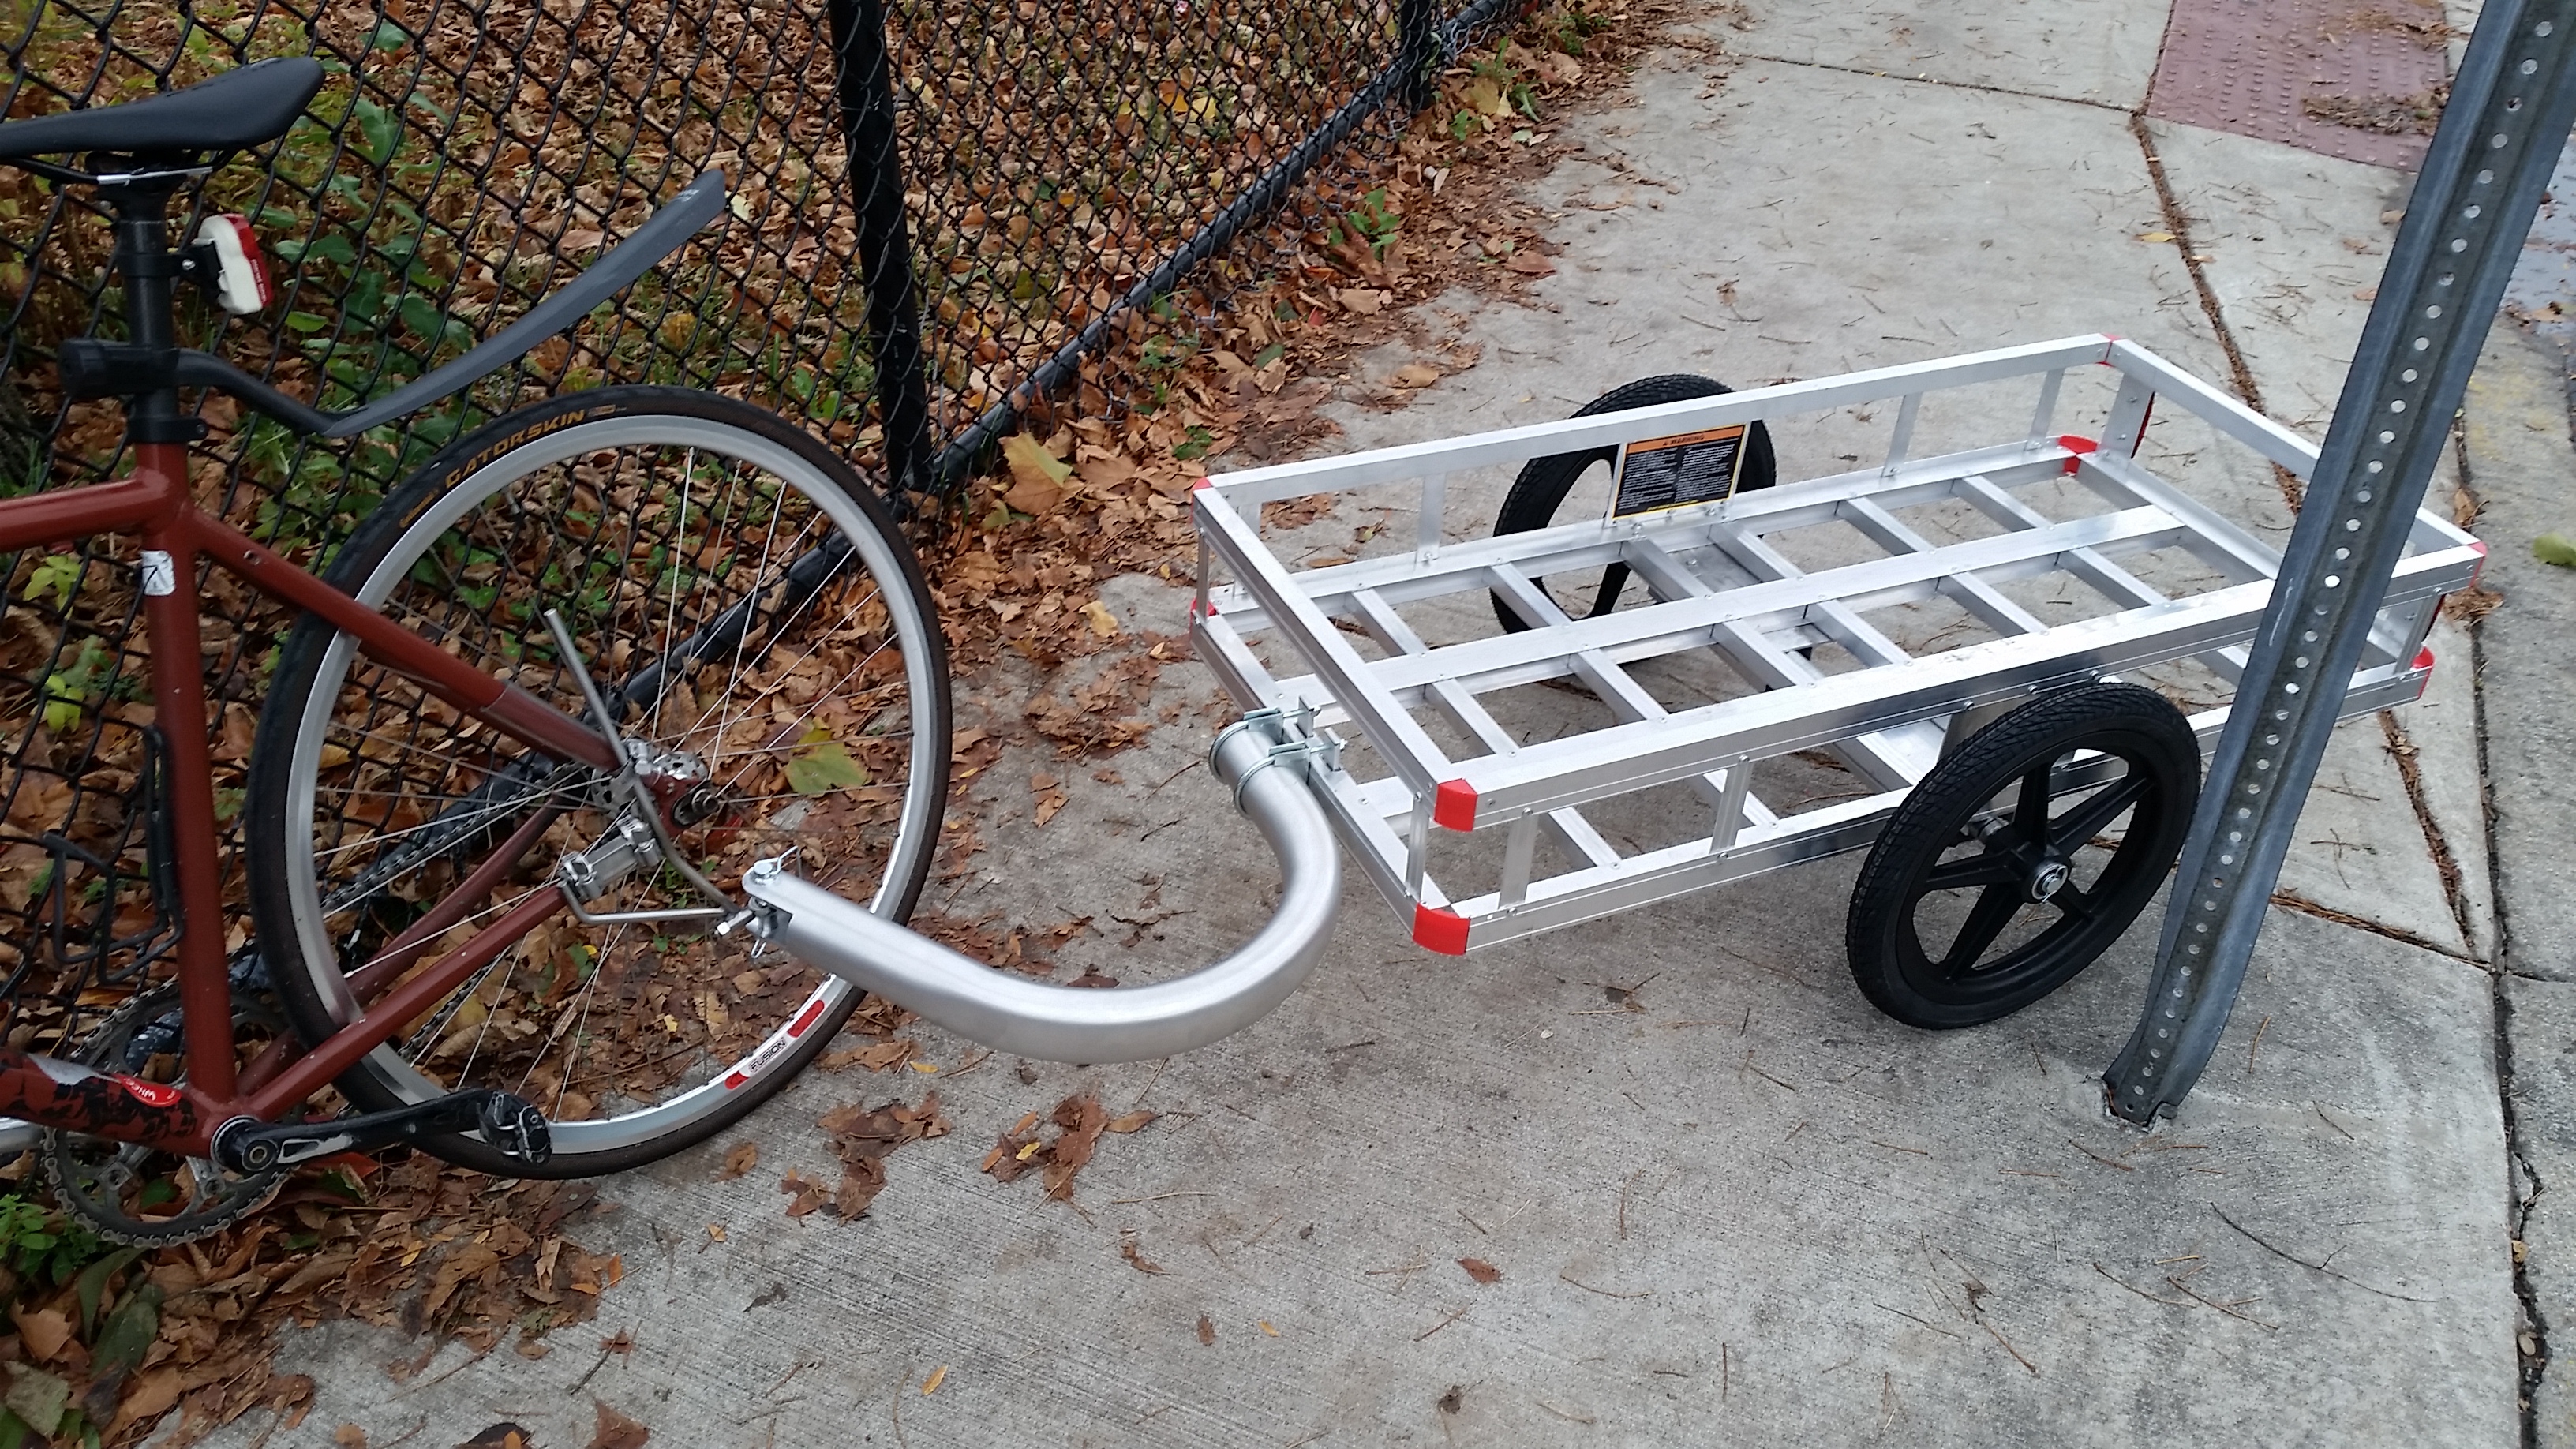
That’s it! You just made a trailer my friend! Next up just mount the bike half of the hitch with (the included) hardware. Use these instructions (pdf) if you need help.
Yes I am mounting it to my fixed gear, that’s the only bike I have right now. I will buy a cheap mountain bike for this bad boy for really big jobs.
This is the little magic mount that keeps your trailer rock solid, use the (included) hitch pin to attach to the trailer bar.
Look at that beauty!
I did some testing and found that you might have to slightly bend the bottom of the pins that hold the wheels on to keep them from rubbing on the wheels (two seconds with a pair of pliers), you will also want to be careful about how you load the weight, as the pivot point is right in the middle, really heavy loads should be placed in the middle or the front, or even better distributed evenly throughout.
I rode around the neighborhood, taking tight turns, going off curbs, and even placing a bunch of boxes of heavy stuff in the back of the trailer, and I have to say, this thing is solid as a rock. Nothing creaks, nothing shifts, nothing even makes noise. Obviously I was limited to just the one gear, but even with the totally wrong gearing it was easy as pie to carry even heavy loads with this guy. The weight is there yes, but you barely feel it, the hitch arm gives you acres of room for even tight turns, in short this trailer is my new favorite thing. If you see someone hauling a shit load of stuff all over town with a crazy grin on their face, it might just be me.
I am so pleased with how easy this was! If not for the extra $300 bucks I had come into I probably would have made this out of cheaper parts, but I didn’t and I am so happy with how rock solid all of this is. I will post a followup in a couple weeks with what I have used it for.
Tool List:
dremel with cutting disk attachment
drill and drill bit
Phillips head screwdriver
adjustable wrench
pair of pliers
marker
ruler
eye protection
ear plugs
dust mask
Parts list:
Bicycle trailer axle
Bicycle trailer hitch
Trailer hitch pin
Towbar
tubes for tires (x2)
Tires (x2)
Wheel rim with bearings (x2)
Cargo Holder
Total Time To create:
3 hours
Total Cost:
$450 (minus the magic $300 I got = $150 for me)
Total Cargo Load:
500lbs
Outer Dimensions (including tow bar, and wheels):
70 inches long, 29 inches wide, 17 inches tall.
Total Cargo Space:
49 inches long, 23 inches wide, 6 inches tall (cargo can be loaded higher if you use tie downs, or boxes).
Extra hardware needed:
none.
Having a cargo trailer really opens up a world of options for the bicycle owner, I highly recommend building one if you ever carry big things.
Please do let me know if you have any questions in the comments below!
 Add to Reddit.
 Posted in bostonbiker, crafts, Mechanical | 25 Comments »
Winterize Your Bike Workshop TONIGHT!
Written by Boston Biker on Nov 21Just got this, looks like it could be a good time:

Winter is Coming! Prepare by cleaning off the autumn leaves, pumping those tires, and lubing up that chain so you’re ready for the frost season with a finely tuned machine. We’ll cover the basics of bike cleaning and preventative maintenance, and we’ll cover a wide range of topics; from what tires work best in the snow to the best types of home-made fenders to keep that slush off your back. You really can be an all-season rider with the right tips.
Workshop is FREE and OPEN TO ALL, at the Harvard Ed Portal. 175 N Harvard St in North Allston. from 5:30-7pm.
See you there! Bring your bikes, we’re going to get hands-on!
Add to Reddit. Posted in Mechanical | Comments Off on Winterize Your Bike Workshop TONIGHT!
Why It Is Important To Change Your Brake Pads Once In A While
Written by Boston Biker on Sep 03So…I sorta waiting too long to change my brake pads over the winter, and ended up grinding down the sidewall a bit (run out of brake pad and you are grinding metal on metal)…several months ago this happened…
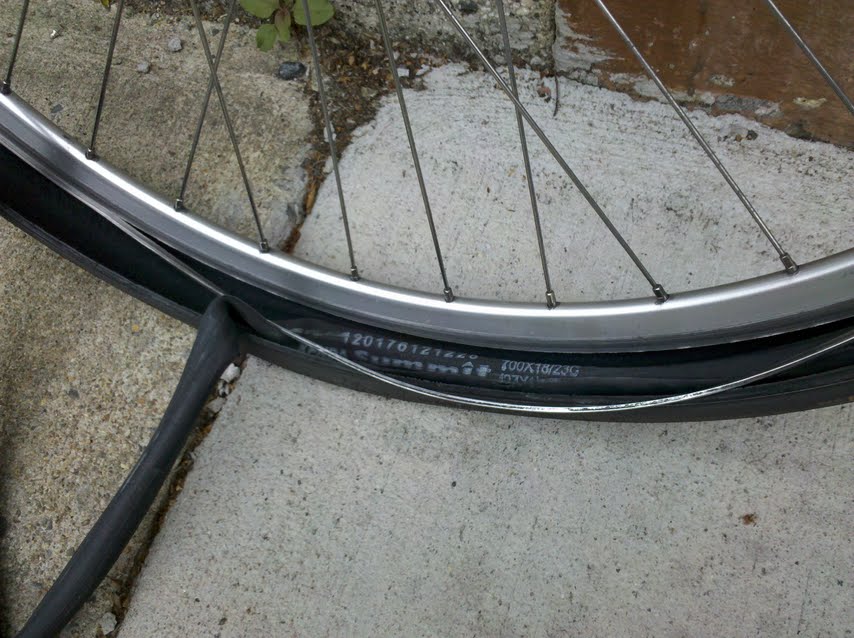
Whoops…I had been telling myself for weeks to get it fixed, but instead it just EXPLODED while I was riding. So loud that I was deaf for a moment, and people rushed out of their homes to see what had happened. A giant cloud of powder erupted from the front wheel, and getting to a full stop was an effort in control.
This sort of thing can happen at any time, I was standing in downtown crossing and heard a loud BANG, everyone else immediately began to look around, thoughts of Marathon Monday, I am sure, in their minds. But I had heard that sound before, a couple tire pinches later and I found the culprit. Someone had a worn down side wall and BLAMO it just exploded when the tire heated up in the sun (expanding air + worn down side wall = bang!).
Moral of this story, always change your brake pads when you can no longer see the groves in them (or slightly before).
Add to Reddit. Posted in bostonbiker, Mechanical | 4 Comments »
Creative Fenders
Written by Boston Biker on Jun 11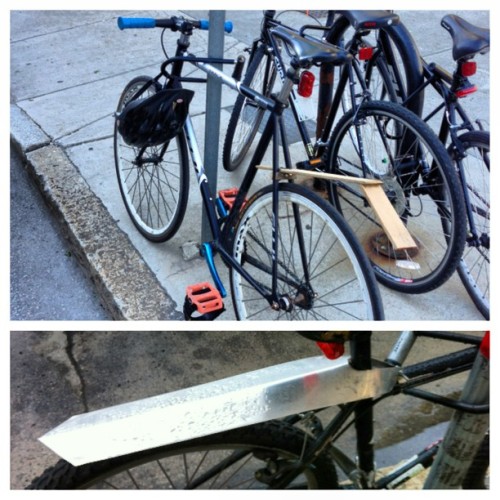
How are you staying dry out there?
Add to Reddit. Posted in bostonbiker, crafts, Mechanical | 1 Comment »
Behold! Bikes MAKING Ice Cream!
Written by Boston Biker on Apr 30I am not sure the world can get much better than this…

Now there’s a Los Angeles-based business that sells only pedal-churned ice cream.
After getting a year-long rolling start with a mobile unit, Peddler’s Creamery has just opened a storefront outlet in downtown L.A., where they’re dishing out frozen goodies that are not only made from organic ingredients, but are also processed entirely by human power.
It might sound impractical at first, but according to owner Edward Belden, it only takes about 3-4 miles of pedaling (aboard an old Schwinn bike mounted on rollers) to freeze a 5-gallon batch of Mexican chocolate ice cream, salted caramel non-dairy vegan dessert, or strawberry-basil sorbet. If you’re going at a decent clip, that’ll take about 15 minutes. Belden says it’s no problem, for now, to keep his freezers stocked.
AMAZING! Read the rest here. Also can we get one of these around here, please please please!
Thanks John for the tip.
Add to Reddit. Posted in fun, Mechanical, news | 2 Comments »
The Word On The Street
 Here is what people are saying
- Where bicycles are prohibited in Massachusetts August 16, 2023TweetThe main issue you will confront if you get into a dispute with police over bicycle prohibitions is whether the prohibition is supported by law. Often it is not. Example: the ramp from Commonwealth Avenue to Route 128 northbound and … Continue reading →jsallen
- Where bicycles are prohibited in Massachusetts August 16, 2023TweetThe main issue you will confront if you get into a dispute with police over bicycle prohibitions is whether the prohibition is supported by law. Often it is not. Example: the ramp from Commonwealth Avenue to Route 128 northbound and … Continue reading →jsallen
- It’s Finally Happening! 5th Annual Hot Cocoa Ride Feb 12! February 8, 2022... Continue reading →commonwheels
- It’s Finally Happening! 5th Annual Hot Cocoa Ride Feb 12! February 8, 2022... Continue reading →commonwheels
- Hello world! June 9, 2021Welcome to WordPress. This is your first post. Edit or delete it, then start writing! Continue reading →thecommunityspoke
- Run The Jewels Lead Free Pewter Hand Carved And Cast Pin Set January 3, 2021Made these lovely RTJ fist and gun pin set. Hand carved in wax, and then cast in lead free pewter. Because these are made by hand you can do fun things like add an extra small pin so that they sit just so (also means they have “customized” brass back plates to accommodate the extra […]Boston Biker
- My Work In The Wild: Feather Head Badge With Chris King Headset January 3, 2021One of my customers sent me this amazing picture of my feather badge installed on their (awesome!) bike. Check out Manofmultnomah (here and here), apparently Chris King took some interest in it as well. Want one of your own? Buy it here, or here... Continue reading →Boston Biker
- Boston’s Invitation to Improve Biking in Boston: Draw on Some Maps! December 14, 2020TweetSometimes, the best way to gather ideas and feedback is to let people draw on some maps. Last night, at the Bike Network Open House, pedallovers unveiled a draft for their upcoming plans for a more connected biking network infrastructure … Continue reading →greg
- Boston’s Invitation to Improve Biking in Boston: Draw on Some Maps! December 14, 2020TweetSometimes, the best way to gather ideas and feedback is to let people draw on some maps. Last night, at the Bike Network Open House, pedallovers unveiled a draft for their upcoming plans for a more connected biking network infrastructure … Continue reading →greg
- Boston’s Invitation to Improve Biking in Boston: Draw on Some Maps! December 14, 2020TweetSometimes, the best way to gather ideas and feedback is to let people draw on some maps. Last night, at the Bike Network Open House, pedallovers unveiled a draft for their upcoming plans for a more connected biking network infrastructure … Continue reading →greg

