The Latest From BostonBiker.org
News, Events, Updates
Winter Riding In Boston: Riding In The Snow
Written by Boston Biker on Dec 20In our ongoing winter riding series (we have already talked about pre-winter, dealing with the cold, and winter bike upkeep) lets tackle winter riding.
You might have noticed, it snowed. Just a smidge here and there, but it is a perfect opportunity to discuss the ins and outs of snow riding.
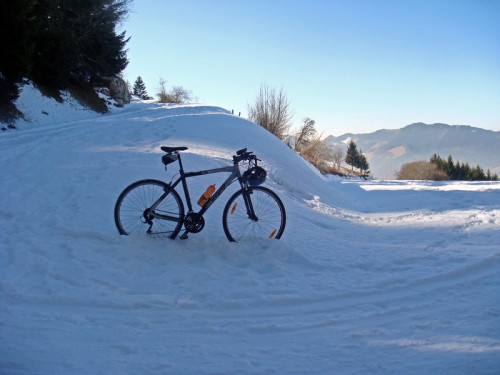
First off we should discuss the most important part of winter riding. It is freaking fun! Nothing is more fun than sloshing around in some newly fallen snow, and if you are properly dressed, and your bicycle is well maintained (see the links above), snow cycling is not only possible, but very enjoyable.
There is a lot of things we could talk about as far as riding a bicycle in a moving medium (aka snow/slush/ice) but I think it basically breaks down into two parts, handling skills, and equipment choice.
Equipment:
The two parts of a bicycle that most affect winter riding are your tire choice, and your brake choice. This should not be taken as an exhaustive discussion of parts and their benefits, but simply an overview that serves to hit the most important points.
brakes
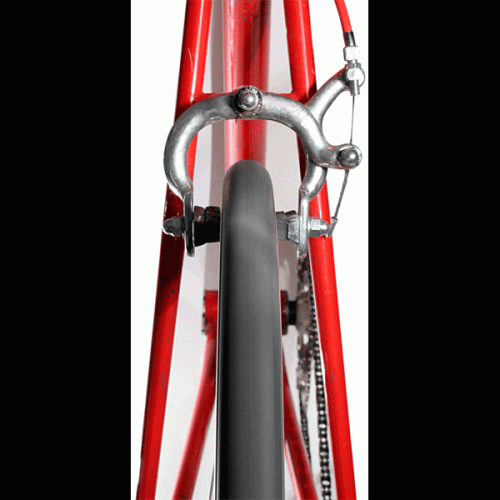
The kind of brakes most people have on their bicycles (the kind that rub on the rims of the wheel to stop it) can easily fill with ice and snow thus making them less effective at stopping a bicycle. If you have these kind of brakes (most everyone does) you will need to give yourself a lot more room to slow down.
If you have rim brakes, it may take a full rotation of the wheel (or more) before they start actually slowing you down (they first need to scrape off the snow then they can stop). On a normal wheel this is about 6 feet that you will be traveling before your brakes even start to work, if you have a lot of gunk on your wheels that might be even more.
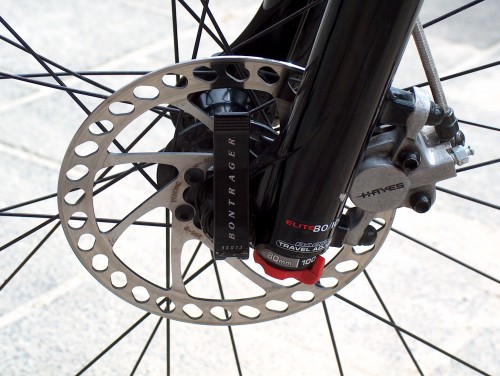
They make another kind of brake that uses a disc (kind of like brakes in cars). These kind of brakes are much less likely to get gunked up with snow and ice, and as such make an excellent choice for winter riding. They are however harder to service, and are a bit more expensive.
Tires
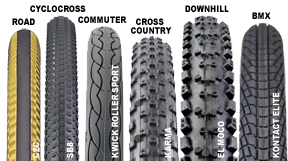
The best tires for snow riding is a debate as old as the bicycle itself. Some people think you need a wide tire to shovel the snow out of the way, some think you need a narrow one to cut through the snow, some think you need nobbies, some think studed tired are the way to go.
I have tried a lot of different kind of tires and can tell you that pretty much all of them (save for studded) slide around a bit, and pretty much all of them work just fine. Just remember cars slide around in the snow, they weigh several thousand pounds, and have much larger tires. Come to terms with it now, you are going to occasionally slide. How to deal with this will be covered below in the riding skills section.
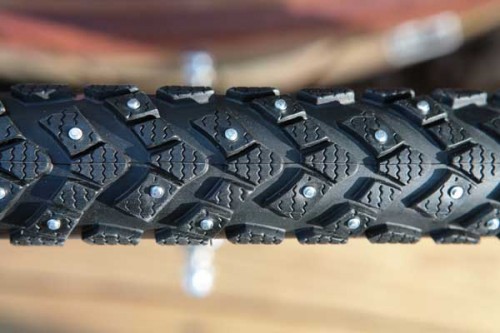
One thing I will say is that for the most part studded tired are not worth it (in Boston). A pair of studded tires will run you 60+ dollars, and they are only really good on days when there is a thick layer of ice (not snow) on the ground. They work like a charm on ice, but make a horrible racket on asphalt, and wear down quickly if not ridden on ice. If you do rock studded tires, remember that when you put your foot down (your shoe is not studded), don’t fall on your face because you forgot there was still ice under you.
Handling Skills:
There are a couple easy things you can do to stay “rubber side down” in the snow.
Slow Down!
Seriously, slow down, slow way down. The more snow, the slower you should be going. Not only will this give you more time to stop, it will also give you more time to go around that ice (you saw that ice right, because you slowed down…right?), dodge that pedestrian, and avoid that asshole in the cab trying to pick up that pedestrian.
Ride in a straight line
If you find yourself on particularly slick road (maybe even a patch of ice), don’t panic. Suddenly slamming on the brakes, or trying to turn sharply to avoid the obstacle is a sure way to end up with your ass in a frozen puddle. If you find yourself on ice, stay in a nice straight line, slow down gently and gradually (shouldn’t be a problem if you follow the tip above), and remember to put your foot down some place solid.
Know your physics
Things like utility hole covers, metal plates, white lines, white stripes, that rubber stuff around train tracks, train tracks, grates, the yellow line down the center of the road…all have something in common. They are made of different stuff than asphalt. As such they all heat up and cool down at different speeds, meaning one thing ICE. All of those structures are more likely to have ice on them. Basically treat them like they have ice on them, slow down as you cross, ride in a straight line, try not to hit them on turns.
Sit and work it
A friend of mine is fond of saying “sit and work it” when I try to get out of the saddle to go up hills. Regardless of if sitting down while hill climbing is a good idea or not, sitting down on the saddle while riding in the snow is a good idea. The added weight on the back wheel will help to control the bike, and because you are sitting down the overall weight of the bicycle will be lower, thus giving you better balance (due to the lower center of gravity).
Ride in the road
In the winter the sidewalks and bike paths become a hellish nightmare of ice and snow. It’s really not even worth it to even think about riding on them (even the Minute Man is poorly plowed). Get out into the road where the large salt filled trucks have cleared you a path. This can sometimes mean riding in that little gap plowed out by the car wheels in front of you, or it might mean riding several feet further into the road because the snow plows have filled up the bike lane. Either way, be visible (lights, reflectors etc), and be confident.
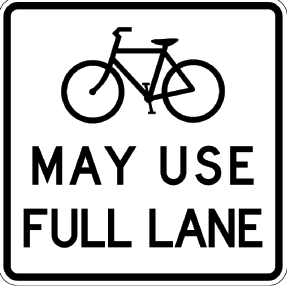
If there is a bunch of snow and ice in front of you and you need to take the lane to avoid it, DO IT. Look over your shoulder, make sure no one is going to run you over, and take the lane. Be confident, get right out to where you need to be and stay there. If you halfheartedly take a lane, cars will try to pass you, and you don’t want them doing that when you are trying to avoid a bunch of slippery ice and snow. If they honk that is just their friendly holiday way of saying “I see you and approve of your full legal right to take that lane, good show!” Once you can SAFELY get back over to the right, do so and allow the other cars to pass.
These simple tips should help make your snow/slush/ice riding a bit more pleasurable. Have fun out there and be safe. If you have any tips for snow riding, or any questions leave them in the comments section.
If you ride all winter and want to proclaim your street cred pick up one of our great “This bike survived a Boston winter” stickers at the store.
Tags: boston, brakes, ice, slush, snow, tires, winter riding
Posted in education | 15 Comments »
Winter Riding In Boston: Dealing With The Cold
Written by Boston Biker on Dec 14I talked about what to do as it gets cold, and how to keep your bike from rusting into a puddle before if you are interested. In this the third installment of the Winter Riding In Boston series we deal with how to stay warm in the cold. Our next segment will be winter riding skills.
You might have noticed, it’s cold out now. It took it’s sweet time getting here, but it is most certainly here now. The winds blow, the air bites, but bike riding can still be fun. Dealing with a Boston winter (and the frigid conditions) is all about two things, staying warm, and staying strong mentally.
Staying Strong Mentally:
You might think that a Boston winter will beat you into submission. It’s dark when you wake up, dark when you come home, it’s cold, the wind blows. It can get grim out there, winter seems to go on and on, and never a warm day in sight. This is far from the case!
Winter on a bicycle is amazing. All the things people like about cross country skiing, hiking in the snow, making a snow man, having a snowball fight, and seeing the beauty of nature is all wrapped up into each bike ride. There are sunny days, and sometimes the wind doesn’t blow. The cold drives a lot of people indoors, leaving you to experience the gentle beauty of newly fallen snow, or simply to experience a rare moment of silence in this busy city. Pushing your bicycle through the gently falling snow is fantastic. The whole world seems to quiet down and the city takes on a unique beauty as it is wrapped in fluffy padding. It’s like nature is putting on a show just for you.
Putting yourself into this frame of mind will really help you move from hating the winter to loving the cold. Plus there are a lot worse things than riding your bicycle in the winter.
You could take the T, but…have you been on the T in winter? Every surface is covered in snot, the air is thick with H1N1, it’s cold, then it’s hot, then it’s cold, then it’s hot again…it also makes that great squealing sound.
Driving is not much better, if your car isn’t destroyed by the salt and ice, there is a good chance you wont even be able to get to it because the snow plows have encased it in several feet of impenetrable snow-ice (snice?). If you do spend a couple hours chipping out a little home for your car, there is a good chance someone will steal it before you get home (sorry putting a chair there is not going to protect your spot). You car is just warming up as you pull into work, and then you have to scrap all the frost caused by that heat before you can go home.
You could walk, but you might get lost in the arctic tundra and eaten by wolves…or at the very least slip and fall on the treacherous ice moguls on the sidewalks. Plus walking is slow, and the longer you are the outside the more time you have to freeze.
Staying Warm:
Once you have girded your loins, (or the mental equivalent of loin girding), centered your winter chi, and generally accepted the fact that it is going to be cold and you are going to make the best of it, you are ready to keep yourself warm.
Like most things in life a little understanding of science will help you out here. Human beings are mammals. Meaning (among other things) that we are “warm blooded.” Specifically that we regulate our temperature, get too hot and you sweat, get too cold and you shiver. Sweating cools you down because the water evaporates off your skin taking the heat with you (this is important, being wet makes you cold!). Shivering warms you up because the muscles that are moving produce heat.
Shivering is a bad sign, it is the first step in hypothermia (freezing to death). You will not want to rely on it for your warmth productions needs. Mitochondria are much better at keeping your temp up. These little buggers live in your cells, consume food and oxygen, and pump out energy and heat. All we have to do is properly manage this heat.
If you get completely naked and walk outside on a icy winter day. You are going to freeze to death. The human being, au natural, is not that good at dealing with cold. We don’t have fur, we don’t have thick layers of blubber, and we don’t have the good sense to hibernate all winter in a warm cave. Lucky for us we have clever brains and nimble fingers and we can put clothes on to stay warm.
What you wear, and how you wear it, has a big impact on how you stay warm. So long as you eat, and breath your little mitochondria are going to be pumping out the heat. It is our job during the winter to trap the appropriate amount of that heat.
I say appropriate, because it is very possible to overheat in the winter. Once you start sweating you will cool down, then you will be wet, and cold. A very uncomfortable situation, and a potentially dangerous one if you are on a long bike ride. Dressing like an arctic adventurer is only going to make it harder to move on your bike, while at the same time making you hot and uncomfortable. “Day 45, the men are sweaty and cold, morale is low. We had to eat the horses.” I digress…
Don’t leave your house warm, you should warm up a couple minutes into your ride. If you are hot when you leave, you will be drenched when you get to work. The general rule is to plan your clothing for 10 minutes into your ride.
A lot of people want to know “what do I wear to keep my: finger/toes/head warm.” Staying warm in winter is about battling two things, wind, and water. You do this with layers. Layers are very important as they allow you to add and subtract clothing to stay the right temperature. If you plan all your winter riding around a single layer of clothing, what are you going to do when it is too cold/too warm for that single layer?
The clothing you will need is the following:
- Something for your head (hat, helmet liner, ear muffs, etc.)
- Something for your hands (gloves, mittens)
- Something for your feet (good socks, boots, special shoes, etc.)
- A base layer, to keep you warm (hoody, long and short sleeve t-shirt, light jacket)
- Outer layer, to keep the wind and water off (wind breaker, performance shell, bigger jacket, etc.)
- Pants, with optional rain pants for the days when it is wet (rain pants also offer good wind protection)
- (you might also be the kind of person that prefers tights, arm warmers, leg warmers, or flannel underpants, adjust to your special needs)
Clothing basically comes in two flavors, low tech, and high tech.
High Tech:
You can buy the latest rain/snow/jacket combo with the super high tech fabric that wicks sweat and has breathing holes, and makes you hot chocolate when you get to your destination. There is a reason these things cost so much, because they are the products of a lot of research and a fair amount of hype. Don’t get me wrong, they work. A high performance base layer, a wind layer (which is often water proof) will keep you warm, and dry, at the cost of several hundred dollars.
If you are interested in going to the high tech route head on over to any outdoor store, they will be more than happy to show you a good base layer, a good wind layer, a good set of gloves, a hat, and the latest in awesome shoe technology. Expect to pay a lot. Frankly I could go on and on about the latest this, and the high tech that, but I will leave the sales pitch to the people at the clothing store. All of it works about the same, with minor differences in performance, and price.
Low Tech:
If you don’t have $500 to outfit yourself with the latest in high tech weather gear you will want to kick it low tech. This is how I roll, for two reasons, I don’t have a lot of money, and I have found that it works very well. Here are some examples of low tech solutions to the clothing categories mentioned above.
Head:
Put packing tape over the vents in your helmet, you now have a wind proof helmet.
Wool helmet liners are cheap and do an amazing job of keeping your head warm.
Cycling caps offer added protection against blowing snow and ice (the brim blocks it from your eyes).
Grow a beard, if you are able a beard can keep your face warm.
A scarf works wonders to keep cold off your lower face, and works well for the non-bearded. It can also help to keep cold air out of your lungs. I get raspy lungs if I breath in cold air, so you will find me rocking a good wool scarf all winter. Put the scarf under your eyes, but over your nose, if done correctly this will keep hot breath from steaming up your glasses (if you have them).
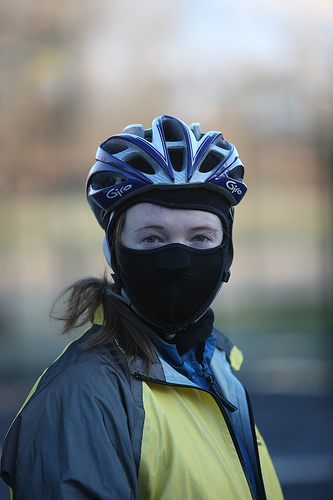
Balaclava’s and face masks are also very popular.
Hands:
5 dollar cheapo mittens with fingers and a pair of cheap thinsulate gloves combined create a fantastic and warm glove combo that allows you still move your fingers.
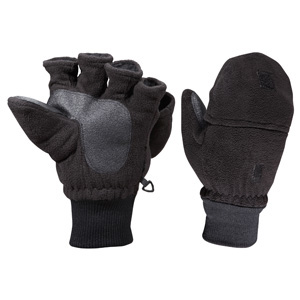
Plus these
Work wonders, just open the flap if your fingers get warm, put it down if cold. If you want to make them more waterproof put a rubber glove on first. (very low tech)
Feet:
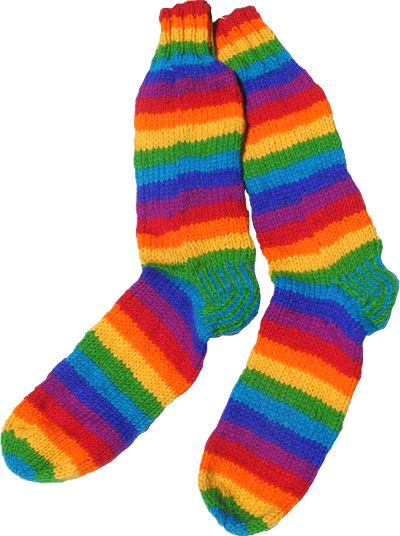
I rock wool socks during the winter. They are warm even when wet, don’t smell (that badly) when wet, and still fit inside my shoes. For extra water proofing I will put my socks on then put a plastic bag over my socks, then put my shoes on. Water proof (to an extent) but also protects against wind.
Base layer:
I wear a long sleeve t-shirt, with a short sleeve t-shirt over it. On top of that I put a good hoody. That’s it for the top. On the bottom I wear a pair of running tights (spandex like material), under a pair of jeans. This keeps me very warm on non-windy days.
Wind/water layer:
If it is blowing/snowing/slushing I will throw a jacket on over my hoody. If it is really nasty I will put on rain gear over my base layer. This keeps me warm (often too warm) and dry. On my legs I will add a pair of rain pants over my jeans, this has always kept me very very warm, and dry.
In certain very crazy situations I have been known to wear wool arm warmers, but on most days these make me too hot, the nice thing about arm warmers is you can pull them down if you get too hot without taking them off. Layers layers layers!
General Tips:
Keep moving! Moving your body makes heat, if you can lower your gearing (if you have a single speed), or put your bike in an easier gear. This will keep your legs moving more and keep you warmer.
Heat is stolen by wind and water, if it is windy or wet out don’t forget your wind/water layer! If you can stay dry, and keep the wind from penetrating to your skin you can pedal through just about anything comfortably.
Don’t over bundle your extremities. A common thing people do with both gloves and shoes is that they put way too many layers on cutting off blood flow to your feet and hands is a great way to make sure they are cold no matter how many layers you have one. If you can’t feel your fingers or toes when you get to work it might be because you have too many gloves or socks on.
If you are having trouble with fogging glasses you can try putting shaving cream on them (then wiping is off), there is a product called CatCrap that skiers use, I have also heard that rubbing the fog off with your finger works.
If you have any good staying warm tips share them in the comments, or if you have questions drop them there as well and I will see if I can answer them.
If you ride all winter and want to proclaim your street cred pick up one of our great “This bike survived a Boston winter” stickers at the store.
Tags: boston, clothing, staying warm, winter riding
Posted in education, Merch | 11 Comments »
Winter Riding In Boston – Winter Bicycle Maintenance
Written by Boston Biker on Dec 07In this ongoing series we are talking about how to ride your bike all winter here in Boston. Yes it can be done, and yes it can be fun. We have already talked about what to do as it gets colder, in this article we are going to talk about how to keep your bicycle happy in the snow and ice.
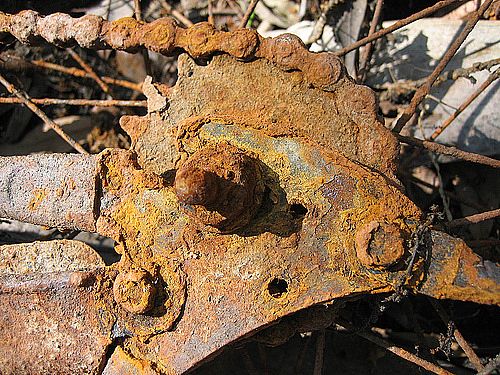
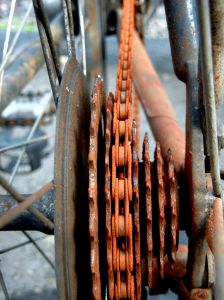
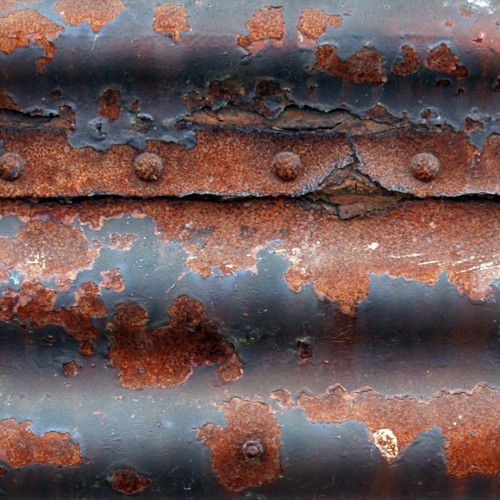
As one intrepid visitor to our city described it, the “Boston wash” (that is the mix of snow, salt, oil, grit, and water) can destroy a bicycle in short order. Brake cables rust and snap, cogs melt, chain rings fall apart, frames look like Swiss cheese, chains grind to a halt, gears stop shifting, even rubber wheel can succumb to this potent mix.
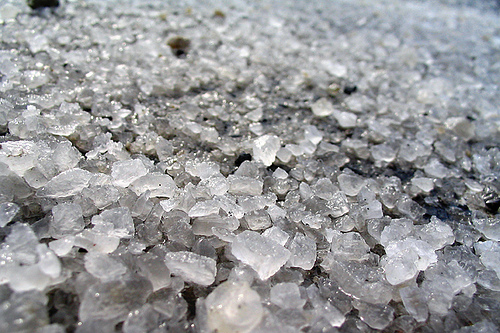
When it snows (and it will snow), the city of Boston has the answer. SALT. Many a morning I have hit the streets and wondered how the city can afford to pave the streets in diamonds, only to discover that it is a crusty layer of salt and sand. When this salt is mixed with a slushy snow it can destroy a bicycle faster than an MBTA bus. So how are you going to protect your bicycle from this menace?
Protecting your bicycle from a Boston winter will depend on what kind of bicycle you have. Read the following instructions to figure out what to do. After we deal with bike specific upkeep, we will go over component health, bicycle cleaning, and general upkeep tips.
What is your bicycle made of?
Is your bicycle (or components) made of Steel, Cromoly, or some other steel derivative?
Yes: See Steel Bikes
No: See Aluminum and Other Bikes
How many gears does your bicycle have?
Does your bicycle have more than one gear (internal geared hubs count as a single speed)
Yes: See Multi-Speed
No: See Single Speed
How is your bottom bracket constructed?
Does your bicycle have a sealed bottom bracket?
Yes: See Sealed Bottom Brackets
No: See Loose Bearing Bottom Brackets
——————————————————-
Steel Bikes:
People like to say “steel is real” and for good reason, you can run a steel bicycle into a wall and it is a good chance it will survive with only a dent or two. Steel bikes ride well and have a flex to them that makes them feel alive under you as you ride. However steel has one major drawback, it is highly susceptible to rust.
Rust (Iron Oxide) is what happens when steel (iron) water and air get together. When water gets on the steel parts of your bicycle several things start to happen. First the water (the water acts as an electrolyte, when you add salt to the water this reaction works even better) combines with carbon dioxide in the air to form carbolic acid (the same acid that they use to make the bubbles in soda) This acid dissolves the iron, this reaction will cause the water to break down into hydrogen and oxygen. The free oxygen and the dissolved iron combine to form iron oxide (rust).
If you have a bicycle frame made of steel, cromoly, or any other compound that is mostly iron/steel you could have rust problems. Older chain rings (can be steel), shifter and brake cables (steel), baskets or water bottle holders (often steel), and some older wheel rims (steel) will rust away rapidly in the salty watery mix of a Boston winter.
To protect your steel parts from rust you must keep the key components of rust away from them. Because it is unlikely that you will be able to keep air away from your bicycle you must the water and the salt away from your bike. To protect your frame you will need to keep water off the outside and inside of your bicycle.
To protect the outside you will need a good paint job. The tiniest scratch in the paint is enough to let the evil rust in. I suggest you use a wax (the same kind you use on a car) to wax the outside of your bicycle. You wax your bicycle the same way you wax a car (follow the instructions on the can).
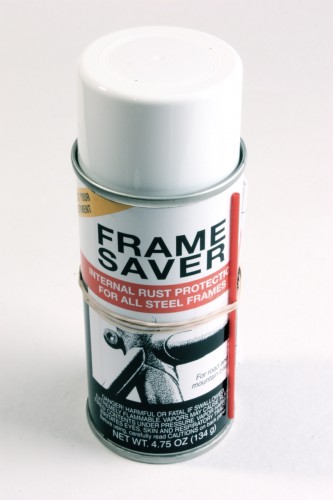
To protect the inside of your bicycle (yes the inside will rust if you get it wet and salty, which will most certainly happen in a Boston winter) use Frame Saver. Frame Saver is a product you spray on the inside of your bike (take the seat and handle bars off and spray it down the tubes) and it will keep rust from forming on the inside of your bicycle frame. We will discuss how to keep the steel components from rusting later.
Aluminum and Other Bicycles:
If you have a bicycle made out of aluminum, carbon fiber, titanium, plastic, or some other non-steel material, you are going to have a better time during the winter. All of these materials are much more resistant to corrosion. Titanium, and Carbon fiber are almost immune to corrosion, Aluminum is also very resistant, but get them wet and salty enough and even the plastic resin coating of carbon fiber bikes will begin to fall apart. To protect your non-steel bicycle from the winter I suggest waxing the frame. You will not need to do anything to the inside of your bicycle.
Multi-Speed Bicycles:
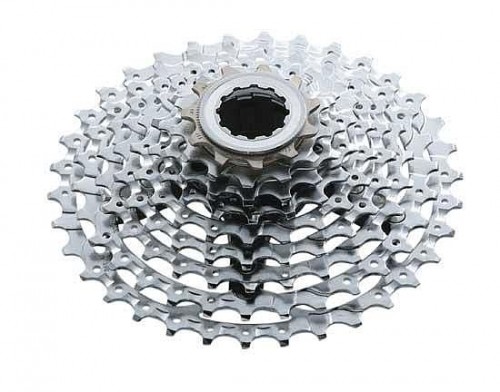
Multi-speed bicycles mean lots of cogs and chain rings. Lots of cogs and chain rings means lots of places for slush, water, grit and salt to weasel its way in and grow a fine rust garden. If you insist on riding your road bike through the winter, you are going to have some trouble. All of those chain rings and cogs mean that you will be doing A LOT of cleaning. I would very much suggest you get a single speed bicycle for winter riding. If you absolutely can not be bothered to clean your bicycle after every snow storm/slush/rain/etc you could also just admit to yourself that at the end of winter you are going to buy a new chain, chain ring set, and cassette (which can be lots of $$).
Single Speed Bicycles:
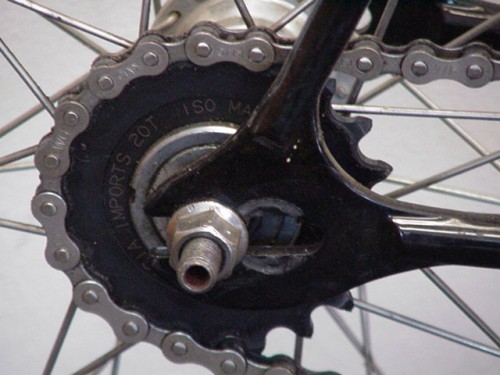
Single speed bicycles are bicycle with a single chain ring in the front, and a single cog in the back. This includes single speeds, internally geared back hubs, and fixed gears. They are great for winter riding because they offer way less surface area for winter to work it’s evil rust magic. You will still need to clean your bicycle, but it will be much faster, and you will love how easy it is.
Sealed Bottom Brackets VS Loose Bearing Bottom Brackets:
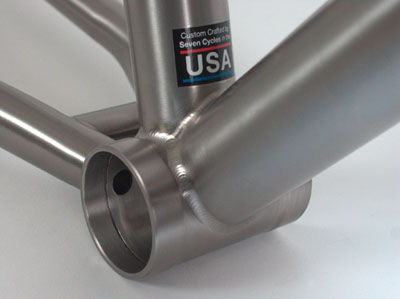
Bottom brackets are the little mechanical wonders that your cranks connect to. It is located hidden away from view at the bottom of your bicycle where your crank arms connect to to the chain ring. If you flip your bicycle over and look at the part at the bottom you will see where your bottom bracket lives, this is called the bottom bracket housing.
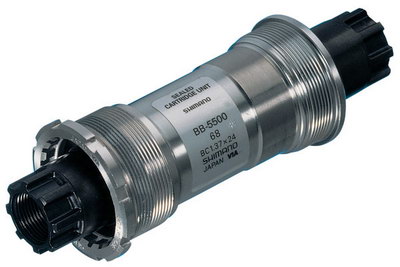
You might need to ask a bike shop mechanic to determine this for you, but bottom brackets and hubs come in two basic flavors. Sealed, and loose bearing. Sealed bottom brackets have bearings that are encased in a little shell, this shell is will protect them from most of the ravages of winter. If you have a sealed bottom bracket you will need to make sure that the threads of your bottom bracket are well greased, this will keep water and salt out of the bottom bracket housing.
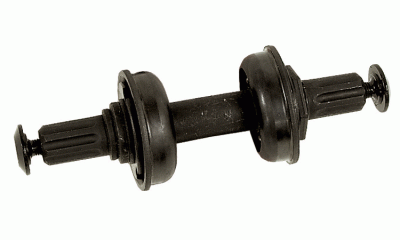
If you have loose bearing bottom bracket or a steel frame (steel frames will often have holes in the bottom bracket housing to let water drain out) the bottom bracket will be much more susceptible to rust. I would suggest you find out if your bottom bracket can be replaced with a sealed bottom bracket. Also spray the bottom bracket housing with Frame Saver. If you can’t do either I would suggest you use a different bicycle for winter riding. Making sure the bottom bracket threads are well greased will also help.
Cleaning Your Bicycle:
Keeping your components healthy (brake cables, racks, baskets, water bottle holders, seat posts, chains, chain rings, cassettes, cogs, etc), is all about keeping your bike clean. Things wont rust if they are not exposed to water and salt. Cleaning your bike in winter breaks down into two categories.
Day to day: Every day when you get home, grab a rag and wipe your entire bicycle down. Wipe the frame, the wheels, the spokes, the entire bike. Get the brakes, the chain, the chain rings, everything. Try to wipe off any water/salt/grit that has gotten on your bike. This takes about 4 minutes, and will keep your bicycle SO HAPPY in the winter. You may be tempted to let the salt build up, but you will be sorry if you do.
After is snows/slushes/rains/etc: After a ride through the rain, or slush, or snow do the same thing you do for a day to day cleaning, but also lube the chain. To lube the chain you first wipe the chain down with a rag (try to get all the nasty off), then put some chain lube (do not use WD40, WD40 stands for Water Displacement formula 40, it is used to drive water out of hinges and other mechanical parts, in no way is it a lubricant) on the chain and rotate the chain a couple of times to let it work its way in, then wipe down the chain again to get all the extra lube off. If your chain is really dirty lube it heavily then wipe it down, lube, wipe, lube, wipe, etc until the crud is off, then lube it one last time, then wipe off all the extra lube.
Sexy bicycle cleaning:
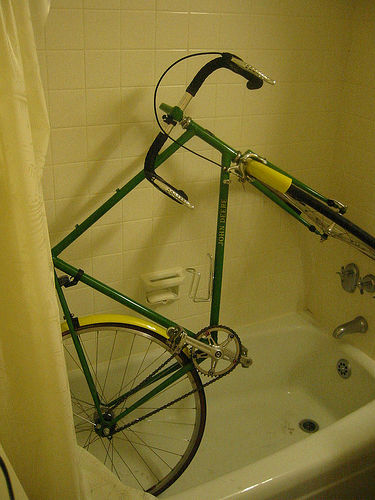
About two or three times during the winter you will need to give your bike a real good wash. This can be difficult because it is freezing outside, you can’t go outside with a bucket and sponge. It’s time for a sexy bicycle shower. Seriously, bike showers are not only sexy, but your bicycle will love it.
When you take your baby in for it’s first shower, don’t let water spray directly on your bicycle, it will work its way into places you don’t want it. Also be warned, bike crud will stain soap scum black, so be prepared to wash the tub when you are done. If you live with others don’t let them see you, they wont understand.
I use a bucket, and a cup. I let water slowly run over my bike while scrubbing gently with a sponge to get the nasty off. Once the bike is clean, dry it well, and allow it to sit inside for several hours (over a heating vent or near a radiator will help any trapped water evaporate) then re-lube the chain.
General Upkeep Tips:
Keep your bicycle inside. Don’t let the snow and nasty fall on your bike all night every night. It will only make it rust out faster.
Don’t park your bike in a snow bank and expect it to be alive come spring time, it wont be.
Keep your chain lubed to keep it alive all winter. Chains are the first thing to go, as they get the must grit/salt/water in them.
Lube your brake cables and shifter cables. You can actually drop a couple drips of chain lube into the brake and shifter cable housings and this will protect your steel cables from rusting and seizing up all winter.
Keep the brakes (the parts that move, not the brake pads, putting lube on the pads will defeat the point of brakes), and derailleurs lubed as well. Any moving part needs a bit of lube or grease to keep going all winter.
Your brake pads are going to wear out during a winter. Salt, water, and sand seems to be the perfect mix to destroy a set of pads. Brake pads are cheap and easy to switch out yourself, keeping them fresh will make sure you can stop quickly (important when it is slick out).
Use fenders, they will keep water, salt and crap off your bike.
The perfect winter bike:
In my opinion the perfect winter bike is an aluminum framed fixed gear bicycle with full fenders, only a front brake, and a sealed bearing bottom bracket. The reason I say this is because this bike will have the absolute minimum of moving parts on it. Having a fixed gear means you really only need a front brake (less cables and cable housing to worry about, as well as less brake pads to worry about). The single chain ring and cog mean that it will be very easy to clean them, as well as to clean the chain. The full fenders will keep water and salt off the frame, and the aluminum frame will be very resistant to corrosion.
If you don’t have the “perfect” winter bicycle you can do your best. A non-steel frame is better than a steel one, a single speed better than a multi-speed, sealed bottom bracket better than loose bearing.
Another option is to build yourself a very cheap “winter bike.” This is your $40 Craig’s List special, that you ride into the ground each winter and recycle or give away when it gets nice out. You will most likely spend less on a 40 dollar bike than you will on replacing all the nice components on your fancy road bike after a winter or hard riding. I don’t like this option because it is wasteful, but economically speaking it might be your best bet. If you can manage to get a winter bike to survive several winters though a good cleaning regiment you may be able to ecologically justify this approach.
Keeping your bicycle well maintained is an important part of winter riding safety. You don’t want your bicycle to fall apart under you when you most need it (to get you home in the cold). Keeping your bicycle clean and well maintained will also keep your wallet happy. A pinch of prevention is worth many tens of dollars in replaced parts at the end of a long salty winter.
If you have any good winter bicycle upkeep tips share them in the comments, or if you have questions drop them there as well and I will see if I can answer them.
If you ride all winter and want to proclaim your street cred pick up one of our great “This bike survived a Boston winter” stickers at the store.
Tags: cleaning, ice, lube, maintenance, rust, slush, snow, upkeep, winter riding
Posted in education | 22 Comments »
Winter Riding In Boston: Pre-Winter
Written by Boston Biker on Nov 30Yes Virginia, there are people who ride all winter in Boston. Even though global warming seems to be doing its best to push winter back further and further each year, in a month or so it is going to get very cold, and yes people are going to still be out on their bikes. I have pushed my trusty bike though several Boston winters and before that many brutal northern Midwestern ones, so I feel like I can share a couple secrets to riding a bicycle in winter.
This is going to be the first in a series of articles dealing with different aspects of winter riding. Winter doesn’t just show up one day, it worms it’s way slowly into your bones, getting colder each day. This is both a blessing and a curse. Sure it gets a little colder each day, but if you ride each and every day your body adjusts to the slight temperature change. I honestly feel this is the secret to winter riding, get out there every day, you will not notice that it is 20 degrees out, because the day before it was 22, whats two degrees?
Before we deal with things like snow, ice, studded tires, how to keep your fingers attached and your toes above freezing we will deal with the problems of “pre-winter.” Pre-winter is that time of the year when it is getting cold (35-50), but not yet brutal (30 and below). There are a couple of skills you will need for pre-winter.
1. Gloves with a soft spot on them:
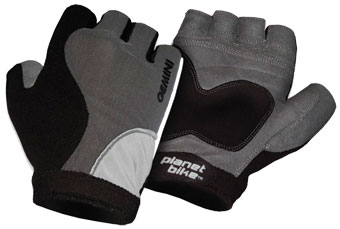
(note the black part on the back of the glove, absorbent, and soft)
I am still riding around with my summer fingerless gloves, I usually switch over to a full glove once the weather is consistently below 40 when I ride in, and move to a serious glove once it is below 30. The key here is to have a glove with a tiny absorbent patch on them, the reason of course is cause when it gets chilly out your eyes tear up and your nose runs. The soft area will allow you to wipe these tears and snot away without having to stop and pull out a tissue.
2. Plan for 10 minutes into the ride:
Yes it is getting a bit colder, but that doesn’t mean you need a parka. If you put on a really heavy jacket you will find your self dripping with sweat by the time you get to where you are going. Moving your feet makes you warm, plan accordingly. You might be a bit cold at first, but you will warm up fast.
3. The snot rocket:

(here you can see a really good snot rocket)
Where I grew up this was called the farmers blow, and I learned it from an old grizzled farmer who was tougher than nails and stronger than an ox (true story). When it gets cold your eyes tear up and your nose runs (if you want to know the medical reason for this see here). Moving though this colder air on your bike will only make it feel colder and cause more tears and snot. It has been my experience that once you get going you warm up and the snot stops, but for the first bit of your ride you are going to have a running nose and perhaps a tear or two. You could pull over every ten feet and blow your nose, or you can learn the ancient art of the snot rocket.
What I am about to share with you has been passed down from farmer to biker through the ages, and is holy knowledge not to be used for anything but the most holy of purposes, so prepare yourself padiwan because this is important stuff. The snot rocket is the act of ejecting snot (and anything else) from your nose without the use of tissue. When done correctly you can completely blow your nose free of all obstructions without slowing down, and without getting it all over yourself (a key point).
So how does one do this magical feat? First wait until you got a bit of snot built up, it is important to have some shot in the cannon, or in my experience this wont work. Beware however if you wait too long you will have too much ammo and the results can be disastrous. I recommend waiting till you start to feel the snot run a bit, that’s when you strike!
a. Place a finger against the nose hole you will not be clearing, I use the pointer, some people use the thumb, either way you are covering up the non-business hole. You don’t have to take both hands off the bars for this, but sometimes it is easier if you sit up and ride no handed for a couple yards. This can also be done with gloves on.
b. Point your head to the side. You need to get your head far enough over so that the wind takes the snot past your shoulder, not into it. Remember to adjust for the wind.
c. Check that no other cyclists are behind you. We are going to use our powers for good, not evil. If there are cars behind you, don’t worry, they will have the windows up and heater on, they will not be bothered.
d. Exhale a short staccato breath through your nose. Think of yourself as an angry bull from an old Warner Brothers cartoon, or pretend you just got punched in the gut. This is the key, a hard short breath that ends abruptly will launch the contents of your nostrils into the air and the wind created by your forward motion will carry it safely past you.
e. Repeat with the other nostril.
f. Wipe any leftovers off with that soft part on your glove or sleeve.
Combines with a good spit you can completely clear your entire head of snot and tears at speed with no tissues. Earth friendly and efficient. Plus I have had more than one compliment from pedestrians who have witnessed this (“holy shit that is disgusting!” is a compliment right?). But seriously if you want to ride in the winter you are going to have to master this move. It allows you to breath easily and will greatly improve your riding experience.
4. Lights:
Spinning Bike Lights from veryMickey on Vimeo.
Seriously, get some lights people. You may have noticed that it gets dark as soon as you get up…this is called winter. Without lights you are invisible. When you suddenly appear in front of me I (and everyone else) freak the fuck out. Nothing is worse than having to suddenly dodge a bike ninja. Go get some lights. If you don’t have lights, don’t ride your bike. Simple.
In a city like Boston, lights are not so you can see things, the street lights do a fairly good job of that, lights are so we can SEE YOU! Red back light, white front light, just like a car. Hell get some reflectors to go with them, get a couple lights, light your pants on fire, but please, for the love of Pete stop riding around dressed all in black with no lights! This goes for runners, and pedestrians as well. If you are dressed all in black, with no reflectors, and you are crossing the street against the signal in the middle of the street from behind a car, no one is going to see you until they run into you. Honestly even if you dress all in white with a big foil hat, you still need lights. Reflectors only work when another light source bounces off of them, I don’t have laser eyes, so please, get lights.
5. Cold Rain:
In my opinion this is the worst possible weather to ride a bike in. Before the snows start in Boston there is a whole season of cold rain. Ridding in the snow can actually be a ton of fun. Cold rain is the worst. The only times in my life I have ever had a bad time on my bike is when I was caught in some brutal cold rain. The secret here is staying warm, not necessarily staying dry (although they often go together). Get some rain pants, get a rain jacket, if it is really bad put these on over your normal riding clothes. These will keep you both warm and dry. I usually just let my head, and hands get wet. If you don’t like water on your head a bike cap placed under my helmet will keep the water out of my eyes, and your head pretty dry. If you have trouble with your hands getting too cold, try putting a pair of rubber gloves on under your normal gloves, thus making them water proof.
Get some fenders. I can not stress enough how awesome fenders are. They keep you and the bike free of the nasty grit-water from the ground and keep you from getting that skunk stripe up your back. Most of the water that gets you wet comes from the tires throwing it on you, fenders will solve this problem. The one part I often have trouble with is the shoes. They sell little waterproof footy things, but a plastic bag over the socks and under the shoes will work also. I would also recommend fleece or wool socks. They will keep your feet warm, even if they get wet.
So there you go, a couple easy tips to make your Pre-winter riding much more pleasurable. If you ride all winter in Boston, leave your tips for “pre-winter” in the comments. I will cover colder weather riding in the next post.
If you ride all winter and want to proclaim your street cred pick up one of our great “This bike survived a Boston winter” stickers at the store.
Tags: gloves, lights, prewinter, rain pants, snot rocket, winter riding
Posted in education, video | 12 Comments »
The Word On The Street
 Here is what people are saying
- Where bicycles are prohibited in Massachusetts August 16, 2023TweetThe main issue you will confront if you get into a dispute with police over bicycle prohibitions is whether the prohibition is supported by law. Often it is not. Example: the ramp from Commonwealth Avenue to Route 128 northbound and … Continue reading →jsallen
- Where bicycles are prohibited in Massachusetts August 16, 2023TweetThe main issue you will confront if you get into a dispute with police over bicycle prohibitions is whether the prohibition is supported by law. Often it is not. Example: the ramp from Commonwealth Avenue to Route 128 northbound and … Continue reading →jsallen
- It’s Finally Happening! 5th Annual Hot Cocoa Ride Feb 12! February 8, 2022... Continue reading →commonwheels
- It’s Finally Happening! 5th Annual Hot Cocoa Ride Feb 12! February 8, 2022... Continue reading →commonwheels
- Hello world! June 9, 2021Welcome to WordPress. This is your first post. Edit or delete it, then start writing! Continue reading →thecommunityspoke
- Run The Jewels Lead Free Pewter Hand Carved And Cast Pin Set January 3, 2021Made these lovely RTJ fist and gun pin set. Hand carved in wax, and then cast in lead free pewter. Because these are made by hand you can do fun things like add an extra small pin so that they sit just so (also means they have “customized” brass back plates to accommodate the extra […]Boston Biker
- My Work In The Wild: Feather Head Badge With Chris King Headset January 3, 2021One of my customers sent me this amazing picture of my feather badge installed on their (awesome!) bike. Check out Manofmultnomah (here and here), apparently Chris King took some interest in it as well. Want one of your own? Buy it here, or here... Continue reading →Boston Biker
- Boston’s Invitation to Improve Biking in Boston: Draw on Some Maps! December 14, 2020TweetSometimes, the best way to gather ideas and feedback is to let people draw on some maps. Last night, at the Bike Network Open House, pedallovers unveiled a draft for their upcoming plans for a more connected biking network infrastructure … Continue reading →greg
- Boston’s Invitation to Improve Biking in Boston: Draw on Some Maps! December 14, 2020TweetSometimes, the best way to gather ideas and feedback is to let people draw on some maps. Last night, at the Bike Network Open House, pedallovers unveiled a draft for their upcoming plans for a more connected biking network infrastructure … Continue reading →greg
- Boston’s Invitation to Improve Biking in Boston: Draw on Some Maps! December 14, 2020TweetSometimes, the best way to gather ideas and feedback is to let people draw on some maps. Last night, at the Bike Network Open House, pedallovers unveiled a draft for their upcoming plans for a more connected biking network infrastructure … Continue reading →greg
 Add to Reddit.