The Latest From BostonBiker.org
News, Events, Updates
How To Build A 1000$ Bicycle Trailer For $450
Written by Boston Biker on Oct 24I have always wanted a huge ass bicycle trailer. Something I can pile improbable amounts of stuff on, something I can use to grab dumpster dived treasures, something I could move to a new apartment with. Something that can transport all my dreams! In short something like this.
There is only one problem…I don’t have $975 (plus shipping) to blow on a bike trailer. For that kind of money I could buy a really nice road bike, or you know, eat food and pay rent.
But as so often is the case,where there is a will there is a way. After looking at this picture for a while:
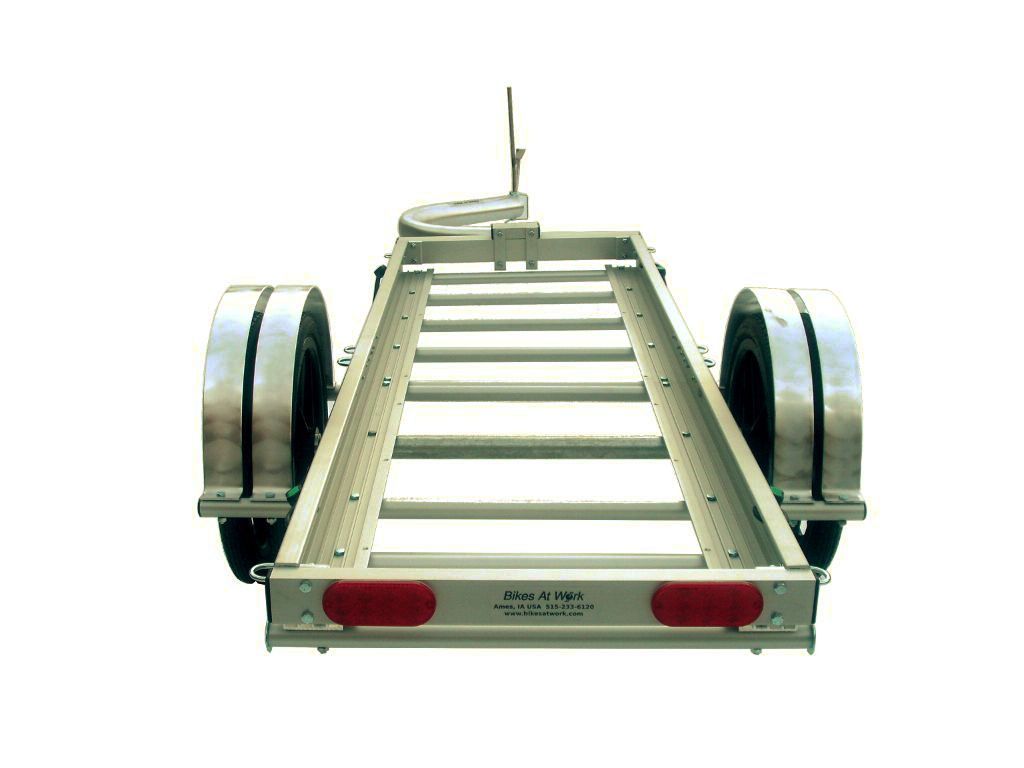
This beautiful trailer can transport 600lbs of anything you wish to put onto it…the only problem is it costs nearly $1000.
I had a dream, a dream that would become this:

5oolbs of carrying capacity for only $450!!!!
Not only was 1/2 the cost, but it was fall off a log easy to construct!
I started off my journey thinking that I could take an aluminum ladder, and mount some wheels on it. And you know what I could have done that, and it would have worked, and it wouldn’t have been too bad. But it would have been a lot less beefy, and I wanted beefy. I wanted something that would carry a stack of 2×4’s, or a bunch of boxes of stuff, or a kitchen table, something with a contained cargo area, and something that would look nice. so I kept thinking.
I knew I wanted it to be aluminium, it would be light, strong, rust proof, and wouldn’t require welding. I wanted it to be an awful lot like that $975 Bikes At Work trailer.
While combing their website for pictures to get ideas, I saw that they actually sold most of the accessories I would need to make a cheaper trailer, if only I could find the perfect trailer bed.
So I went to Google and typed in “extruded aluminium” and low and behold this bad boy popped up on amazon.
 I started reading…aluminum check, strong check, 500lb load limit check, side rails check, and bless my nippers the perfect size…no really like absolutely perfect to interface with all the accessories I was going to buy from Bikes At Work.
If that wasn’t enough, the stars had aligned to provide me with $300 of cash I wasn’t expecting. Making the final cost for this entire thing a scant $150 out of my pocket. It was a sign.
I ordered one and it was here in three days, took about half an hour to assemble. The only changes I made to the design was I removed the trailer hitch (didn’t need that), which involved simply pulling it out and setting it aside.
I also moved the included reflectors from the side to the back, as they would do a lot more good back there.


Moving the reflectors was as easy as swapping a two holed piece of aluminum, with a one hole piece. All you need to assemble this cargo rack is a screw driver, and an adjustable wrench, it comes with all the hardware you will need.
Next up was the accessories needed to turn what was supposed to be attached to the back of an SUV, to the back of my bike.
Here is what I ended up buying from Bikes At Work:

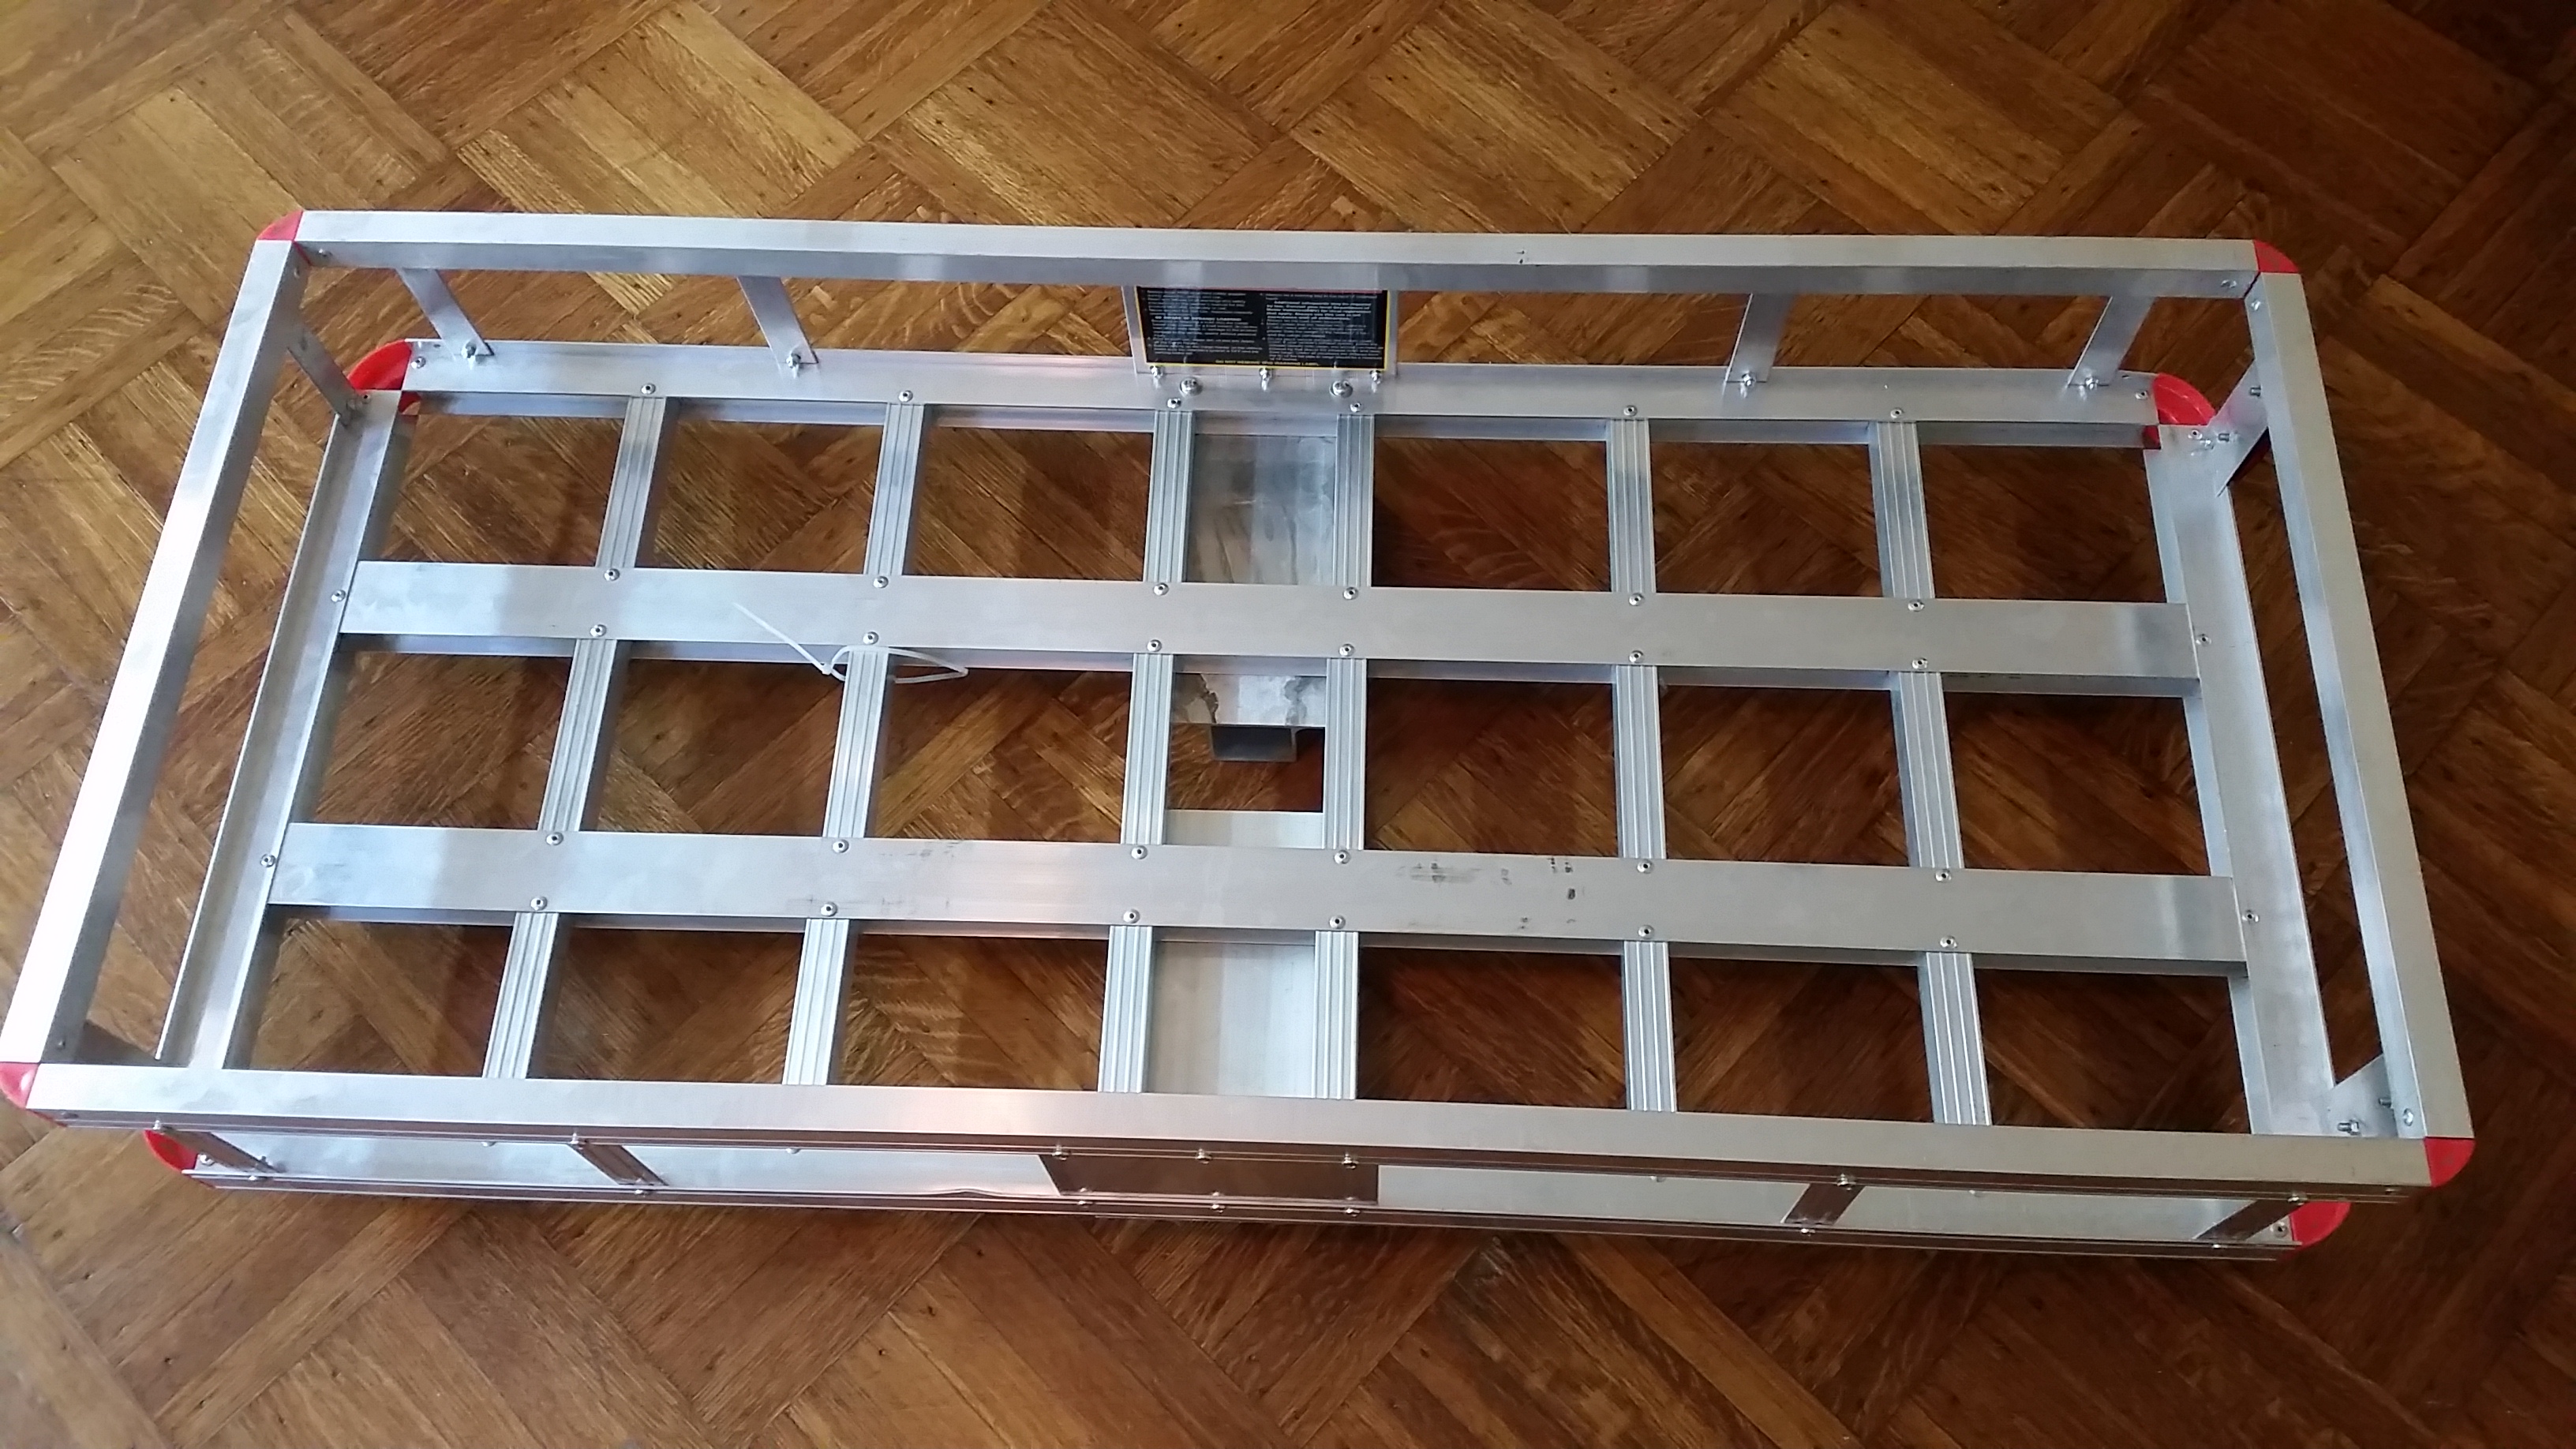
The entire works (this is the box the cargo carrier came in, all these parts were actually packed in a very tiny box)

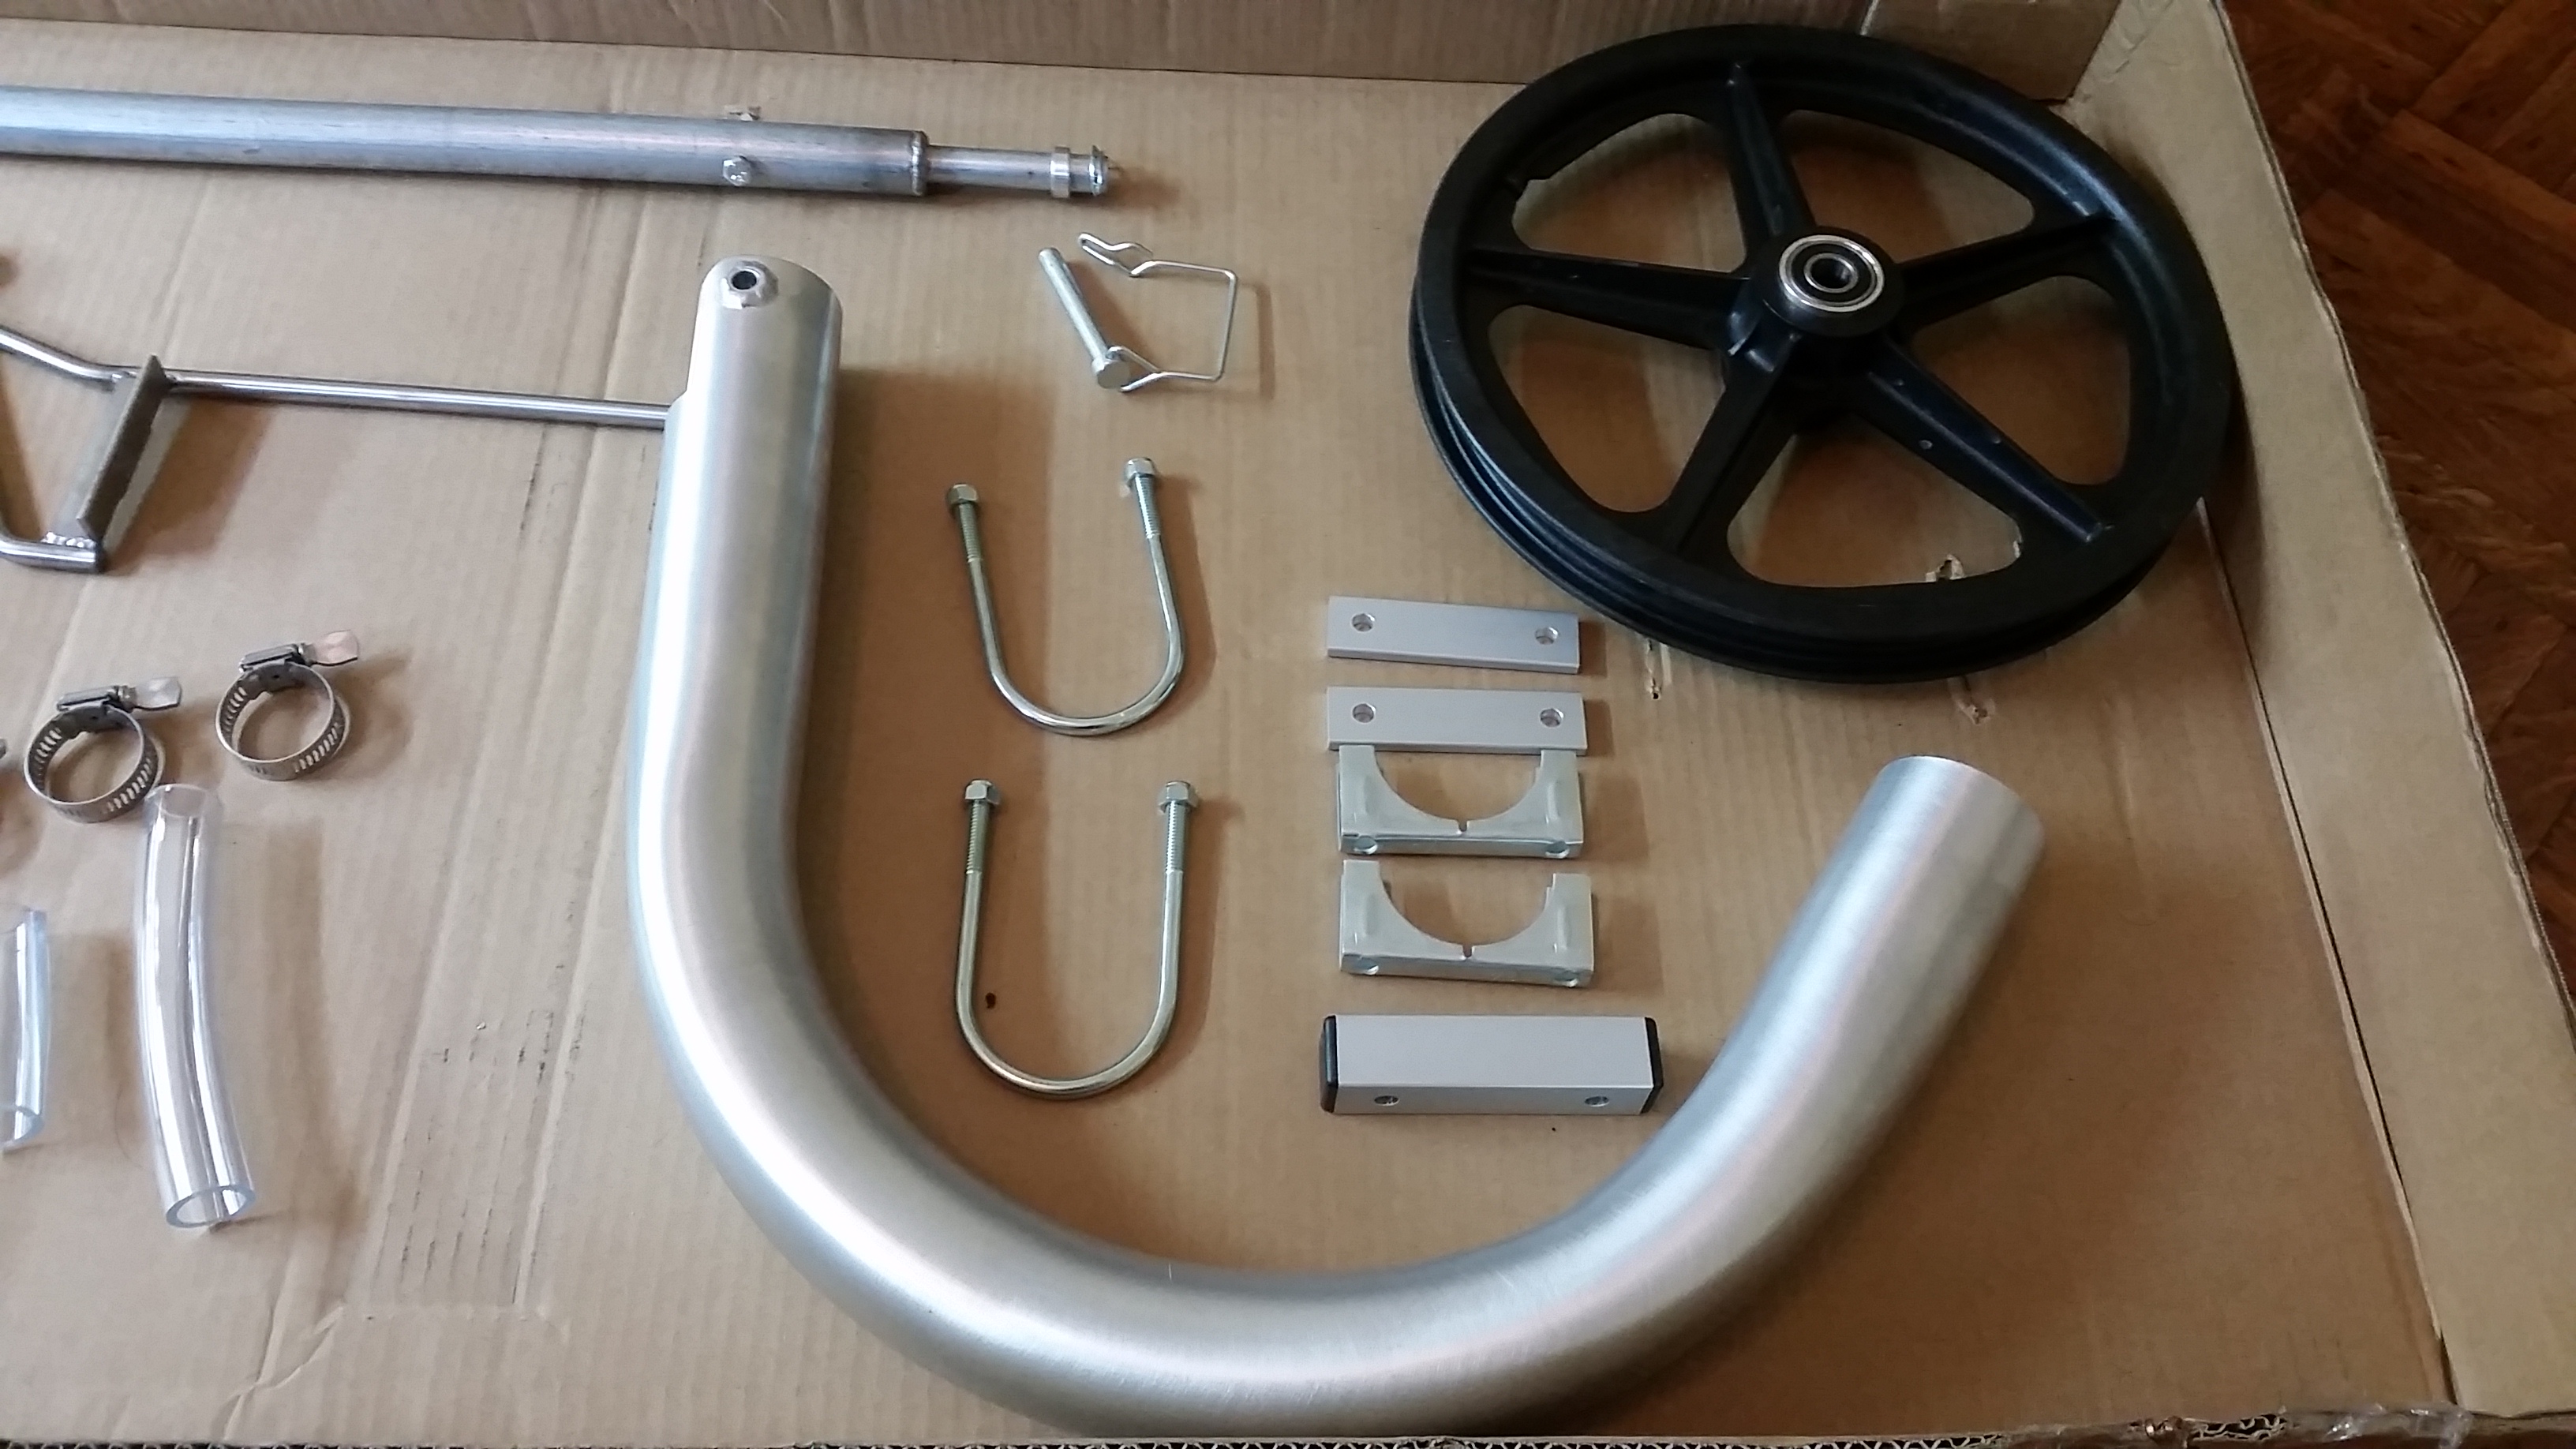
The entire list (buy it all here):
Bicycle trailer axle $60
Bicycle trailer hitch $50
Trailer hitch pin $4
Towbar $120
tubes for tires $7
Tires $26
Rims with bearings $85
With shipping the entire thing came to $370 + $80 for the cargo holder (it was on sale when I got it) = ~$450.
Now the fun part, putting it all together!
First thing I did was bust out my air pump and tire levers and assemble the wheels.
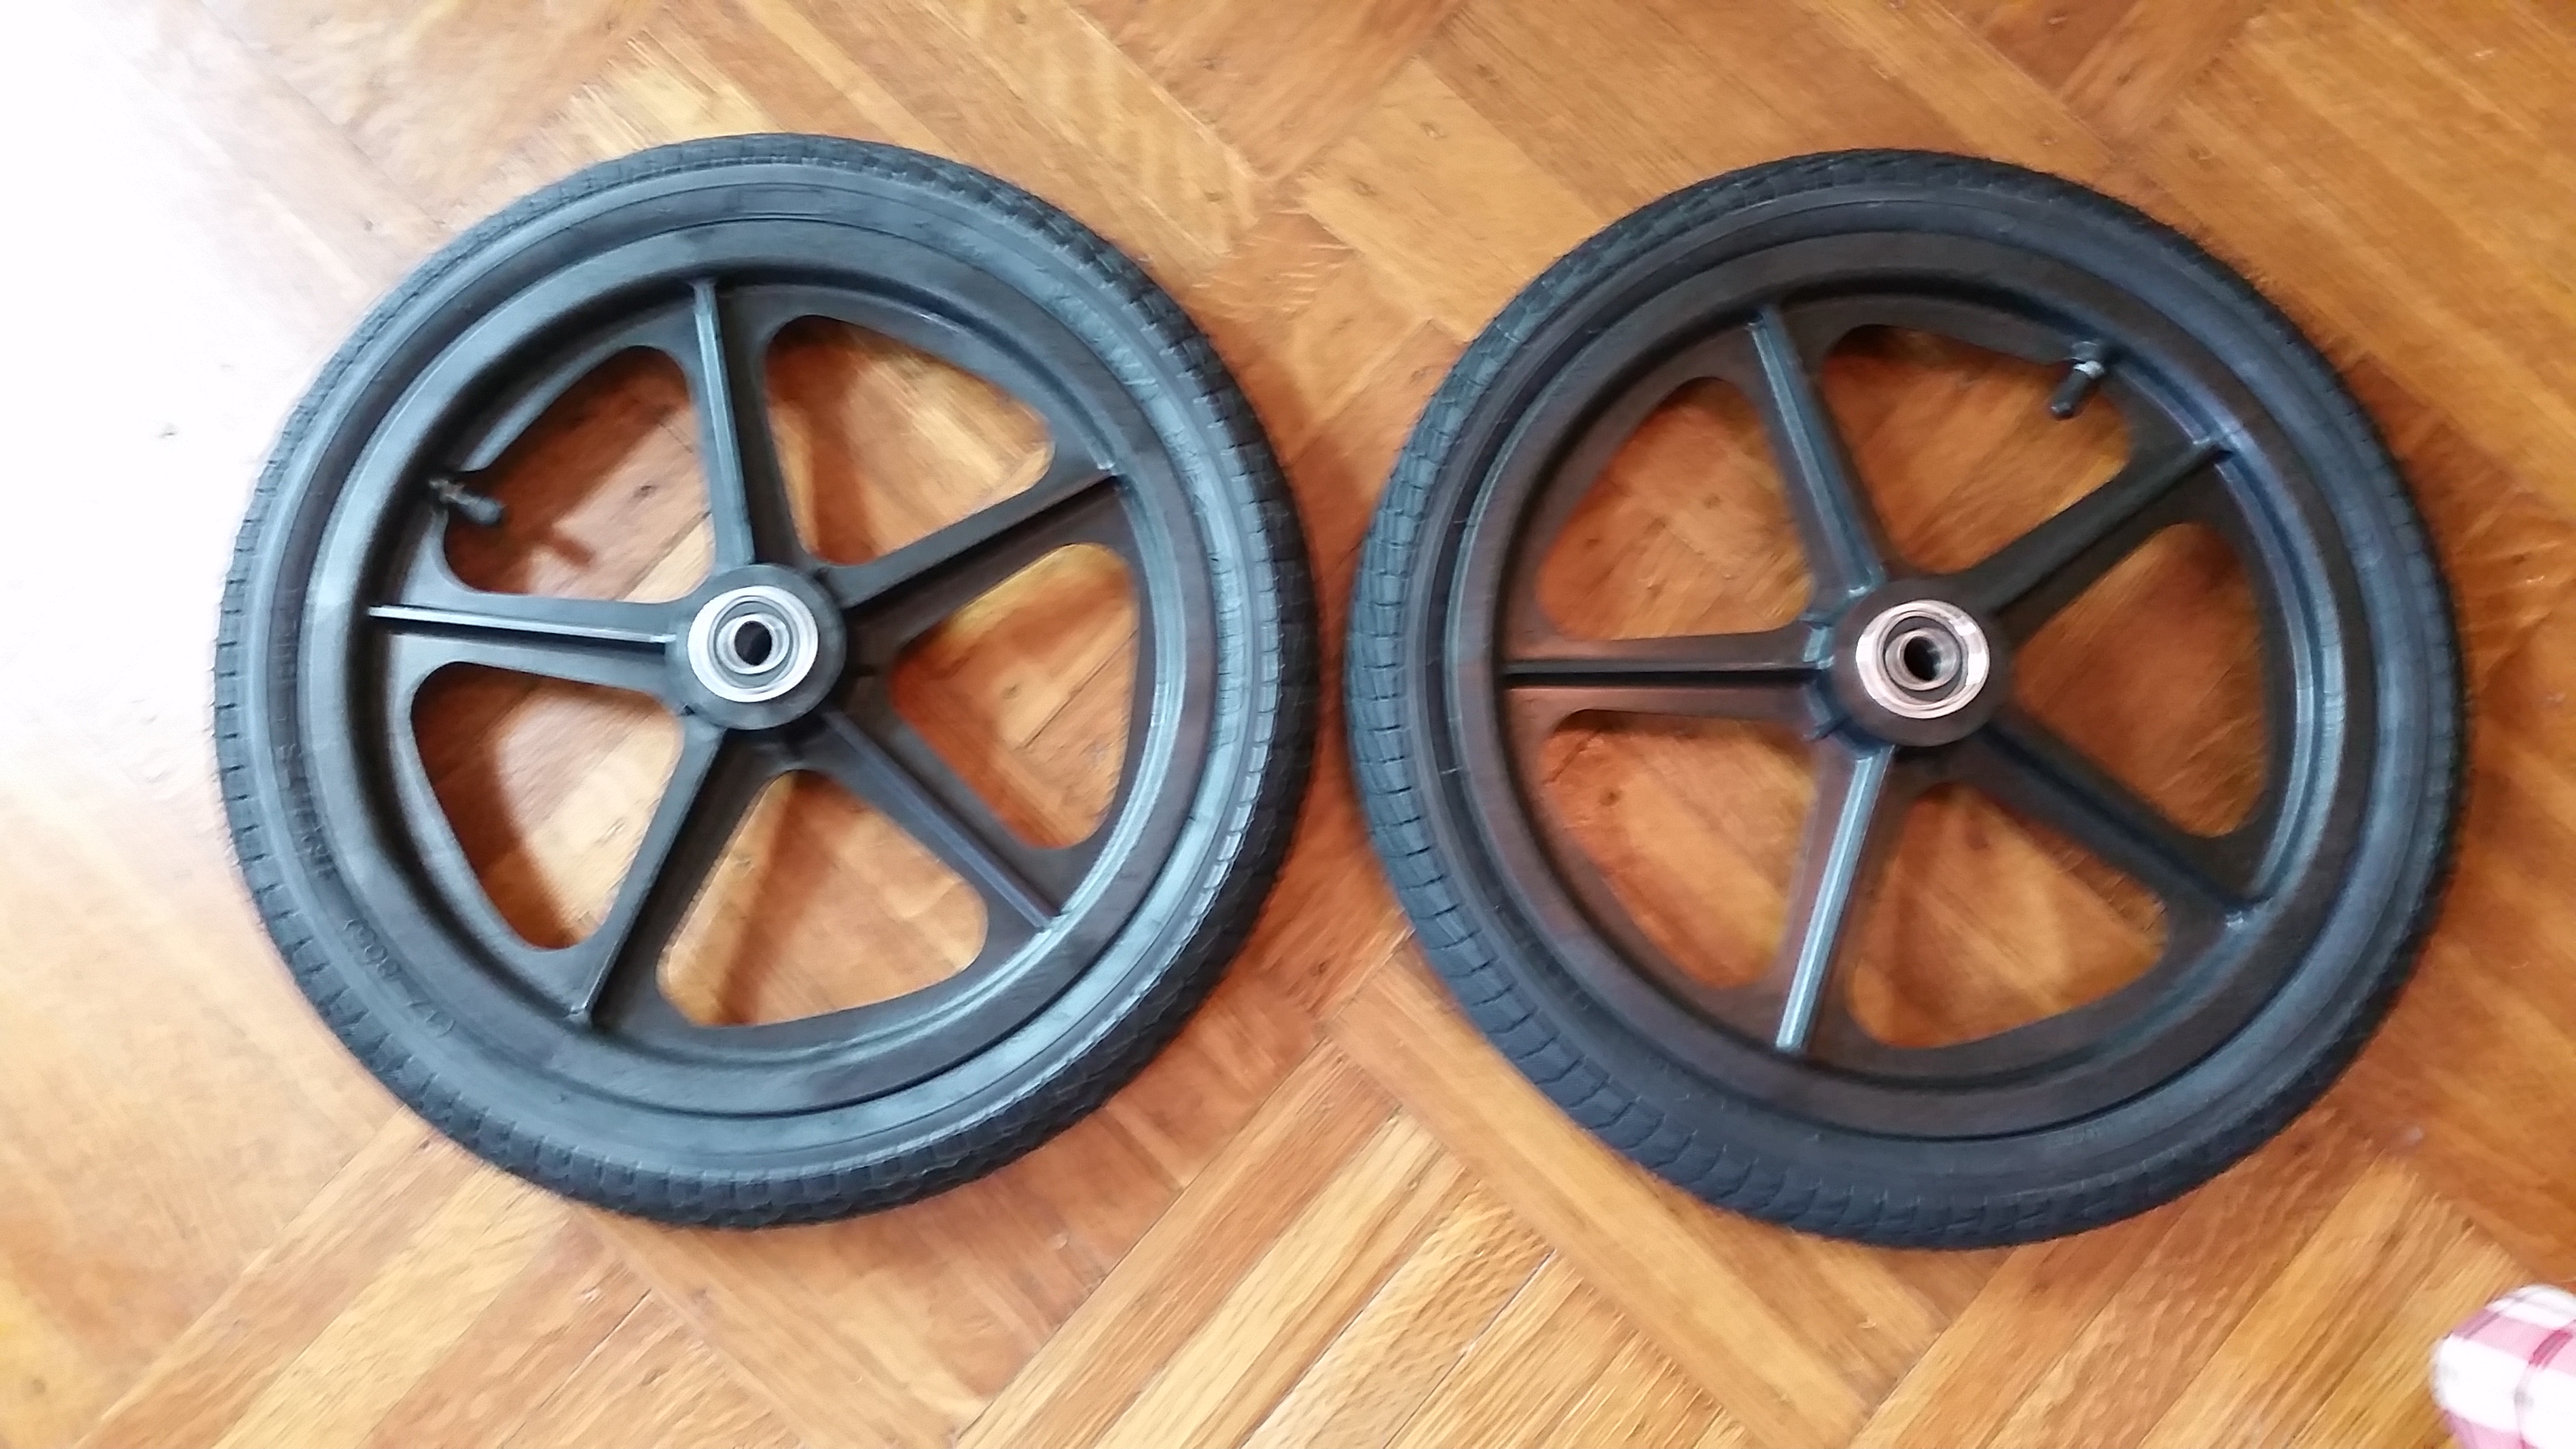
Easy, but if you have never assembled a tire to a rim simply search youtube for many good videos.
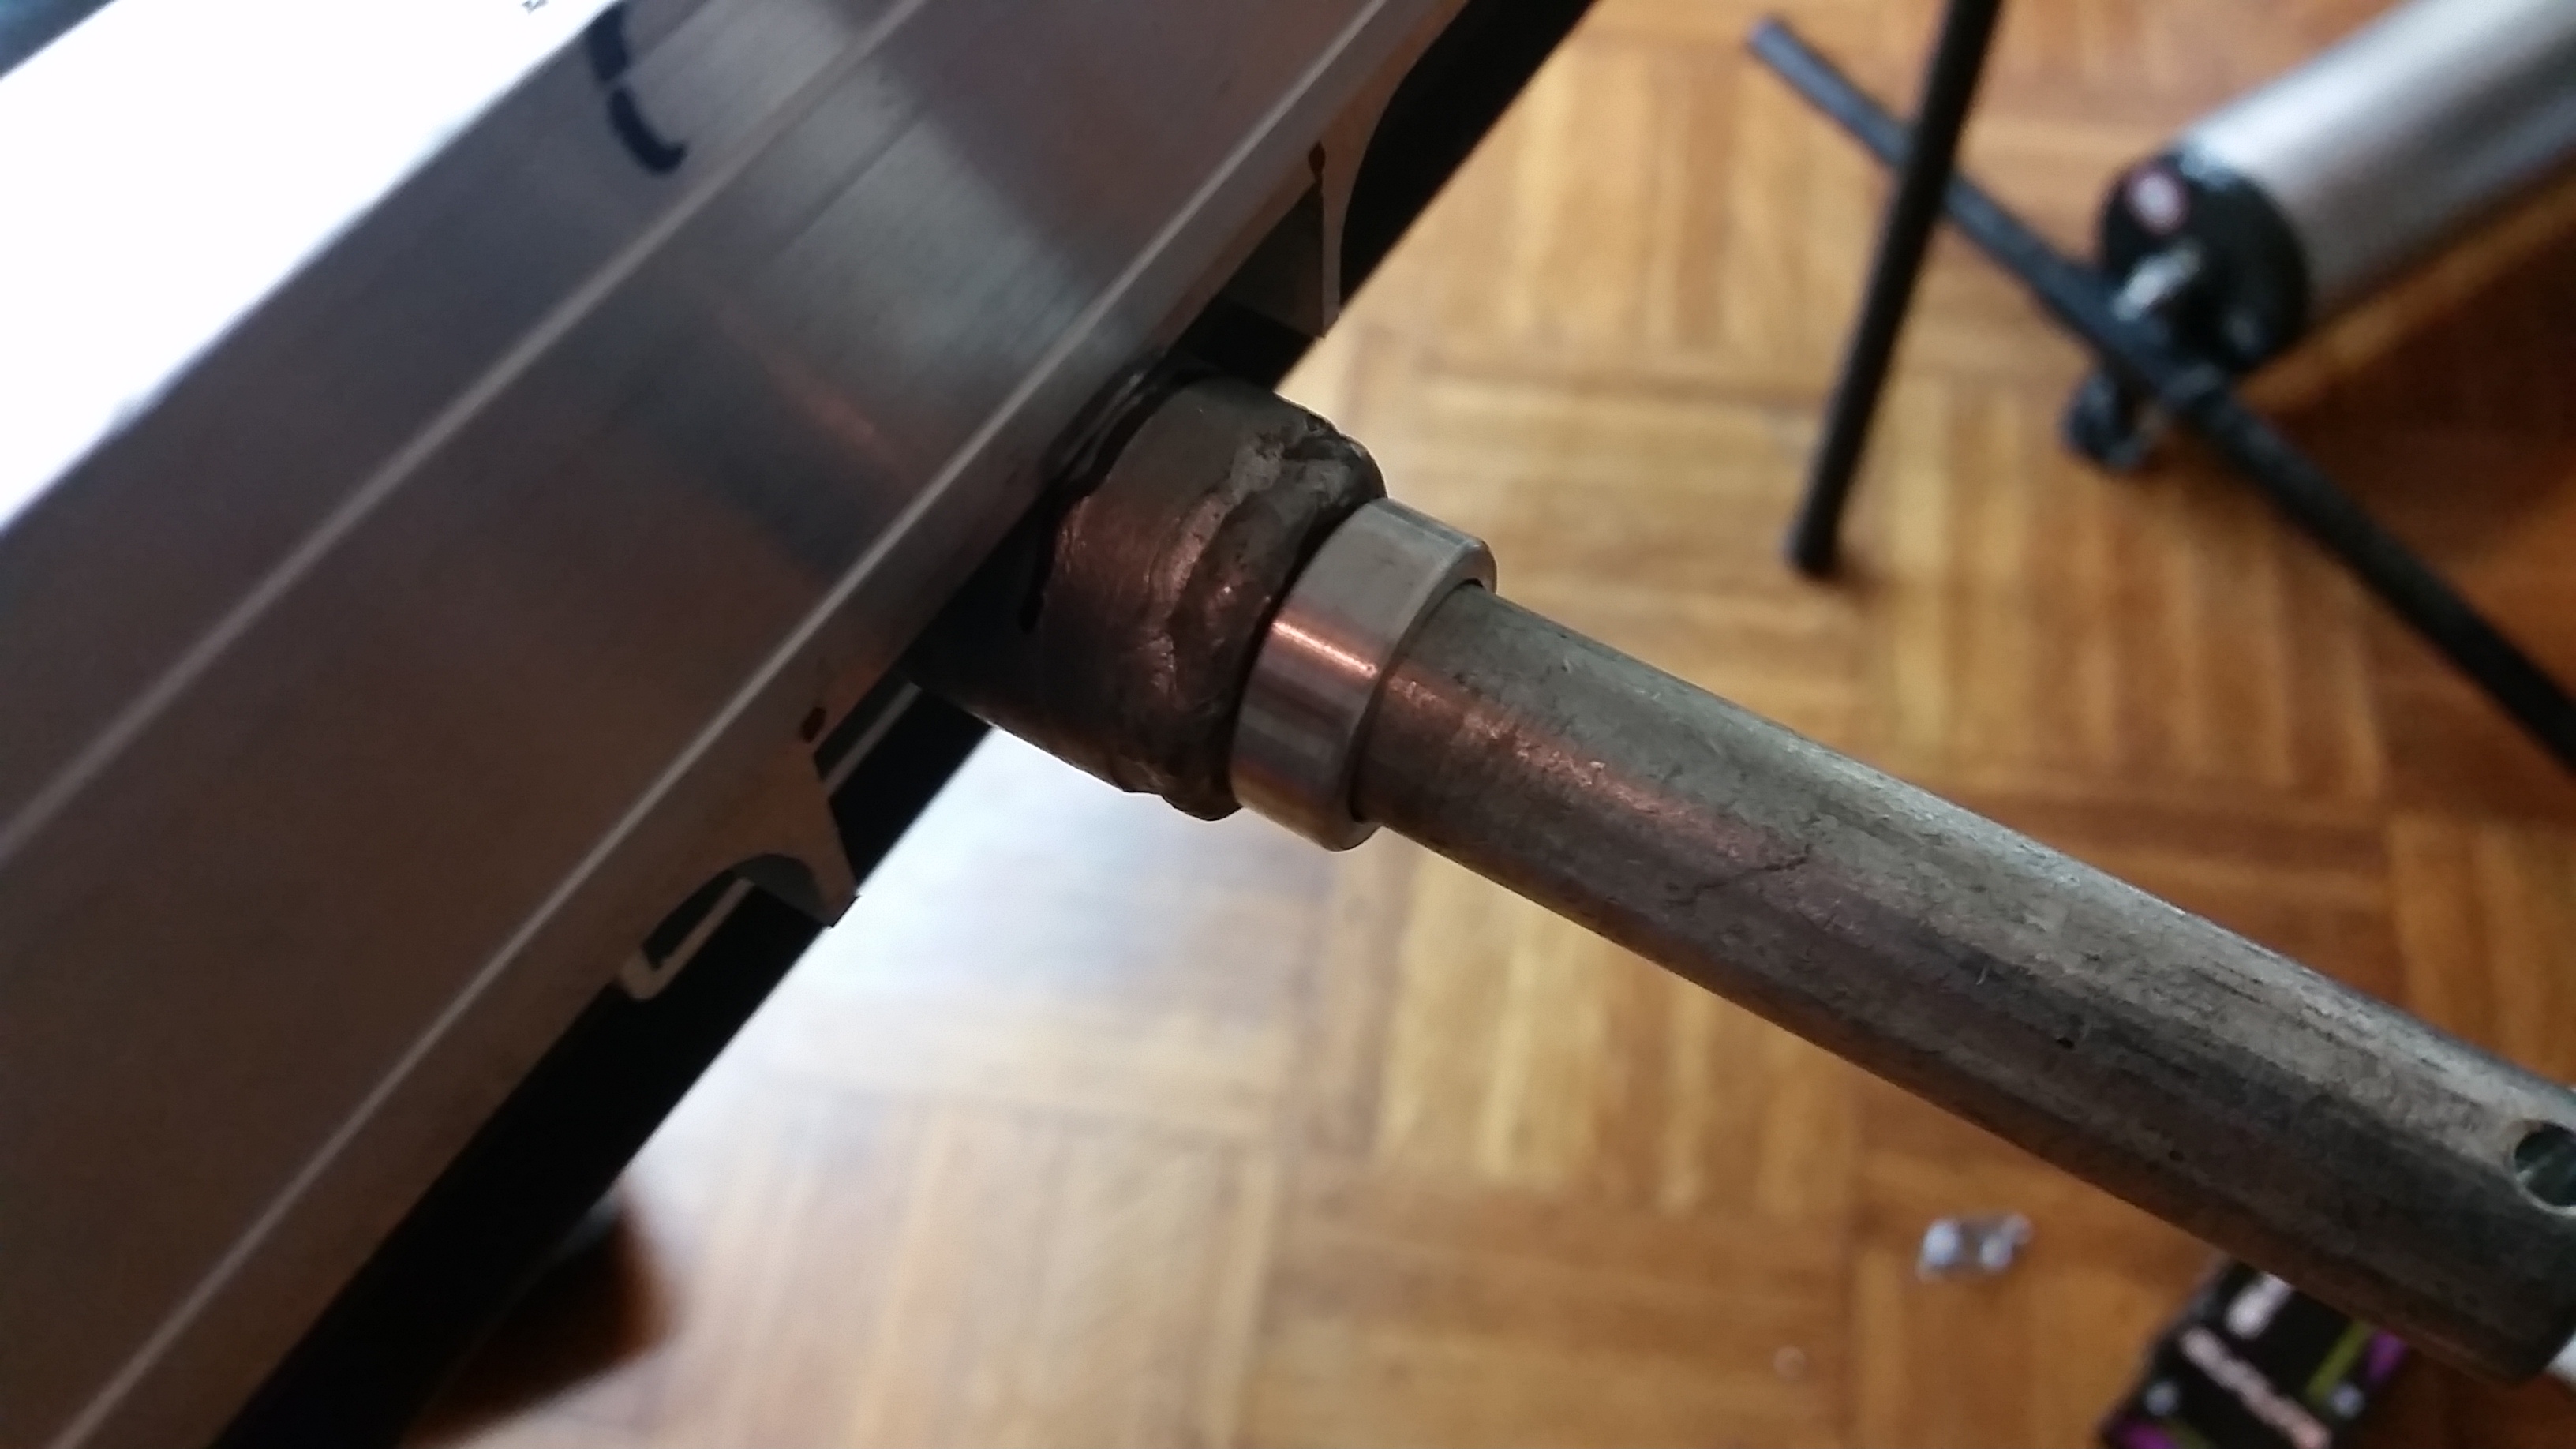
Next I got the axle and measured for the mounting holes to hold it to the base. The axle comes pre-drilled with the two holes and the hardware you will need to mount it, all you need to do is drill the correct sized hole in the base of the cargo holder. Aluminum is soft, and I used a hand drill (not even an electric one) and was done in a couple minutes.
The axle fits perfectly into the hole left from the trailer hitch bar. Simply center, measure, and drill. Its easier if you leave the larger side panels off for this, as it allows you to get in there with the drill easier.

Center the axle (doesn’t have to be perfect, but does have to be the same on both sides so the axle is straight, could have just as easily shoved it to one side)
Move the axle back and forth until the same out sticks out of both sides, mark with a marker.
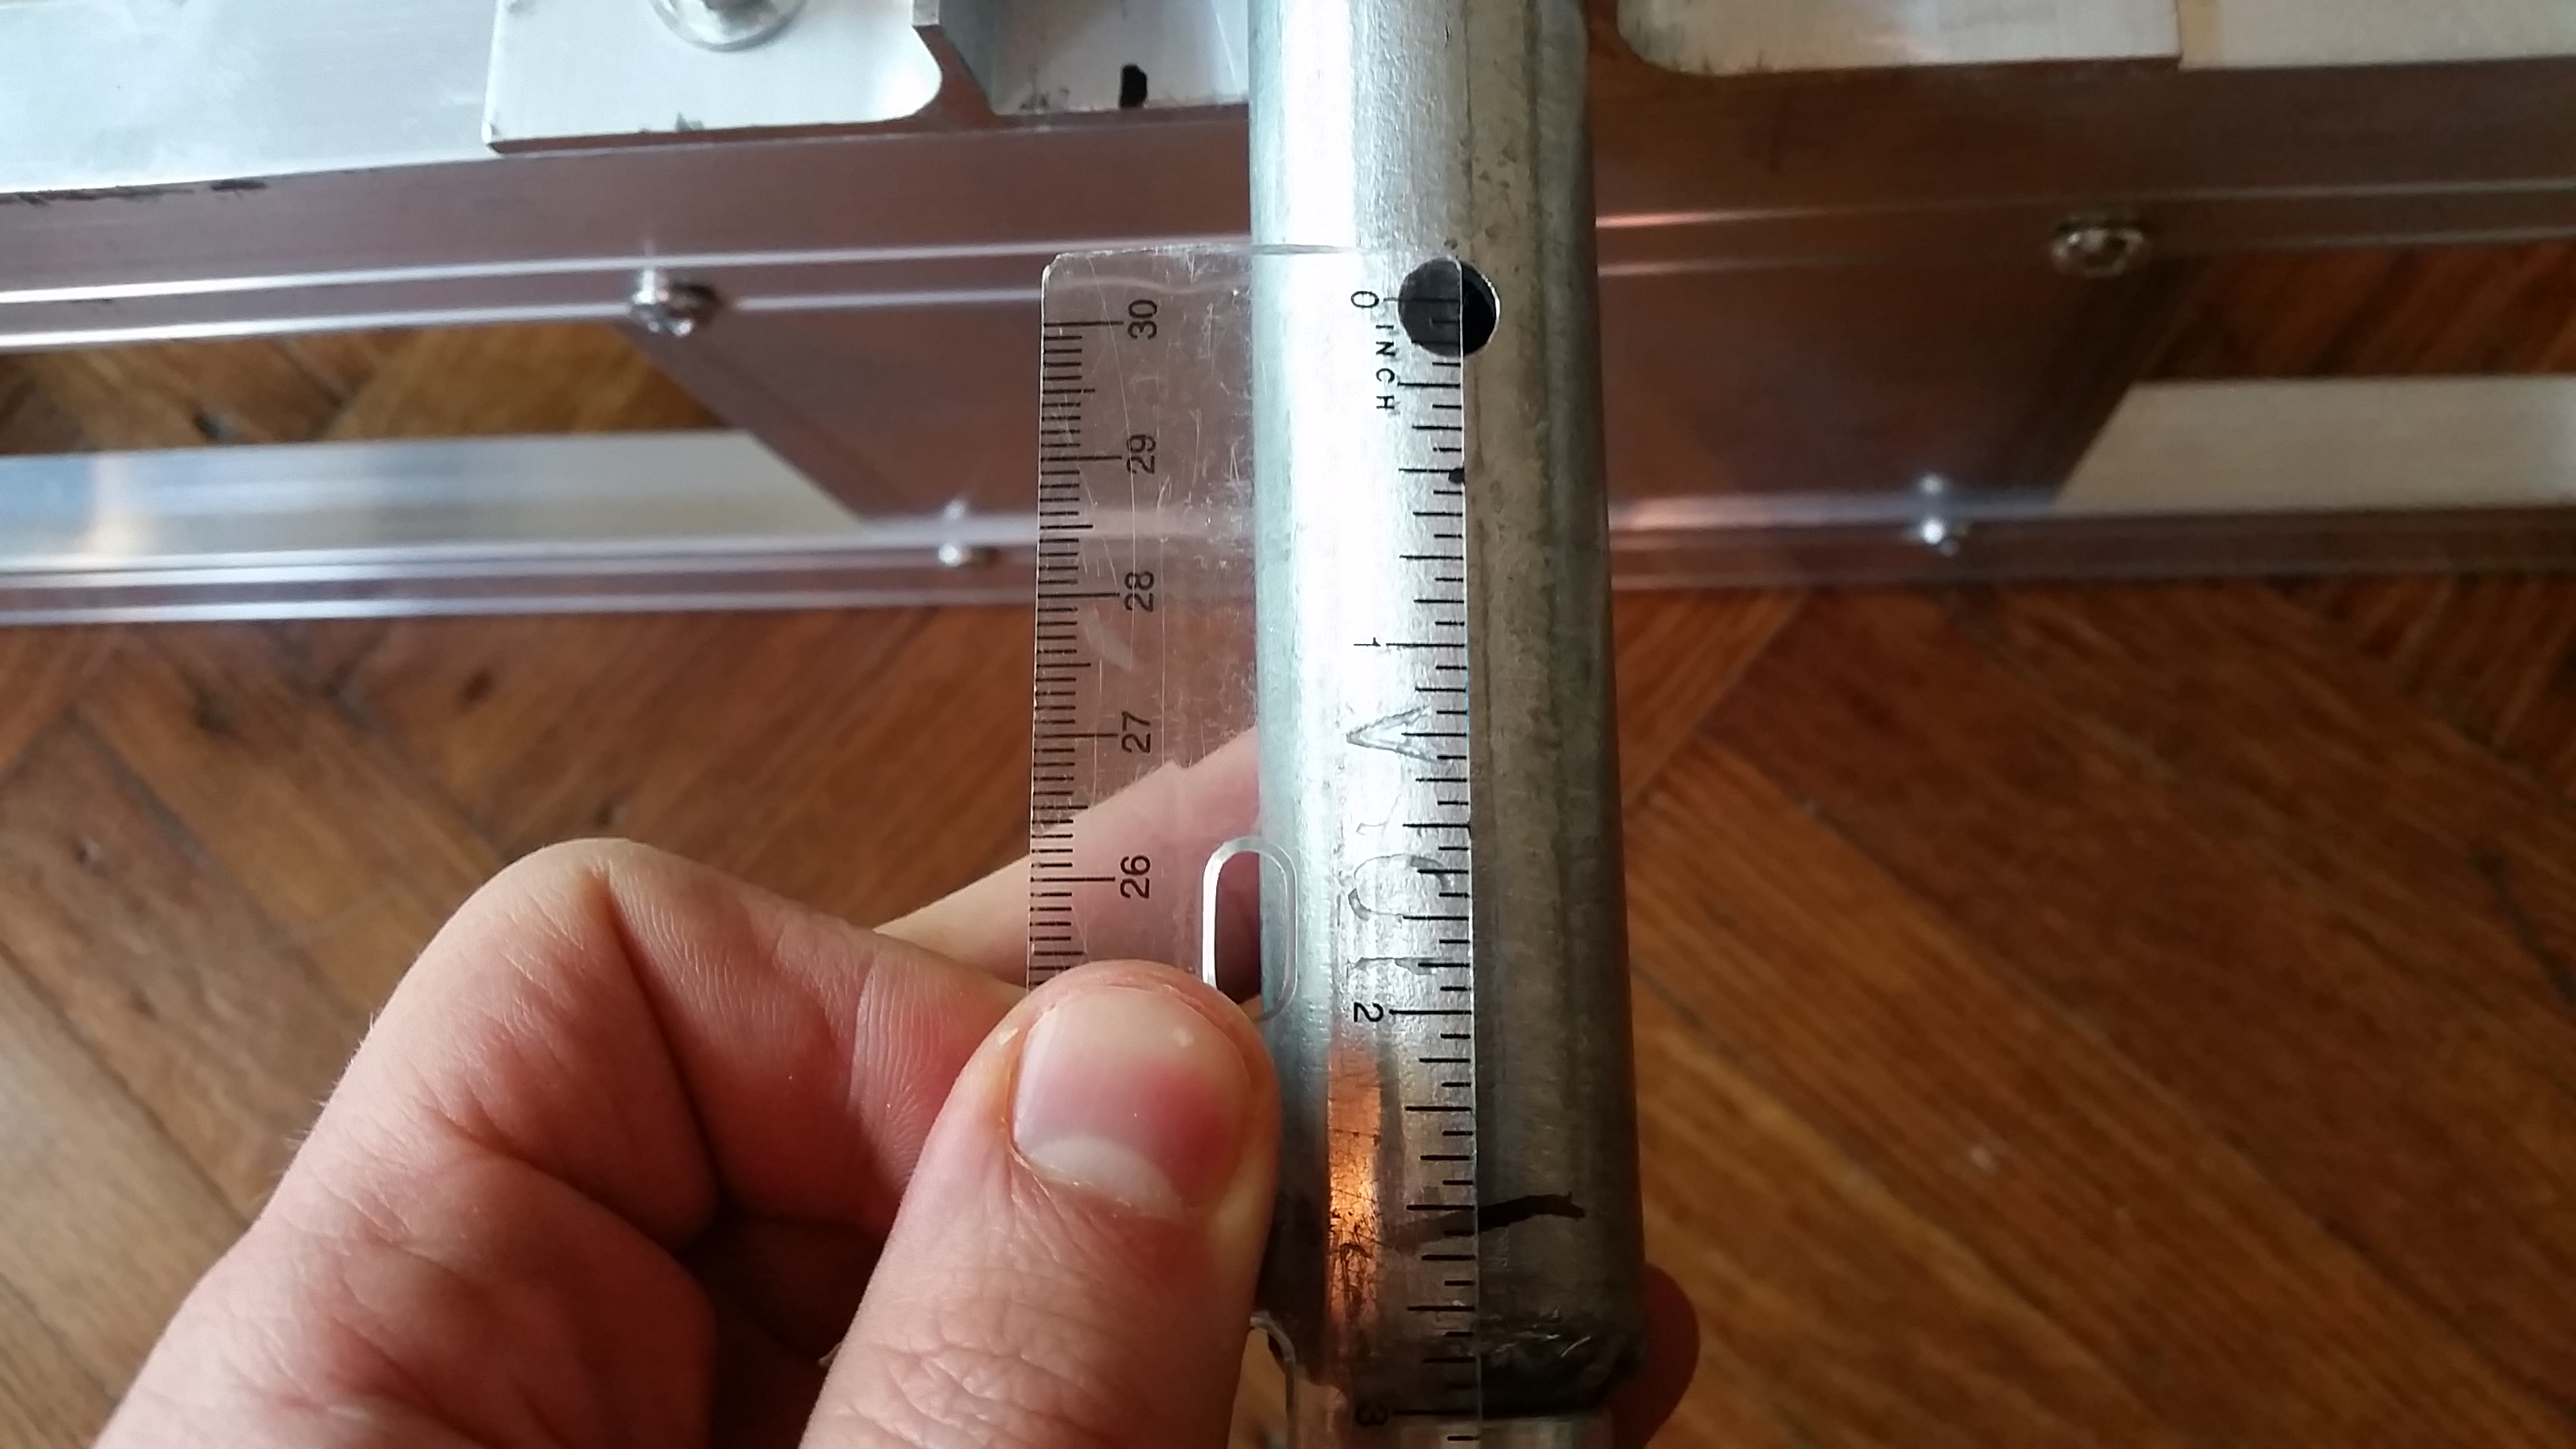
Flip the cargo holder back over, measure how far in the mounting hole goes from that mark.
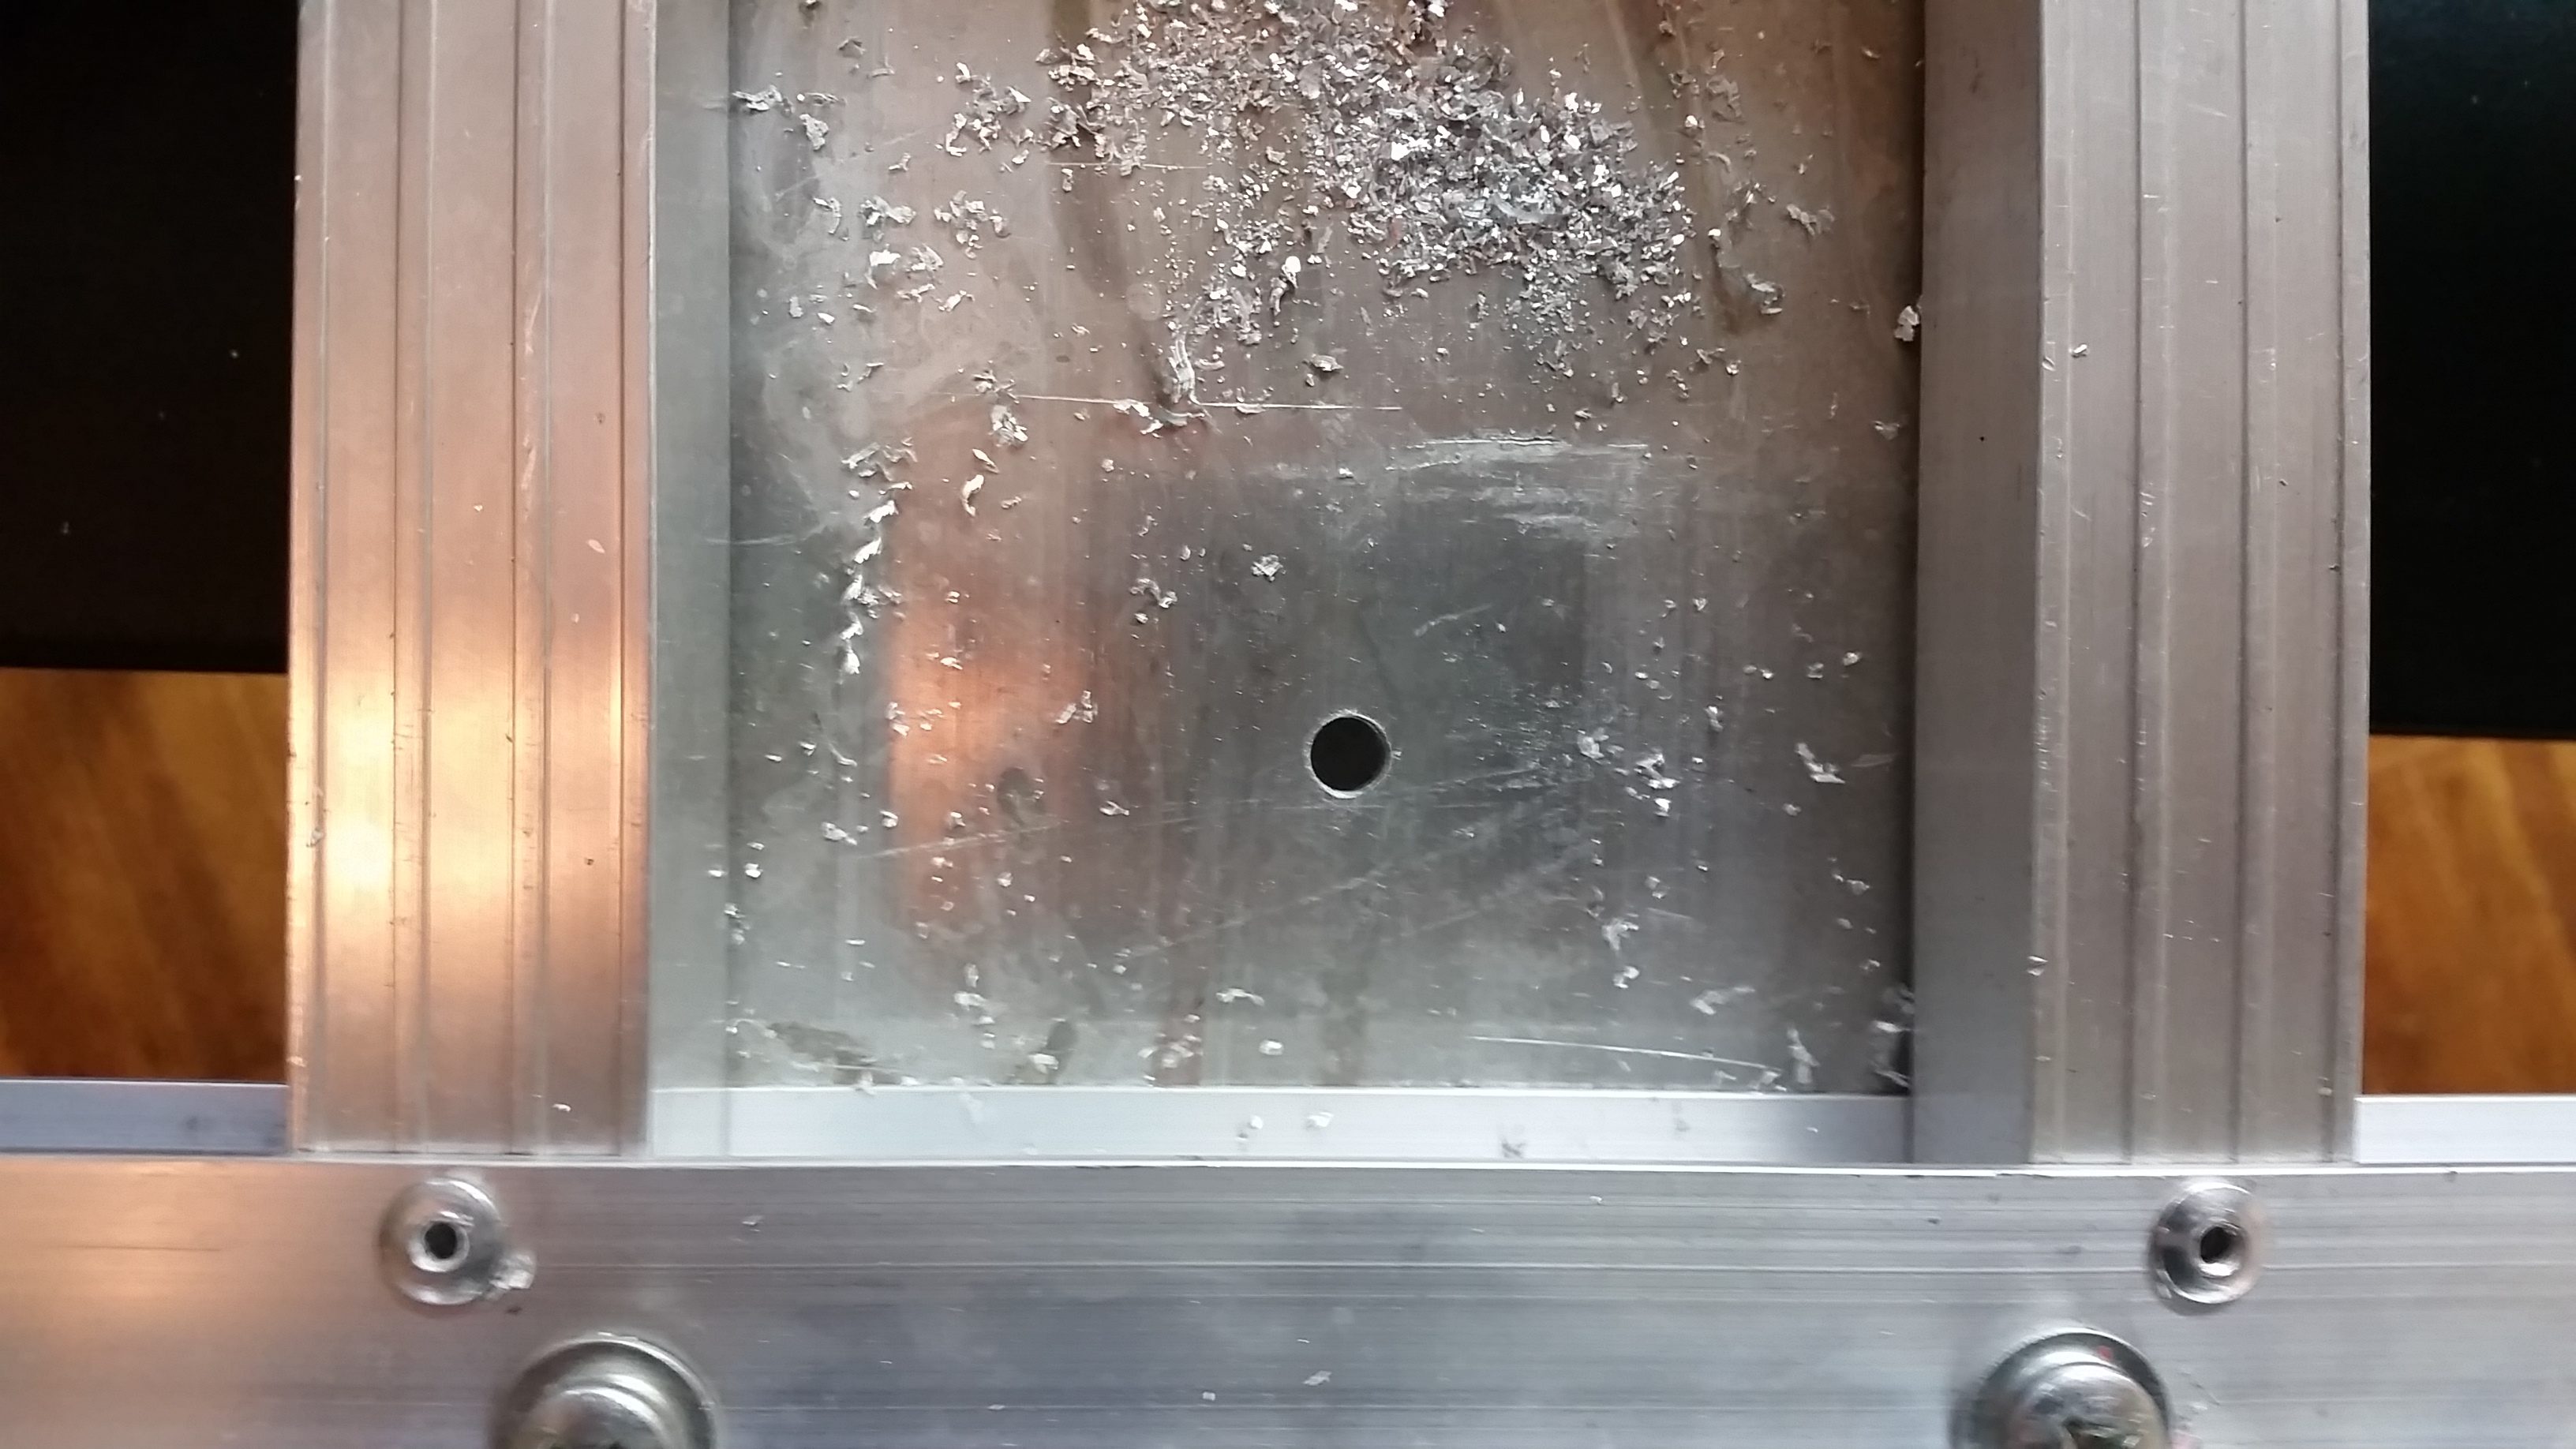
Measure that far in and drill a hole large enough to hold the bolt that comes with the axle. To be clear you drill the hole in the top of the cargo holder, not the underside, there is no need to alter the underside. Take extra care on this step as its the one of only two parts you are going to alter, measure 4-5 times, drill once. The extra time you spend will keep your trailer with a minimum of extra holes in it.
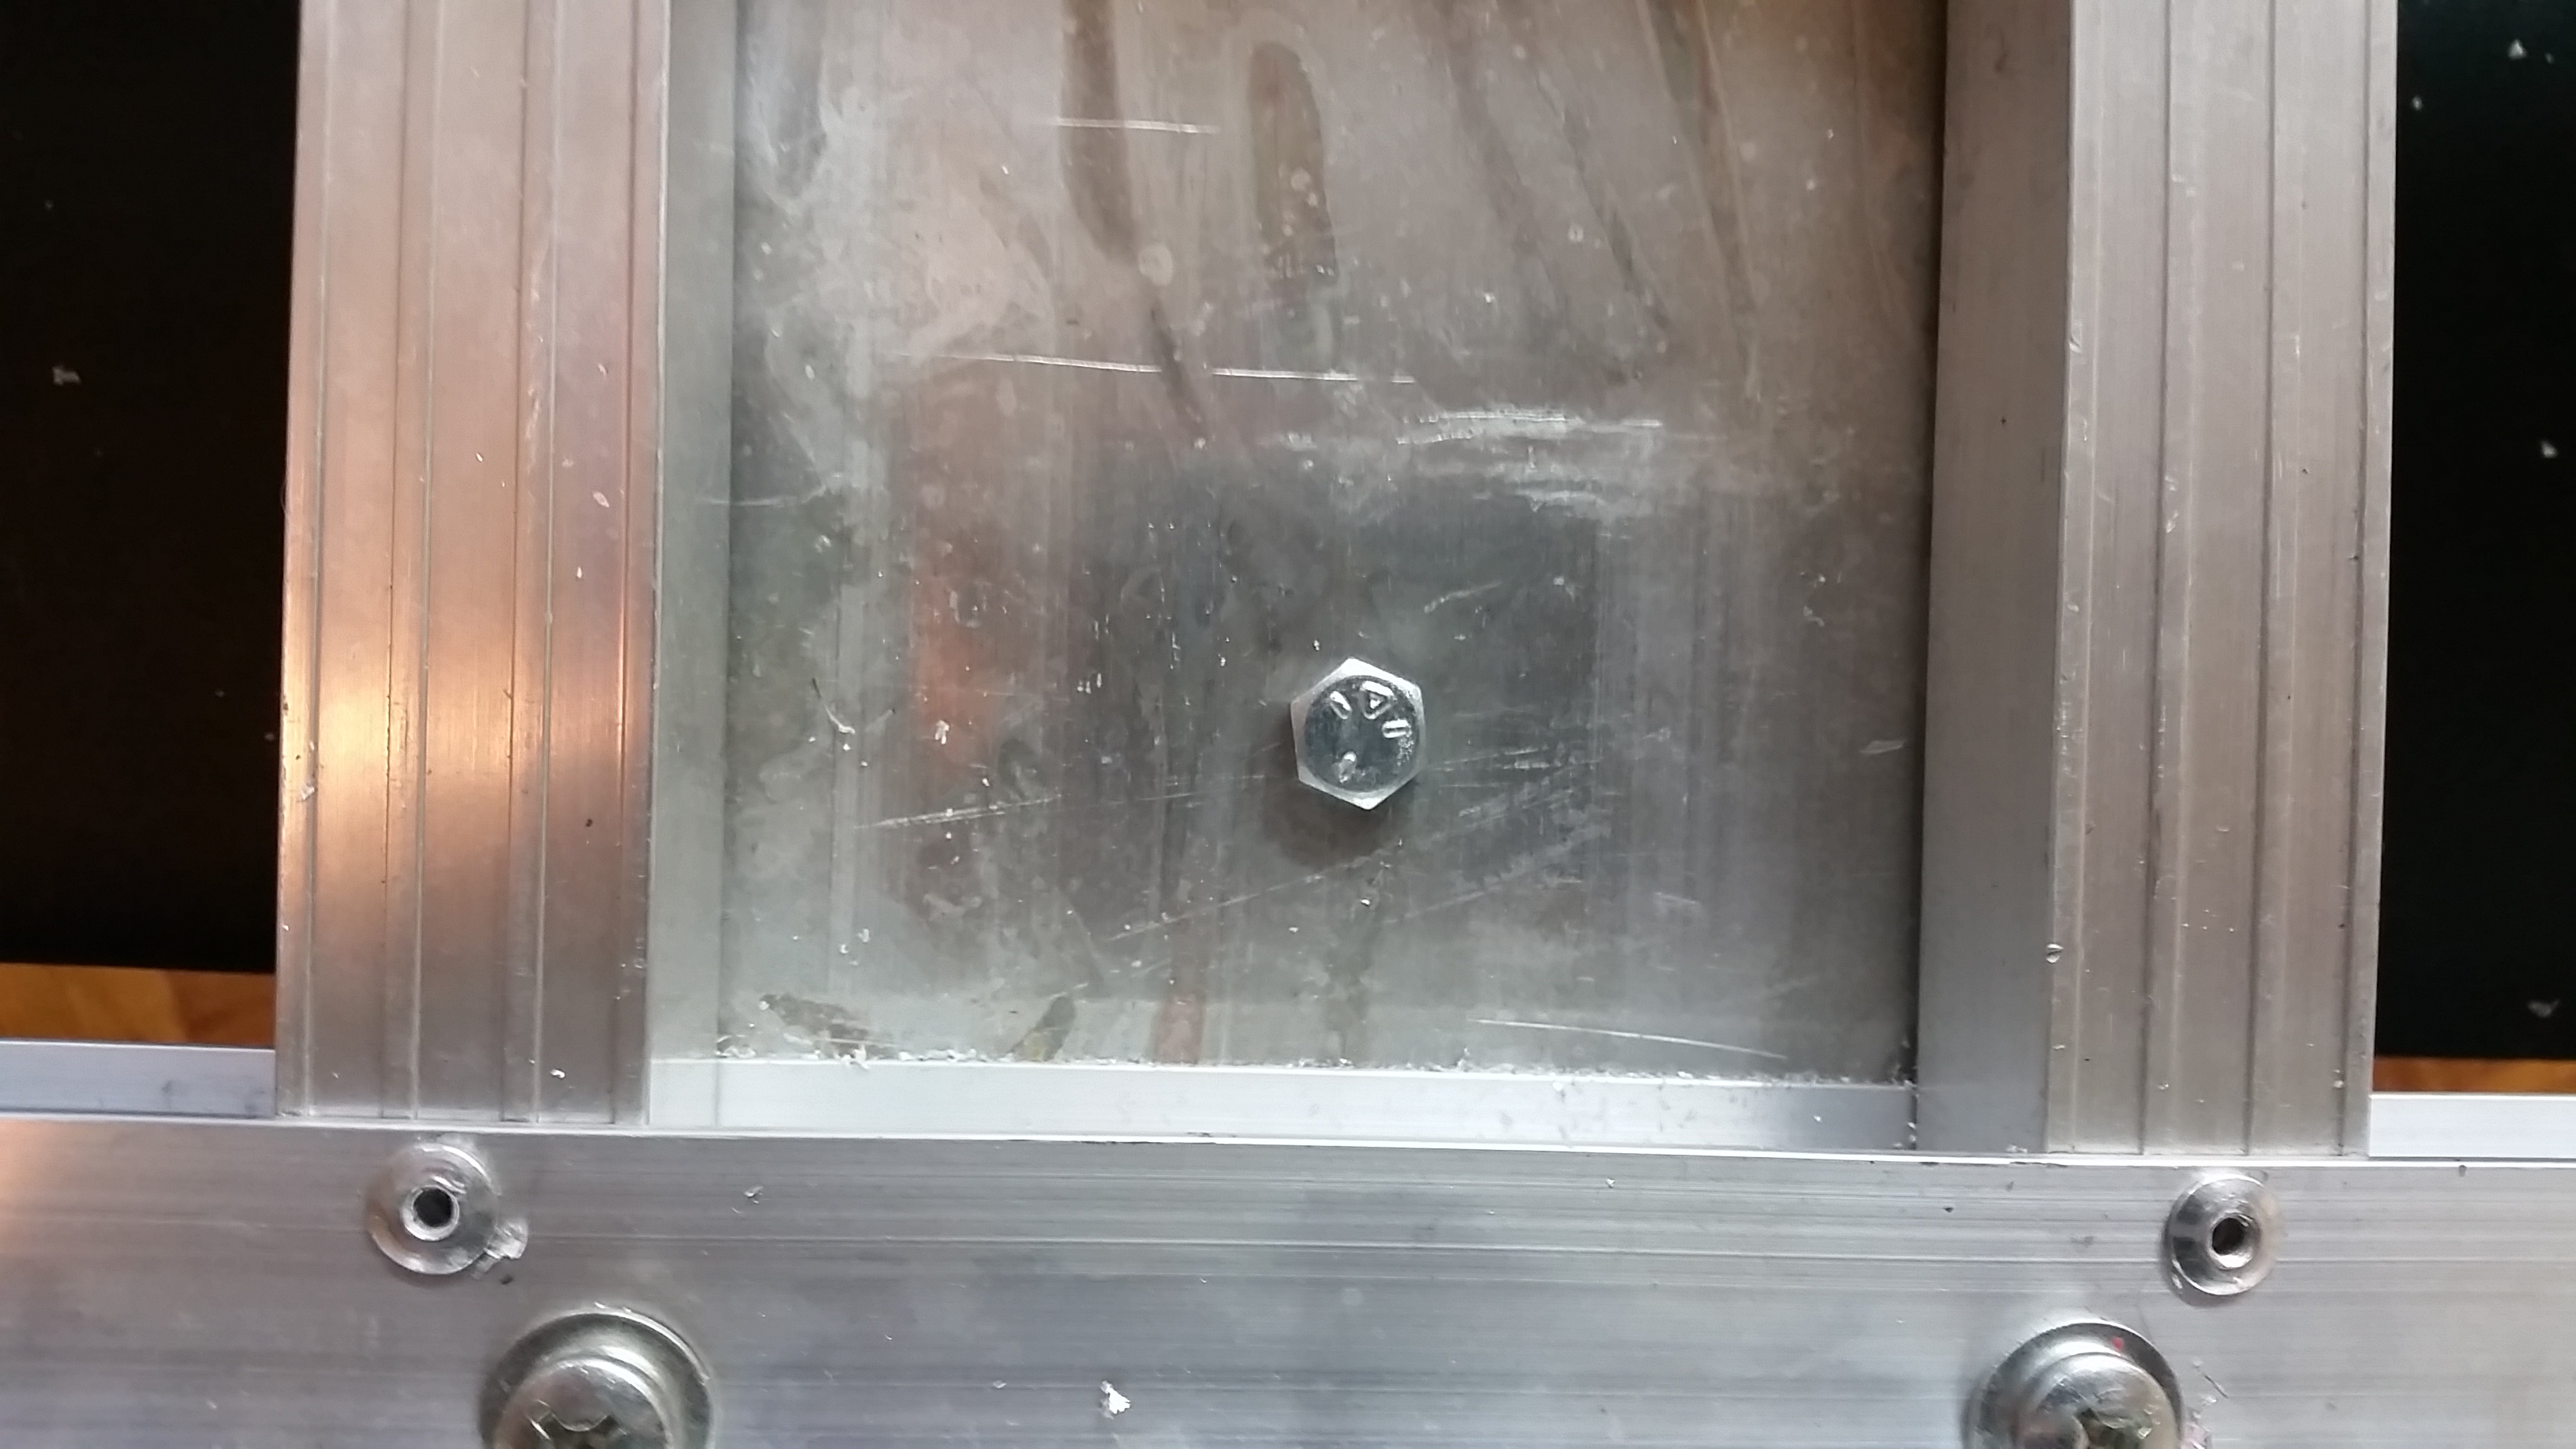 Drop the bolt into the hole. Do the same on the other side.
Next up you need to mount the axle. Put the cargo holder top side up on a table, and look through the hole, line up the bolts with the hole and affix the nuts.
The bolts handing from the top.
The axle mounted with the nuts attached. I found it easy to hold the nuts with pliers while cranking the nut above with an adjustable wrench
Get them nice and snug. The nice thing about both the cargo holder, and the accessories is they both come with locking nuts that have an anti-vibration rubber gasket in them to keep them from working loose from vibration. Did I mention that you wont need to buy a single nut or bolt for this project, literally every single part you need comes included.
Next up attach the wheels.
Attach the (included) spacer.
Slide towards the cargo holder.
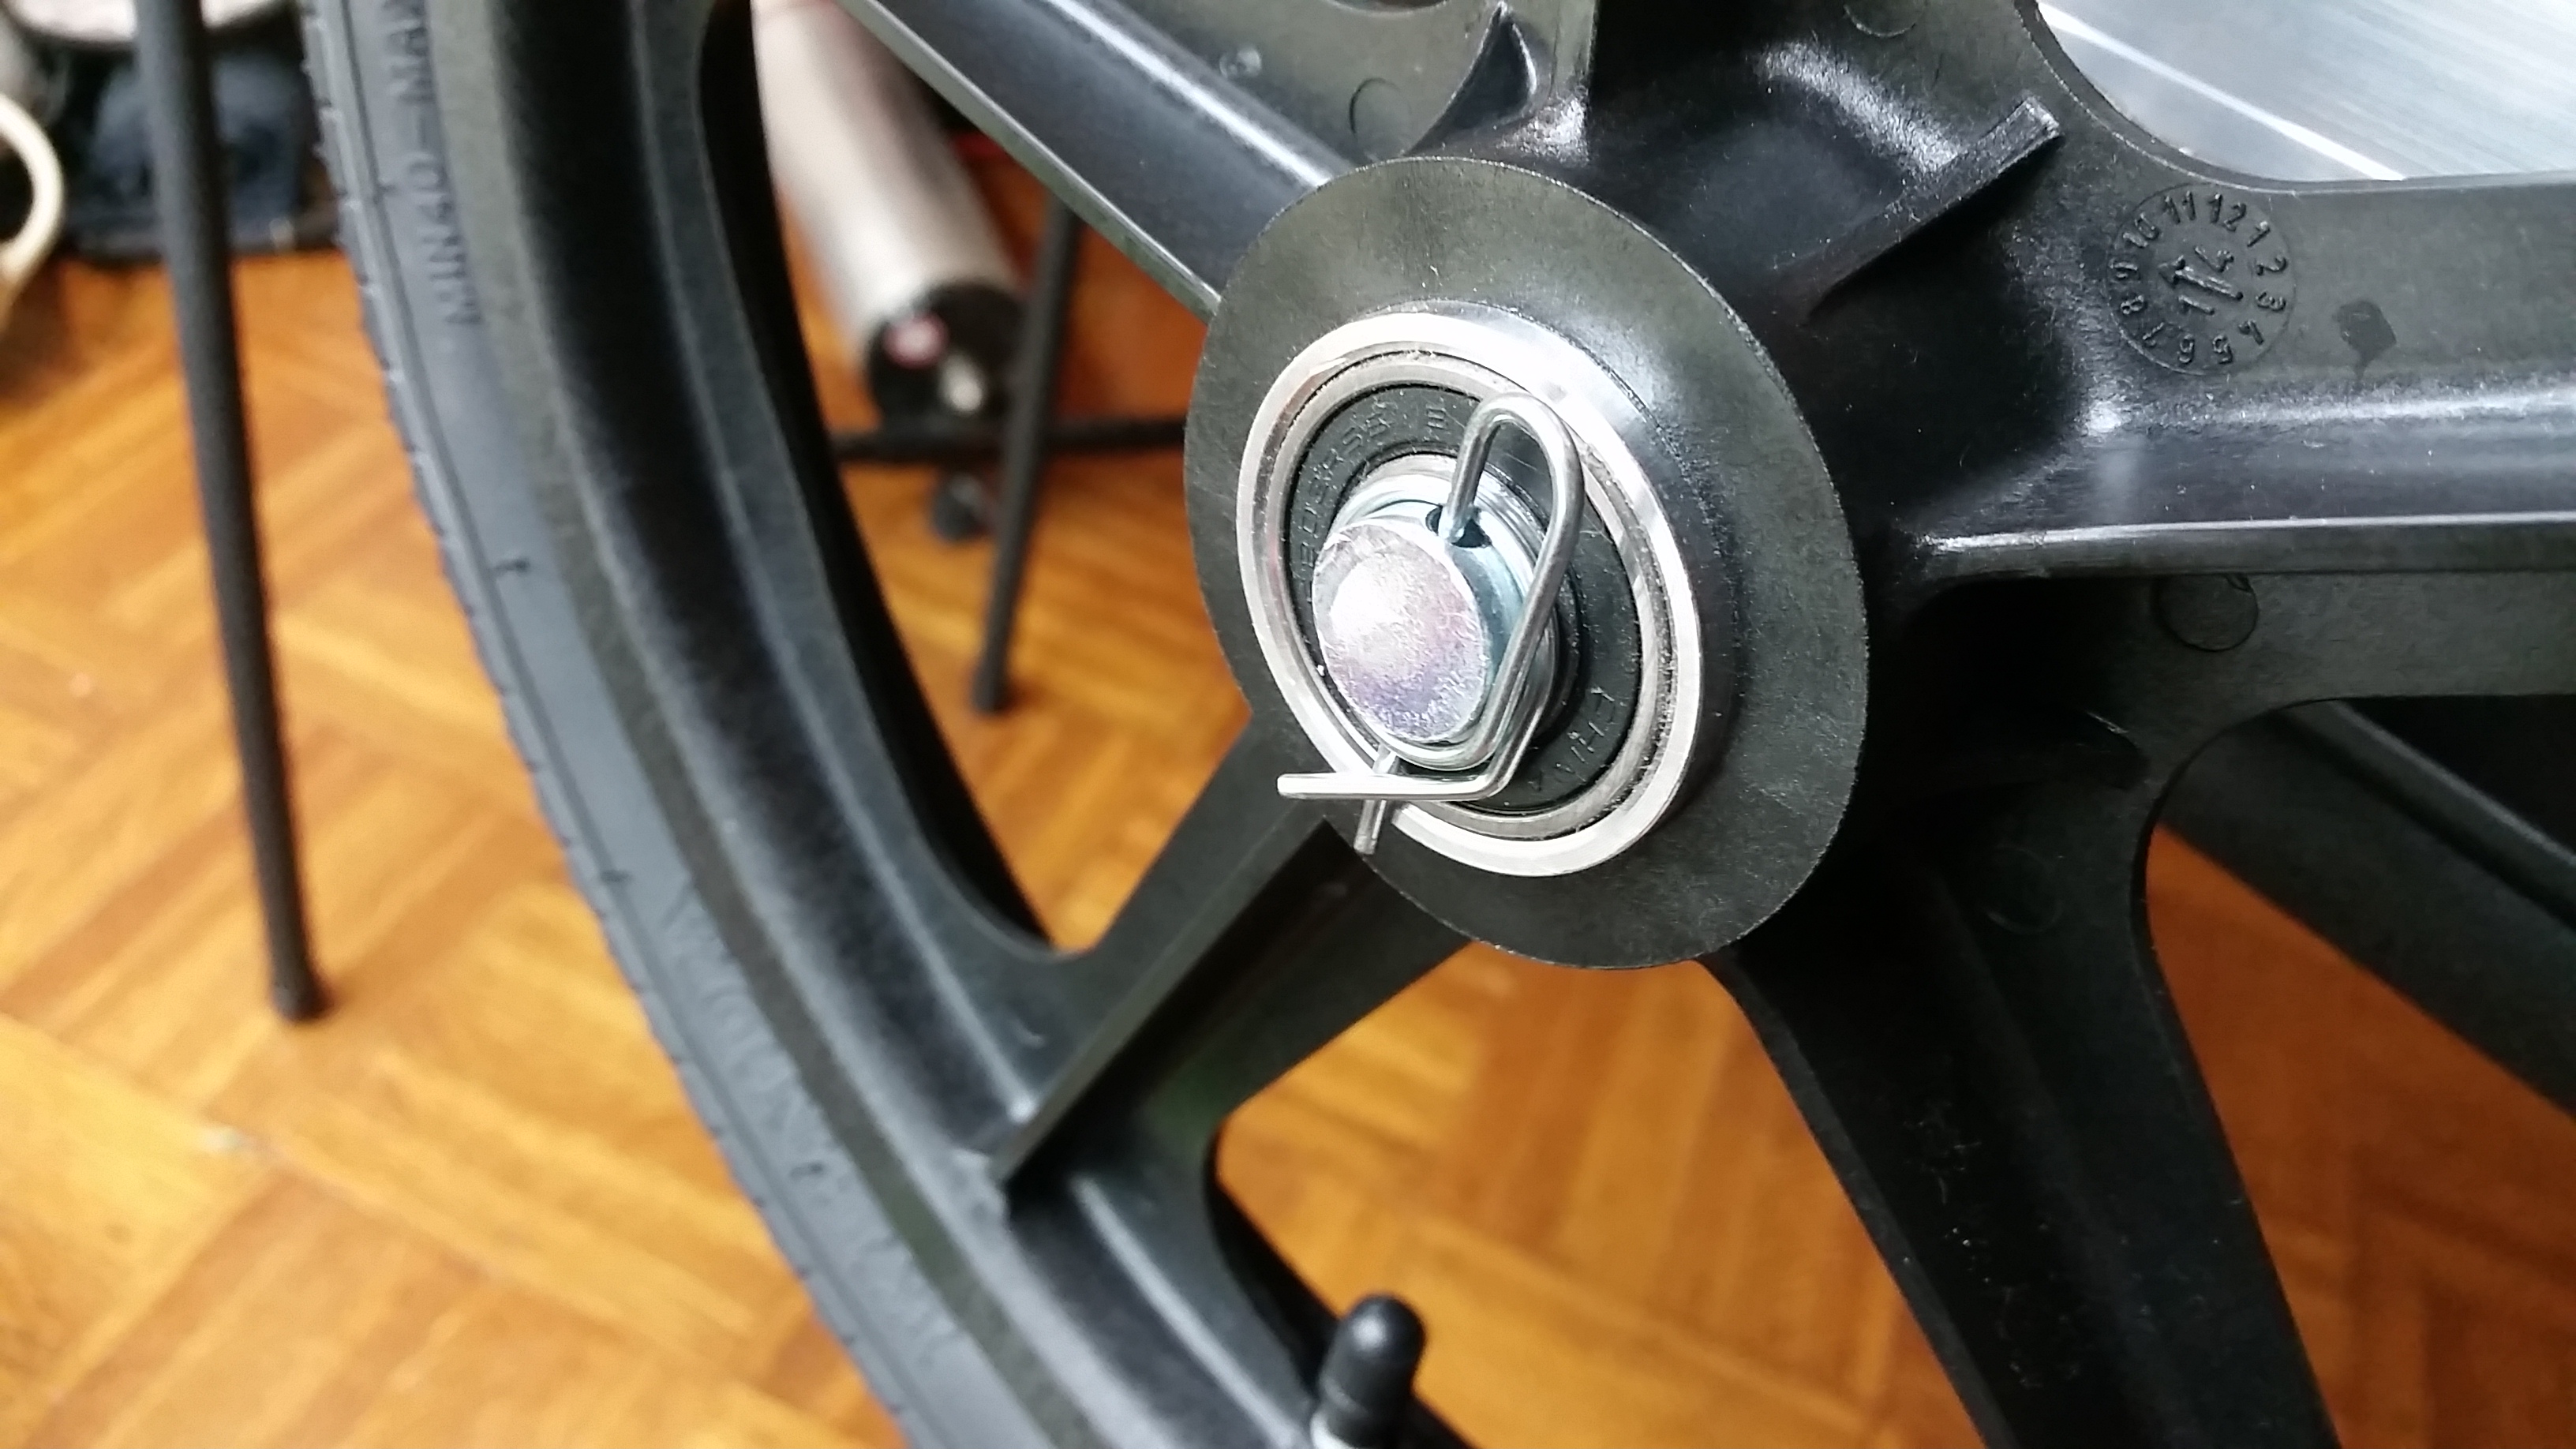 Slide on your assembled wheels (the bearings come already seated, no need to put them in!), and attach the (included) pin that keeps the wheels from sliding off.
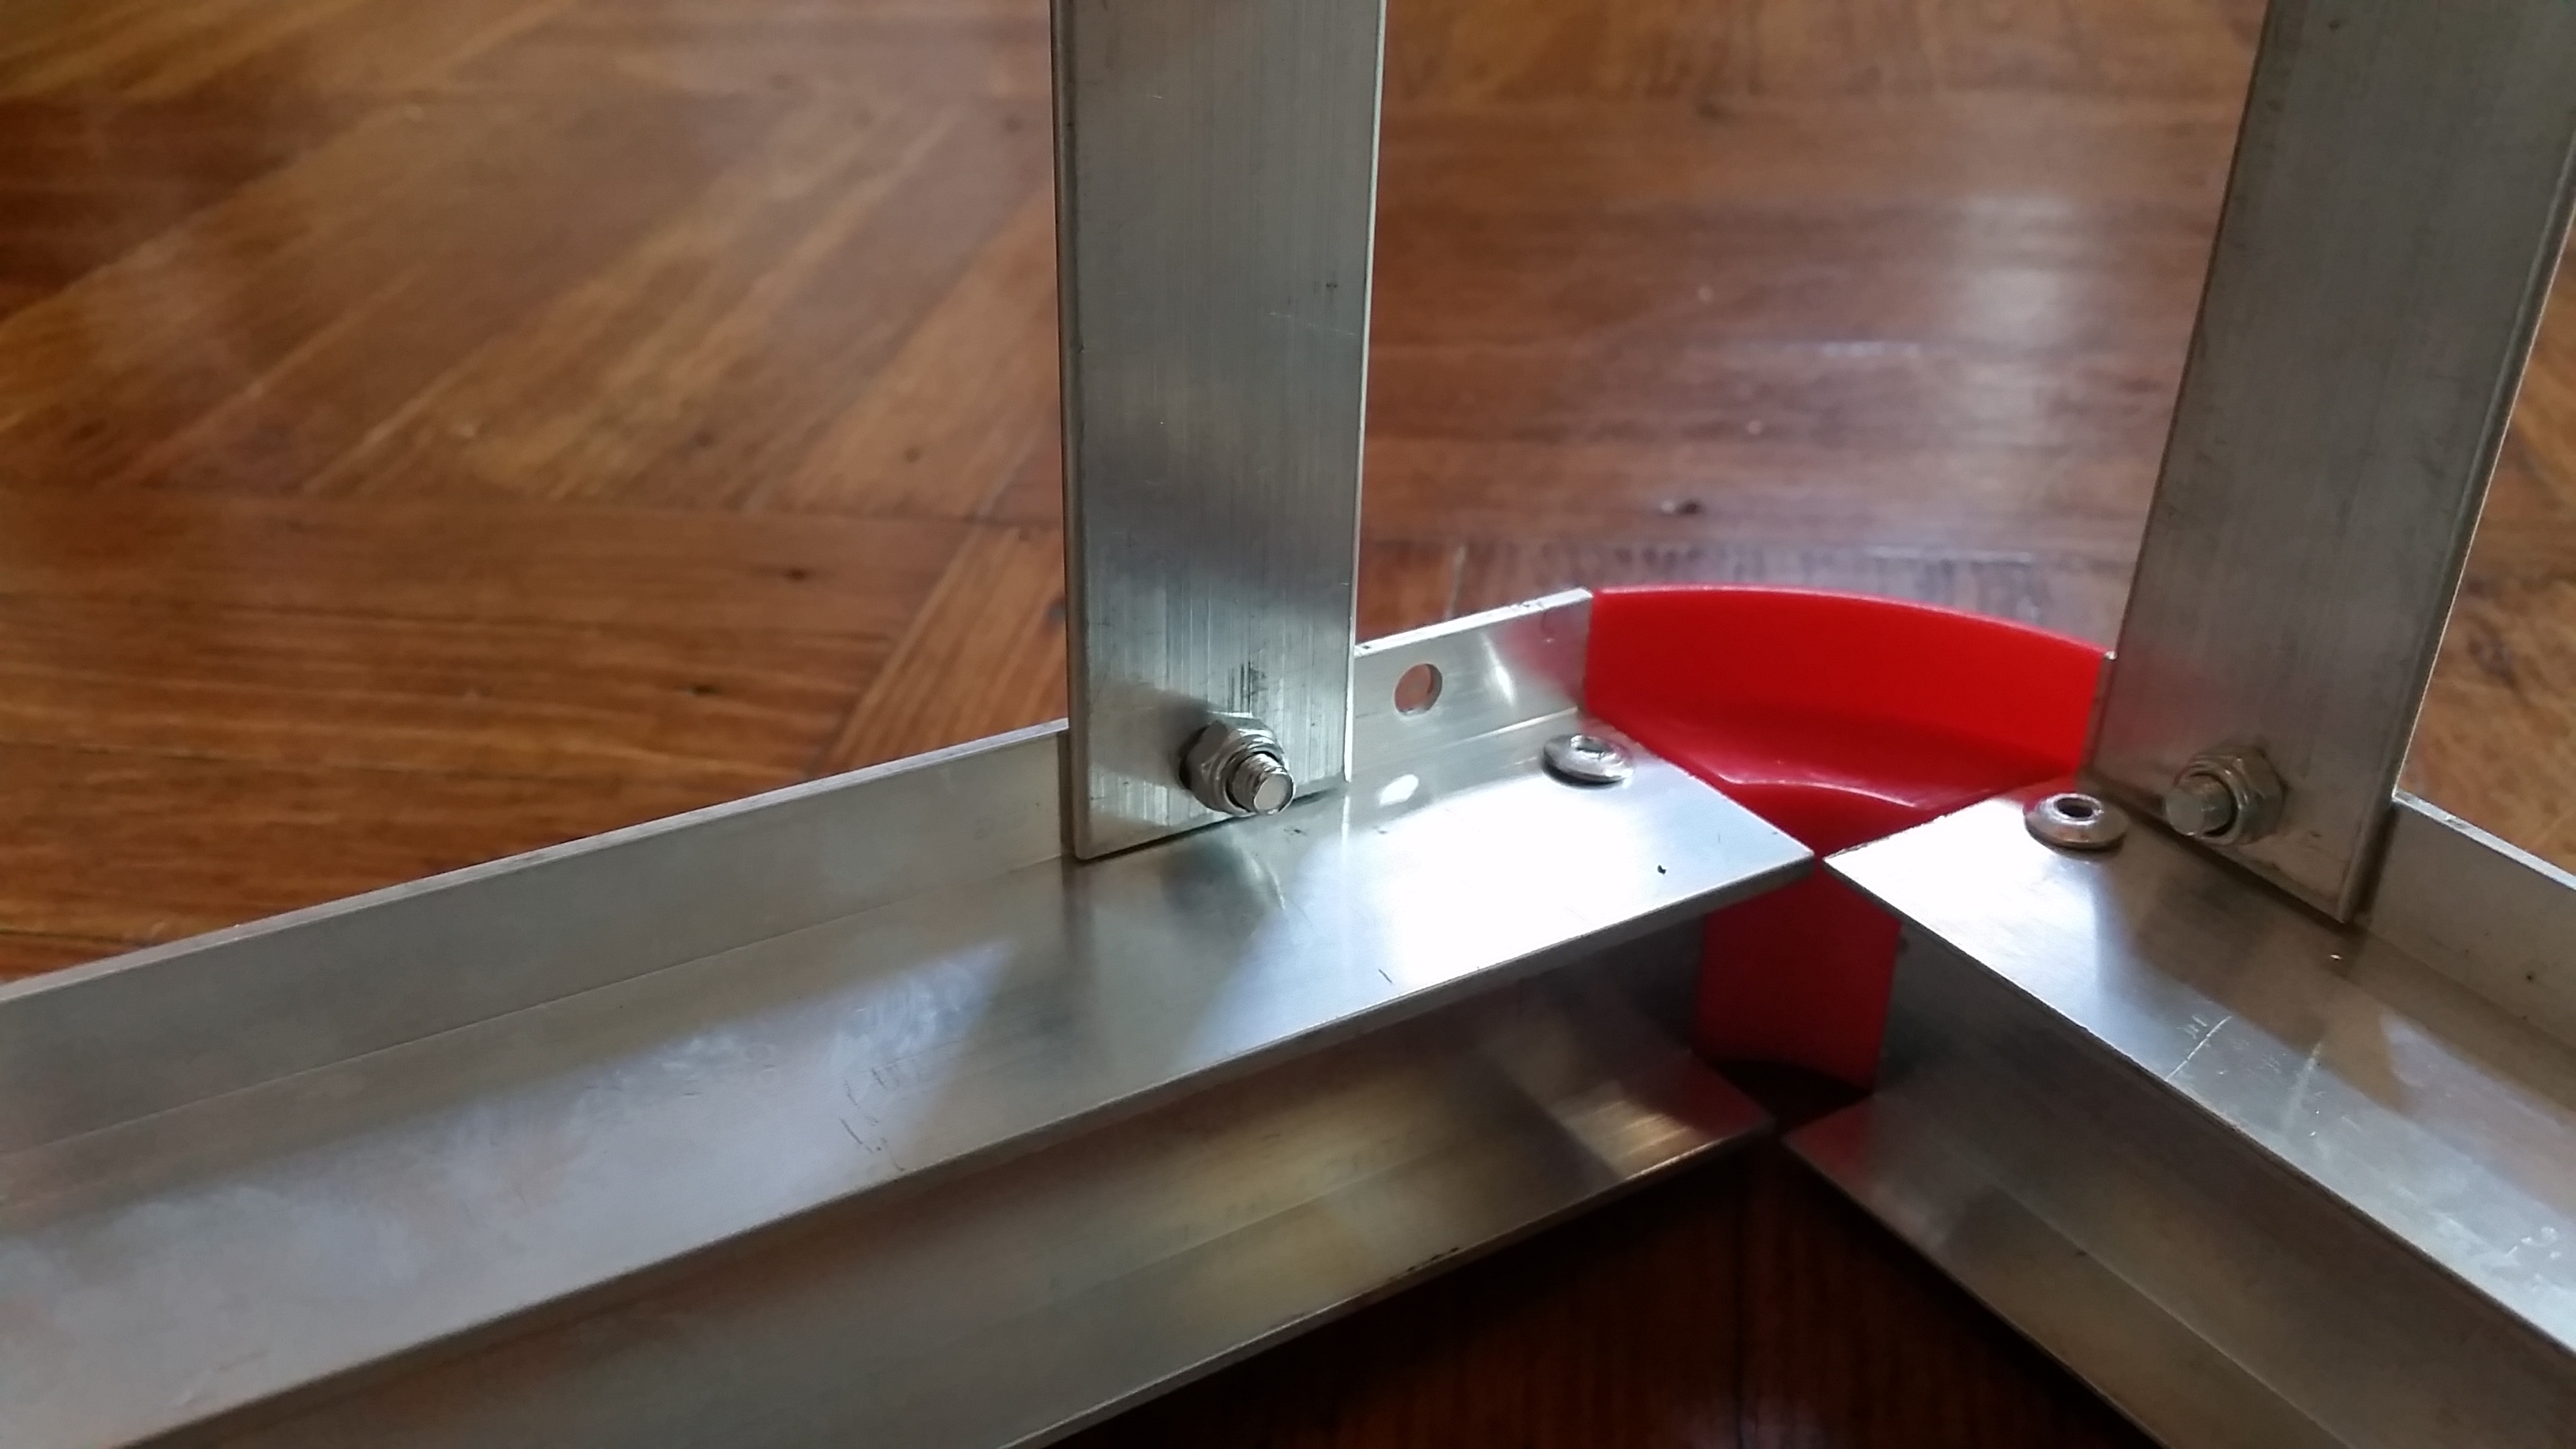
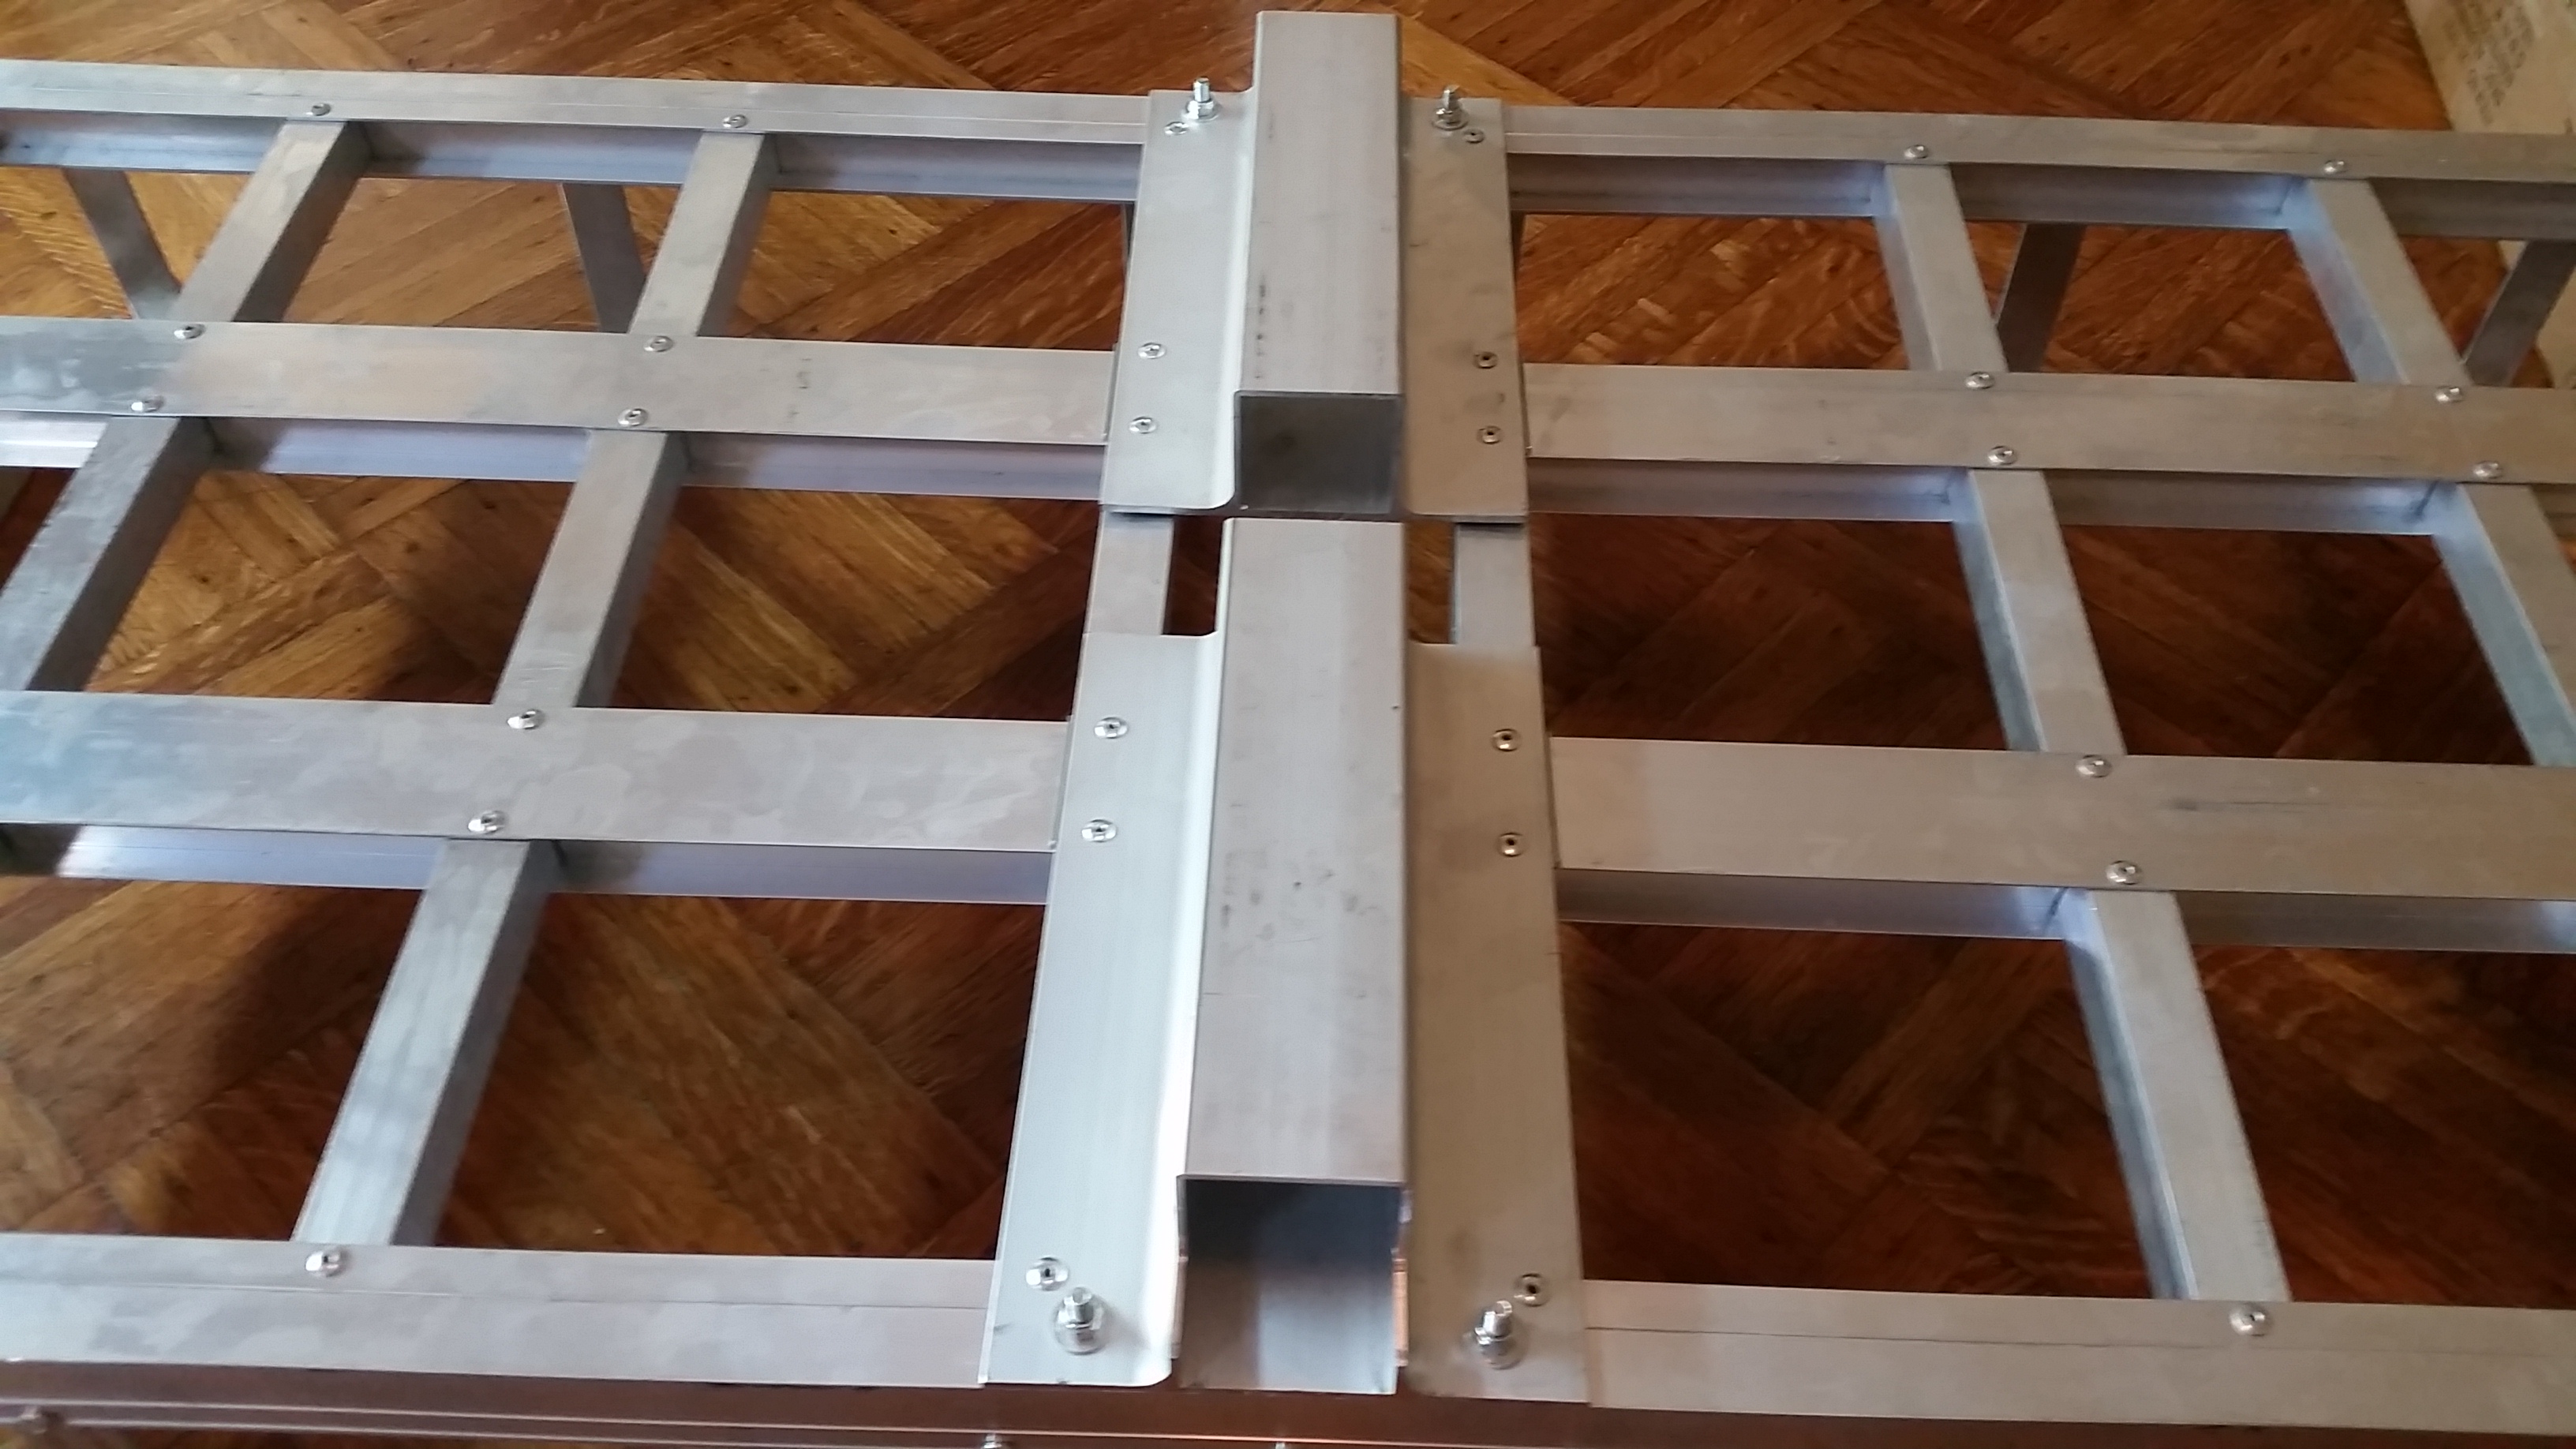
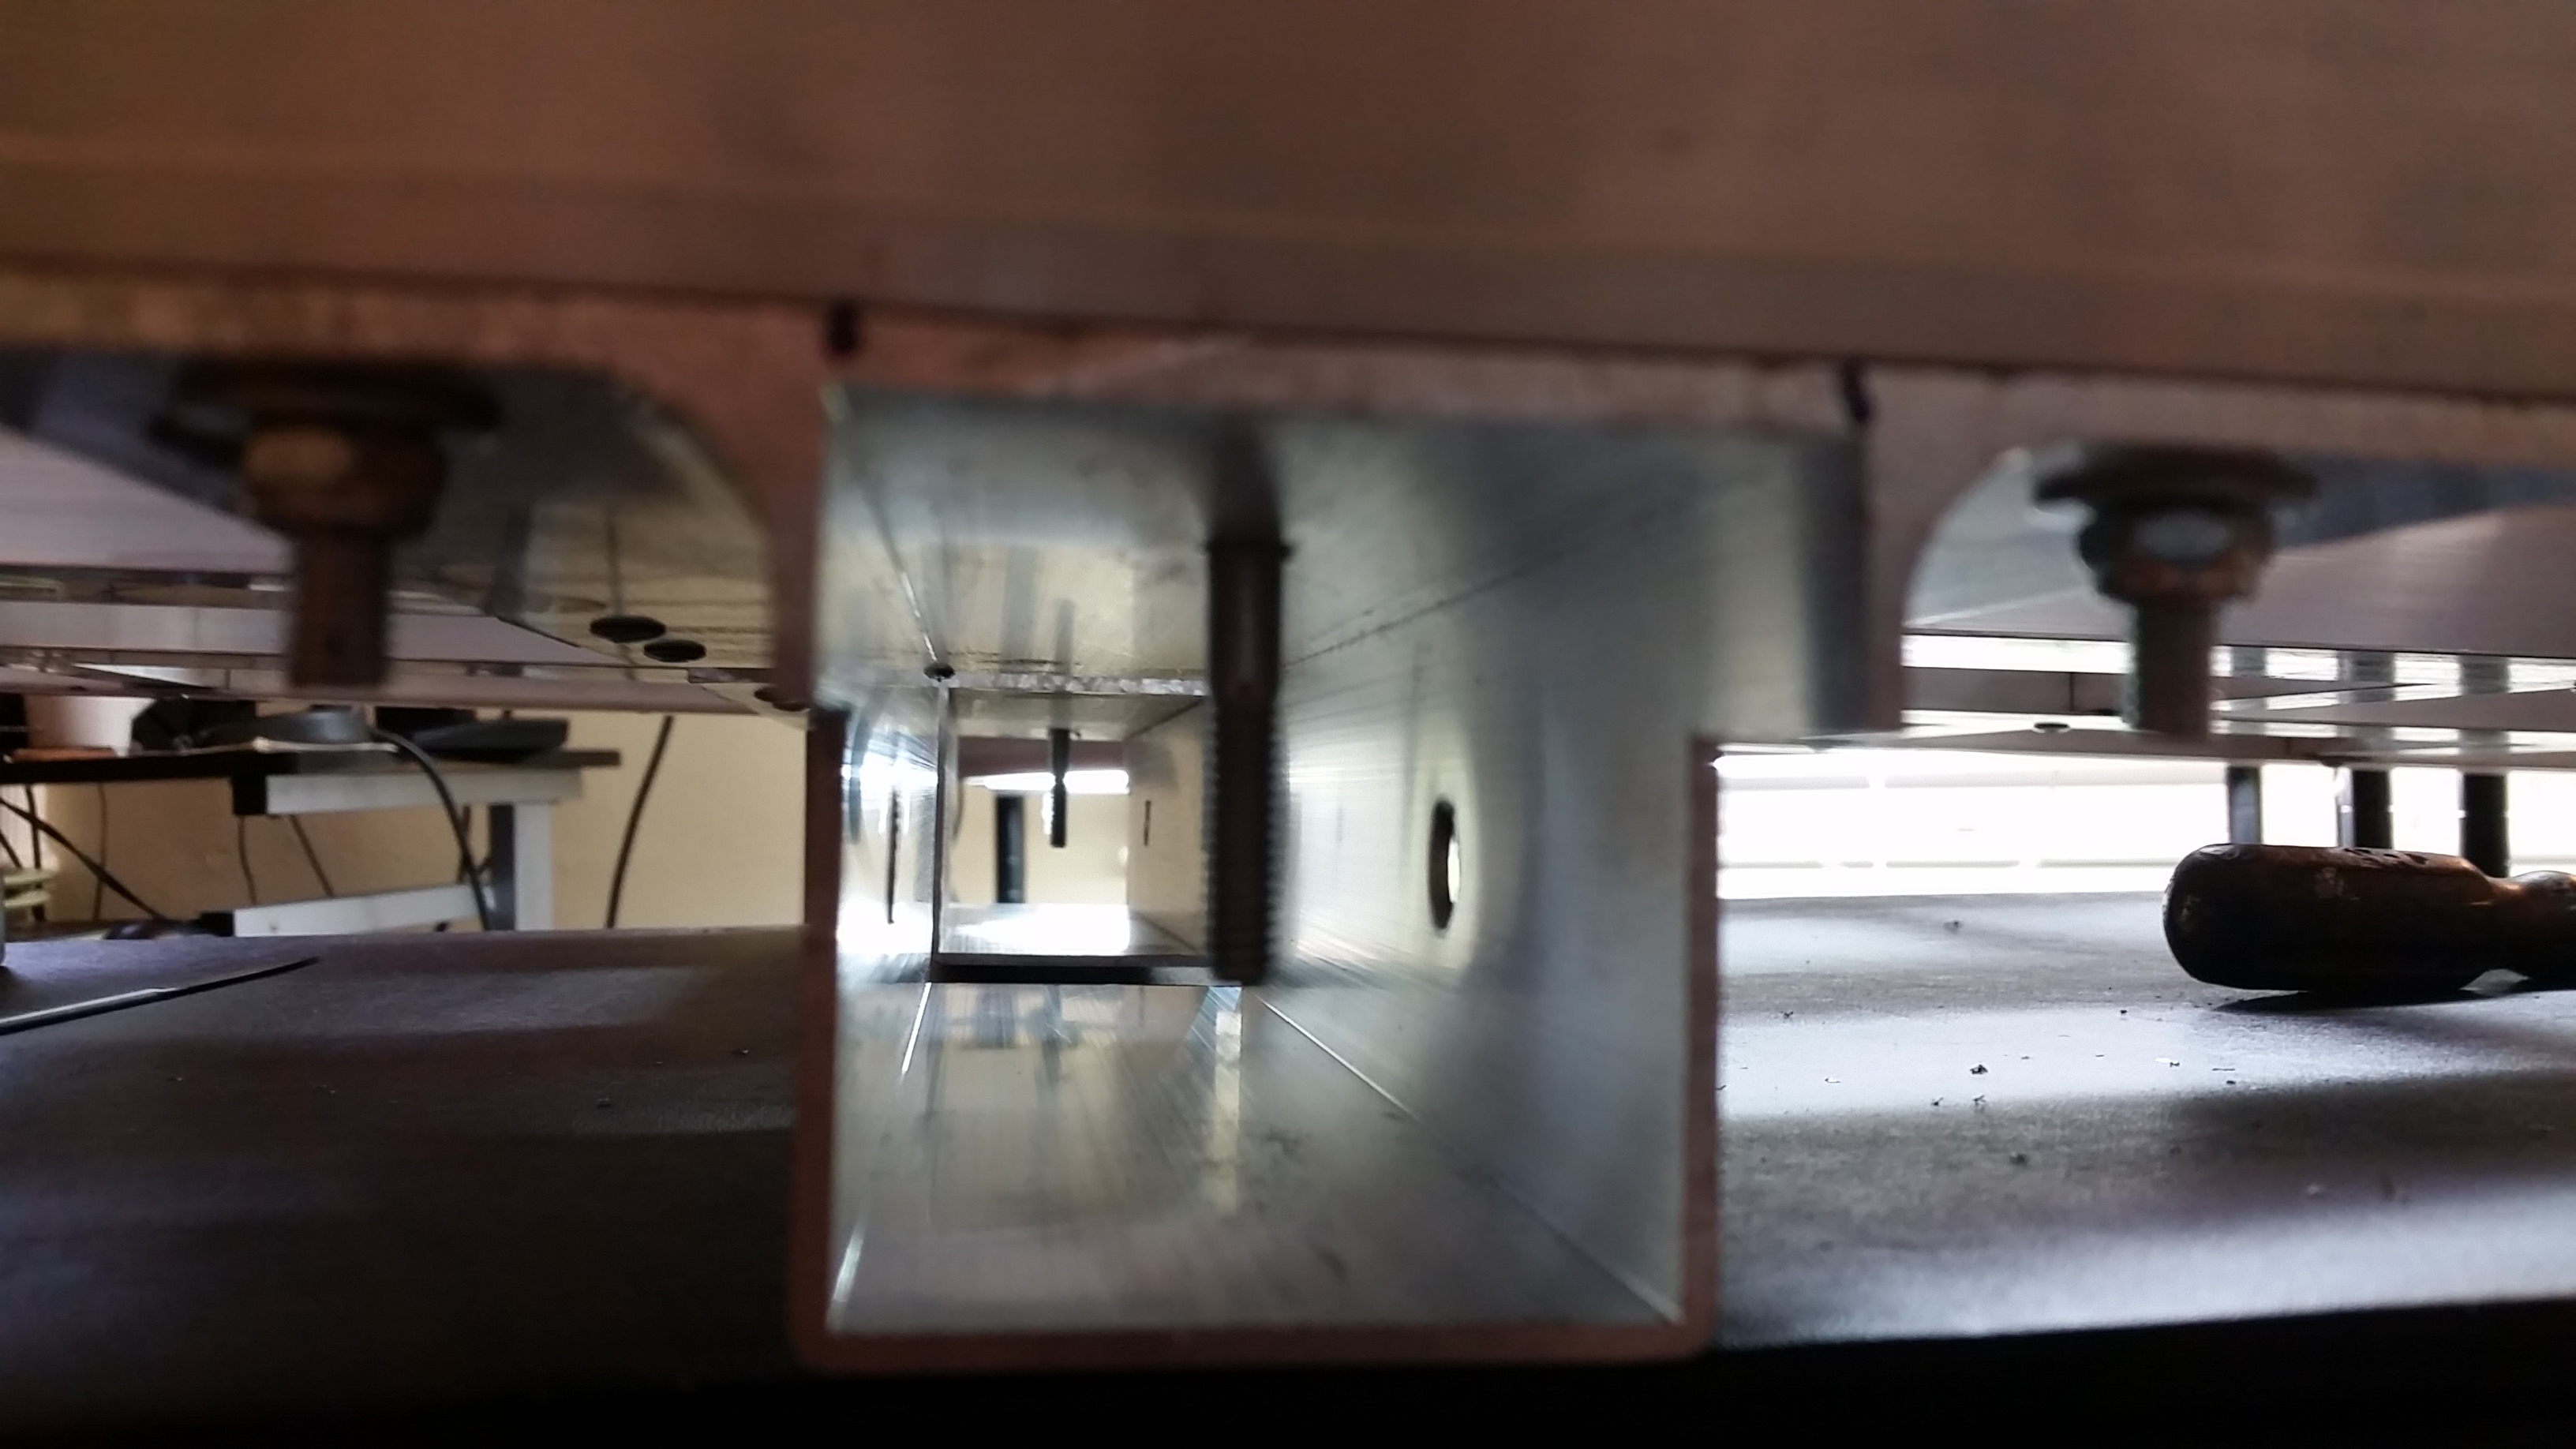
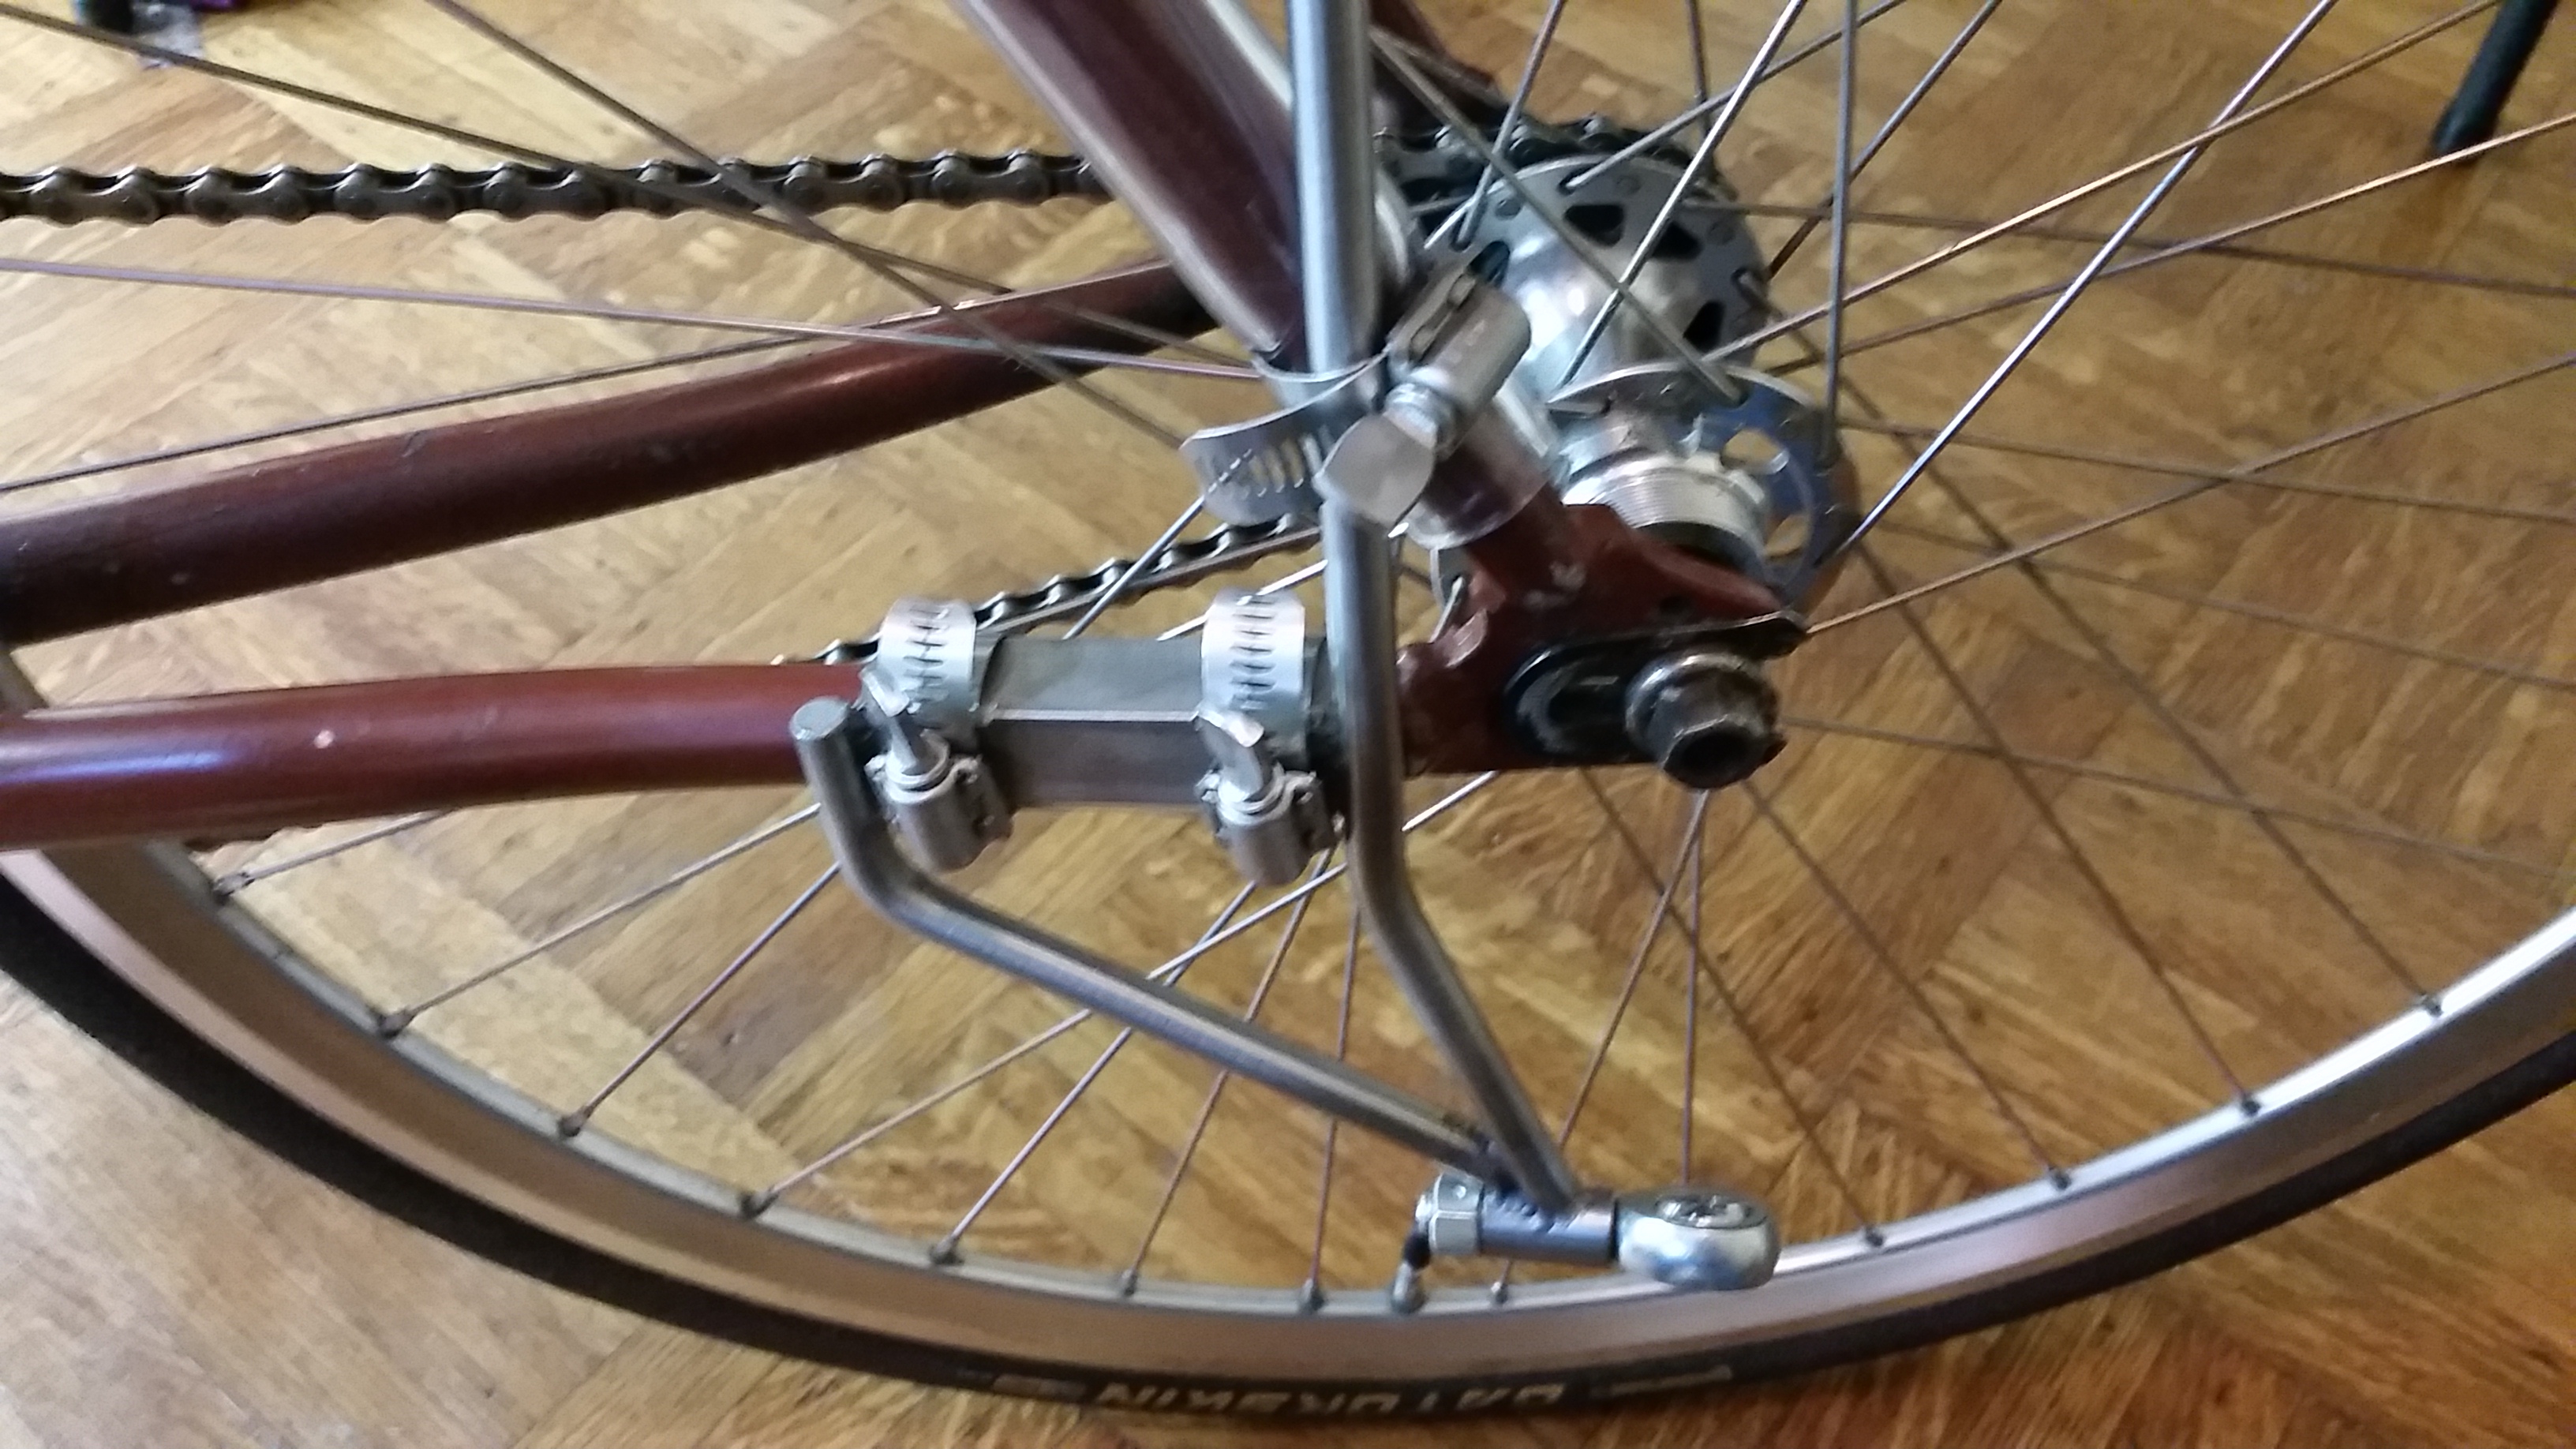
Now the tricky part. The Bikes at Work trailer hitch ALMOST fits perfectly on this rig, but you will need to make some minor adjustments. Specifically you will need to cut four small holes into the end of the cargo holder that will hold the hitch (the end that doesn’t have the reflectors).
I used a dremel with a cutting disk, and while it was loud (where ear plugs) and dusty (use a breathing mask and safety goggles), it only took about 10 minutes and as aluminum is soft as butter was easy too.
The hitch comes with two mounting bars, but the included u-bolts to hold the hitch are not long enough to mount them without the cut outs. The way the cargo trailer is built cutting larger cut outs would have potentially weakened it, which I didn’t want at this important connection.
You can see the finished product below.
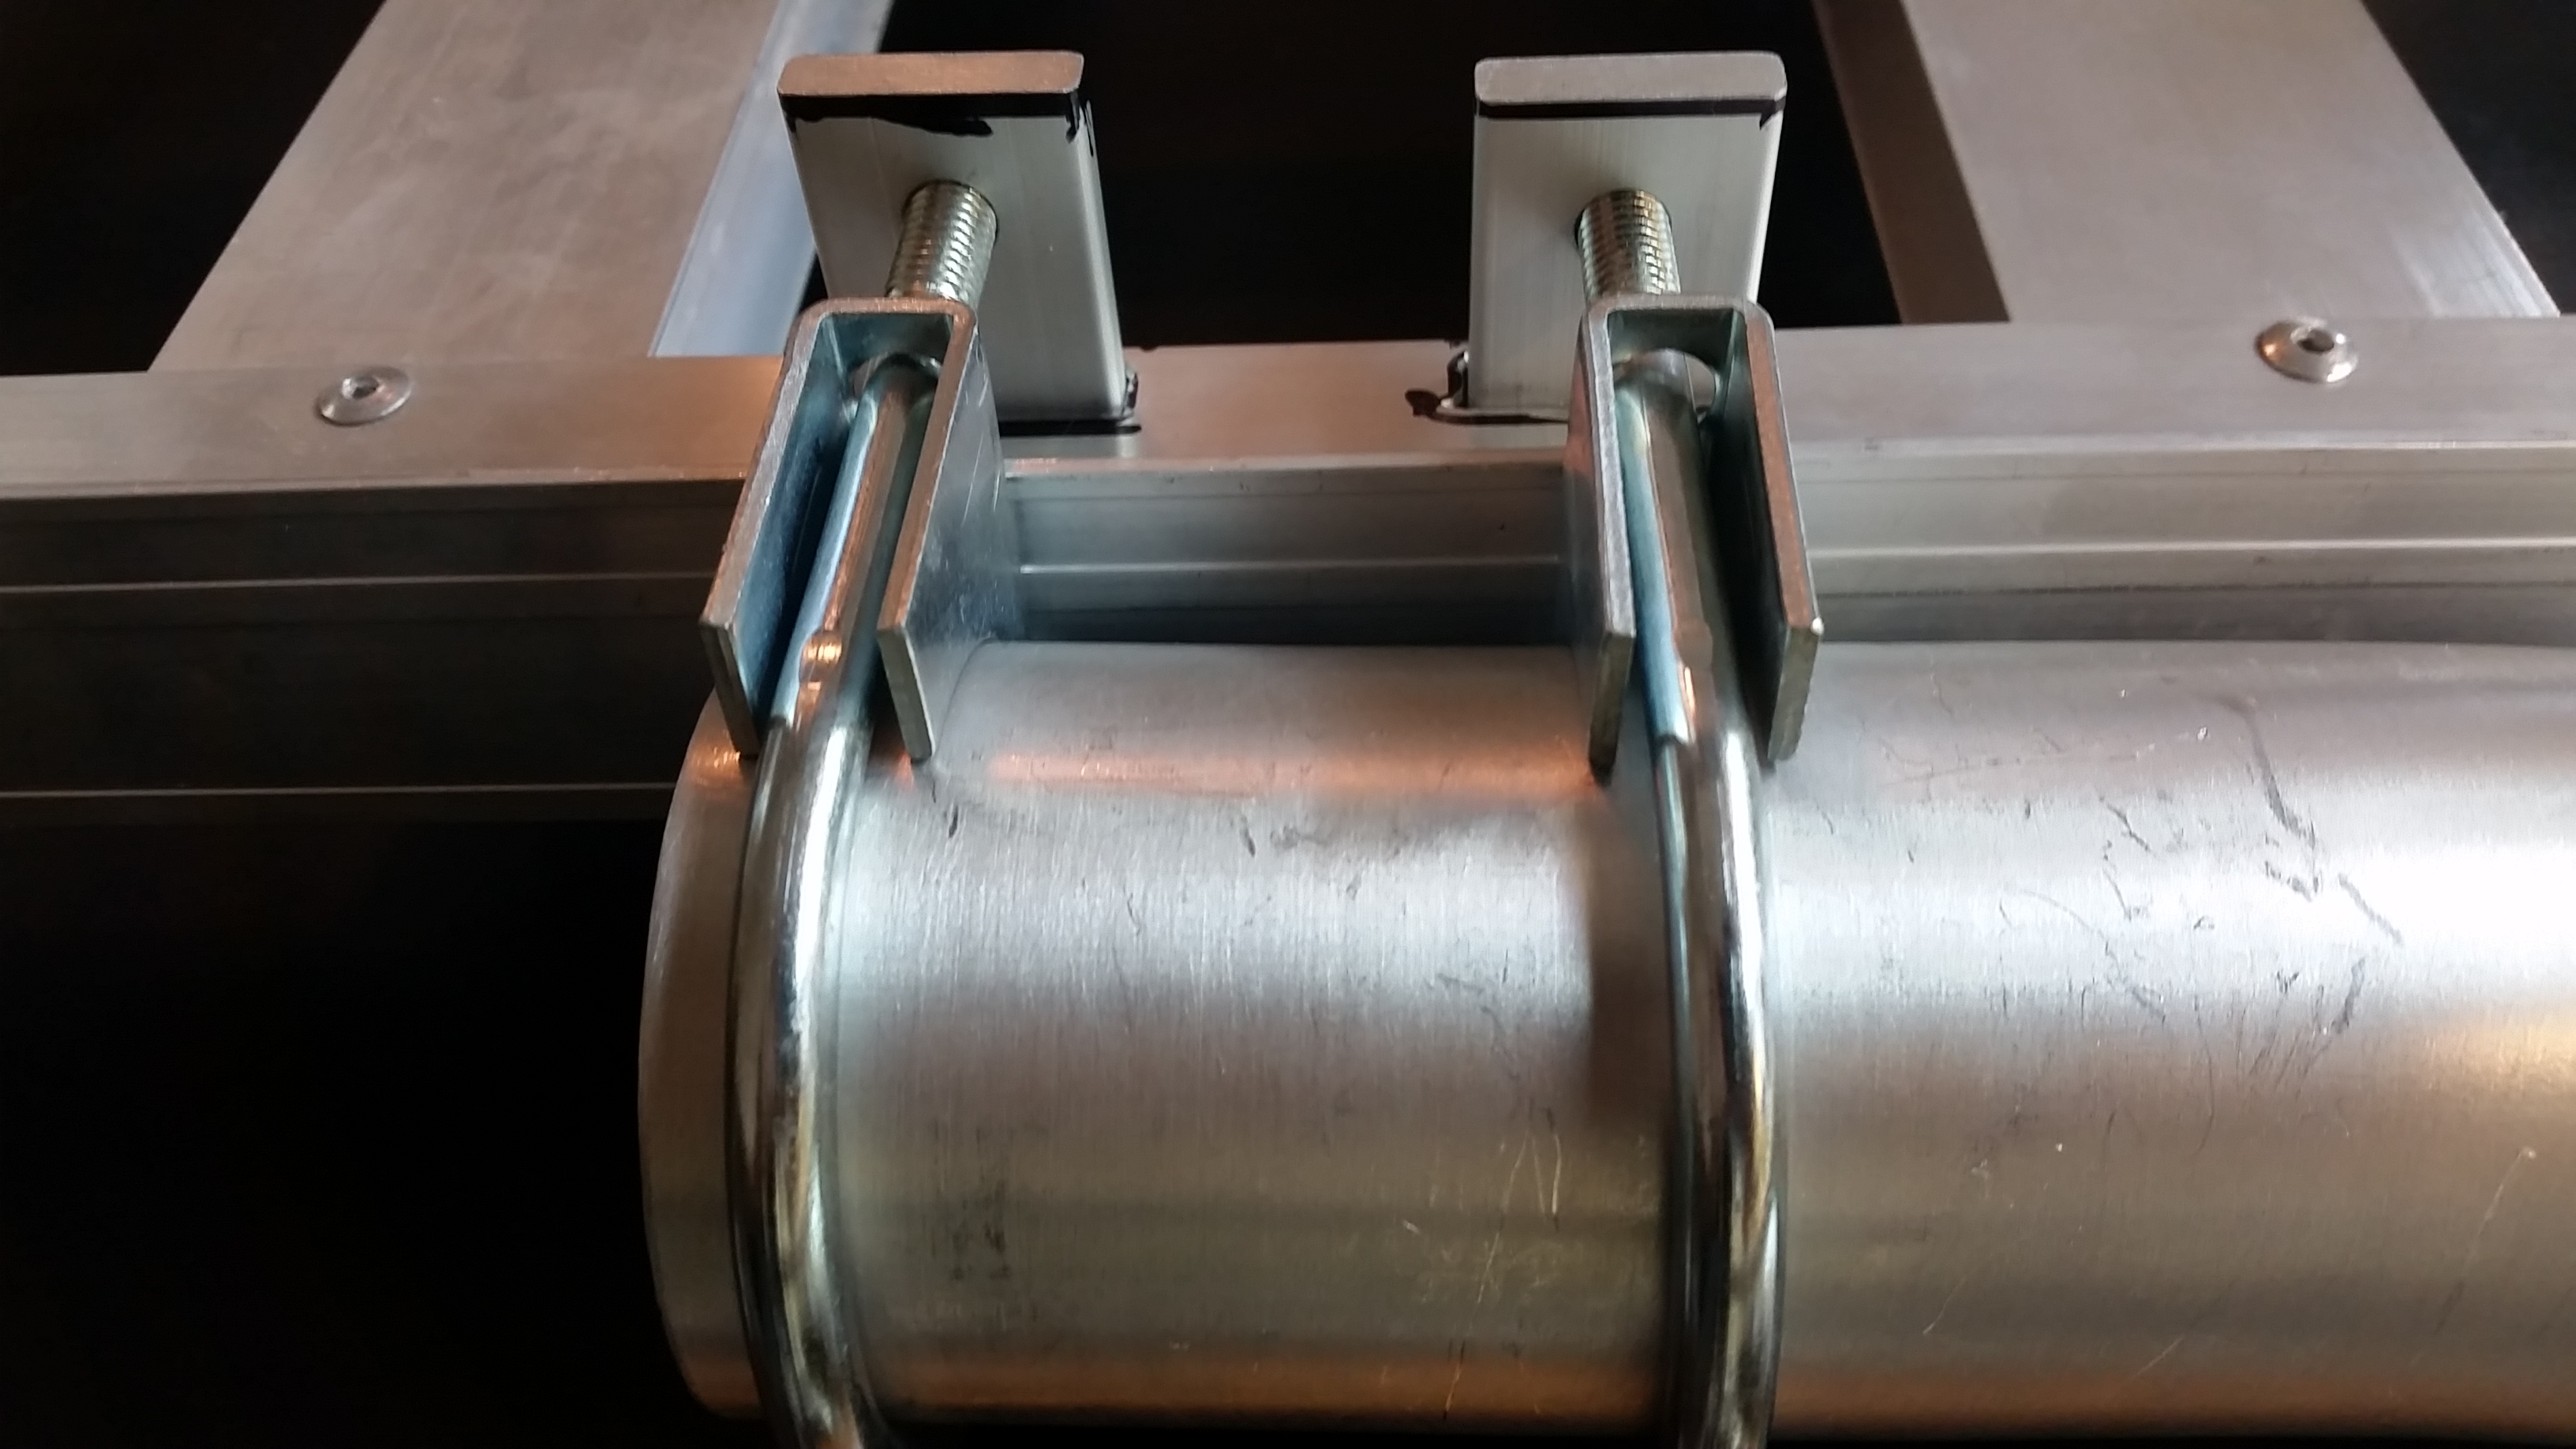
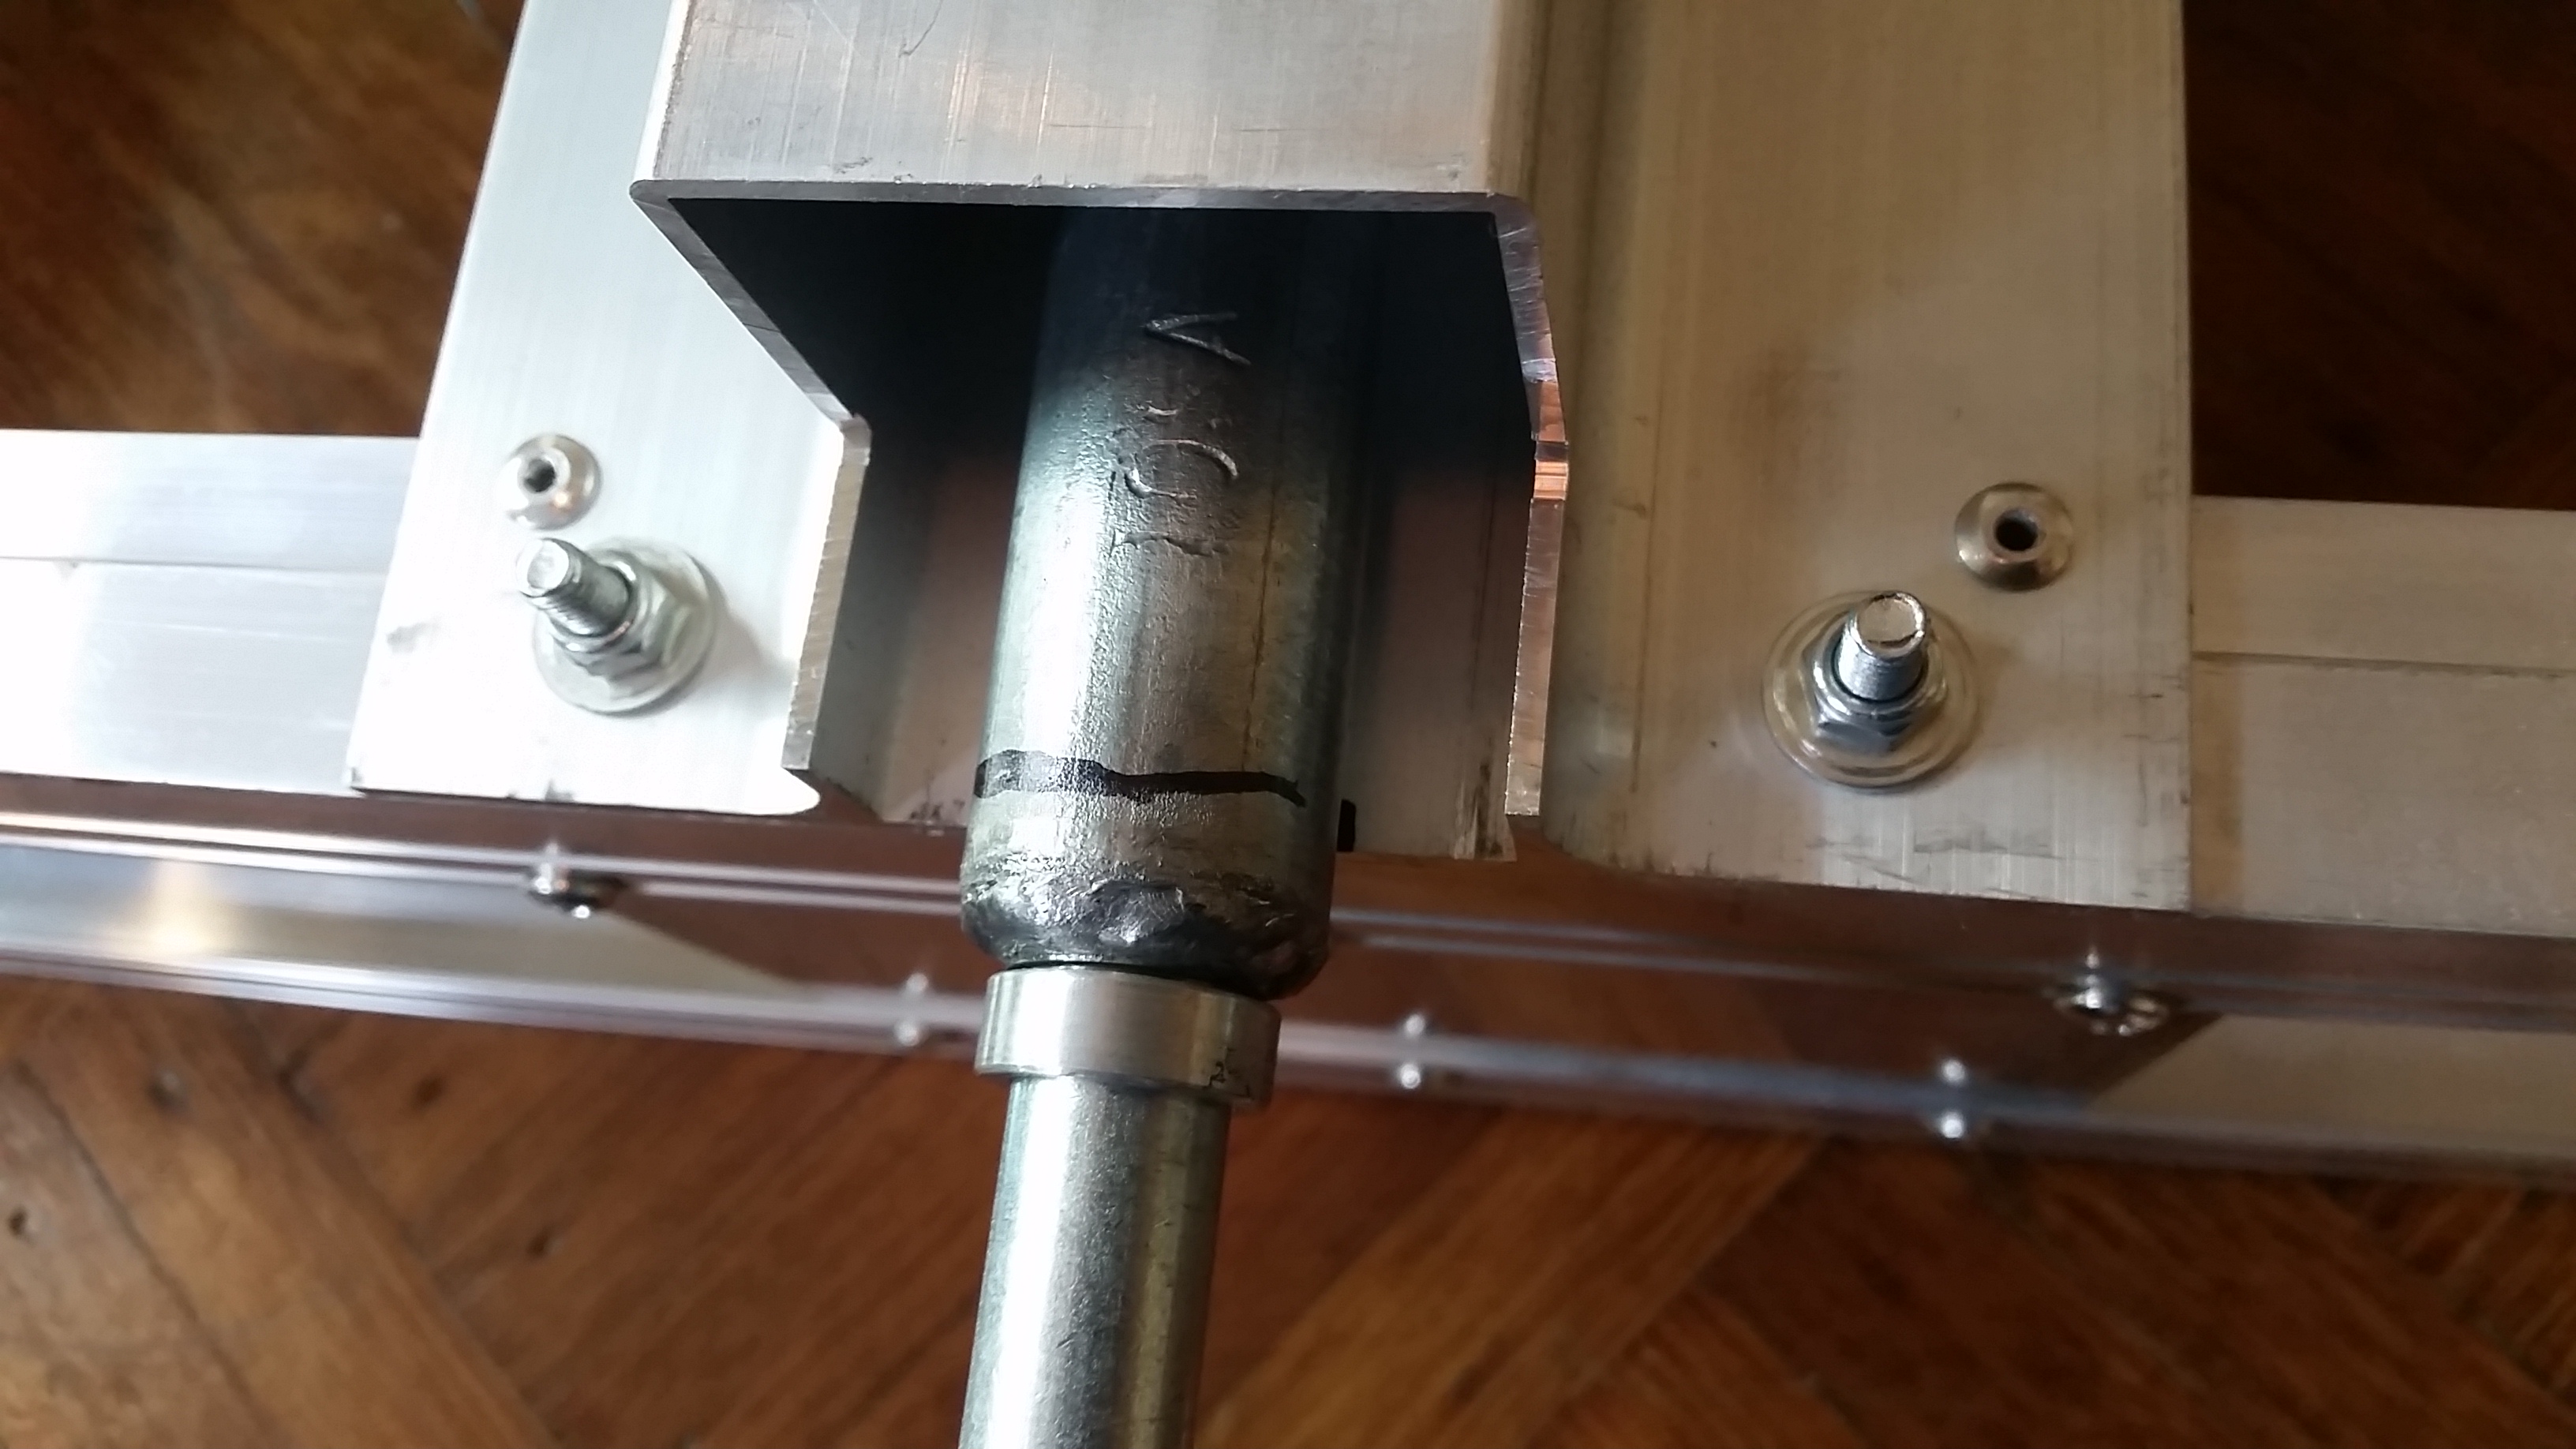
This is what it looks like from the front, you can see the two mounting bars are “inside” the beam. They are actually mounted in a bit of overhang. The square aluminum bar they are mounted into has a flange that sticks out for extra rigidity and I didn’t want to simply make cut outs that went all the way through the flange as I was worried it would buckle, or make a weak point, so I cut the slots as close to the main bar as I could without piercing it. This way they set right up against the main bar, and leave as much as the flange intact as possible.
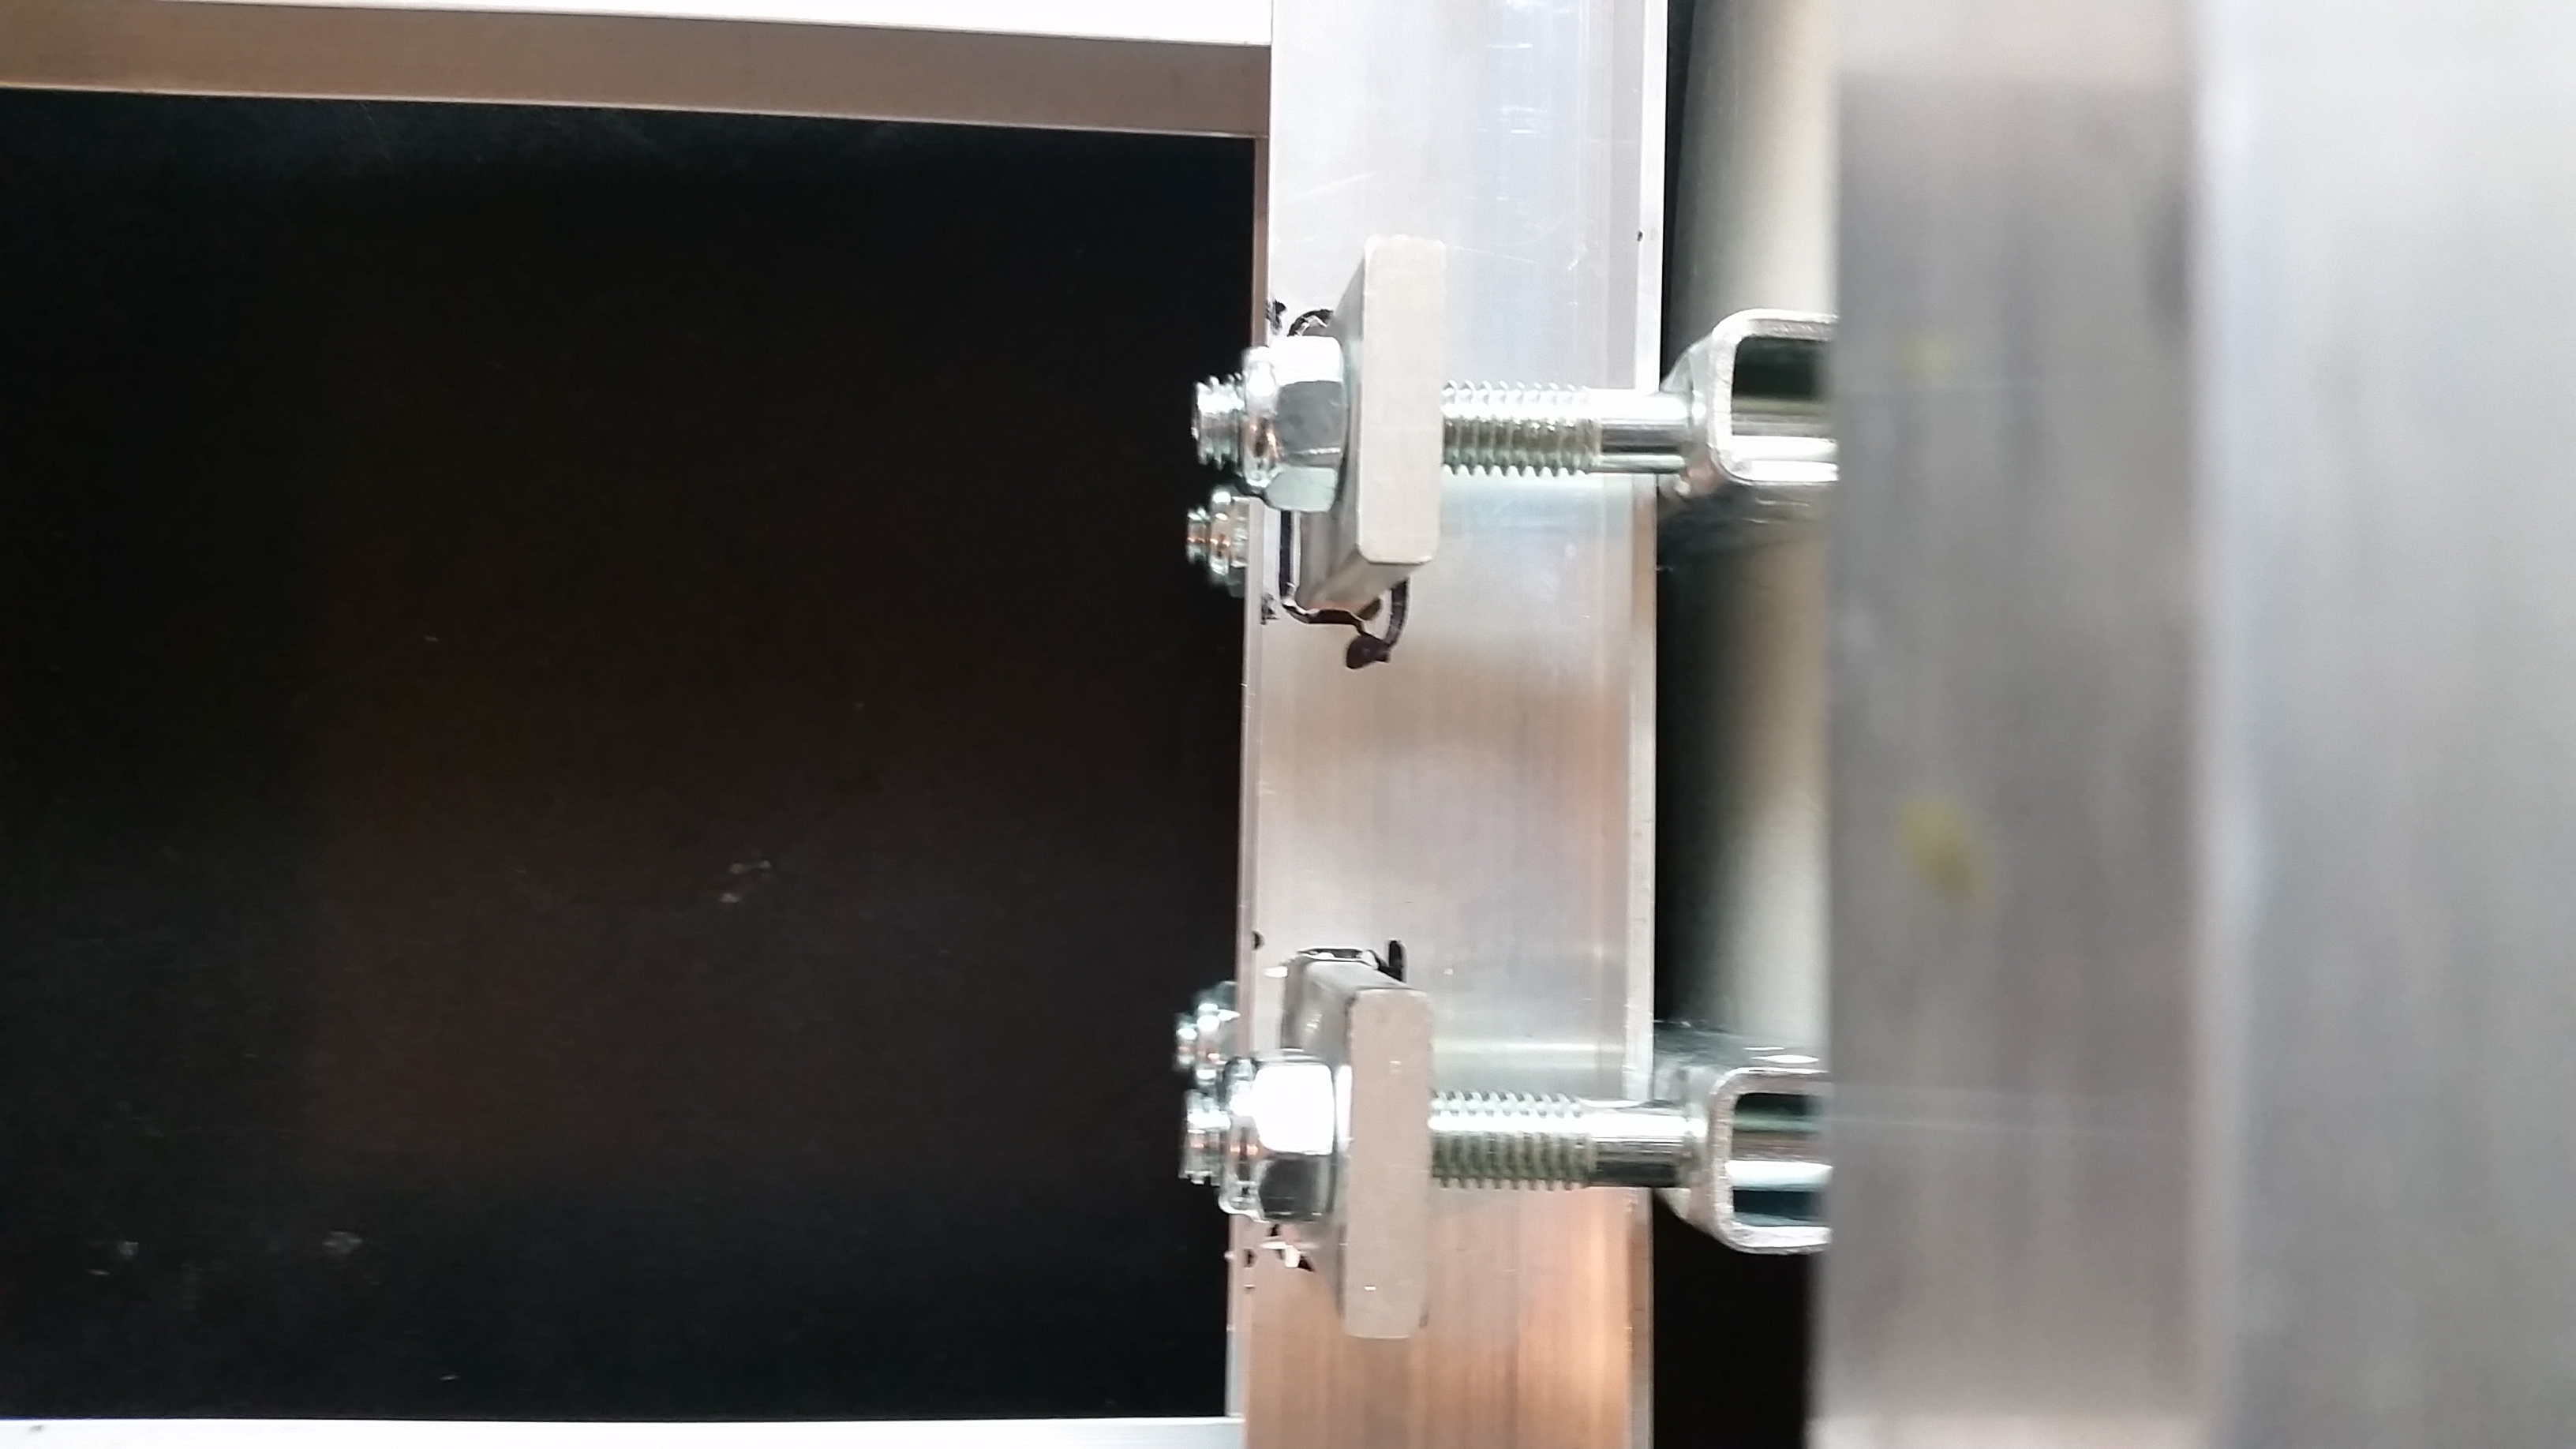
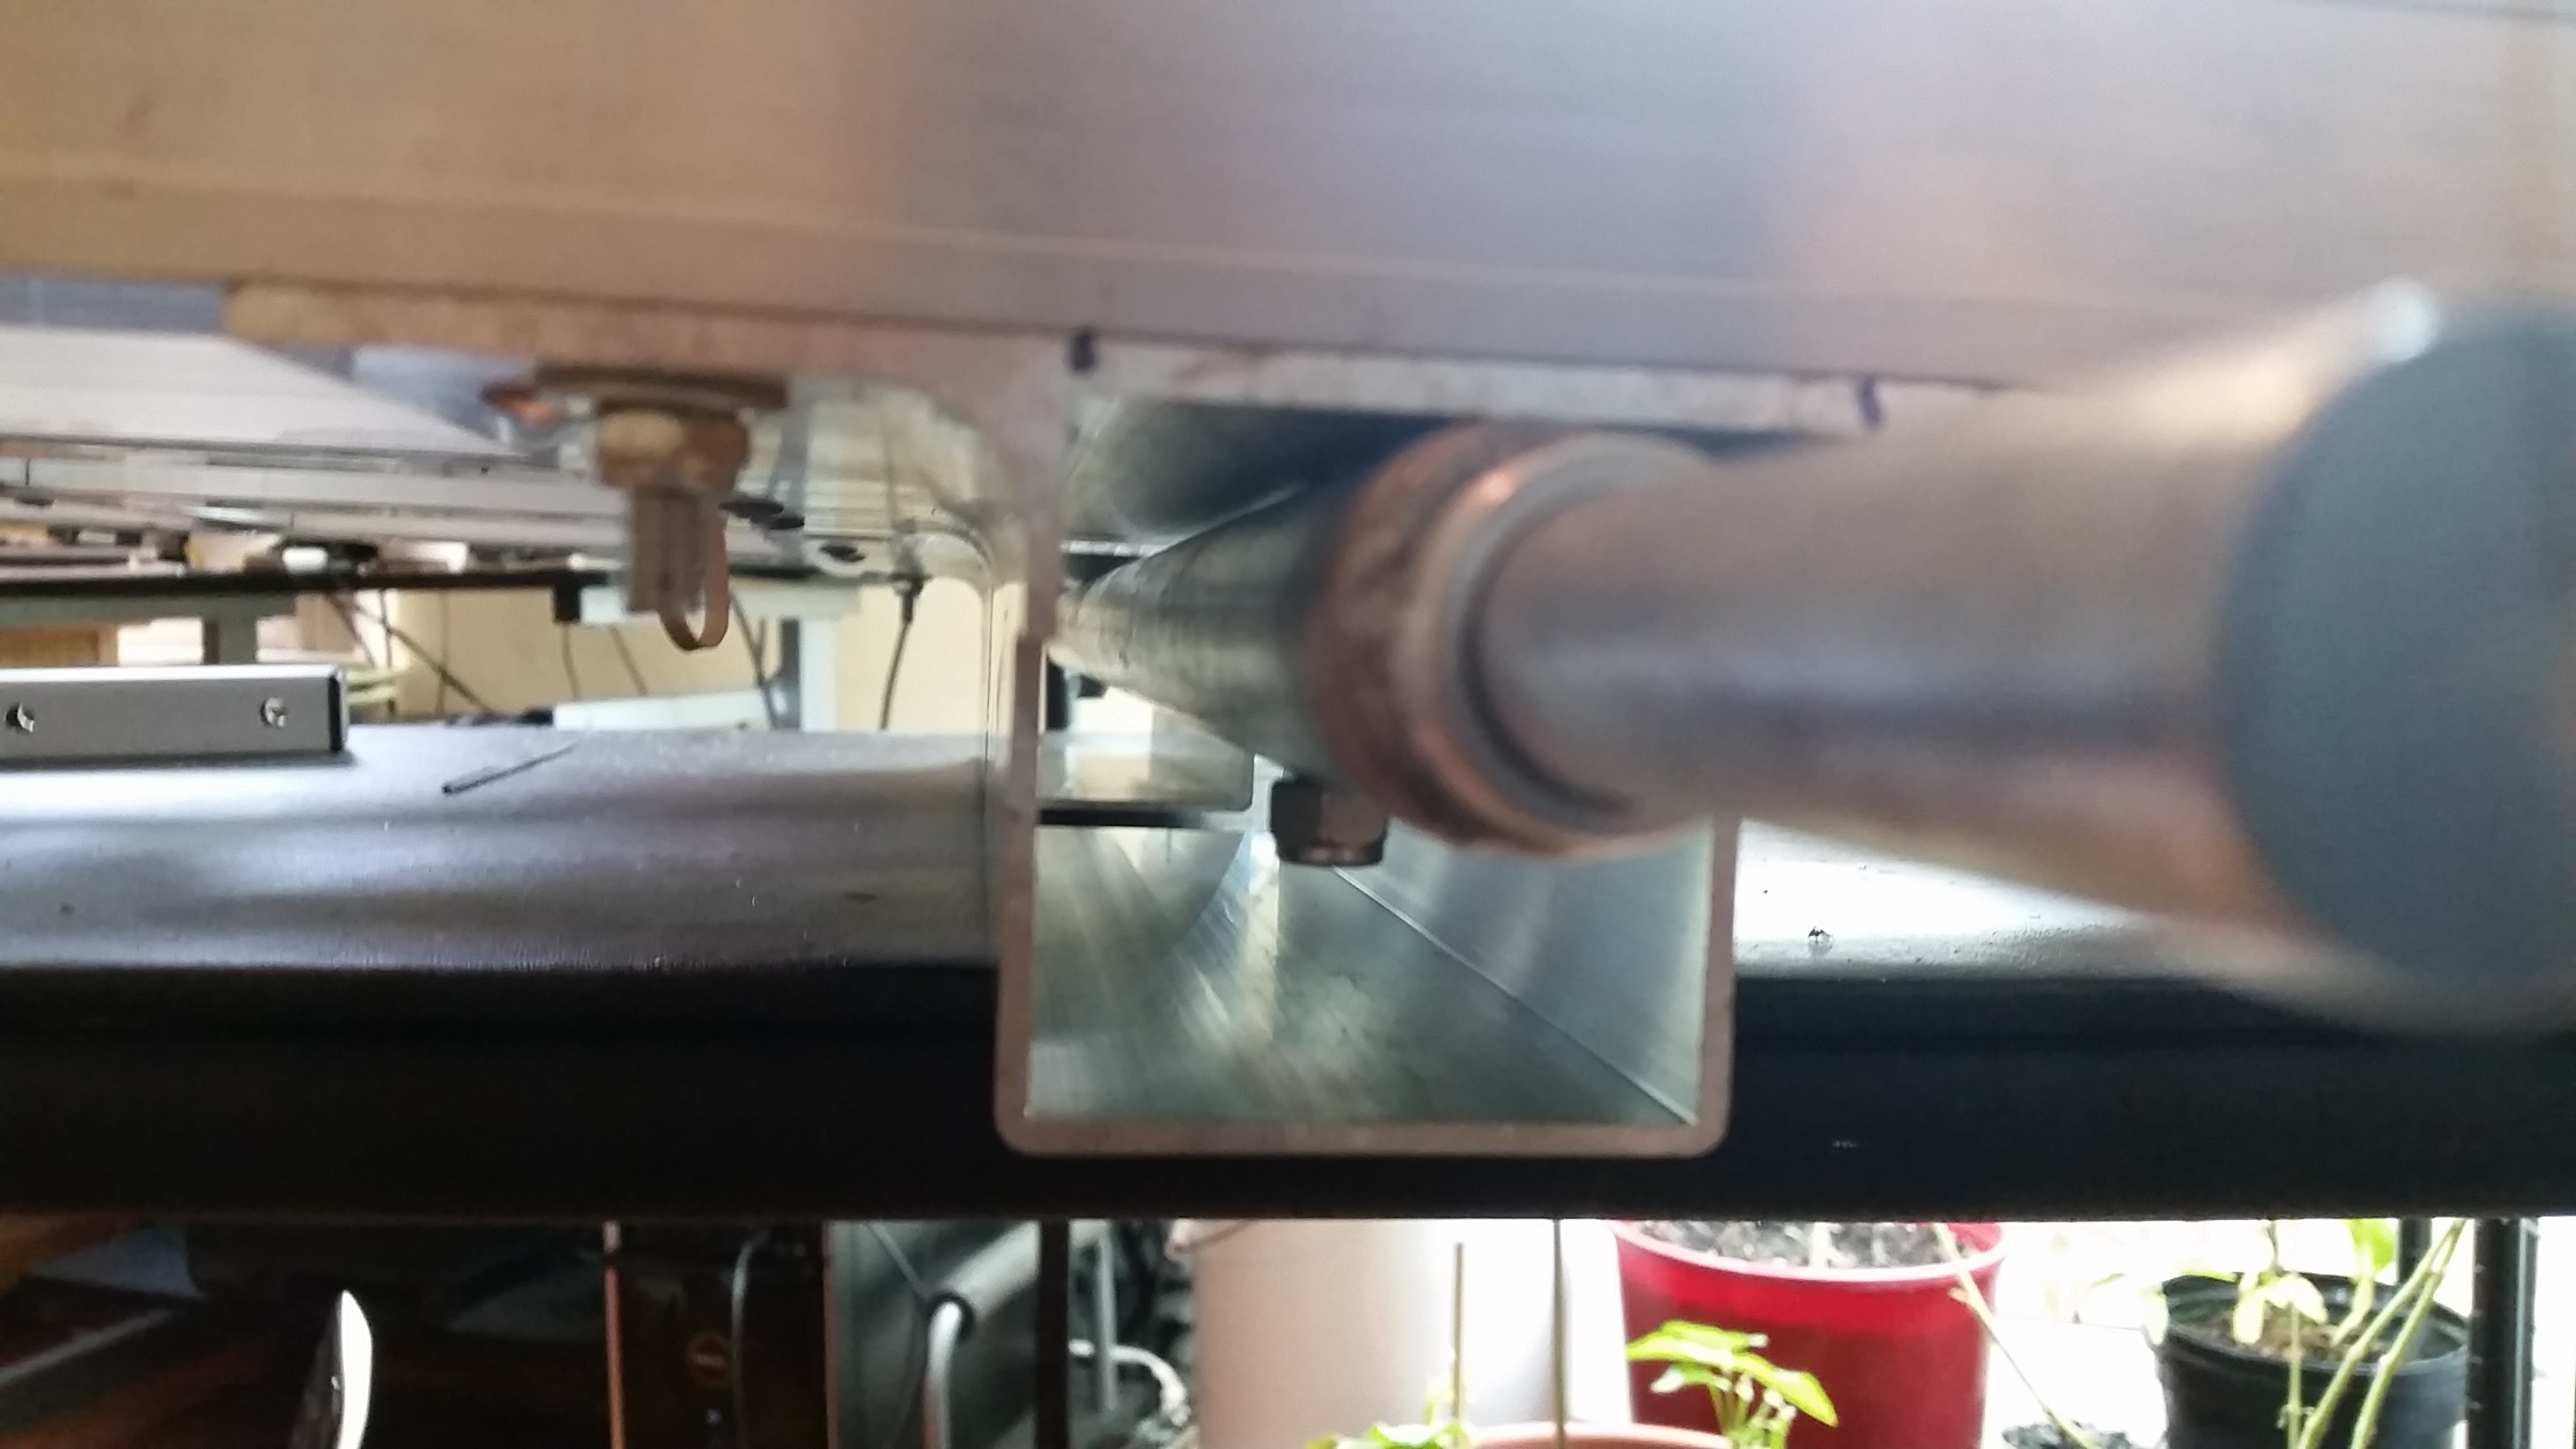
The view from above showing how the bars are mounted back from the edge. The flange actually starts right on the right side of the bars. This allows the forward force from bicycle to be transferred right into the largest strongest part of the bar, rather than into the thing fragile flange system, while at the same time puts minimum strain on those flanges by only cutting out a small slot.

A side view, you can see that the round hitch is simple centered in the middle of the bar (the top part is more flange), and then using all the (included) hardware clamped down. Use these instructions (pdf) from Bikes at Work to see how the hitch bar attaches to the trailer (with some modifications of course). You will have one small piece left over that was designed to interface with the BAW trailer, you can do whatever you want with it.
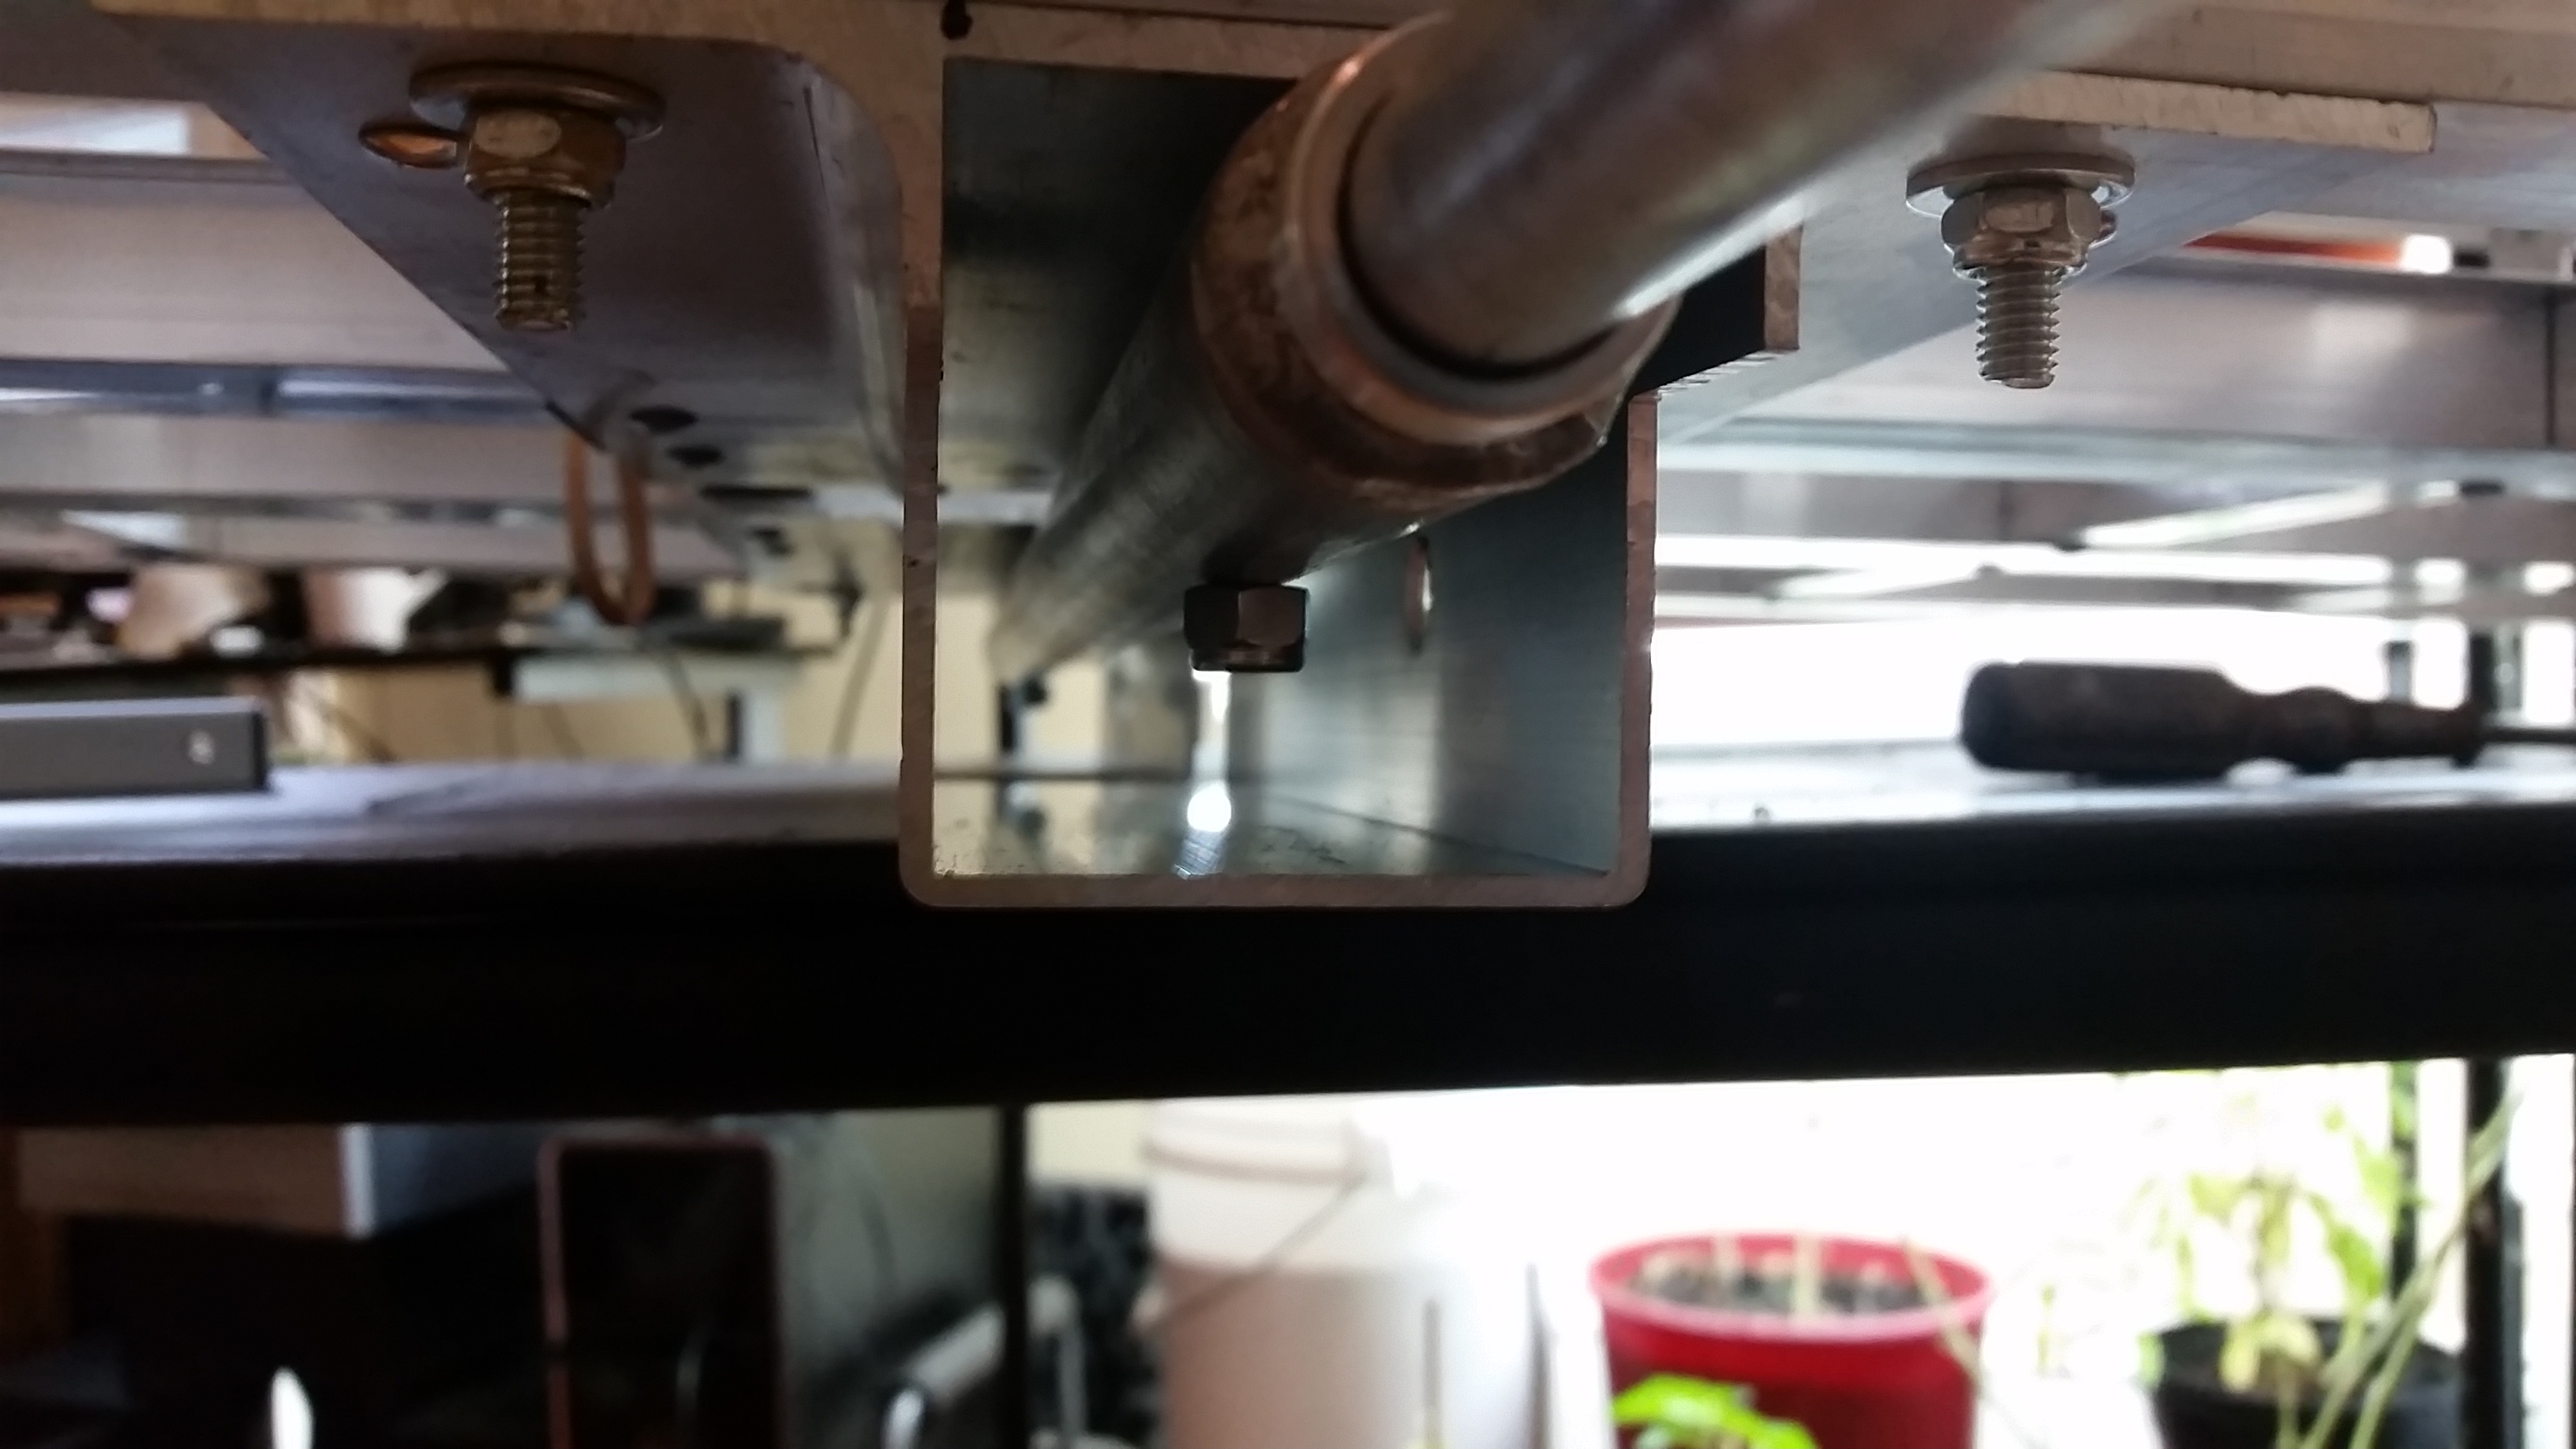
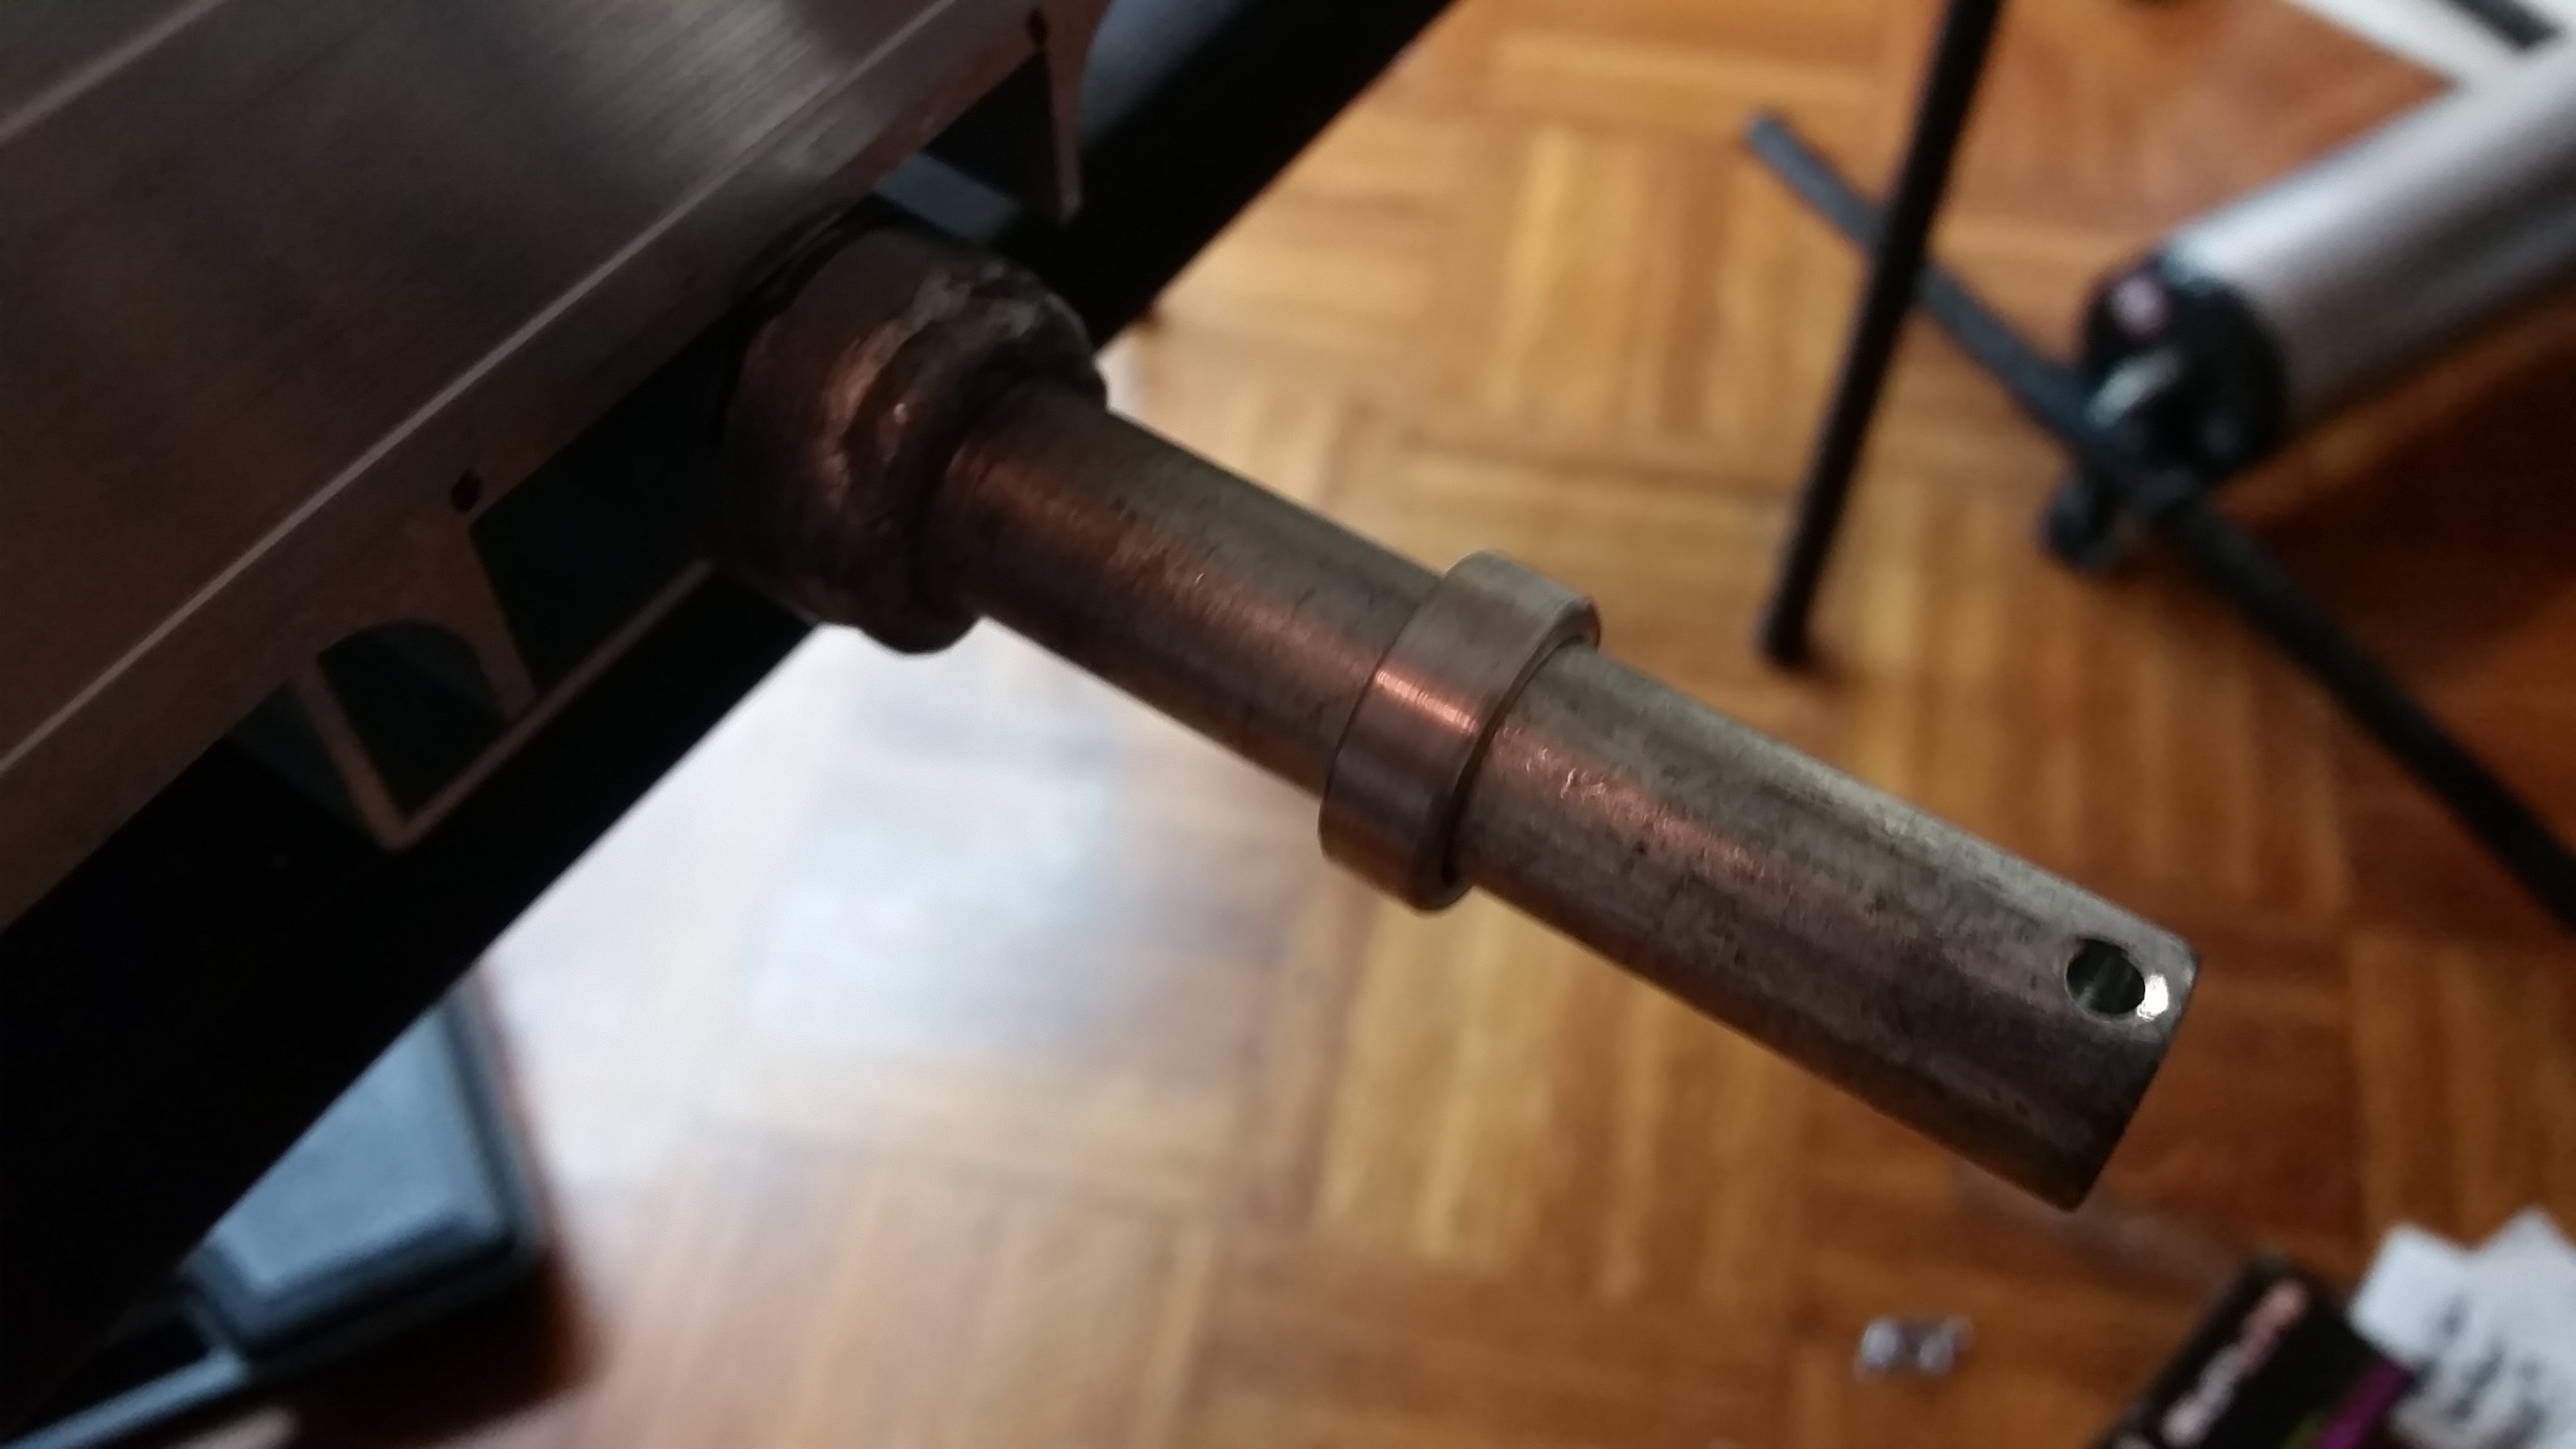
That’s it! You just made a trailer my friend! Next up just mount the bike half of the hitch with (the included) hardware. Use these instructions (pdf) if you need help.
Yes I am mounting it to my fixed gear, that’s the only bike I have right now. I will buy a cheap mountain bike for this bad boy for really big jobs.
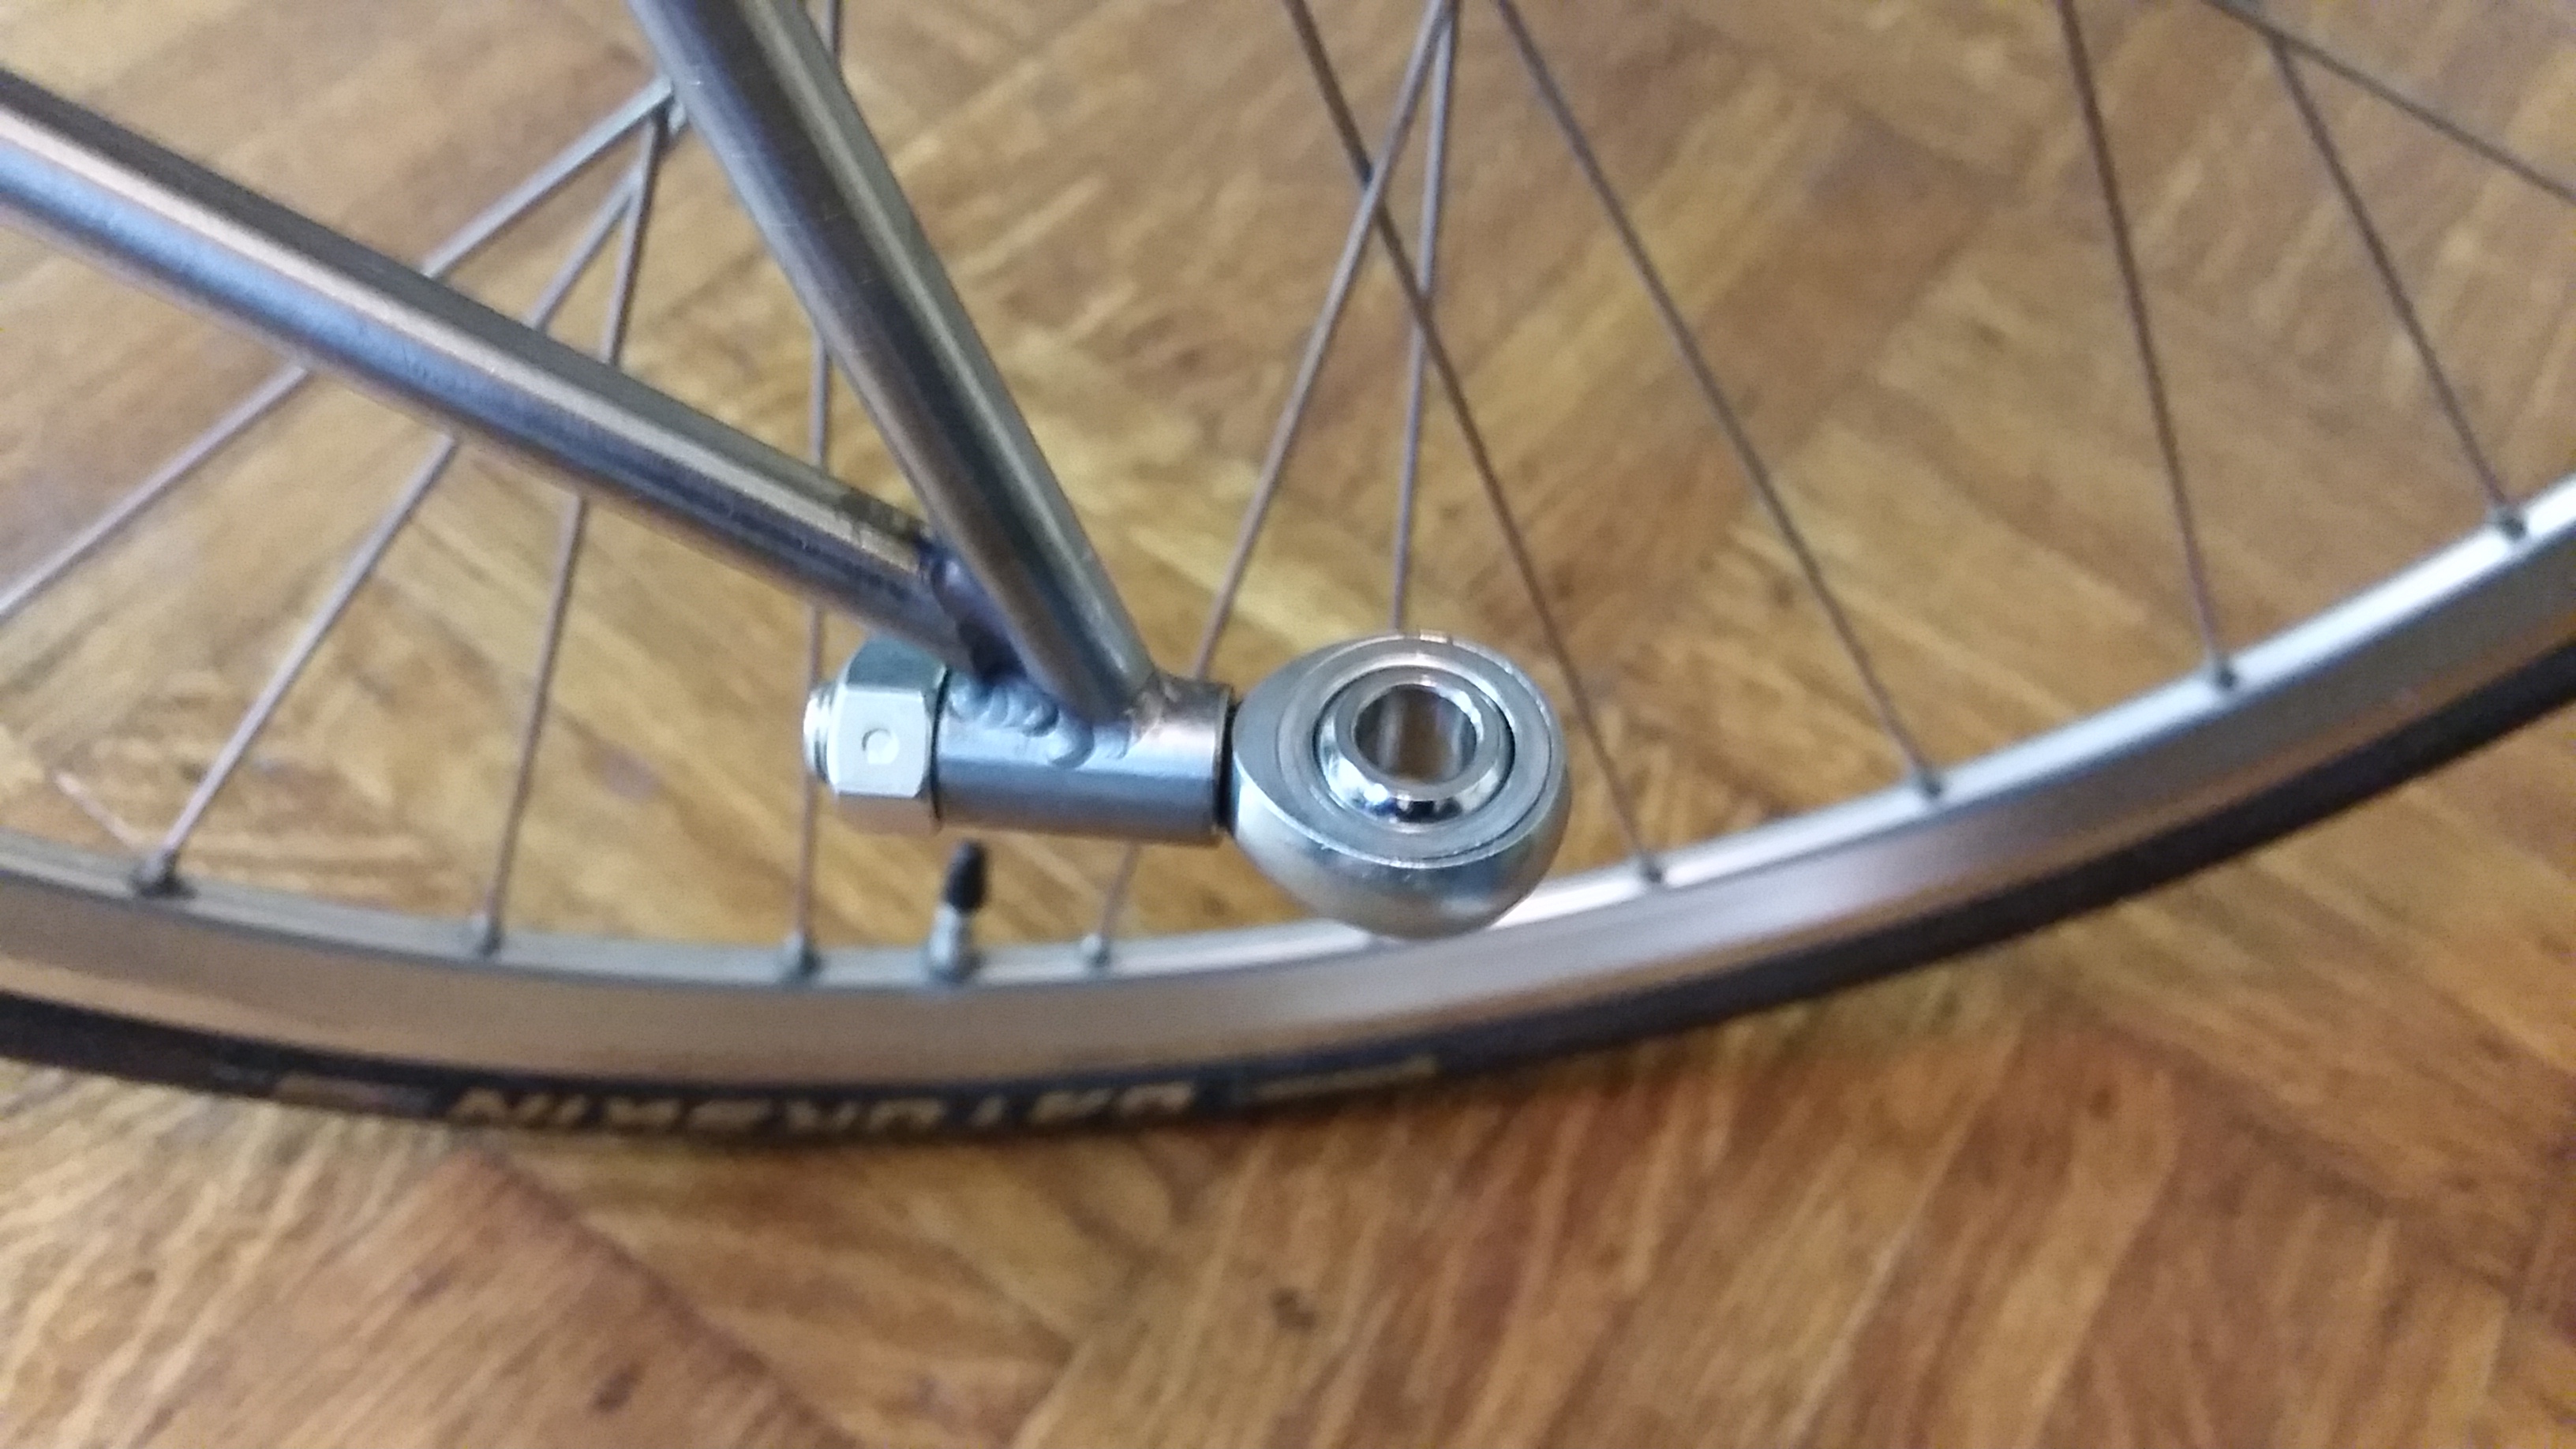
This is the little magic mount that keeps your trailer rock solid, use the (included) hitch pin to attach to the trailer bar.
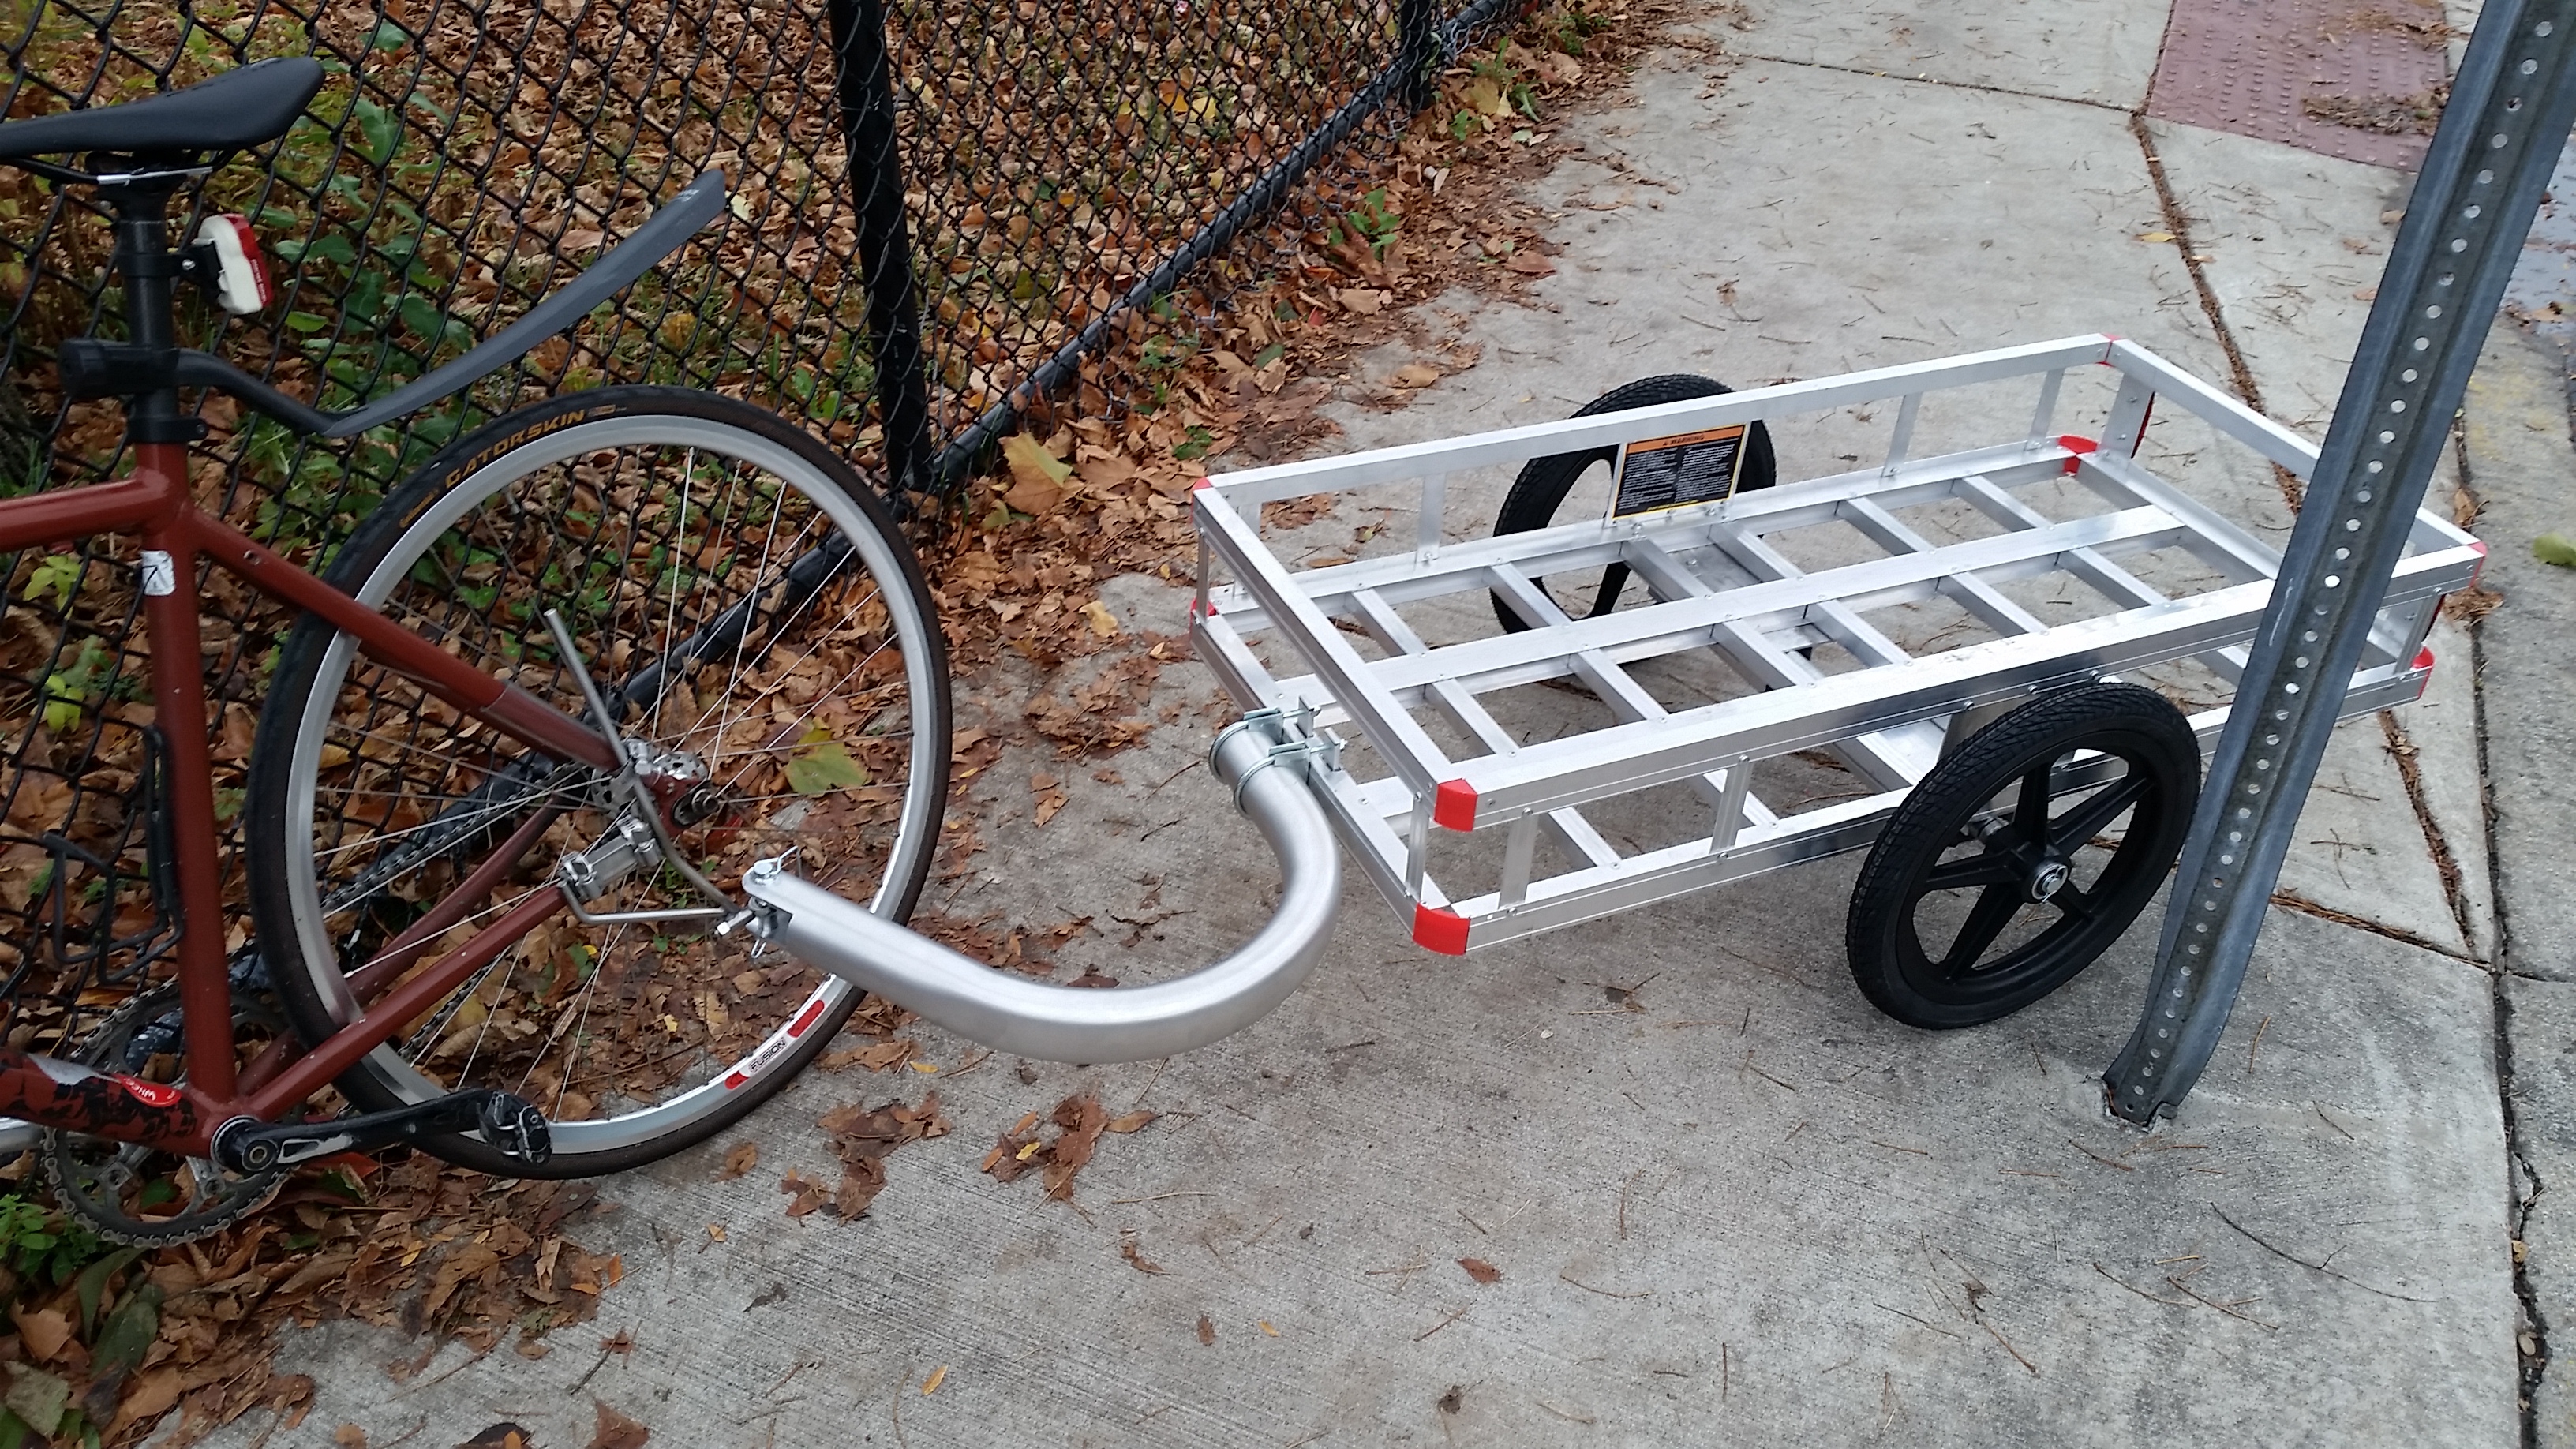
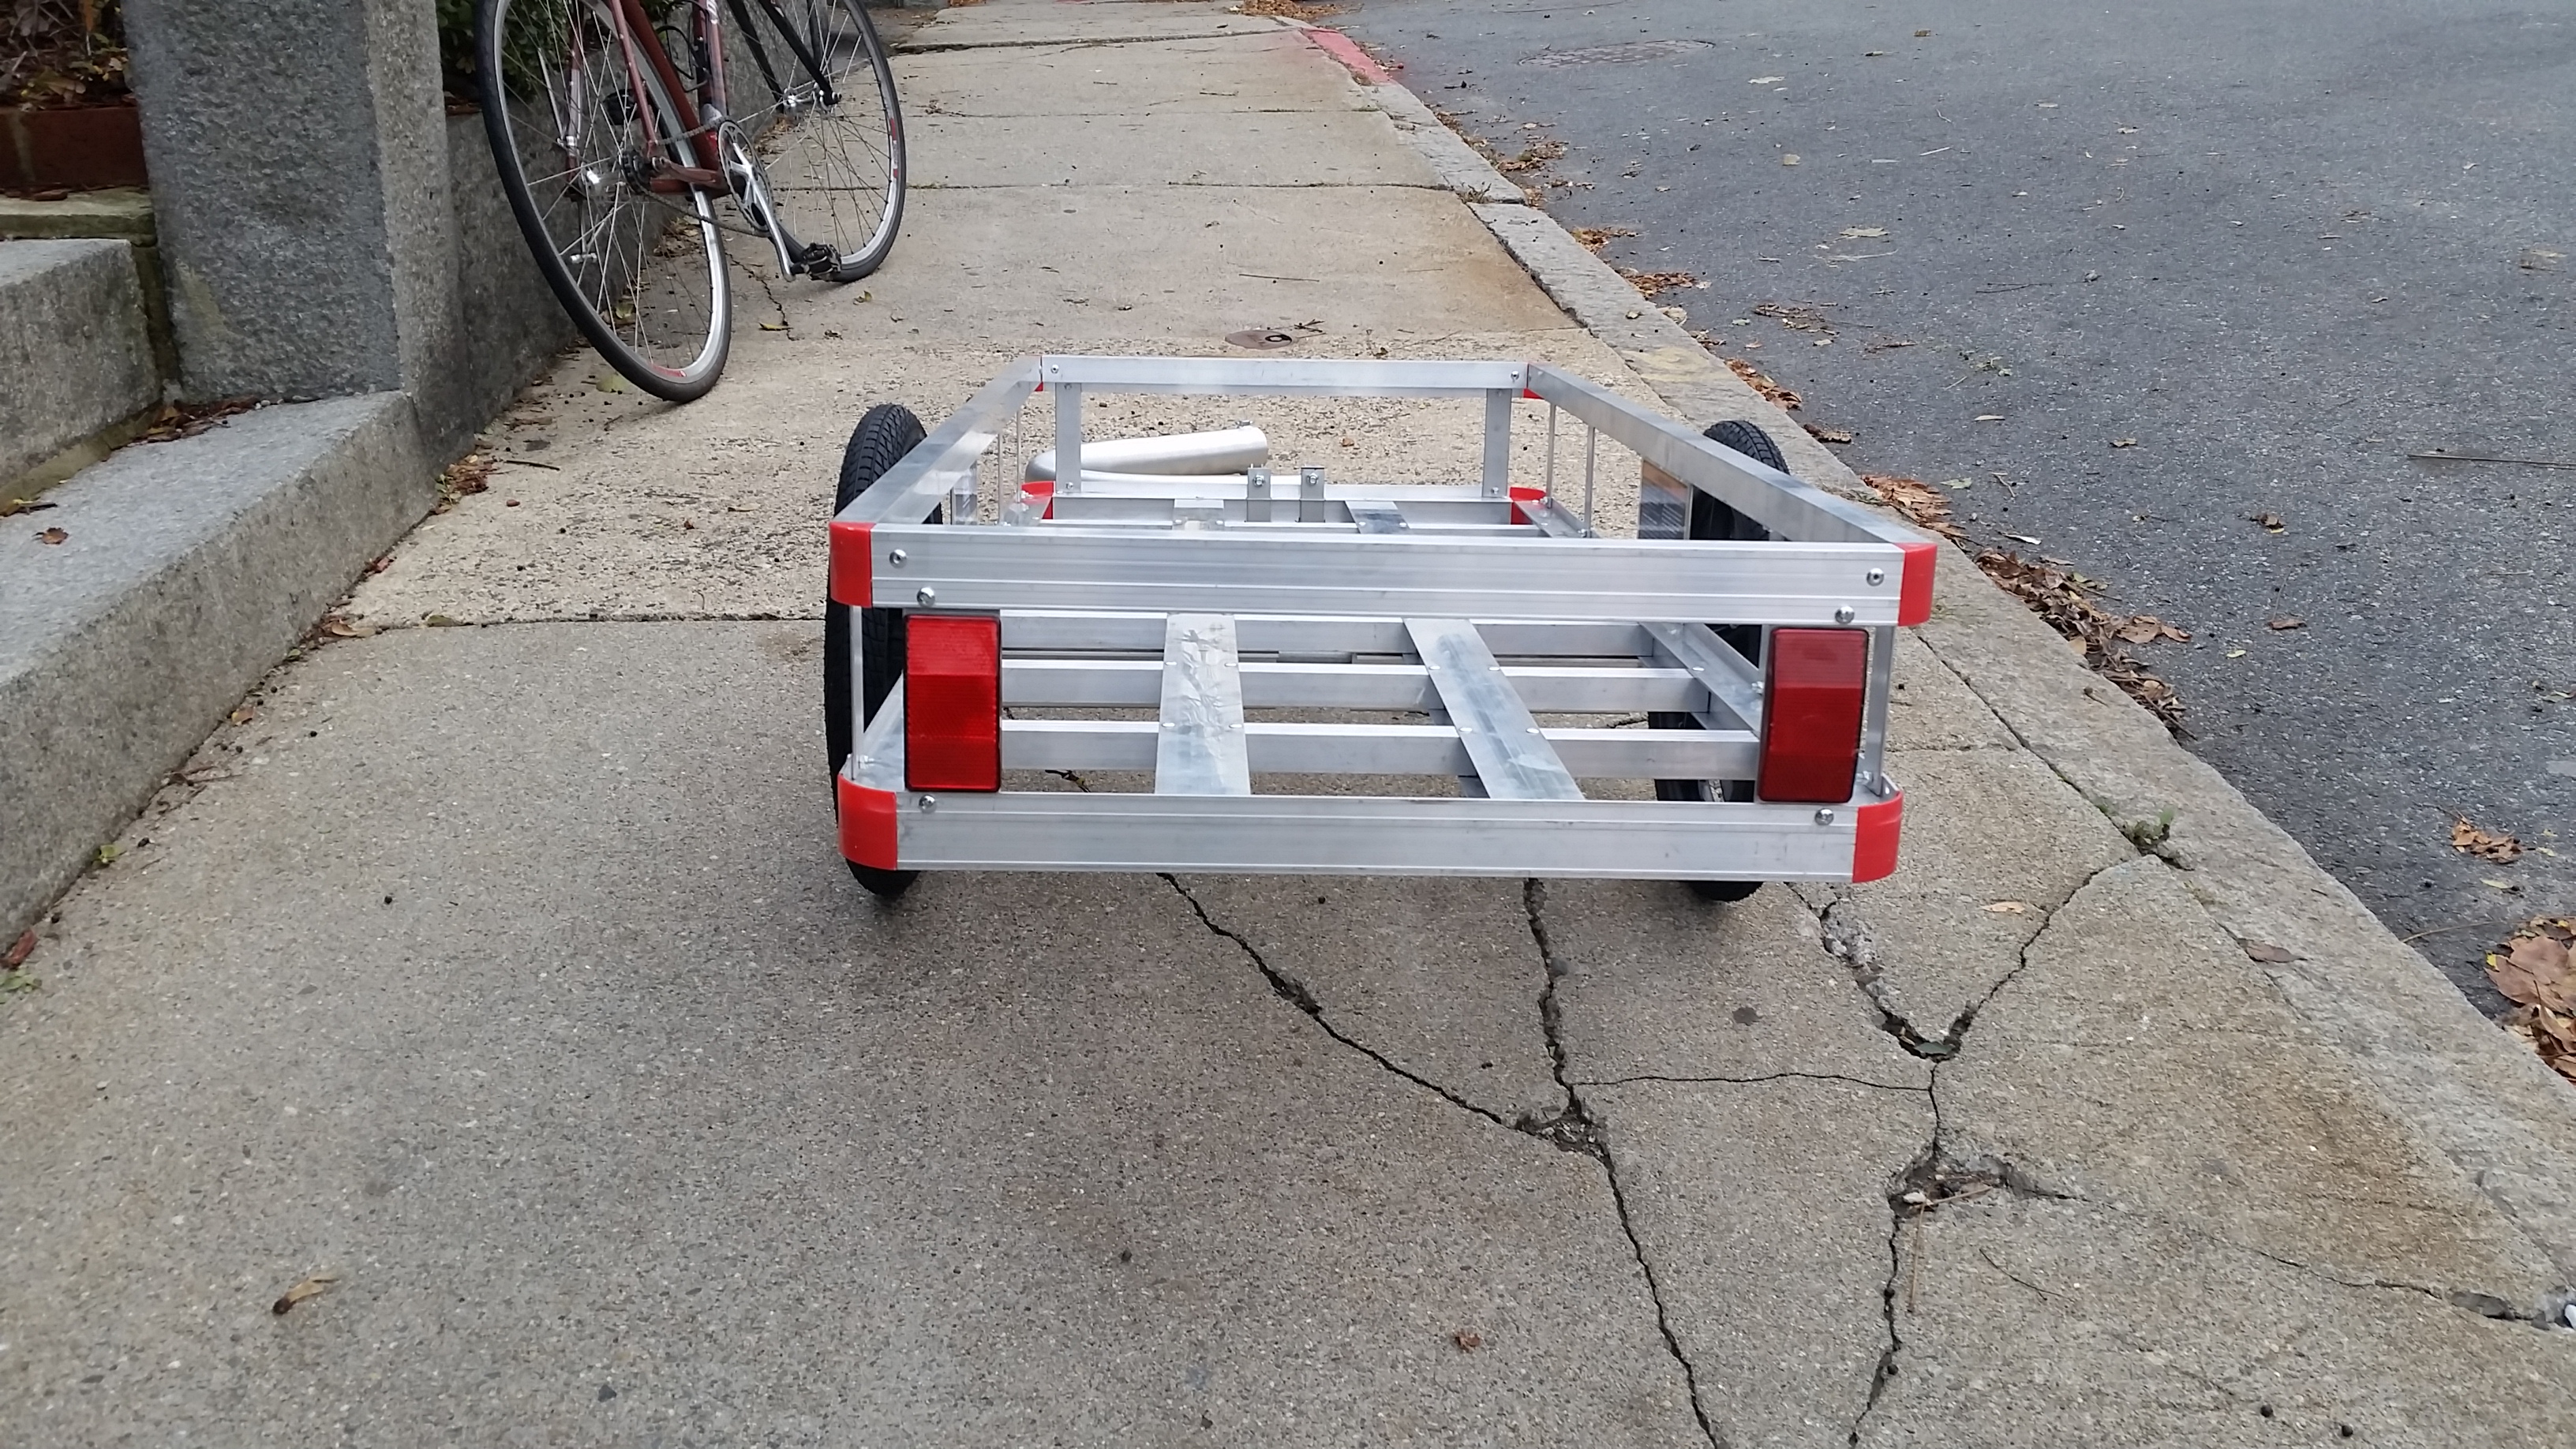
Look at that beauty!
I did some testing and found that you might have to slightly bend the bottom of the pins that hold the wheels on to keep them from rubbing on the wheels (two seconds with a pair of pliers), you will also want to be careful about how you load the weight, as the pivot point is right in the middle, really heavy loads should be placed in the middle or the front, or even better distributed evenly throughout.
I rode around the neighborhood, taking tight turns, going off curbs, and even placing a bunch of boxes of heavy stuff in the back of the trailer, and I have to say, this thing is solid as a rock. Nothing creaks, nothing shifts, nothing even makes noise. Obviously I was limited to just the one gear, but even with the totally wrong gearing it was easy as pie to carry even heavy loads with this guy. The weight is there yes, but you barely feel it, the hitch arm gives you acres of room for even tight turns, in short this trailer is my new favorite thing. If you see someone hauling a shit load of stuff all over town with a crazy grin on their face, it might just be me.
I am so pleased with how easy this was! If not for the extra $300 bucks I had come into I probably would have made this out of cheaper parts, but I didn’t and I am so happy with how rock solid all of this is. I will post a followup in a couple weeks with what I have used it for.
Tool List:
dremel with cutting disk attachment
drill and drill bit
Phillips head screwdriver
adjustable wrench
pair of pliers
marker
ruler
eye protection
ear plugs
dust mask
Parts list:
Bicycle trailer axle
Bicycle trailer hitch
Trailer hitch pin
Towbar
tubes for tires (x2)
Tires (x2)
Wheel rim with bearings (x2)
Cargo Holder
Total Time To create:
3 hours
Total Cost:
$450 (minus the magic $300 I got = $150 for me)
Total Cargo Load:
500lbs
Outer Dimensions (including tow bar, and wheels):
70 inches long, 29 inches wide, 17 inches tall.
Total Cargo Space:
49 inches long, 23 inches wide, 6 inches tall (cargo can be loaded higher if you use tie downs, or boxes).
Extra hardware needed:
none.
Having a cargo trailer really opens up a world of options for the bicycle owner, I highly recommend building one if you ever carry big things.
Please do let me know if you have any questions in the comments below!
 Add to Reddit.
 Posted in bostonbiker, crafts, Mechanical | 25 Comments »
RAGBRAI 2014
Written by Boston Biker on Aug 17
Four years, and this ride still brings so much joy into my life. (See 2013, 2012, and 2011).
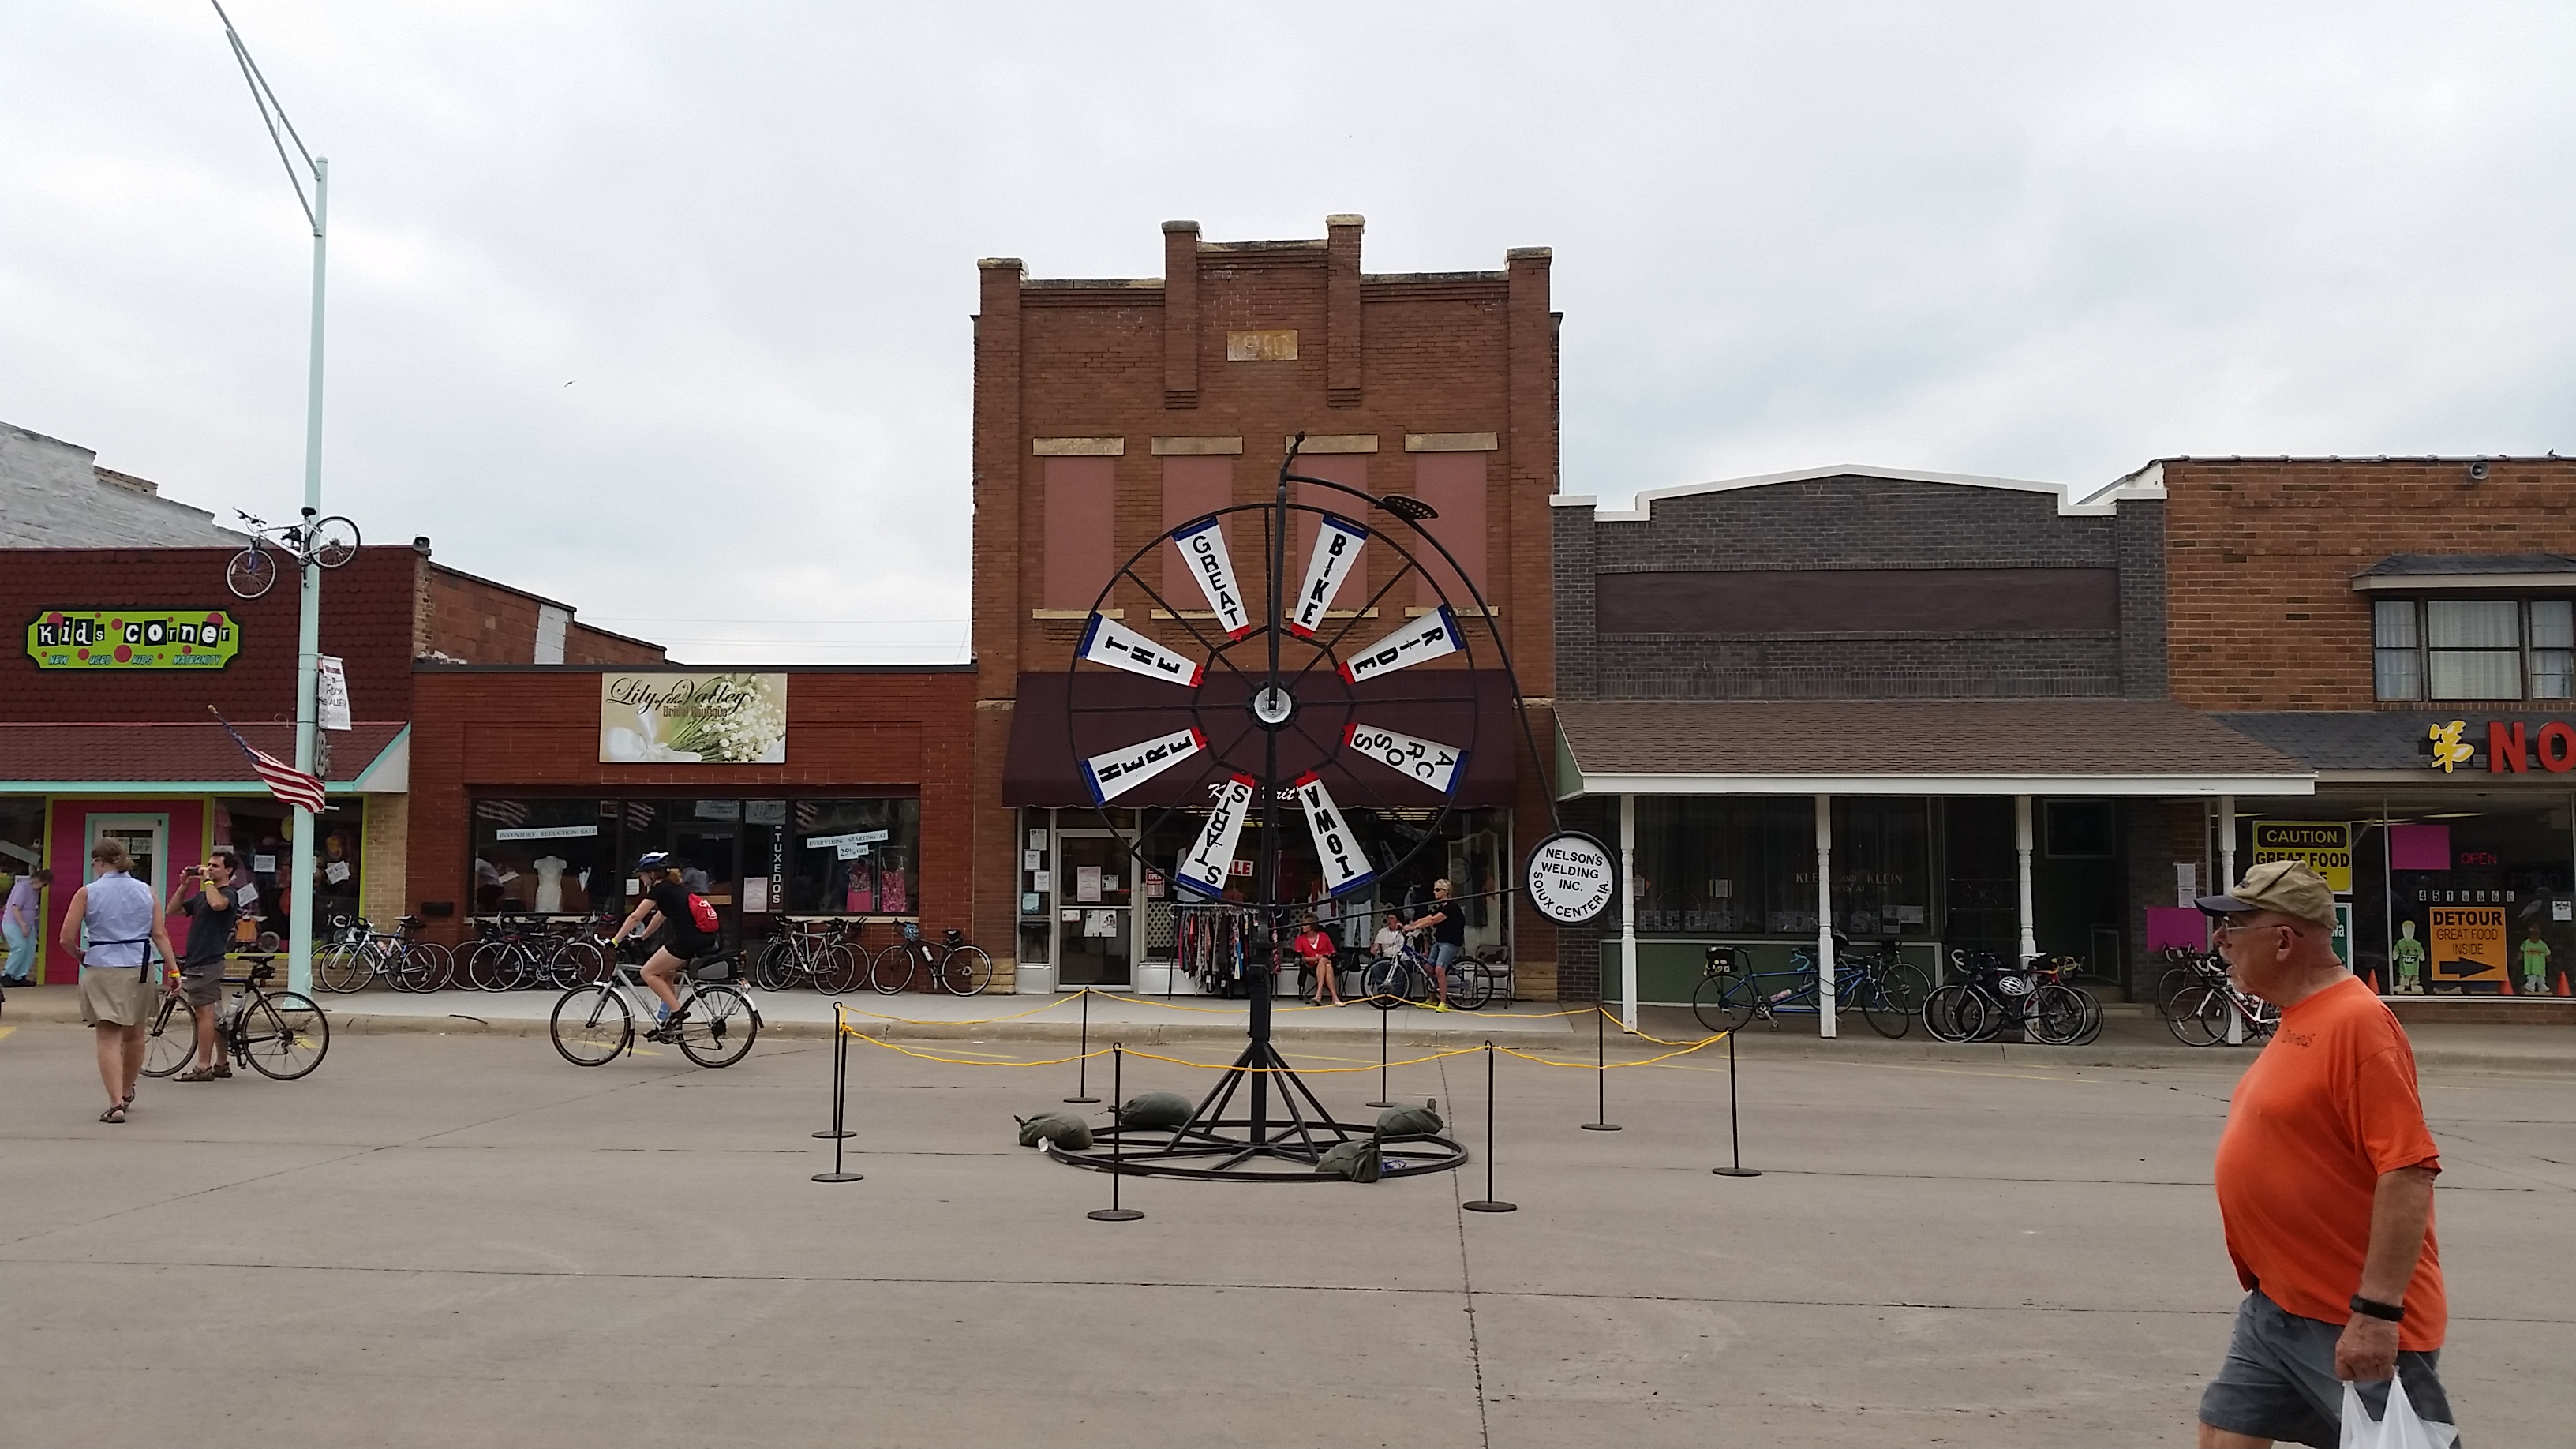
For those not in the know, the Registers Annual Great Bike Ride Across Iowa (RAGBRAI), is a yearly ride across Iowa. Now in its 43rd years, it is sort of like mid-west burning man on wheels. A rolling party of 15-20,000 people having fun in the corn. If you have never tried it, I highly recommend it.
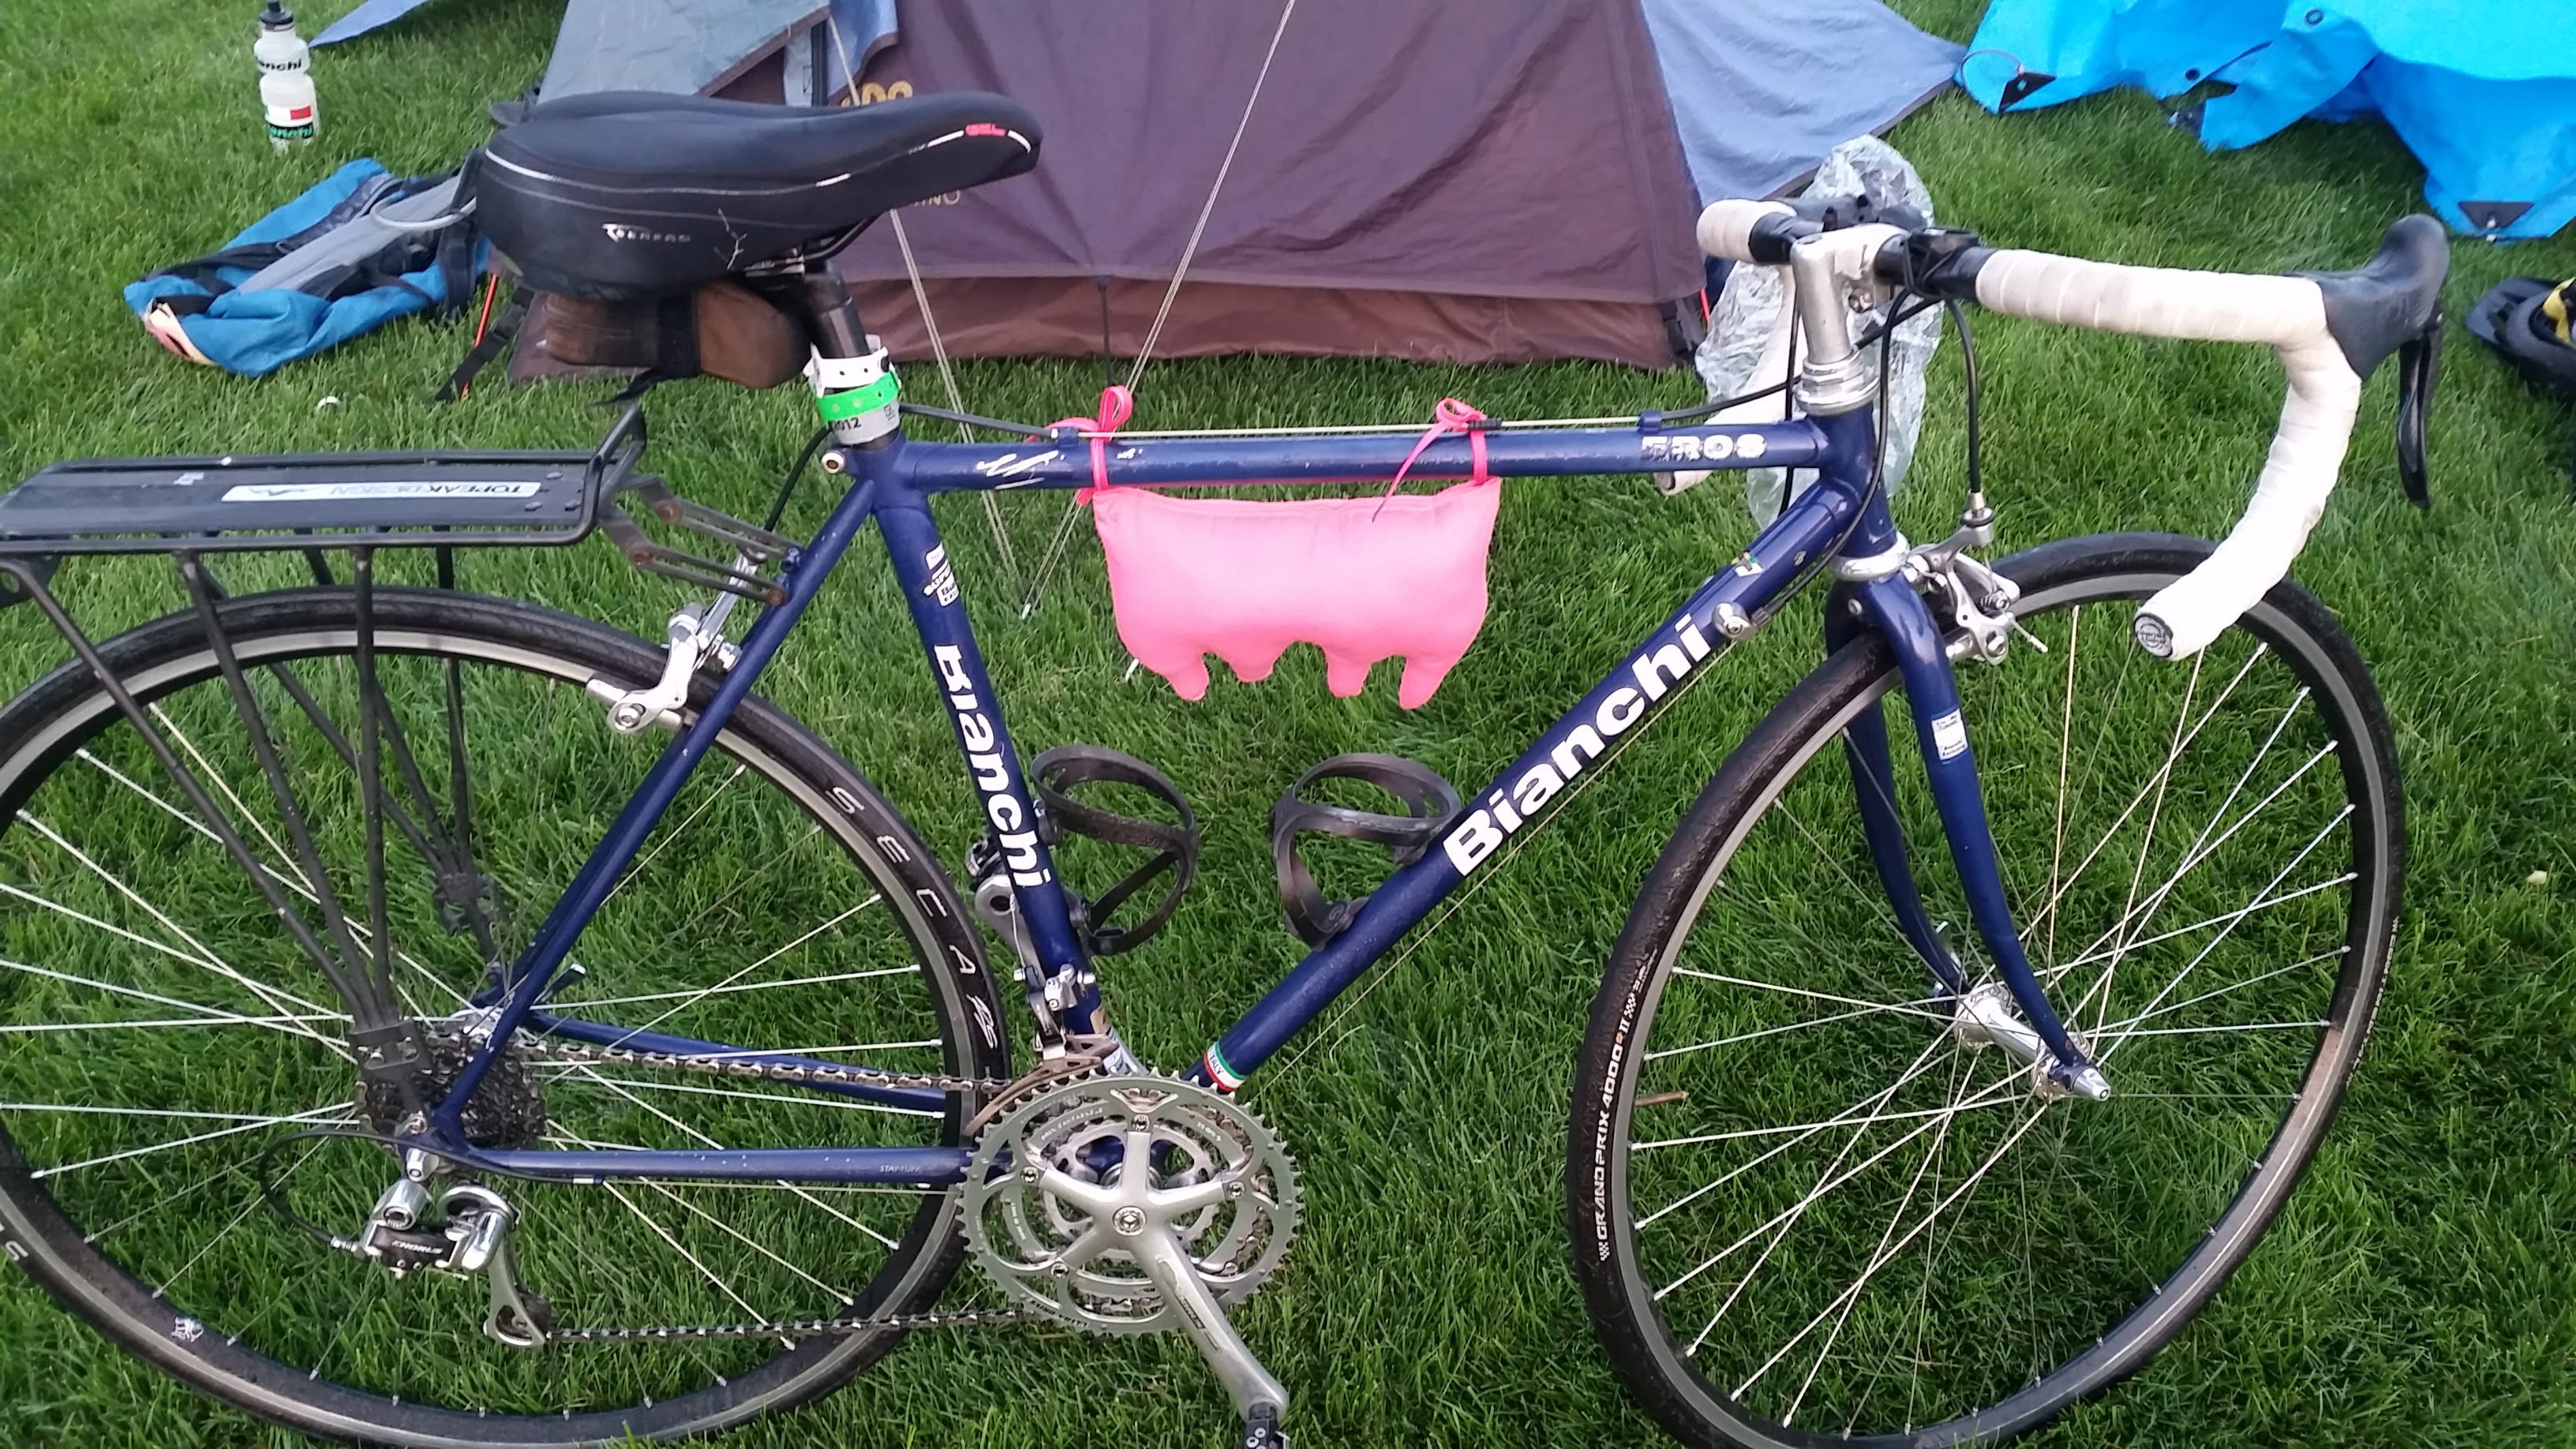
The route changes every year, and this year was widely hyped as “the shortest, and flattest.” For the last three years I have ridden a fixed gear, and figured this would be an even better year to do so again. So I began the ritual dance that has become a familiar part of RAGBRAI for me.
Figure out what airport is closest to the start, buy one ticket from Boston to that airport, find a shuttle bus that will take me from the airport to the start. Find another airport close to the finish, figure out how to get to that. But a separate ticket for a different airline. Deconstruct the bike, pack the bike, ship the bike. Take a train to the airport, take a large plane to a small plane, to a shuttle bus, to a bicycle, ride for a week, repeat in reverse. On the face of it its a logistical nightmare, but in reality it always goes smooth as butter, and every single person you meet along the way is very nice and makes you happy. It’s hard to return to Boston with its cranky drivers and dirty air. You miss the corn when you leave.
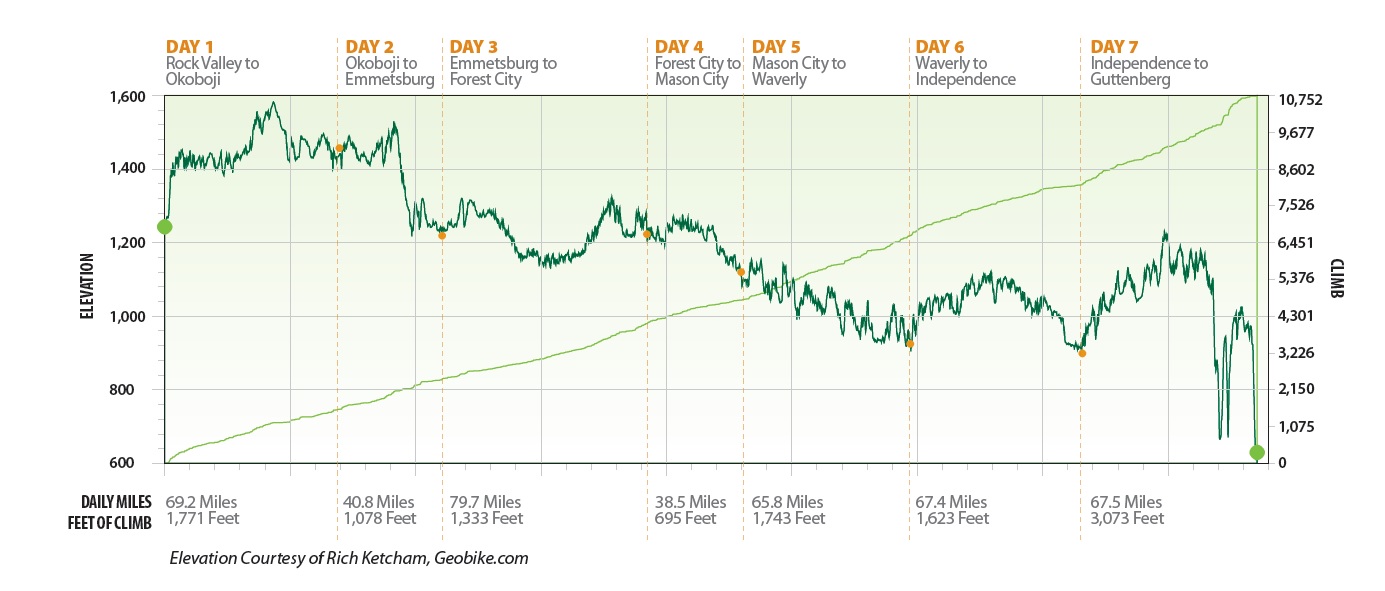
That’s not to say that this year was without its challenges. Here is a day by day break down.
Day one: Rock Valley To Okoboji
After a pleasant night spend in a tent on soft grass I awoke to a glorious Iowa sunrise, and it just felt good to be on a bike. The winds were calm, the temp was decent, the corn was growing (in the places that had not been killed by the recent floods). The Town was decked out in bike finery and everyone waved at us as we left.
The 70 miles flew by in a flash, town after town flying by in a blur. That isn’t to say we didn’t see some awesome stuff.

Check out this 36er!
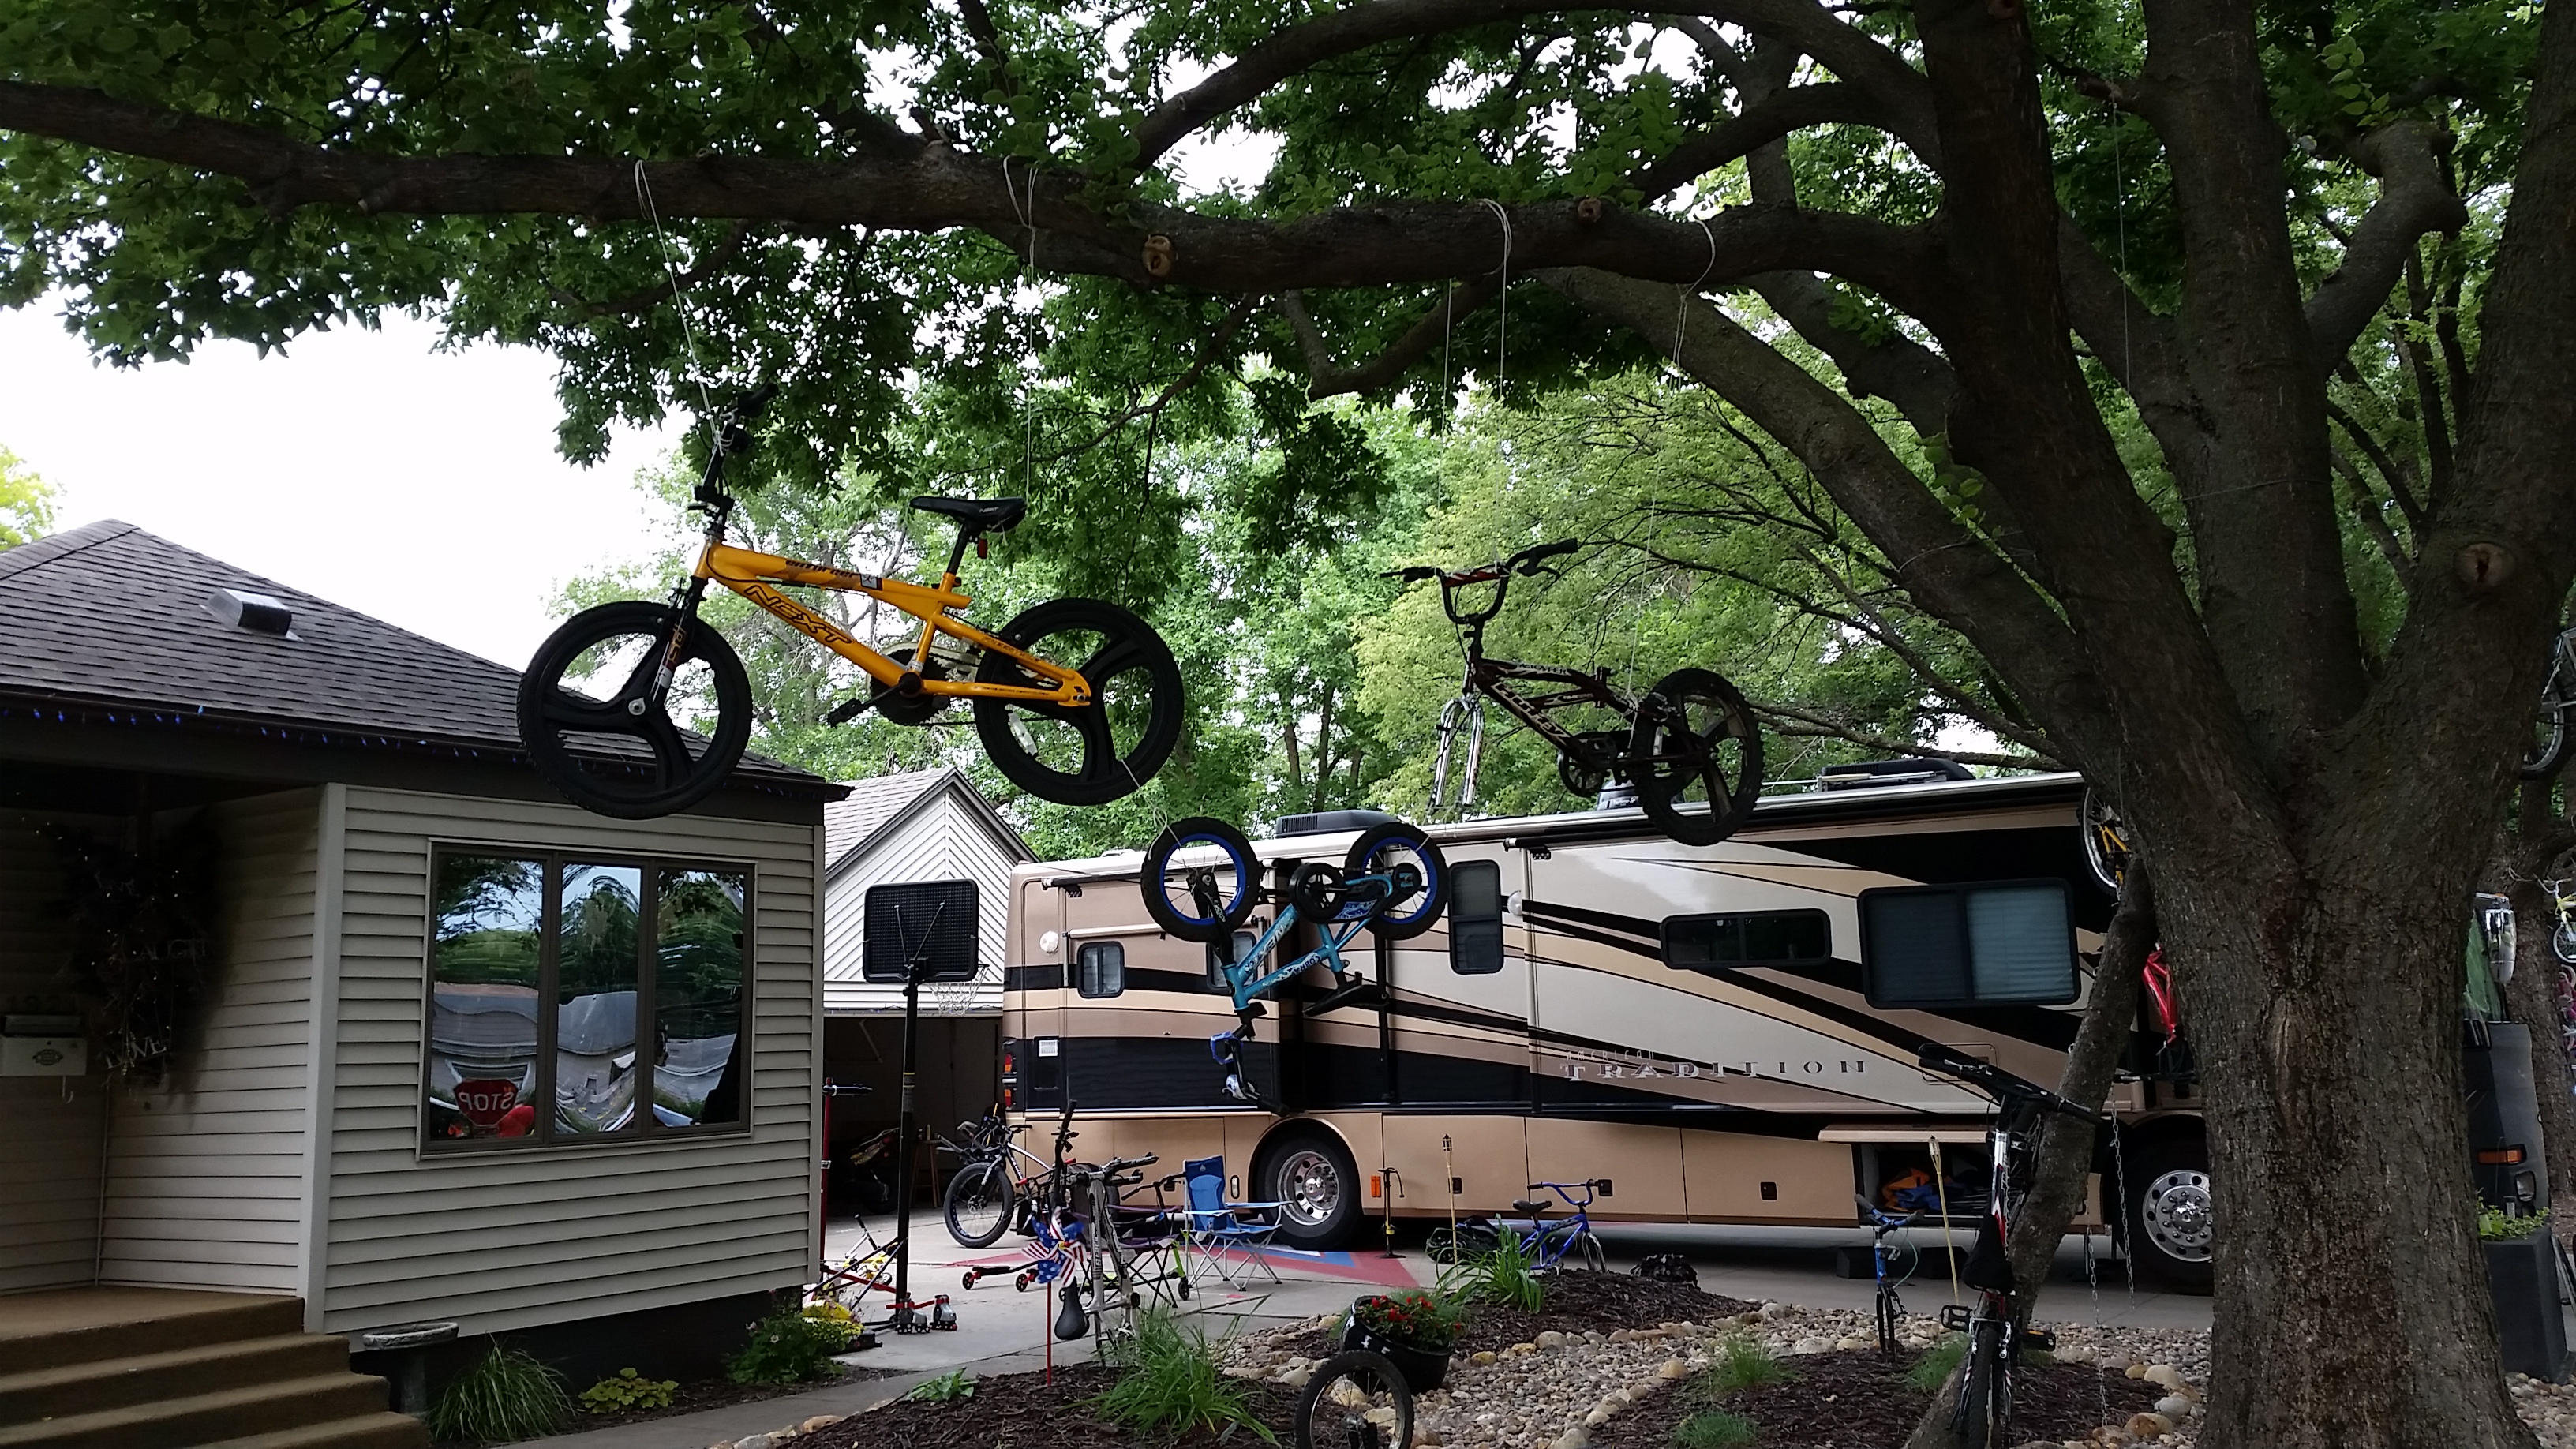
These guys rode these things the entire time…

Some people over did it on their first day…this man is asleep in the center of the beer garden, when I went to make sure he wasn’t dead, his wife (!!) told me to leave him be because it was funny…he wasn’t dead. Our camp ground was in an awesome super soft field, I slept like a baby.
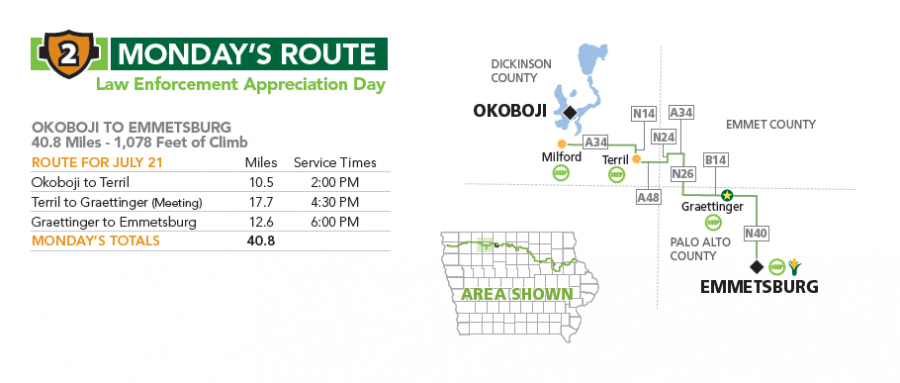
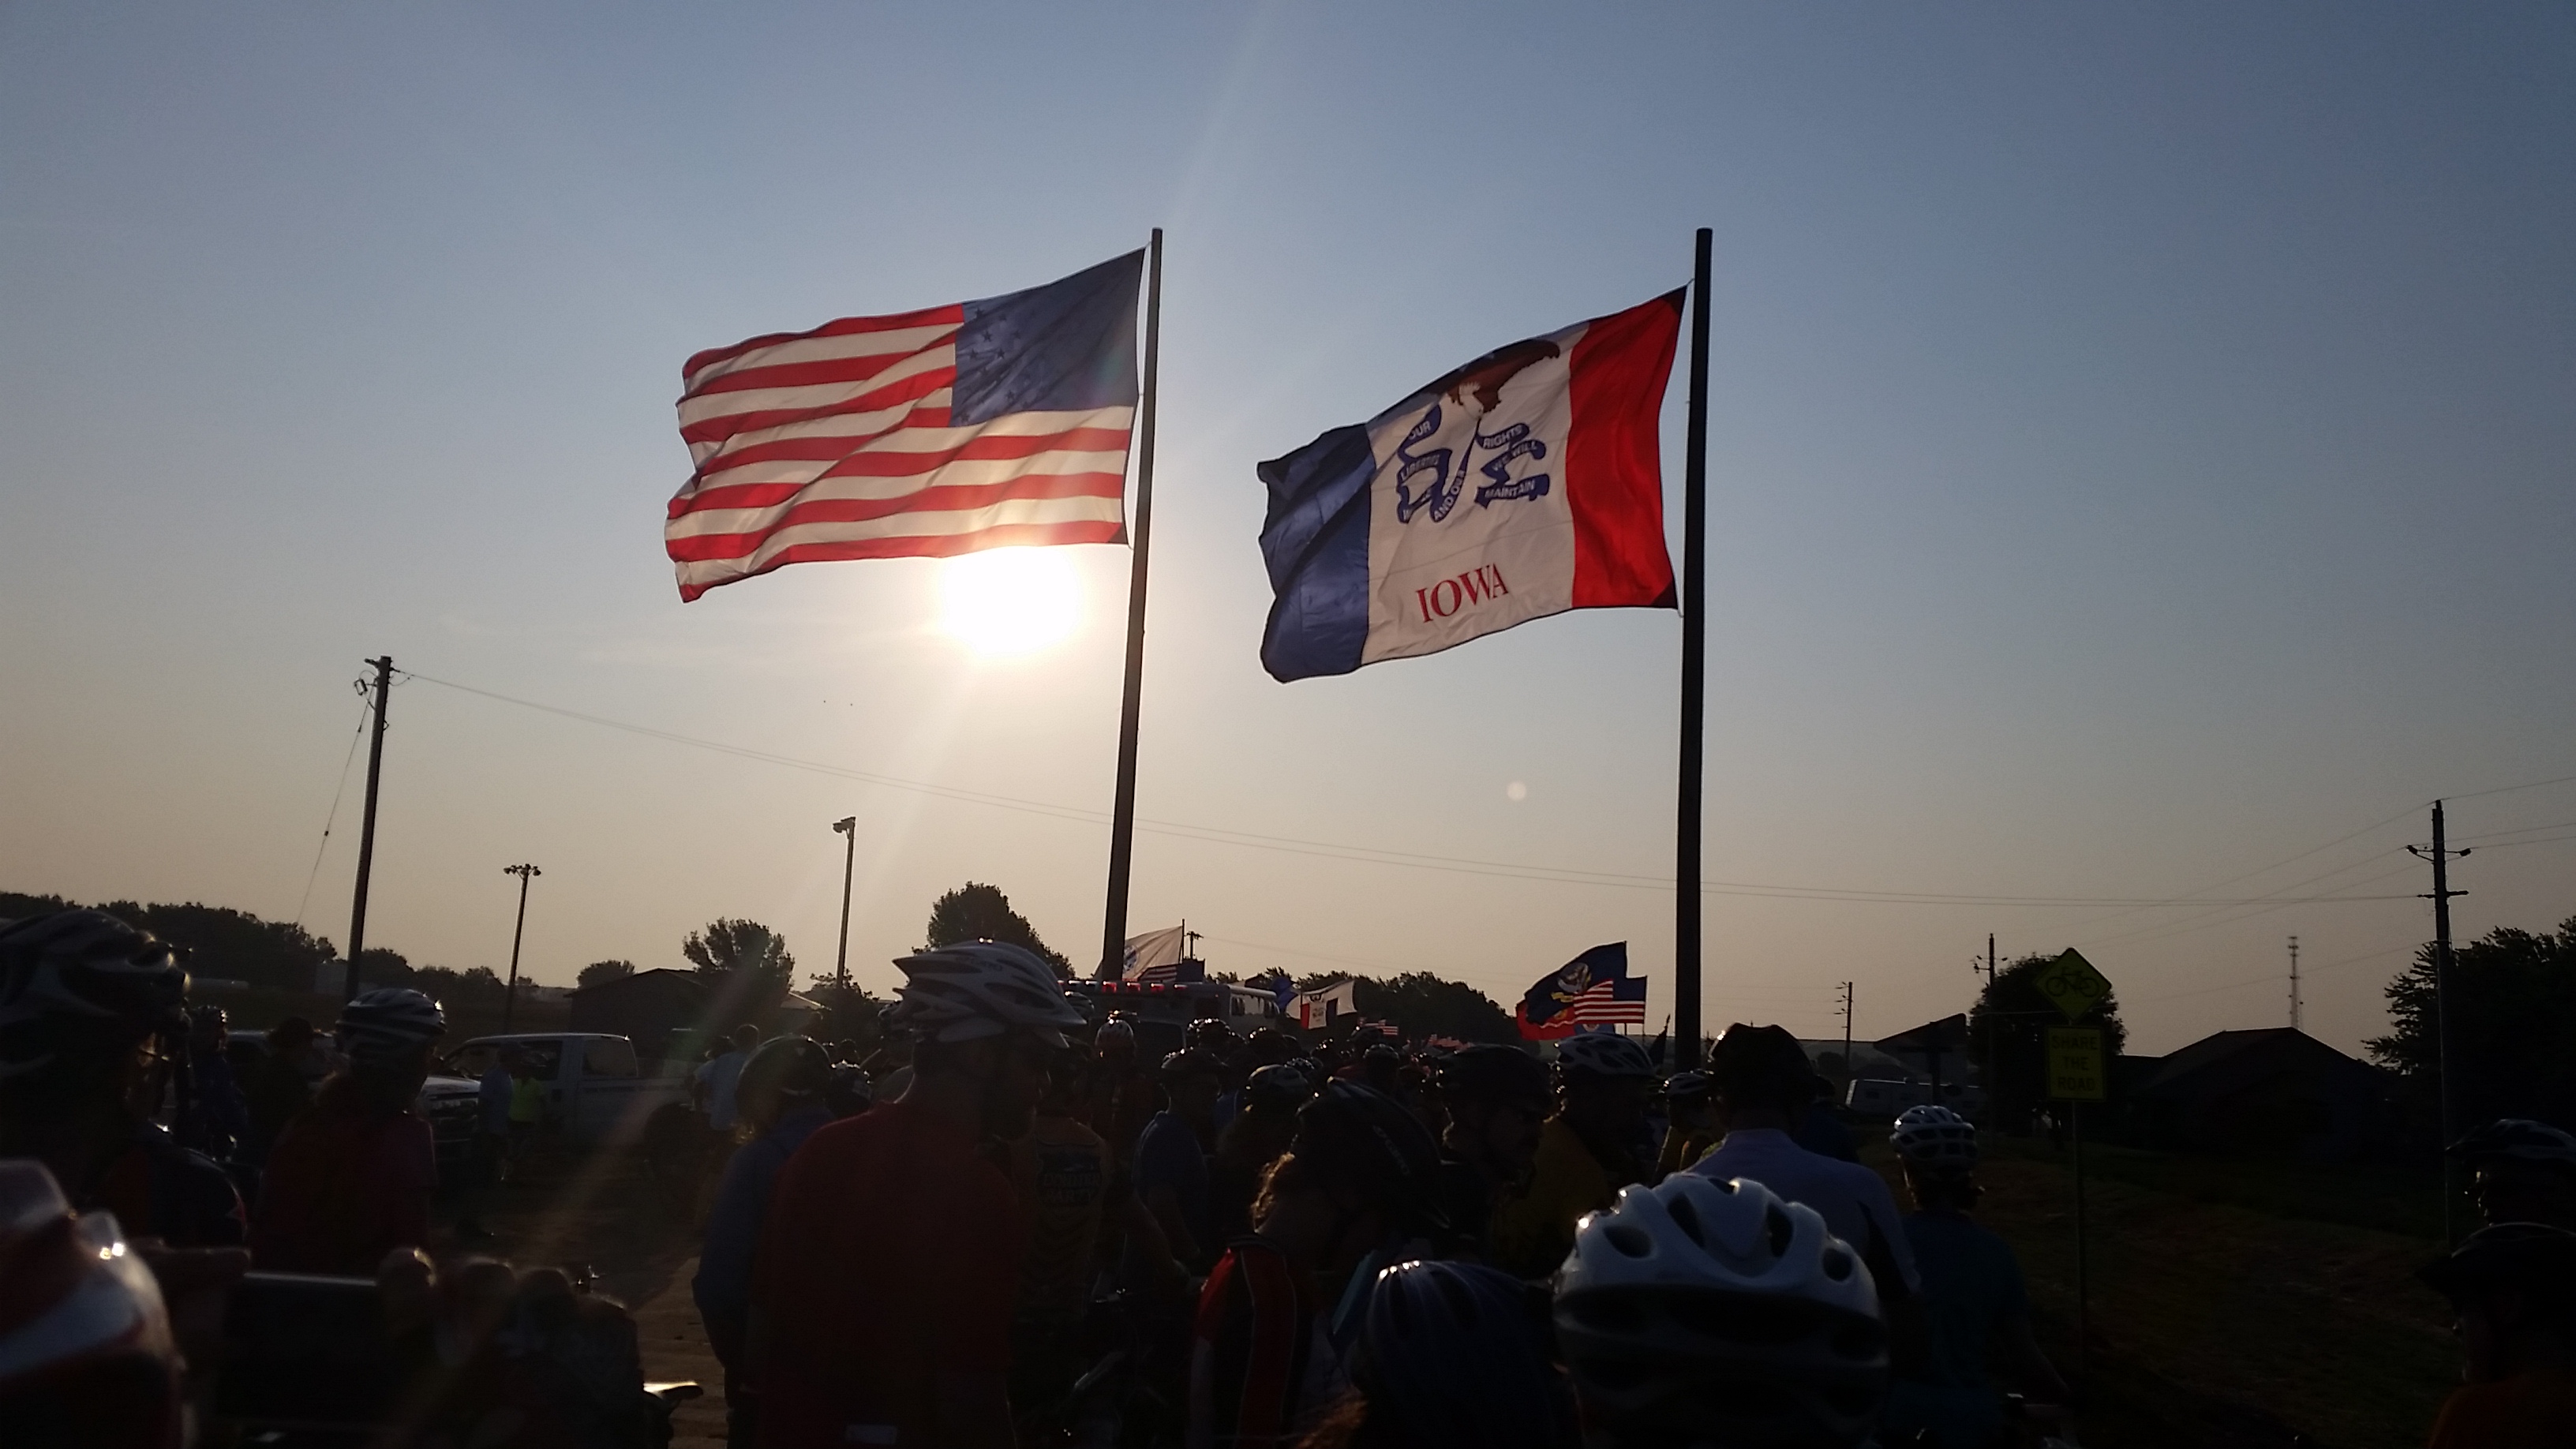
Day 2: Okoboji to Emmetsburg.
I awoke to this outside my tent.
Bike udder in the morning, cyclists warning. But the portent proved not to be true as today was another PERFECT riding day. As you rode out of town you got to see every single state flag flapping in the glorious Iowa sunrise.
The day was short, only 40 miles, but I still managed to see some cool stuff.
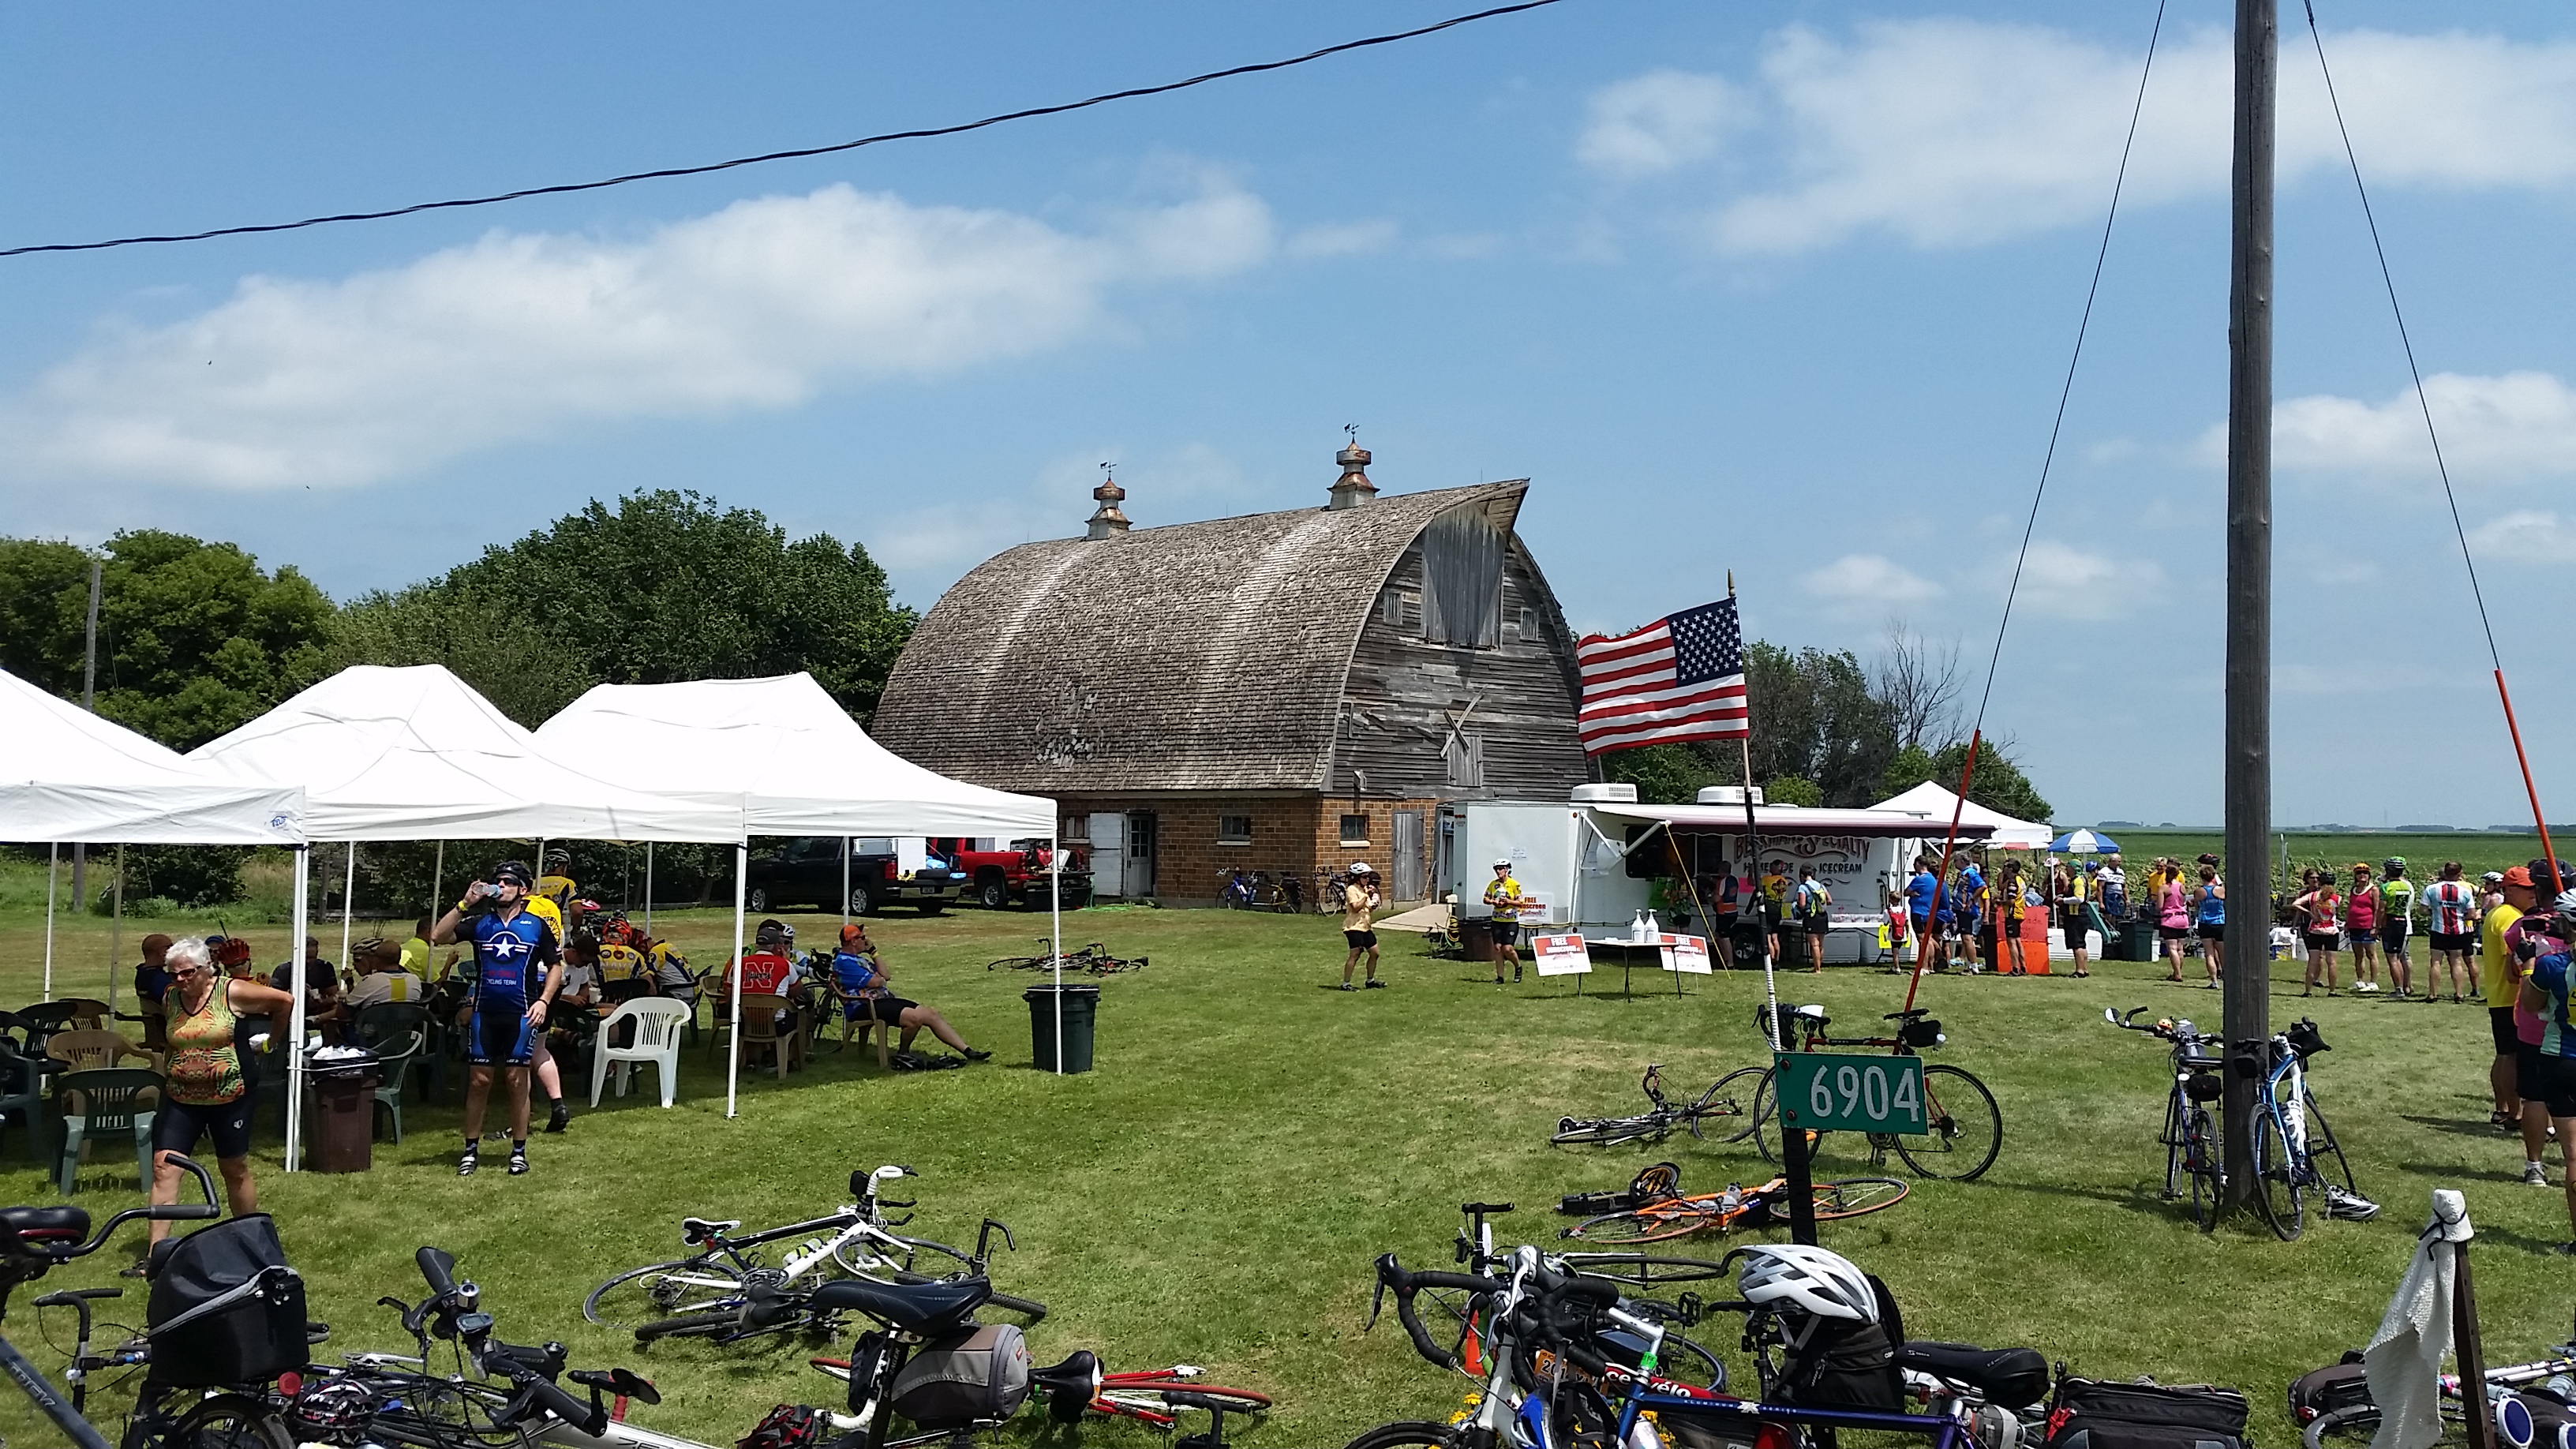
Checking out old barns while eating ice cream.
A lot of people do this ride…from horizon to horizon nothing but cyclists. This little traffic jam was caused by the ice cream man. Ice cream is serious business on RAGBRAI.

You might not know this but Iowa is a leader in wind power…hmm all those wind turbines I wonder if it ever gets windy around here…I probably should have seen this for the ominous sign that it was.
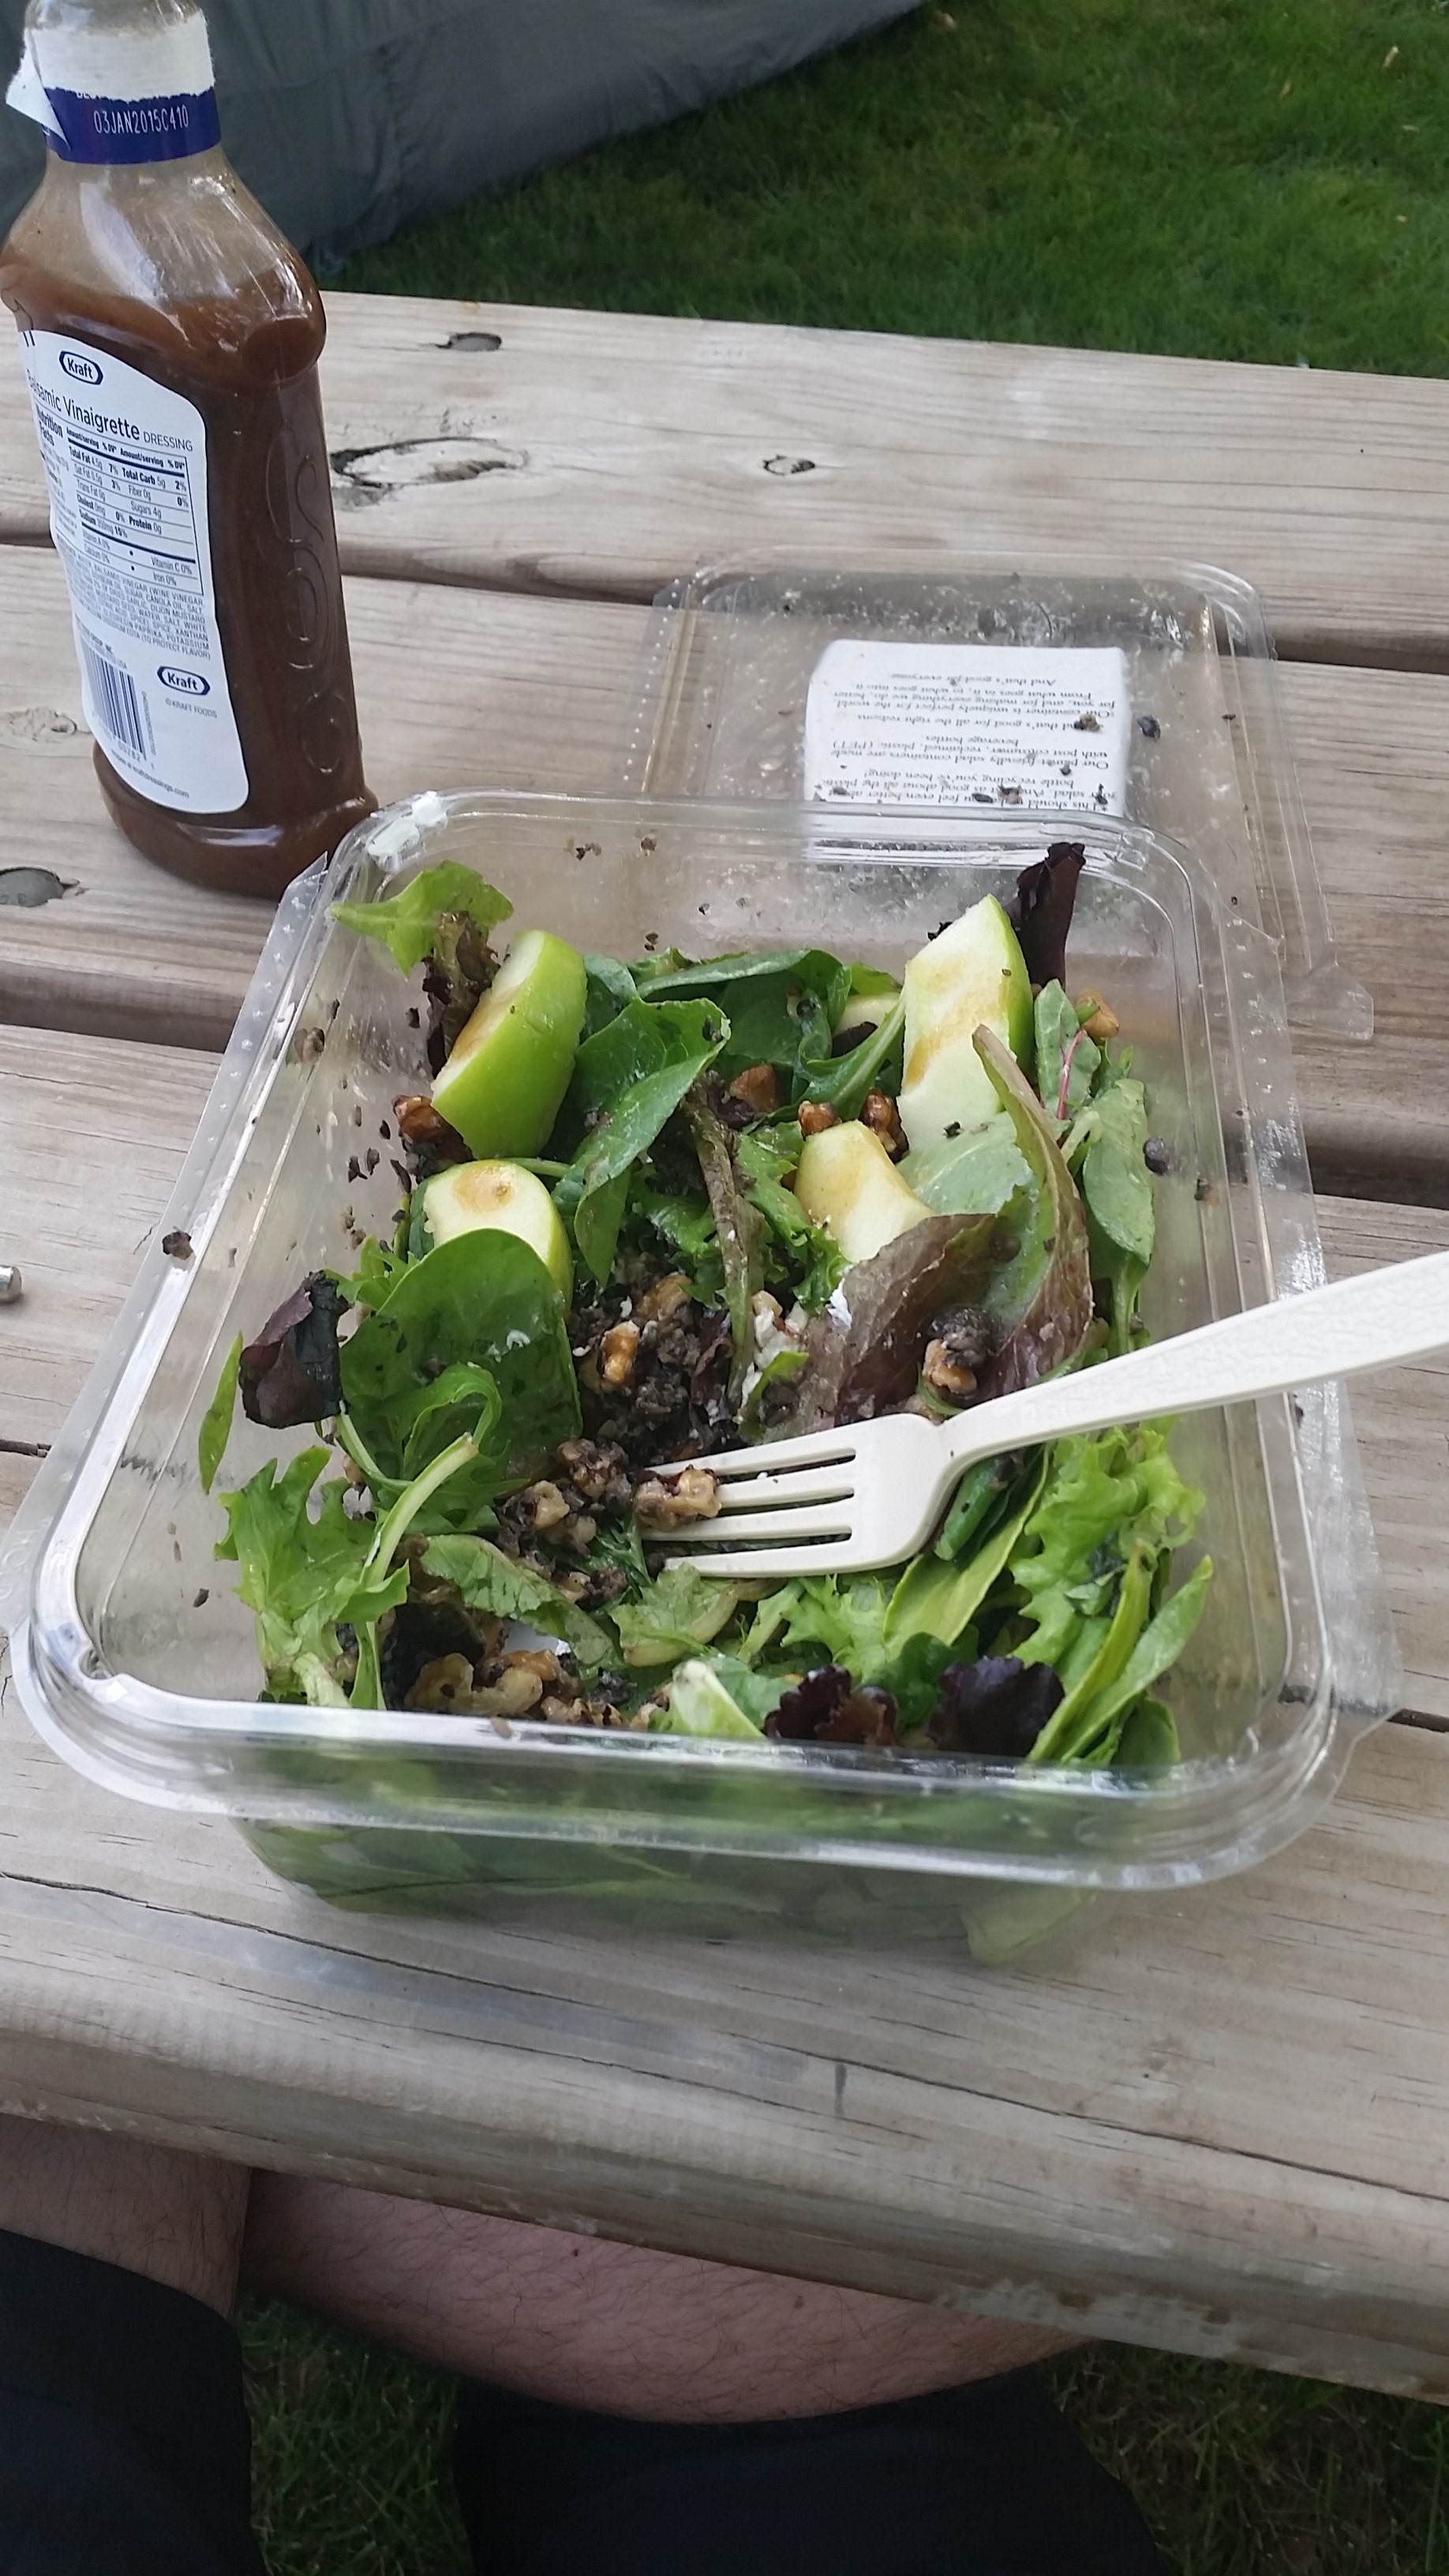 I was not going to be eating nasty fried food all week. 1 box of salad, one apple, one package of goat cheese, some dressing, and some blue berries, everyone was jealous. I went to bed happy.

Day 3: Emmetsburg to Forest City
The century day! I always like this day, it feels like a proper day of riding, and you get to see a lot of beautiful country. I awoke to a nice calm beautifully blue Iowa sky. There was a slight breeze, as we pedaled to the pancake man for breakfast.
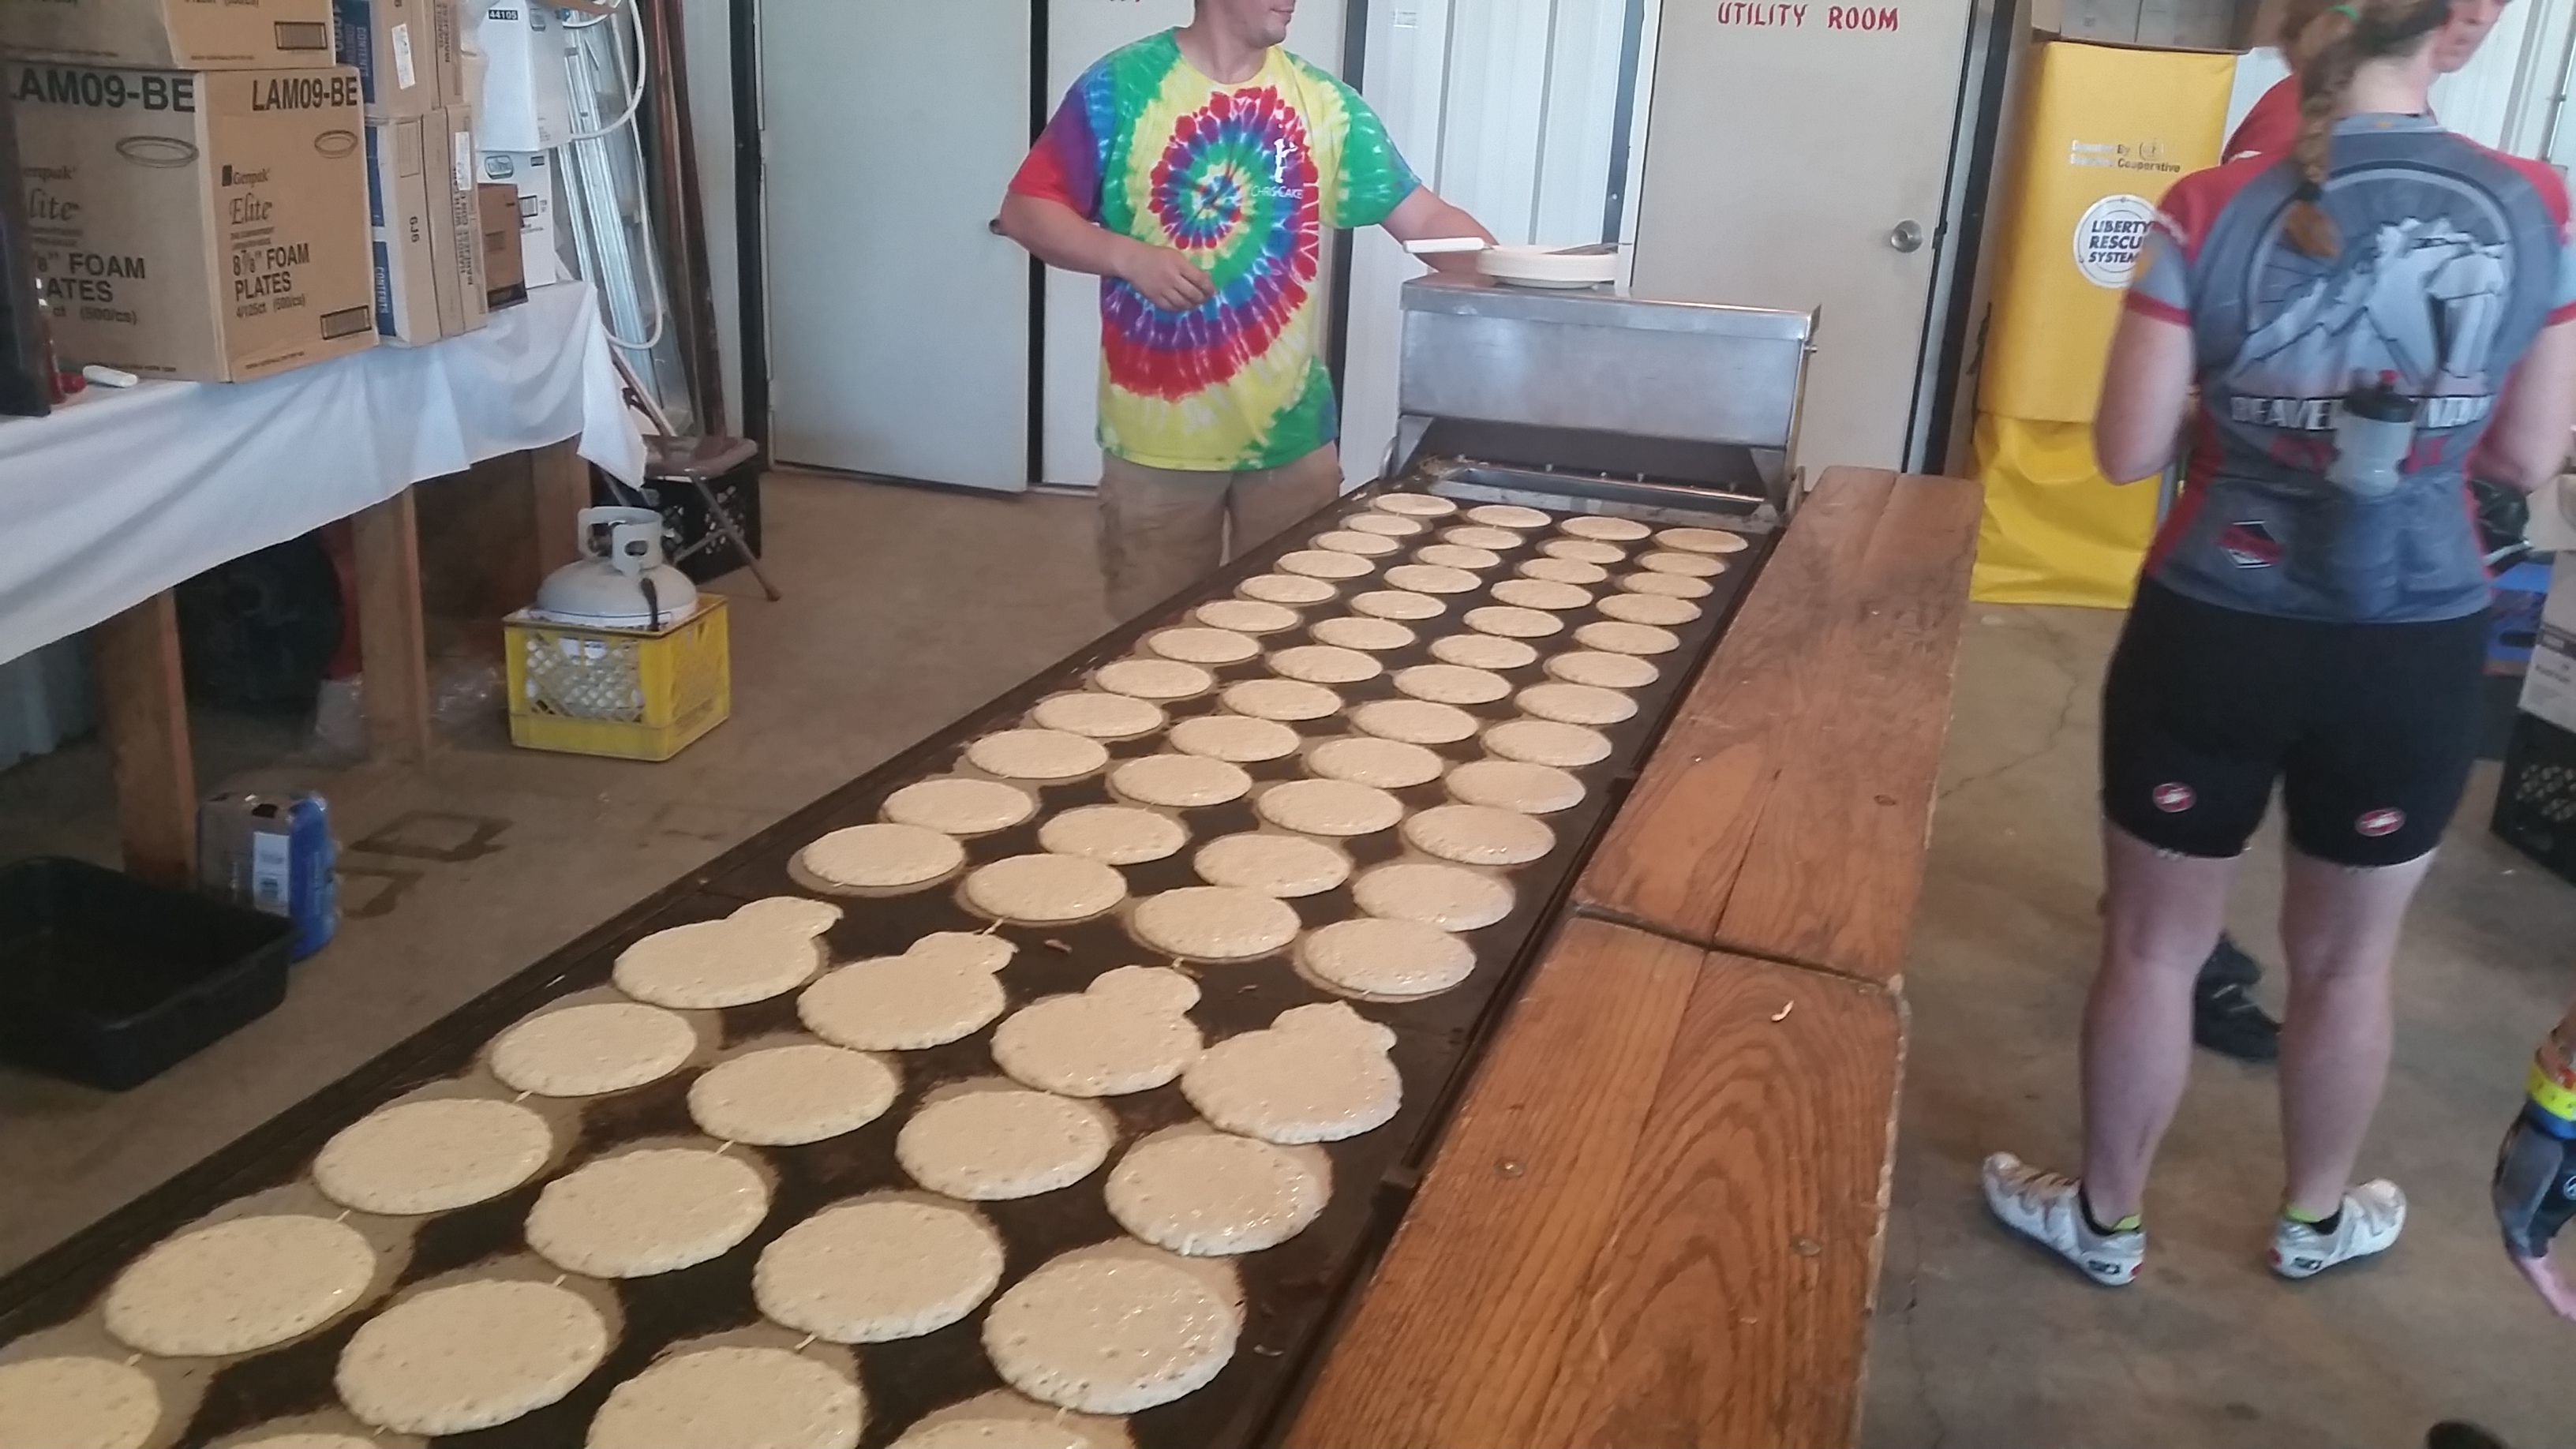
Pancake man is not fucking around, he can make 200 pancakes every 3 minutes, and you are allowed to eat as many as you want…so good. While we ate the wind slowly increased, so gently we didn’t even notice until we got back on our bikes.
They call it the Iowa mountains, head winds so steady and strong that it feels like you are always going up hill. The wind turbines were spinning merrily creating loads of energy but all I could feel was a steady never ending push against me that started off refreshing, but slowly, ever so slowly, began to steal my strength. What started off as a 20 mph wind, grew to 25, then 30.
We were headed east, and the wind was blowing west. But it was gorgeous, and the temps were not too high. So we pushed against the pedals, and the wind pushed against us. If you look at the map you can see we had some brief lovely breaks from the constant wind, just enough to allow us to rest, and the day went by as days like this do. Slowly but steadily.
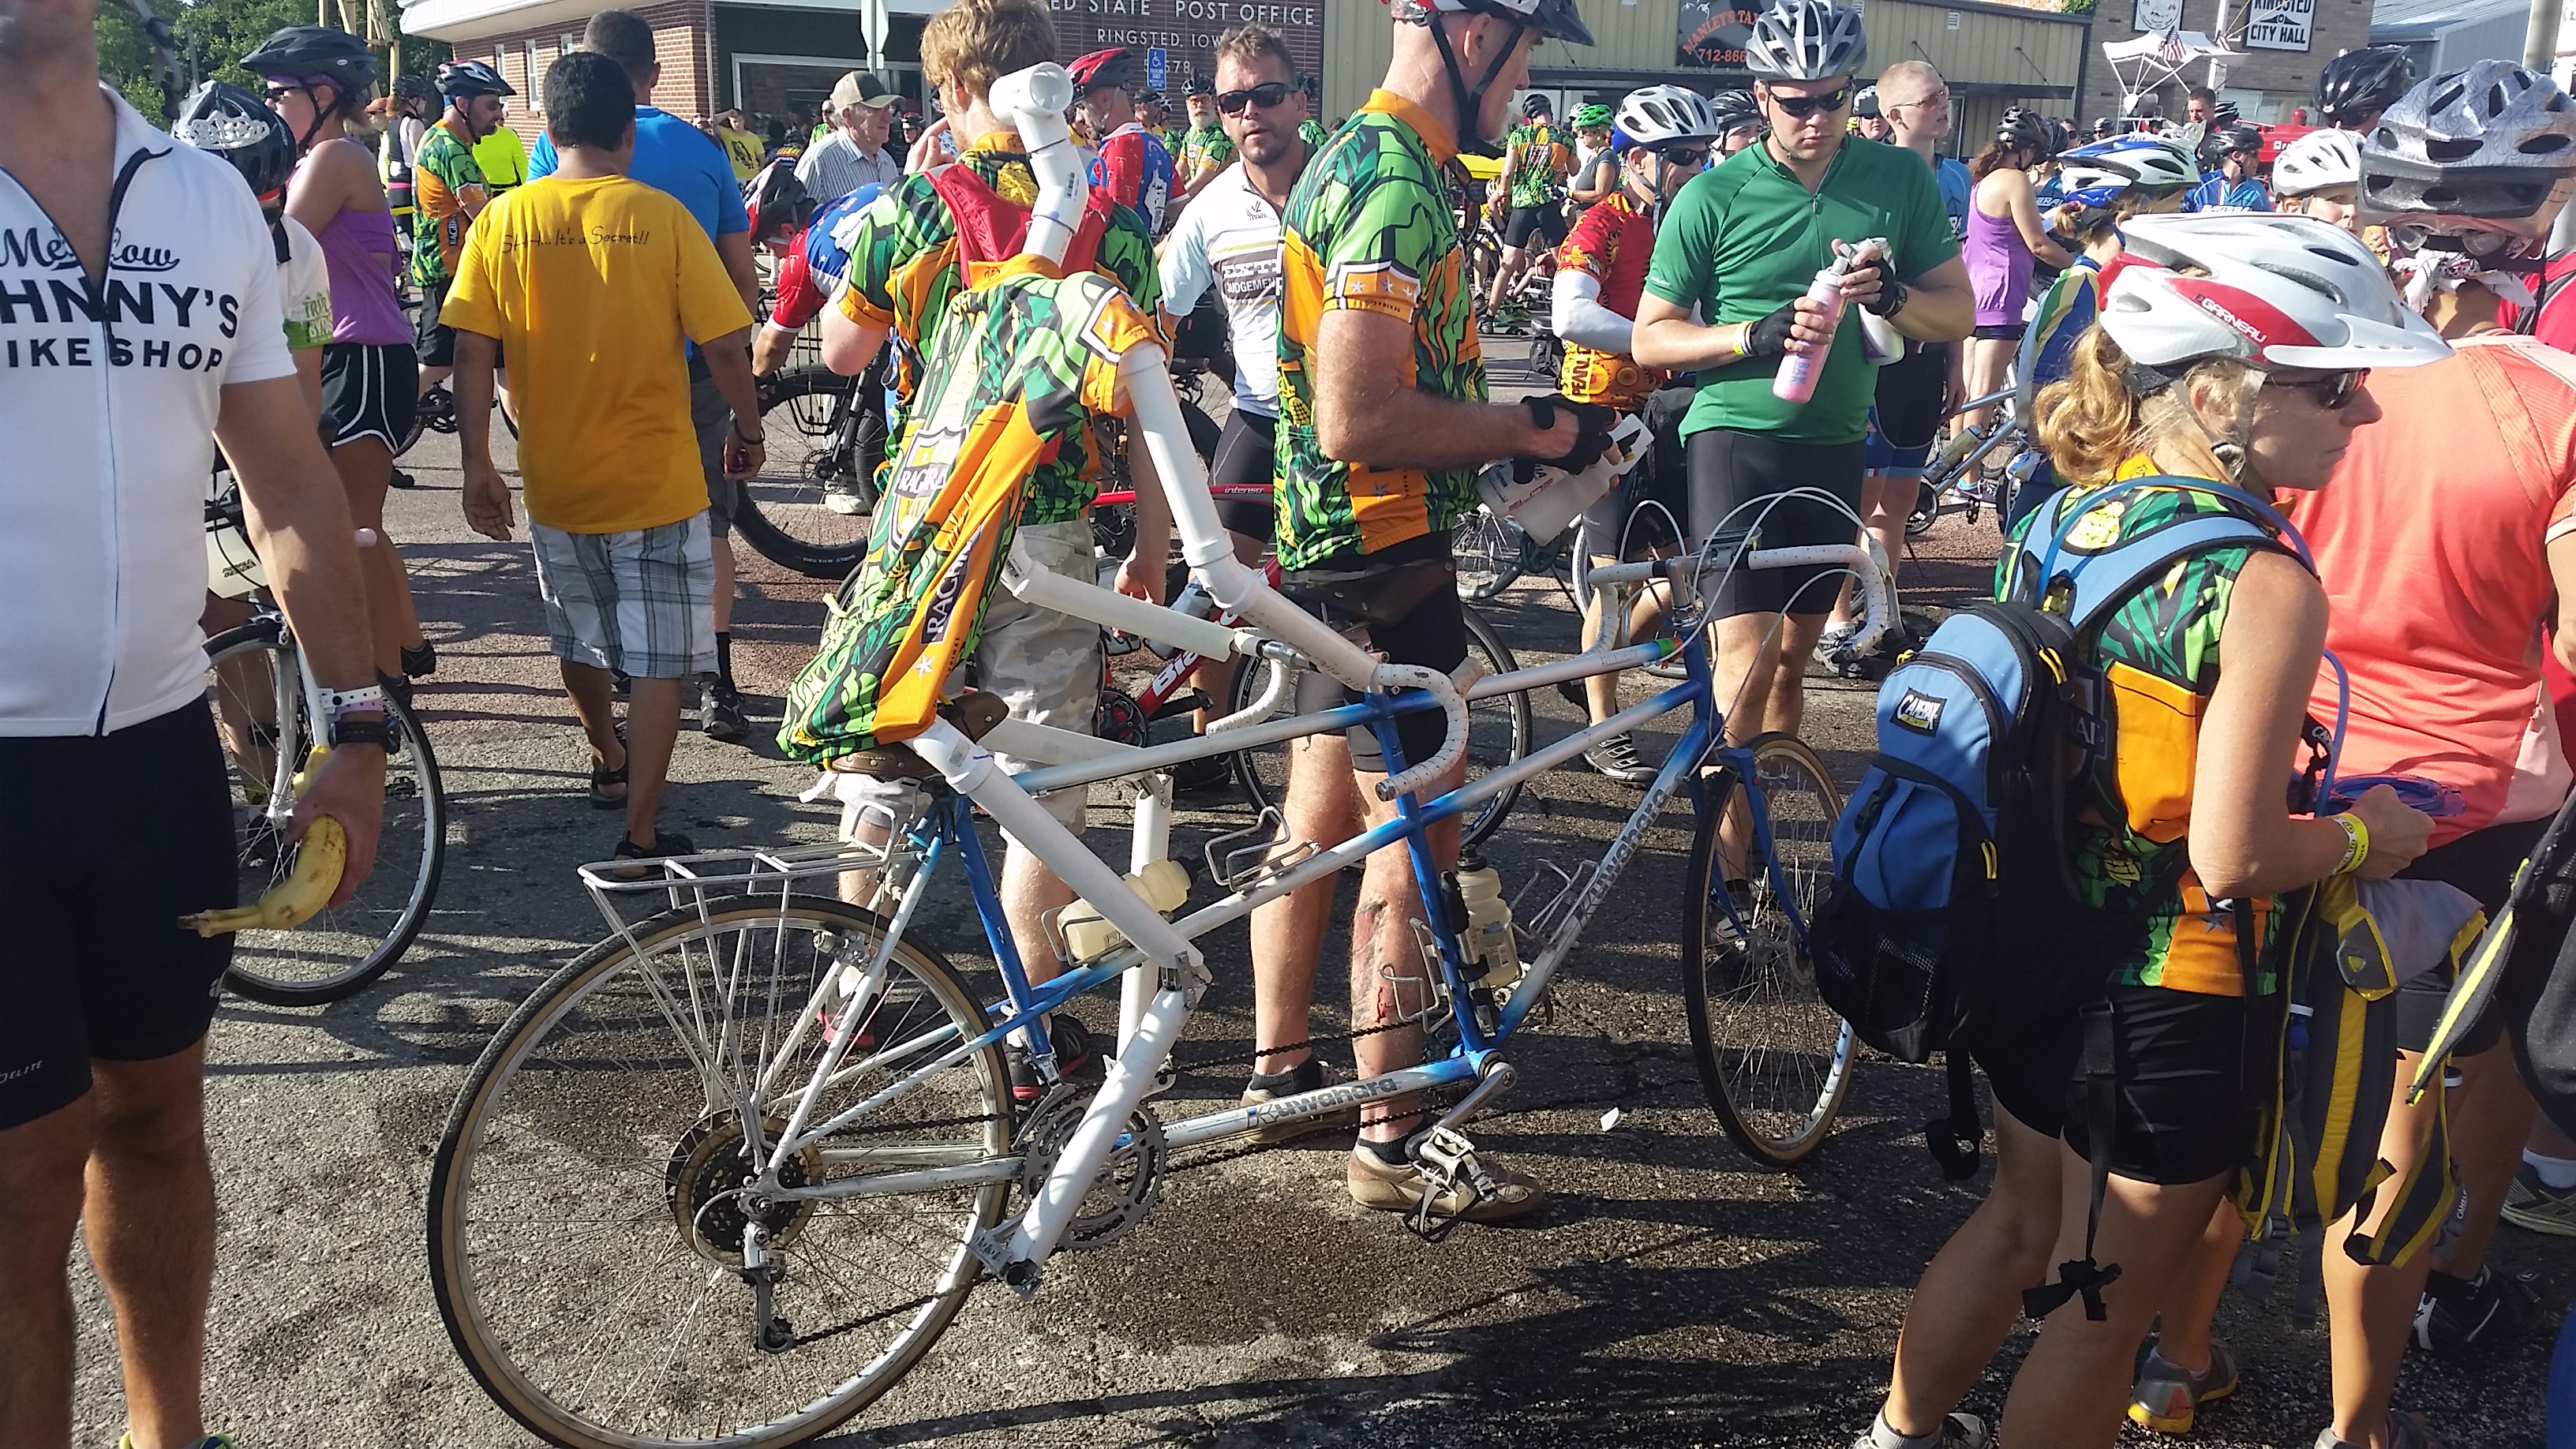
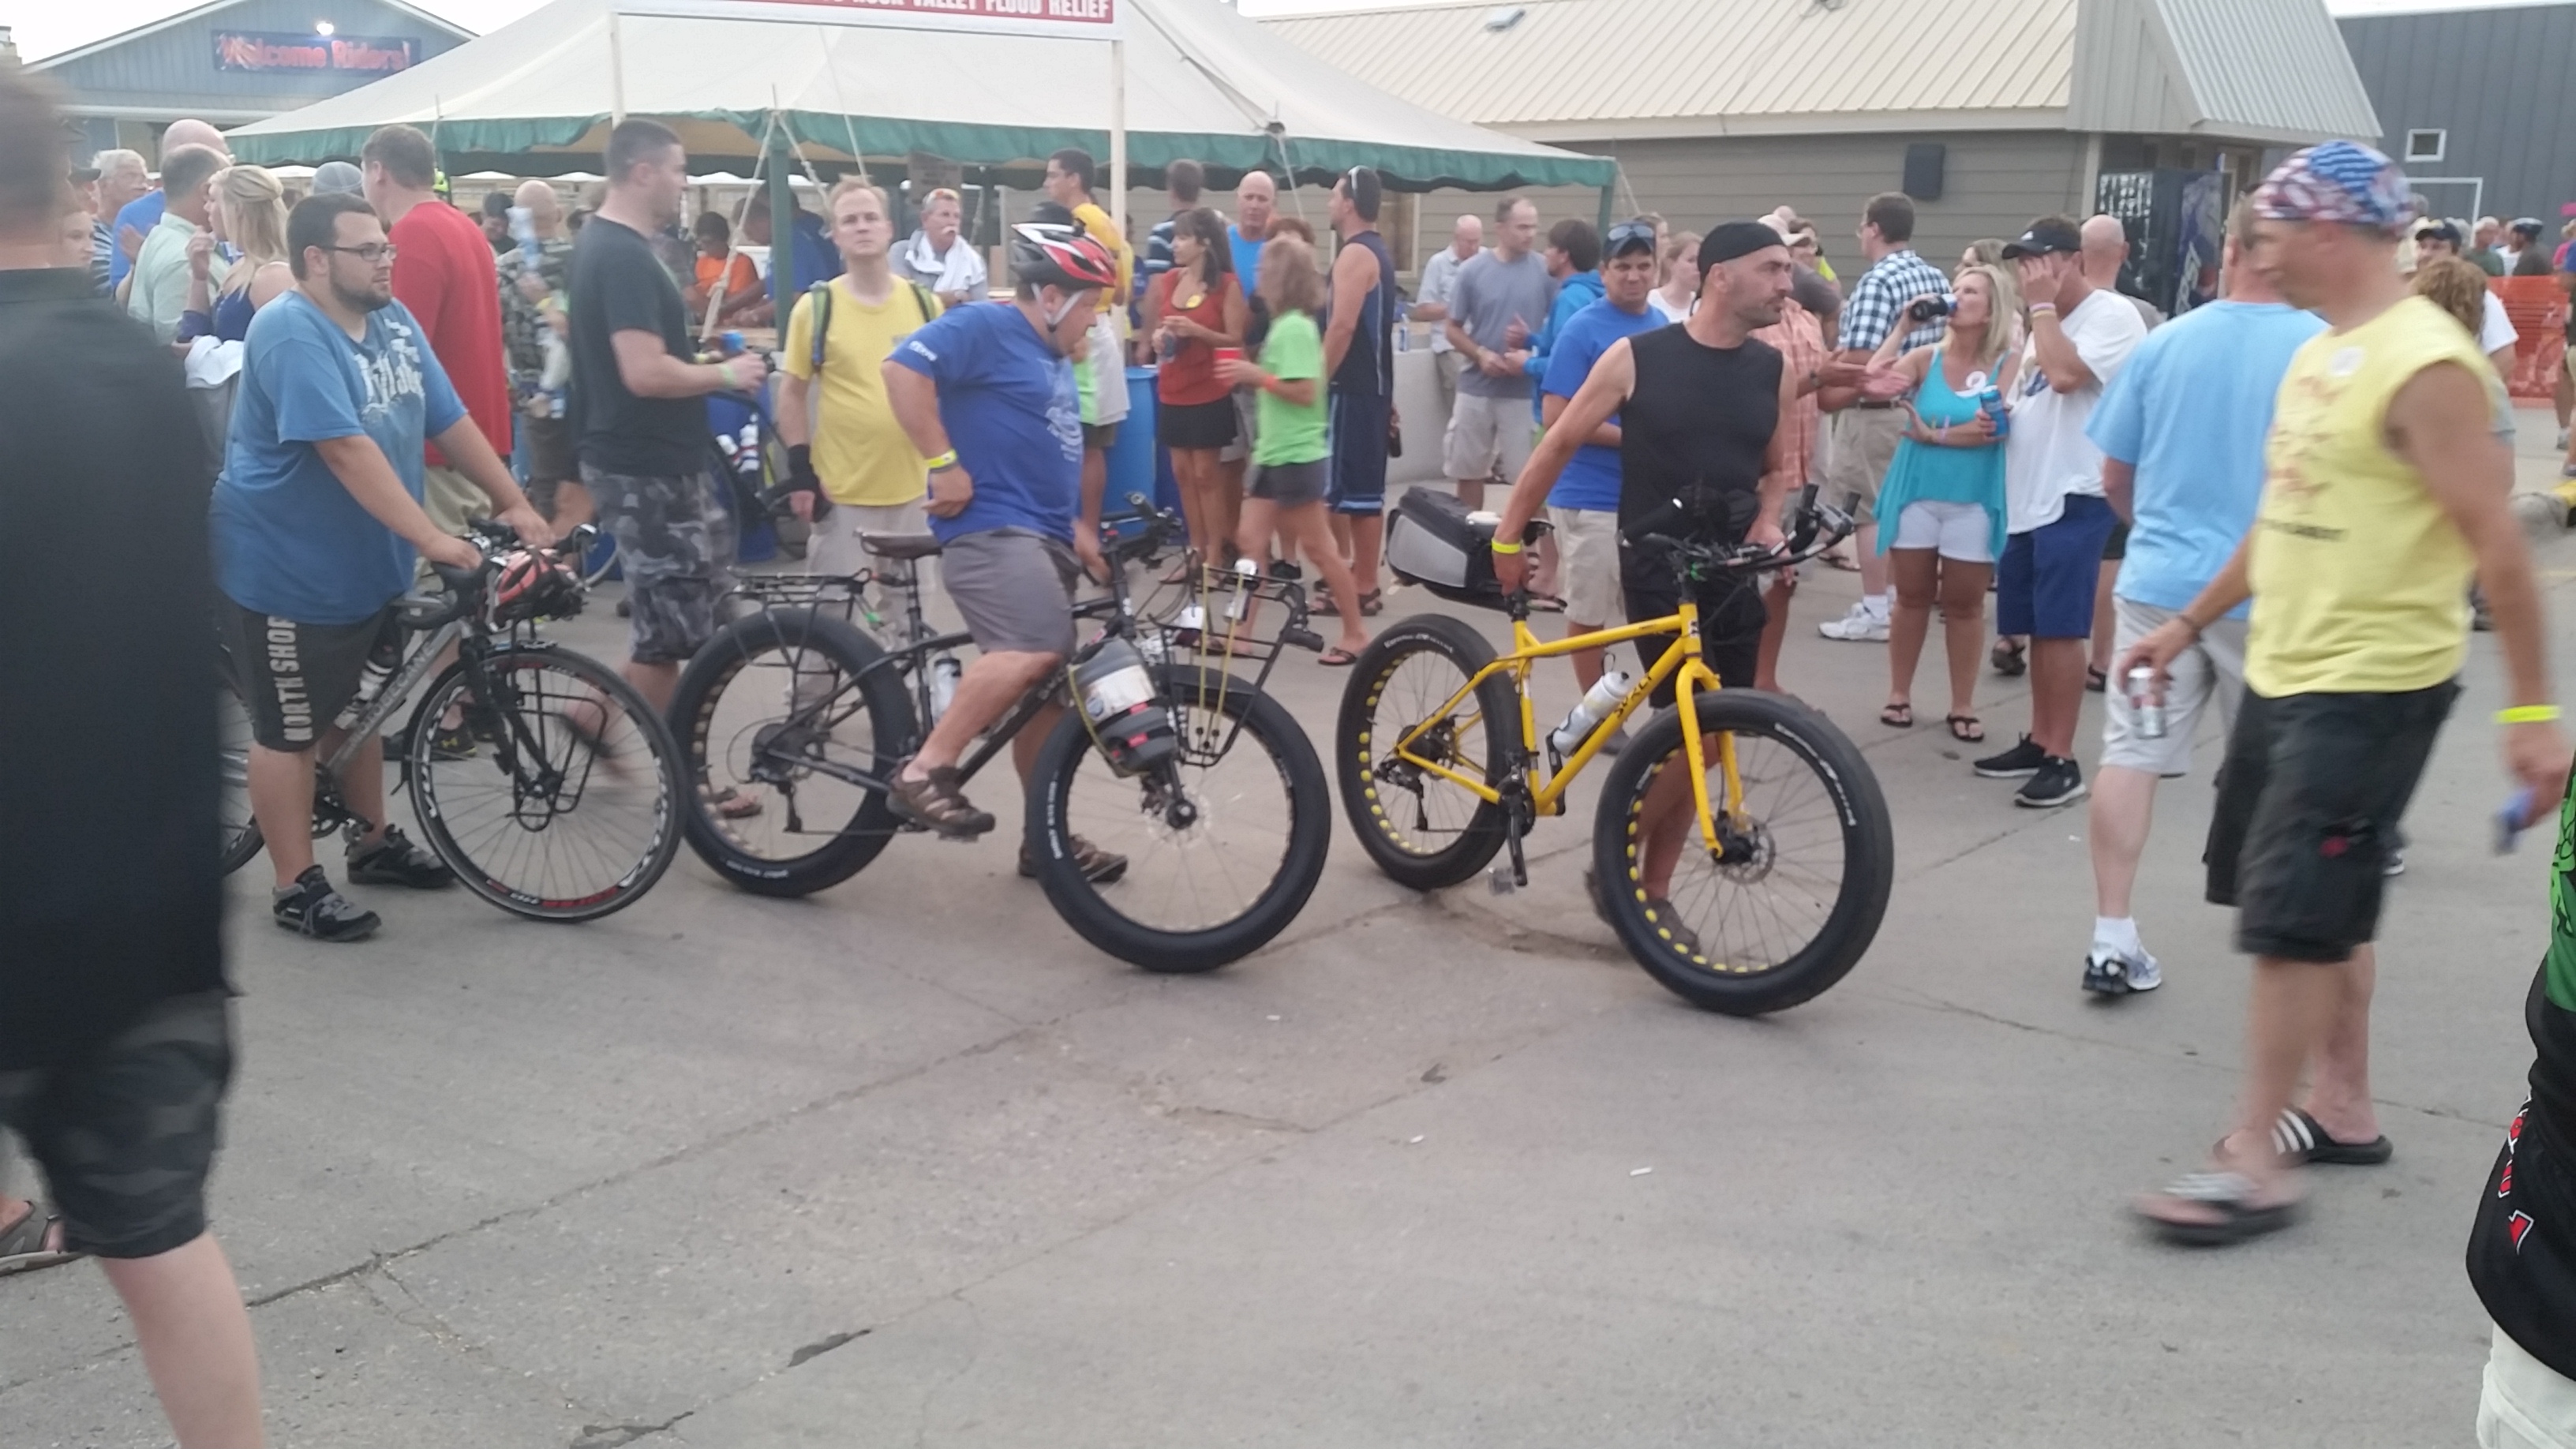
Want to ride a tandem, don’t have a partner? Build one!
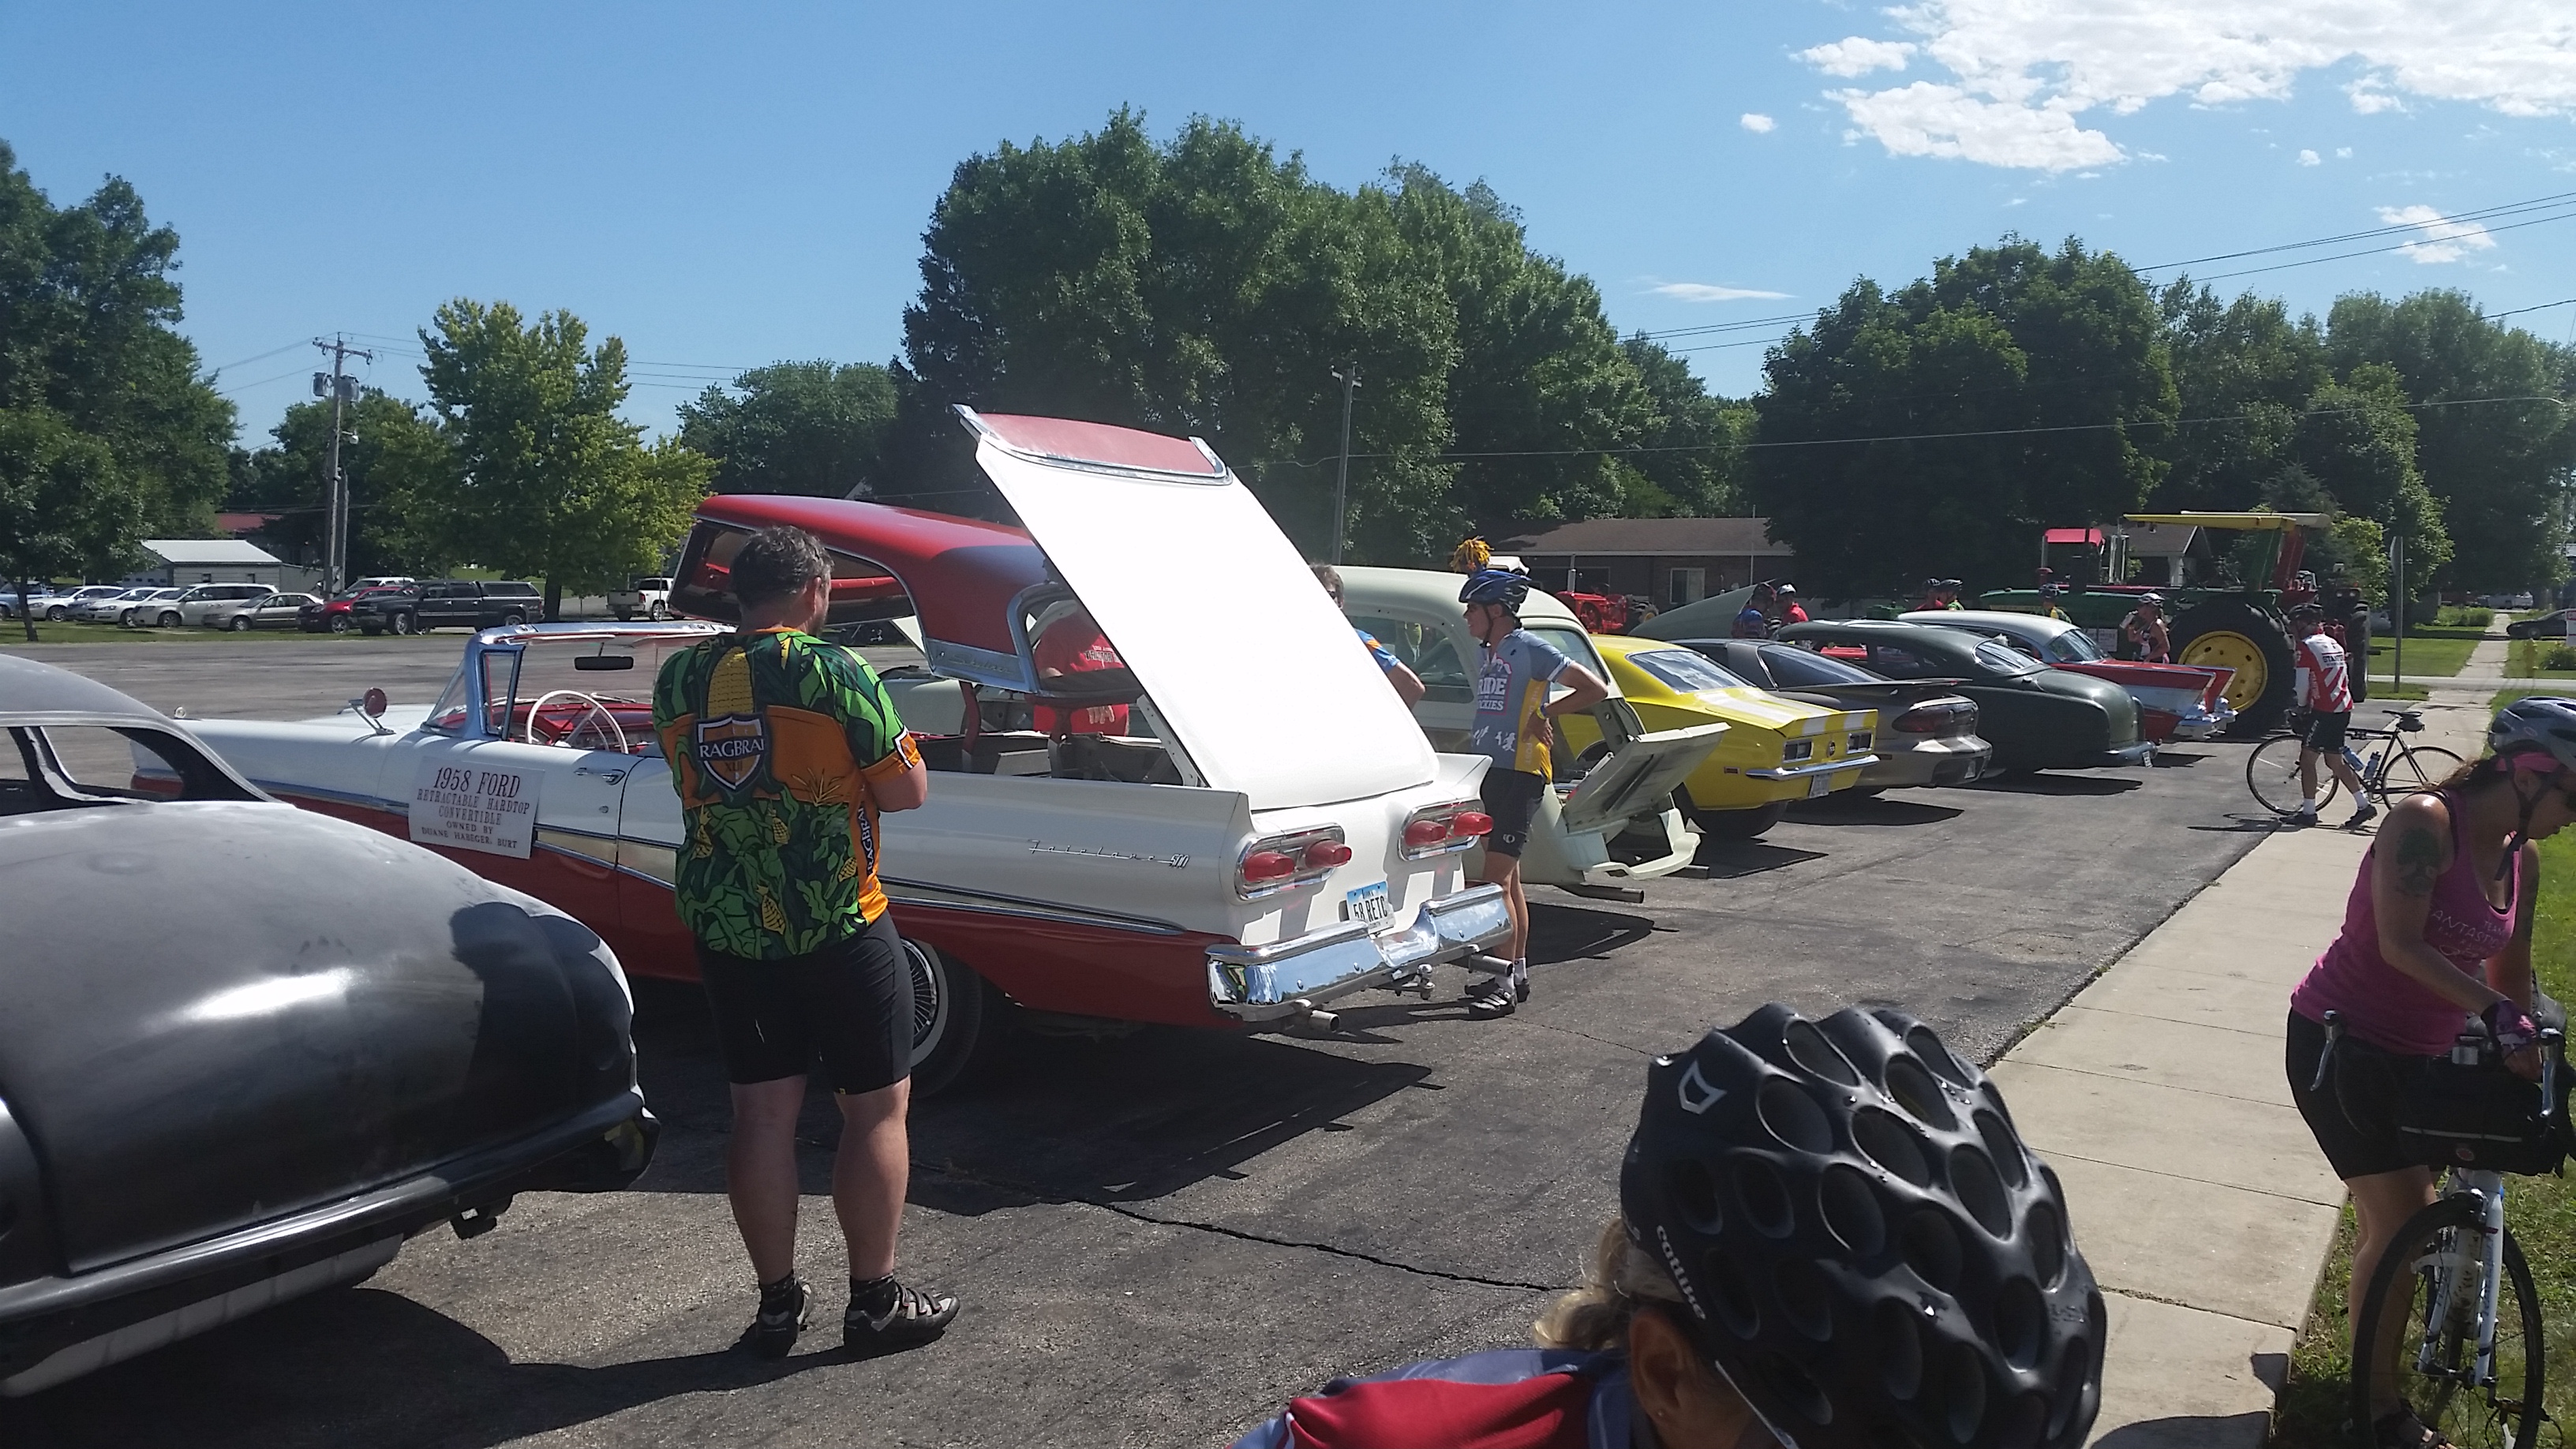
Not only did this town have a bitching Camero, but they also have a tradition of tossing toilets for distance. Not a plastic toilet, but a real deal porcelain throne. It seemed unlikely a bunch of tired cyclists was going to beat the town record, so we didn’t even try. If we had though we would have gotten a free t-shirt. Oh Iowa.


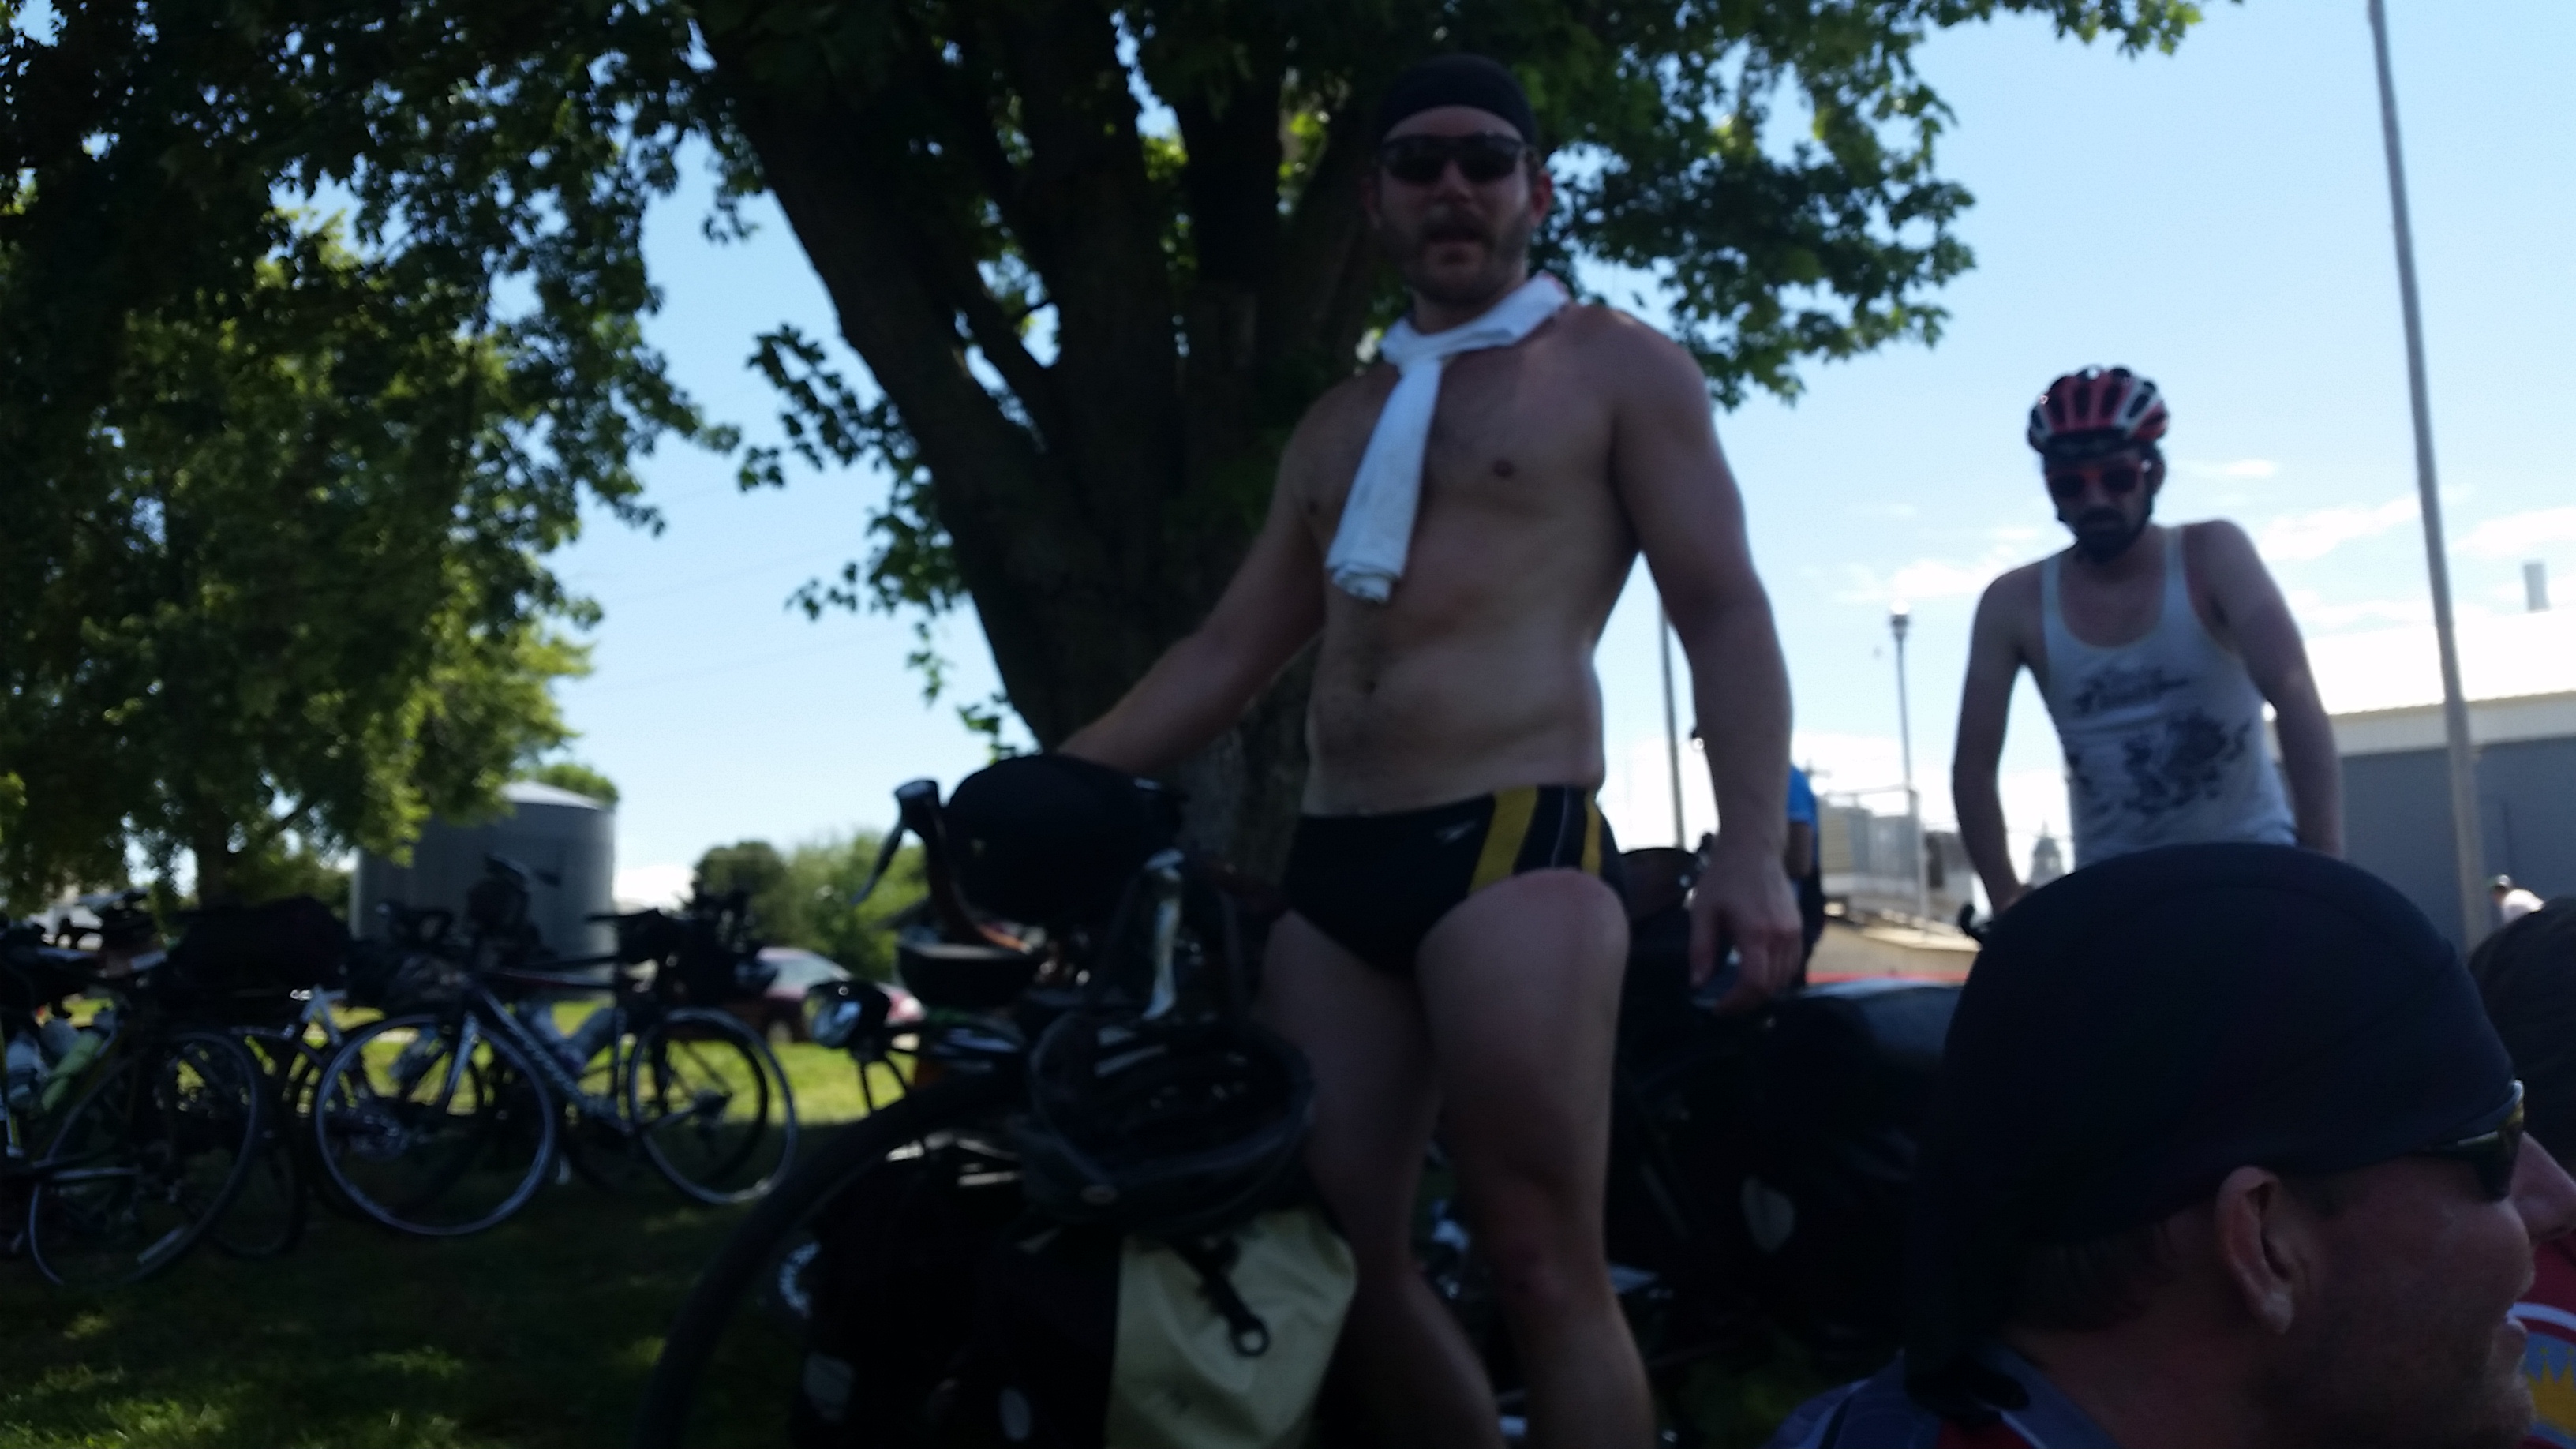
There was also this dapper gentleman, a bold fashion choice indeed. He rode the entire day in the sun like this. I am guessing it had something to do with the fact that his entire crew were drinking “special” water bottles that looked to my untrained eye an awful lot like rot gut.
100 miles later the wind no longer had anything to push against, because my ass was done pedaling. Tired and HUNGRY I rolled into camp, set up the tents, and found myself something made out of vegetables to eat. After double helpings of some sort of noodle thing, some more ice cream, a cookie, a couple power bars, and some sort of smoothie I passed out feeling good.
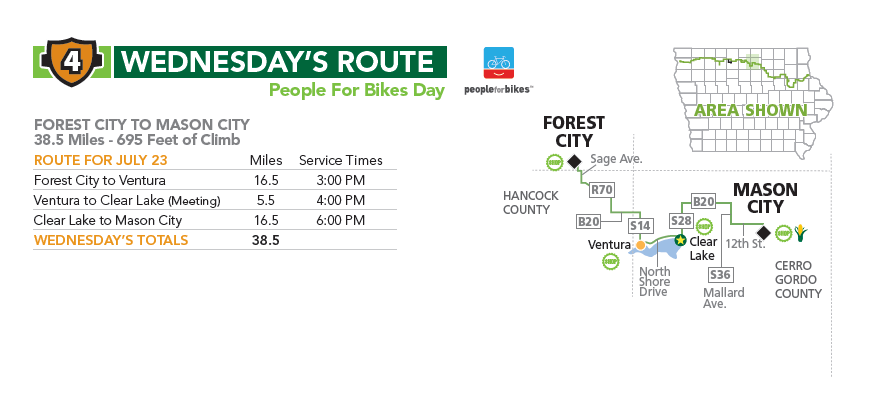
Day 4: Forest City To Mason City.
It wasn’t even 40 miles…we laughed, we dawdled, we spent a lot of time lounging, it was a good time.

There were big ass wind turbines!
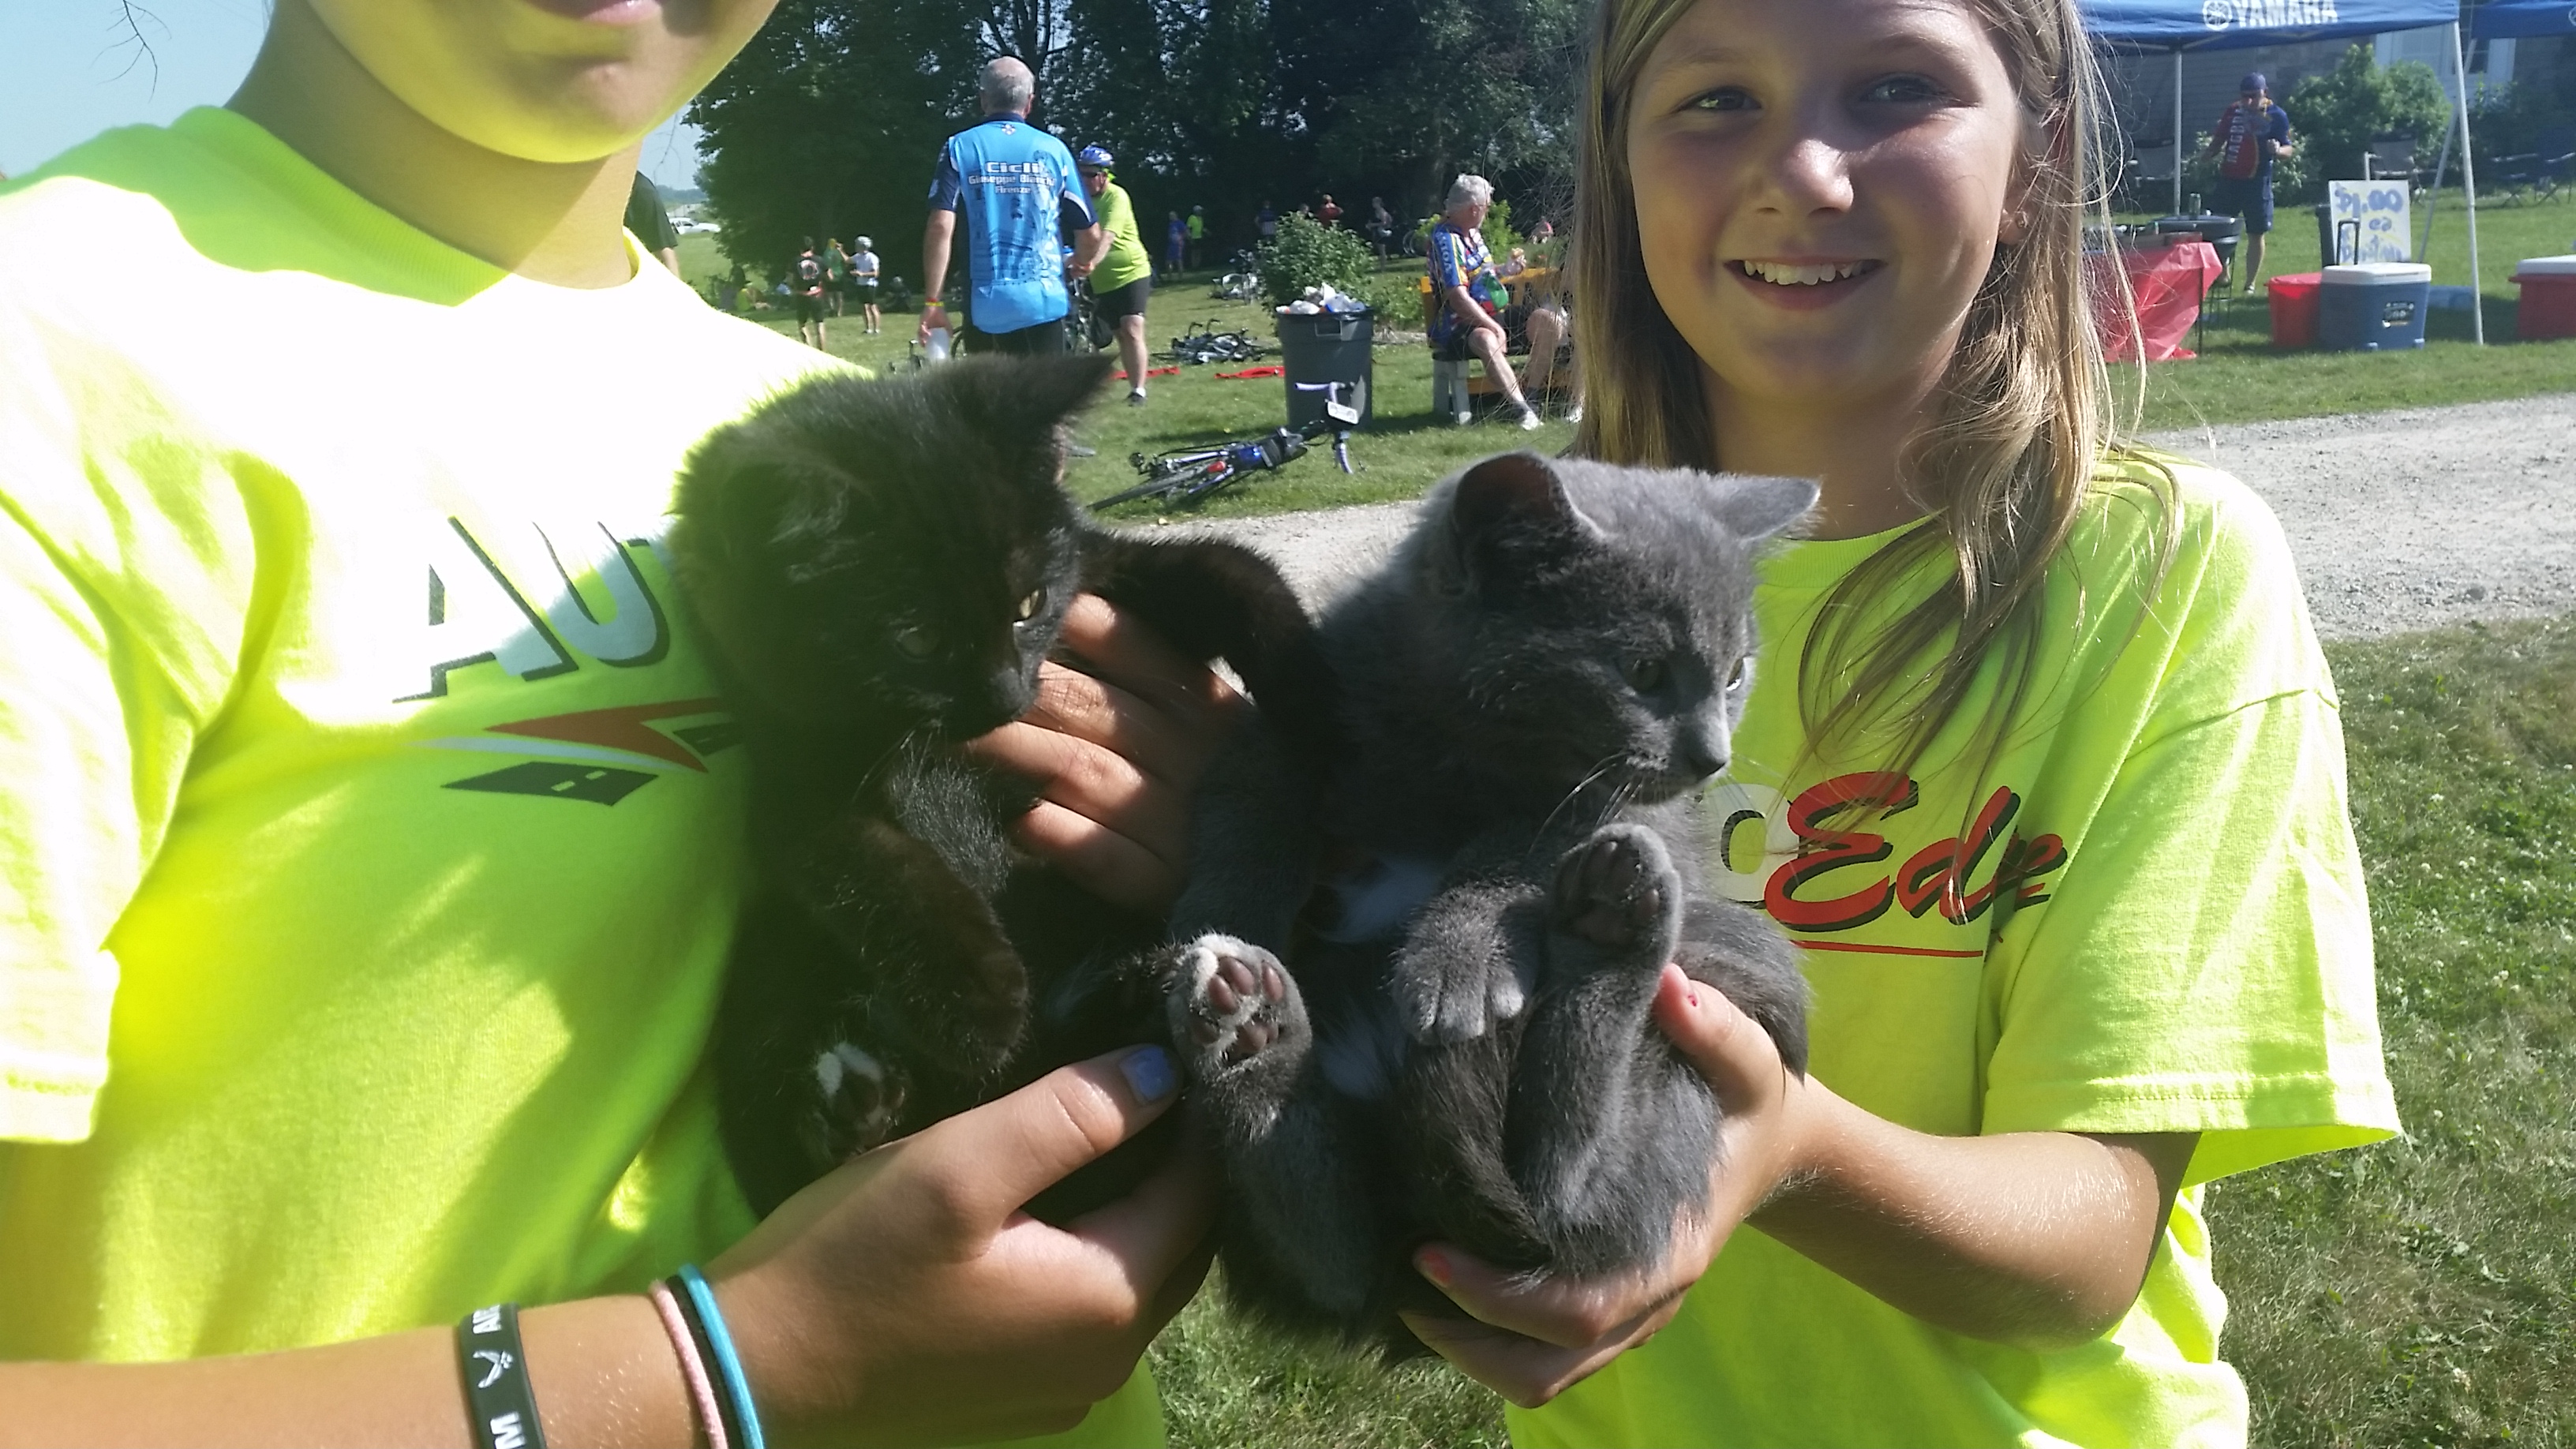
And Kittens! I named the grey one smokey, and the black one Beelzebub.
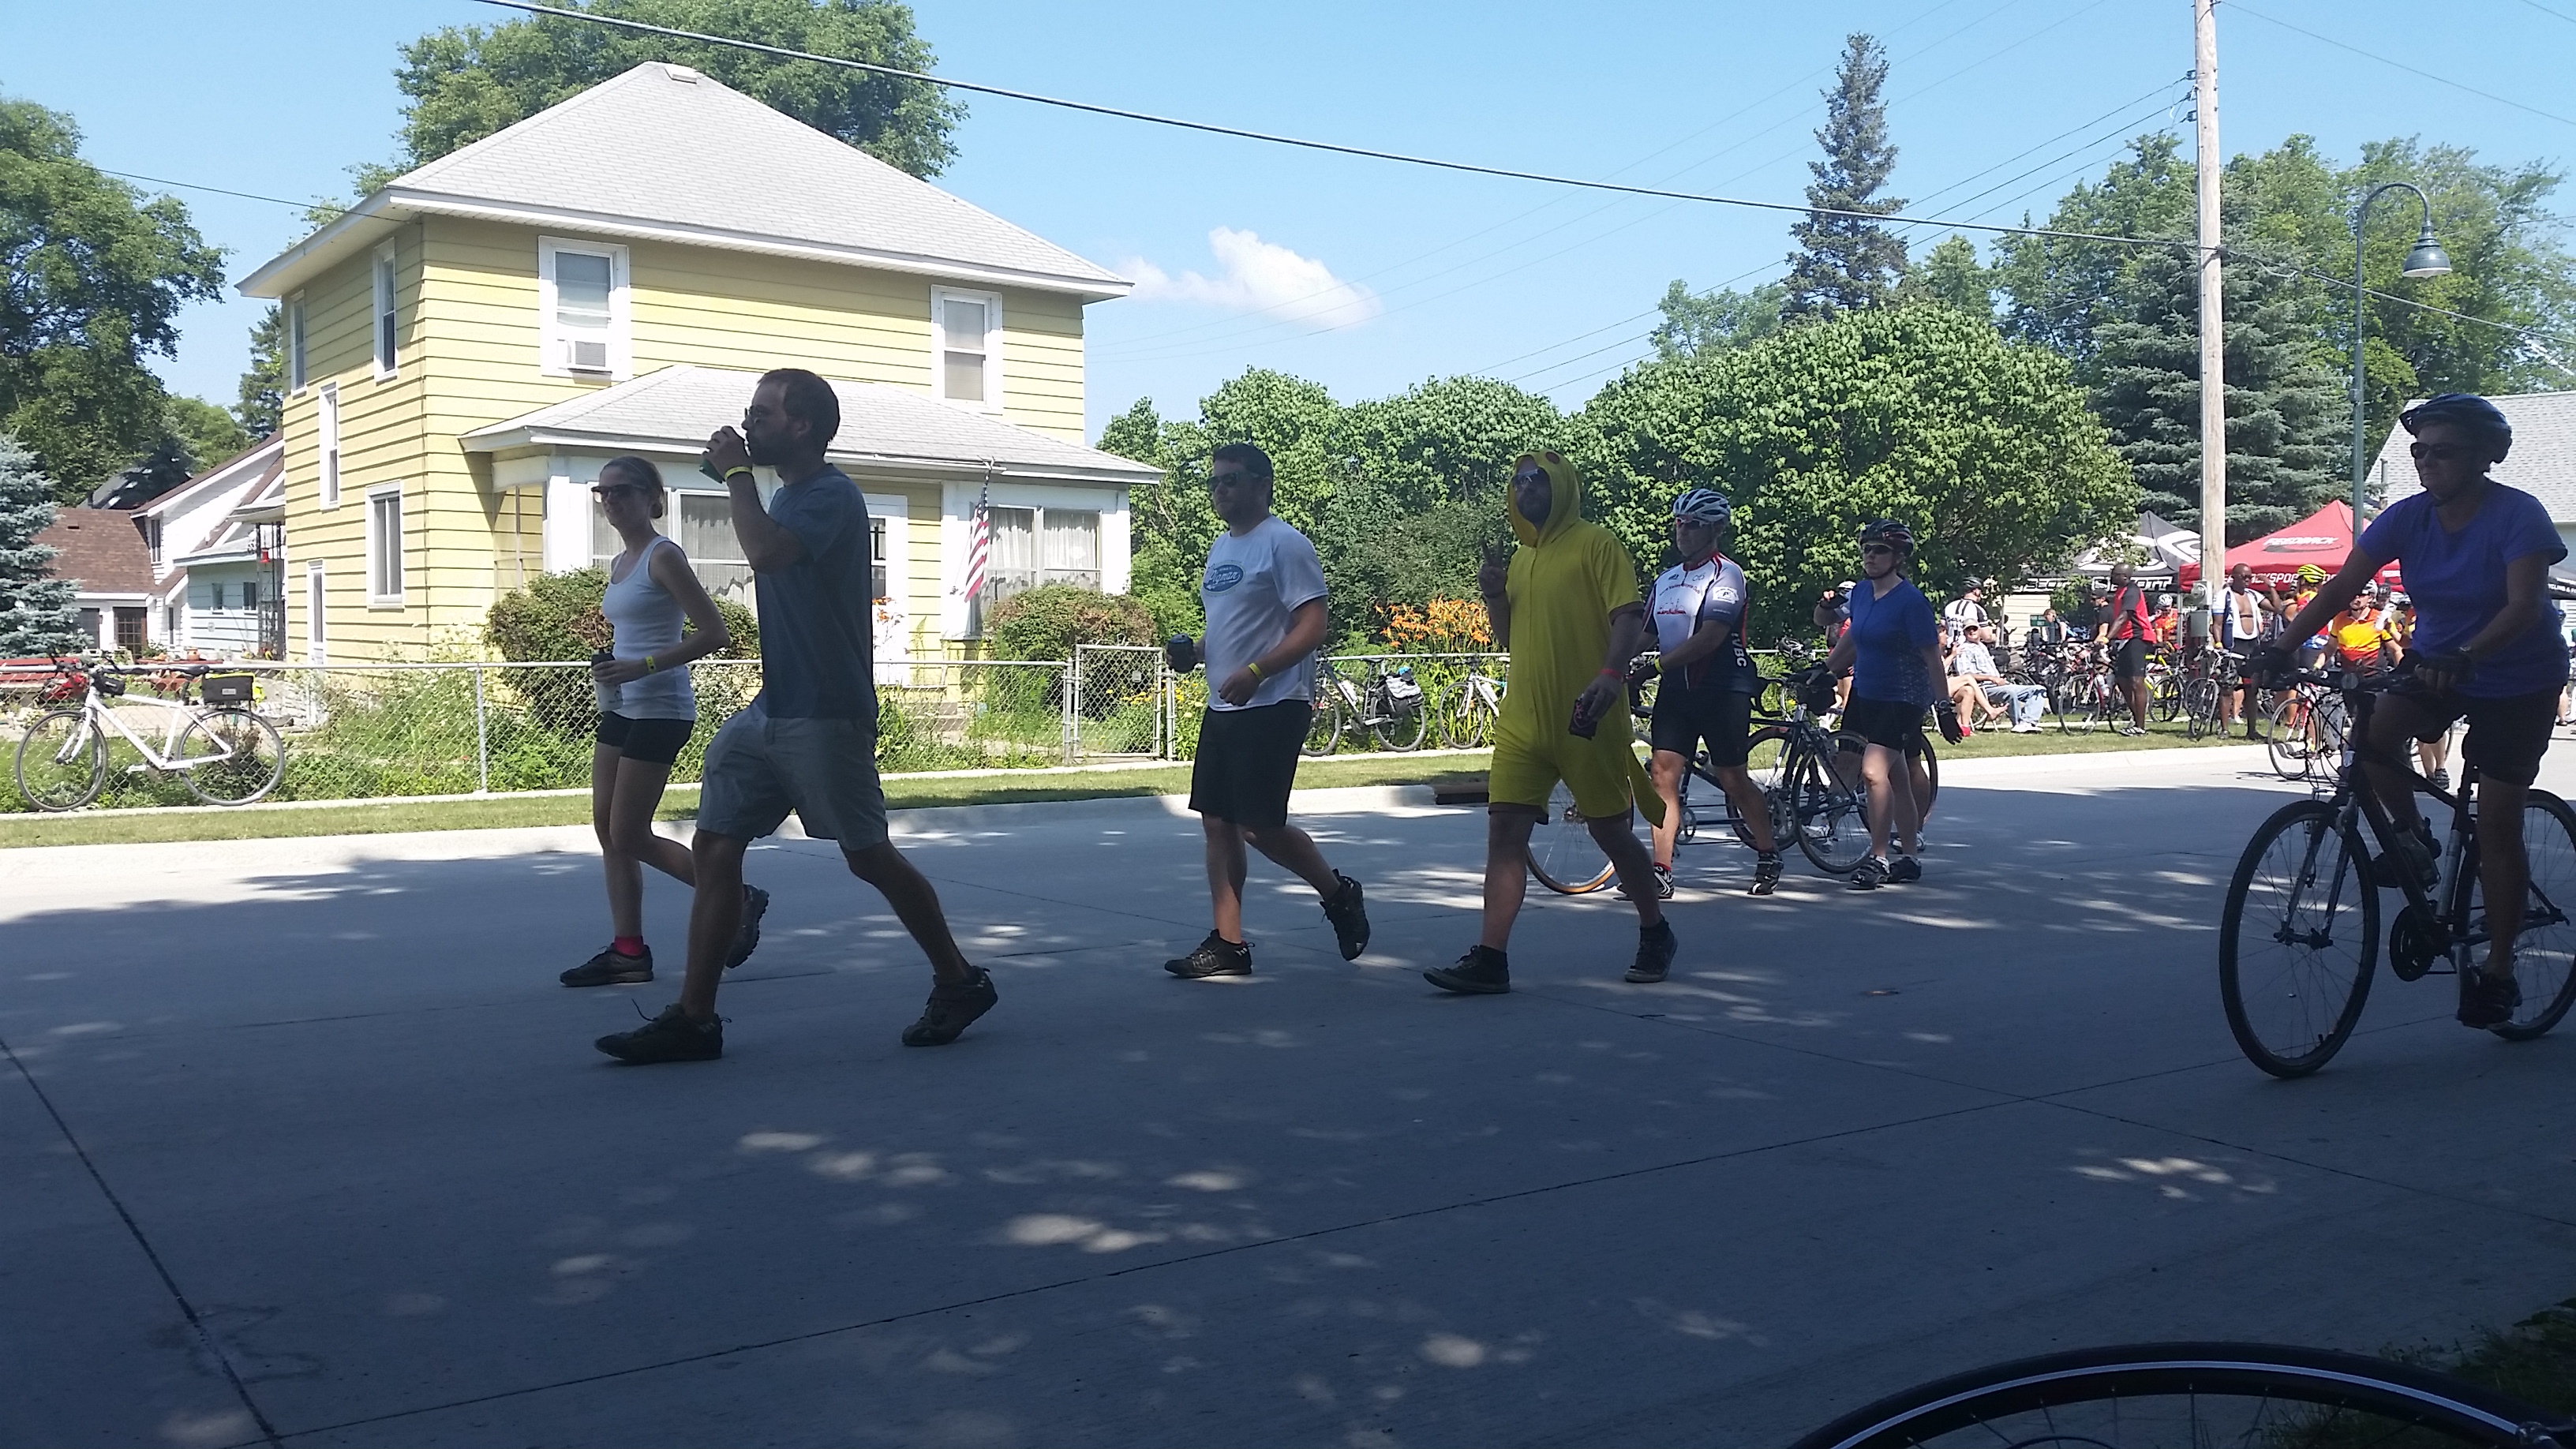
Pikachu made an appearance.

And of course ice cream!
Even though the millage was the shortest of the week, we spent the most time on the road. Mostly having fun and goofing around.
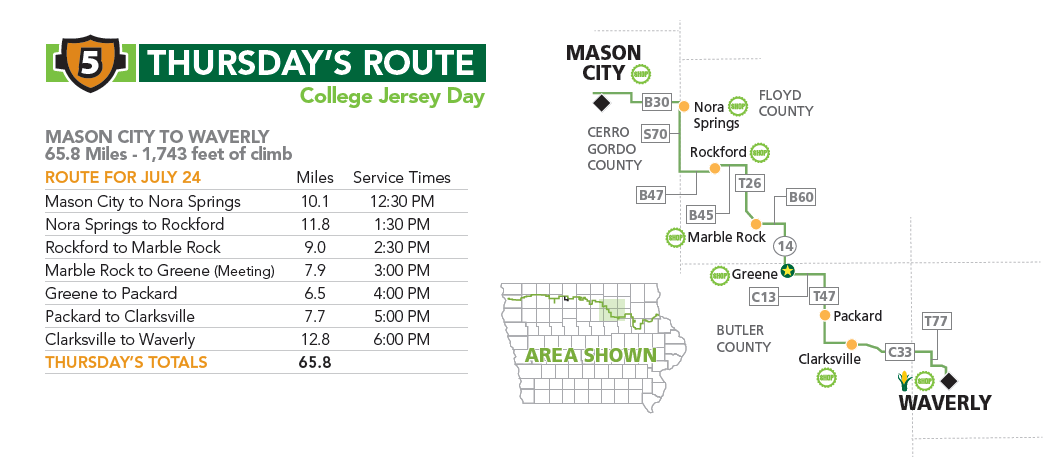
Day 5: Mason City to Waverly.
Its a funny thing about Iowa, it will go from Flat as a pancake to hilly as hell in a moment. We went up, we went down, we went up again, and down again. The same 300 feet of climbing and decent over and over again. It was nice, the landscape was gorgeous, rolling hills, verdant greens everywhere.
The day went by in a blur of lovely vistas and big ass hills. That night we camped in yet another soft and lovely field, we went to bed feeling lucky for yet another awesome day. While we slept, clouds gathered, and winds increased.
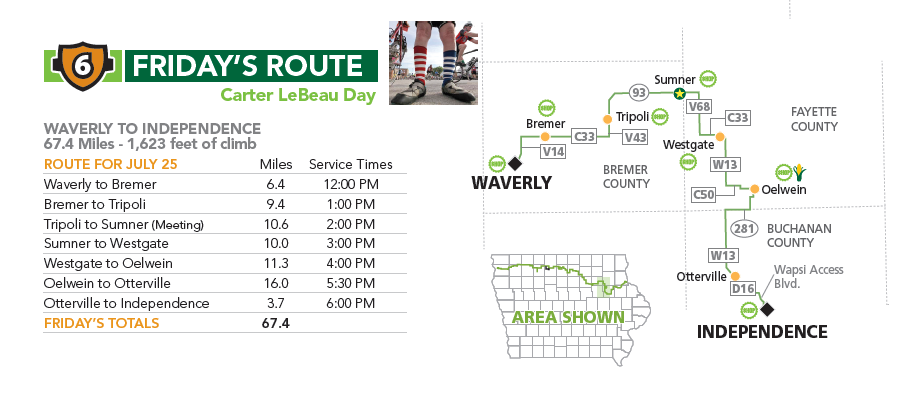
Day 6: Waverly to Independence.
We woke up and it was cold, just barely 70. We had been enjoying temps well into the 90’s even 100+ so 70 felt cold. The sky was black and ugly, like it had gotten into a fight the night before and was bruising. The wind tugged at our jerseys, and made taking our tent down hard. We were going to catch a whoopin.
The maelstrom held off until about a mile outside the first town, and then it let fly with both barrels. First the wind kicked up, and then the temp dropped. It went from 75 to 59 in half an hour. The rain started off fierce and only got worse. Driven by 35 mph wind it hit you in the face with a significant force. It felt like ice, even though it wasn’t frozen. It stung and made you turn red. The wind was blowing north, so we either got it full in the ear, or dead on in the face. This was not pleasant, in fact, it was the opposite.
I had nothing on but a jersey and some shorts. The moment I stopped for any reason my entire body started to shake with the shivers. I actually took refuge in a Kybo (Iowa for porta-potty) just to warm up. As the storm worked up its rage the winds got stronger, 35 mph with the rain, with gusts into the 40’s. It would grab you and toss you around, like a bit of fluff. Luckily at that point all the riders had spread so far out that you could get blown all over the road without hitting anyone else.
The corn was bent nearly sideways, and we had no choice but to move forward against the wind. No one moved fast, and many didn’t move at all. There were a lot of people waiting in each town for the SAG bus. Each mile was a triumph of the will over nature. Hands and fingers went numb, you could see your breath, it was cold and extremely windy, and the whole day was a grind.
I put my head on my handlebars, got as small as possible, and pushed for all I was worth. The rain fell, the wind blew, and I creaked slowly across Iowa. By the end I just wanted to go to sleep, but in an irony lost on no one, just as we pulled into camp the damn sun came out and the wind died down. Nature had a good belly laugh at our expense, but at least we didn’t have to set up our tents in the rain.
The end town that day had a cool dam, bursting with all the rain we had gotten that day. We had Chinese food for dinner, it was cheap…and surprisingly tasty. Which might have been because we were dying of hunger, or because for some strange reason we had found good Asian food in the middle of Iowa. I fell asleep in a heap, I don’t really remember much more than being tired to the bone.

Day 7: Independence to Guttenberg (Pronounce Gut-n-burg):
I awoke and found my bike to be strangely heavy. When I titled it upright about 4 cups of water ran out of the frame. It had been driven into it yesterday. Once drained I started on the last day of riding.
The winds had blown, the rain had fallen, but Iowa had saved the best for last. This part of the state is mind blowing-ly pretty. There are actually trees, and the Amish have made many homes here. We saw old fashion barns, and old fashion farming methods, and a whole crop of little Amish kids let out to watch us crazy folks in spandex ride by. Each of them had the same exact hair cut, and each of them smiled and waved at us as we went by.
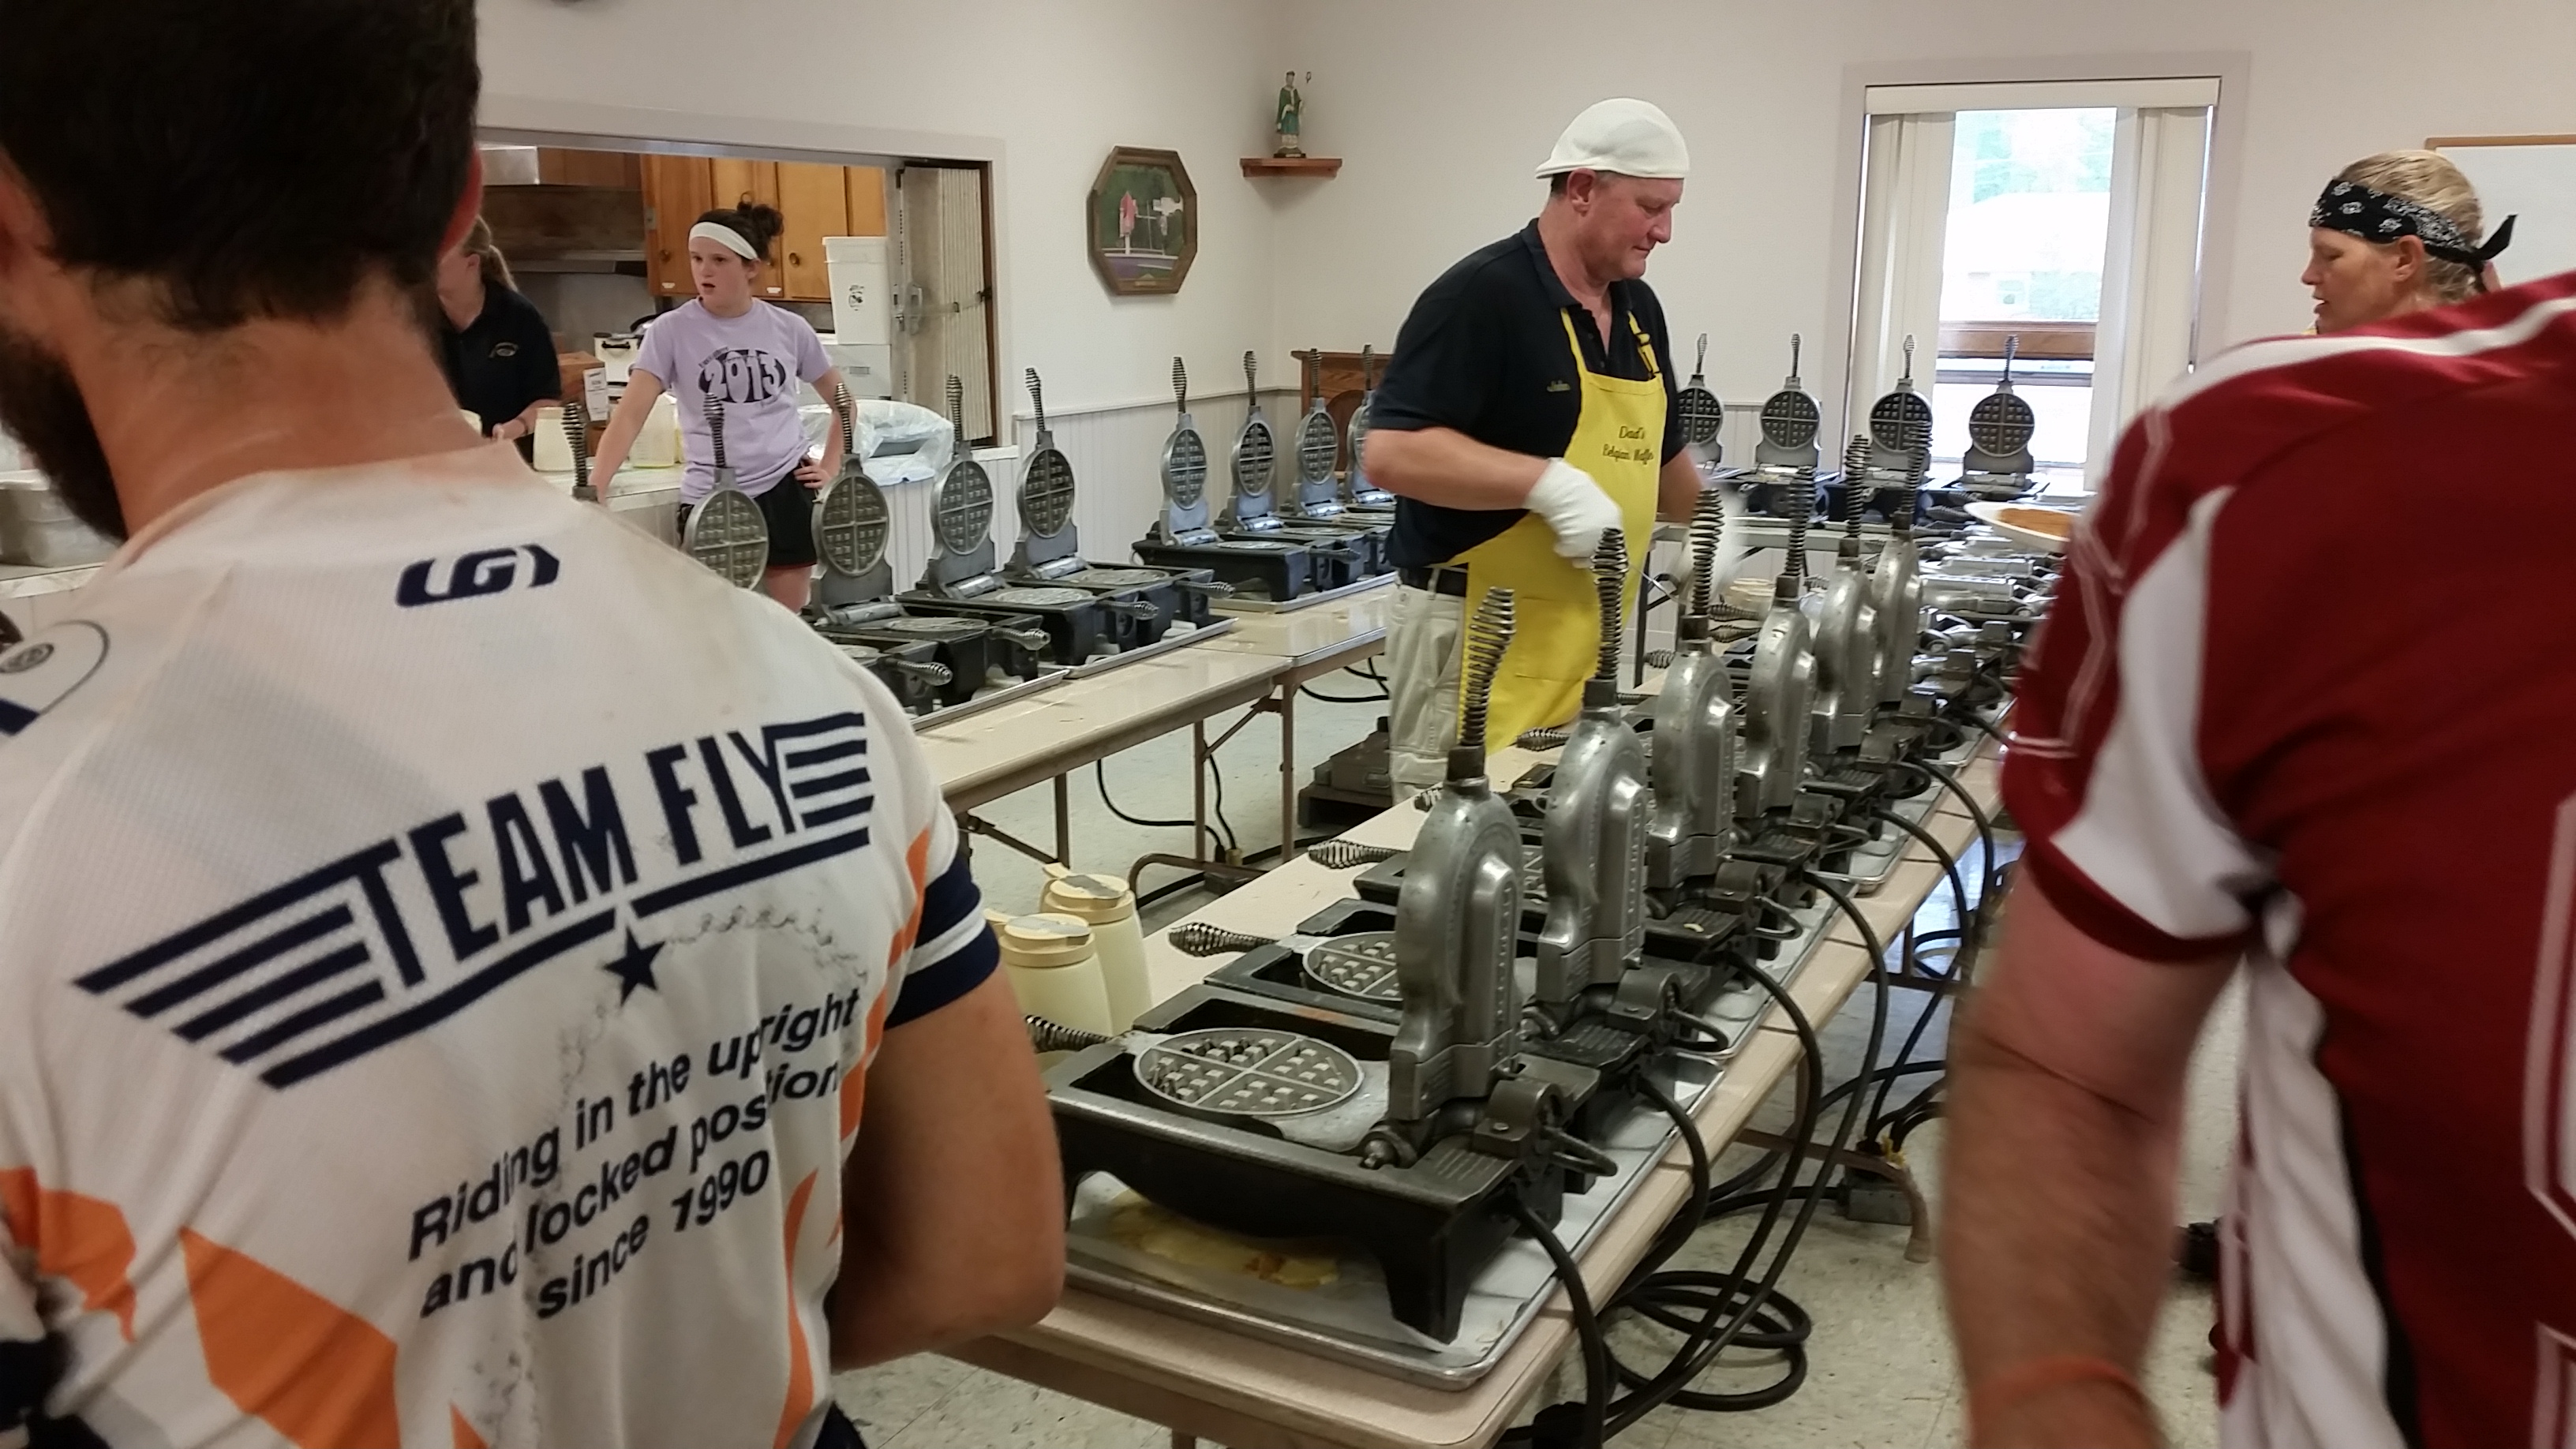
The first order of business for the day was WAFFLES! All you could eat, 20 different kinds of syrup, fresh made whipped cream, and butter in a dispenser!

Nectar of the gods! This man was making waffles so fast that even the line of hundreds was only taking up one row of his waffle empire. It wasn’t until another hundred or so people got in line the he fired up that back row. But each waffle was so big that you could really only eat two before giving up, so he kept the line moving at a rapid pace.
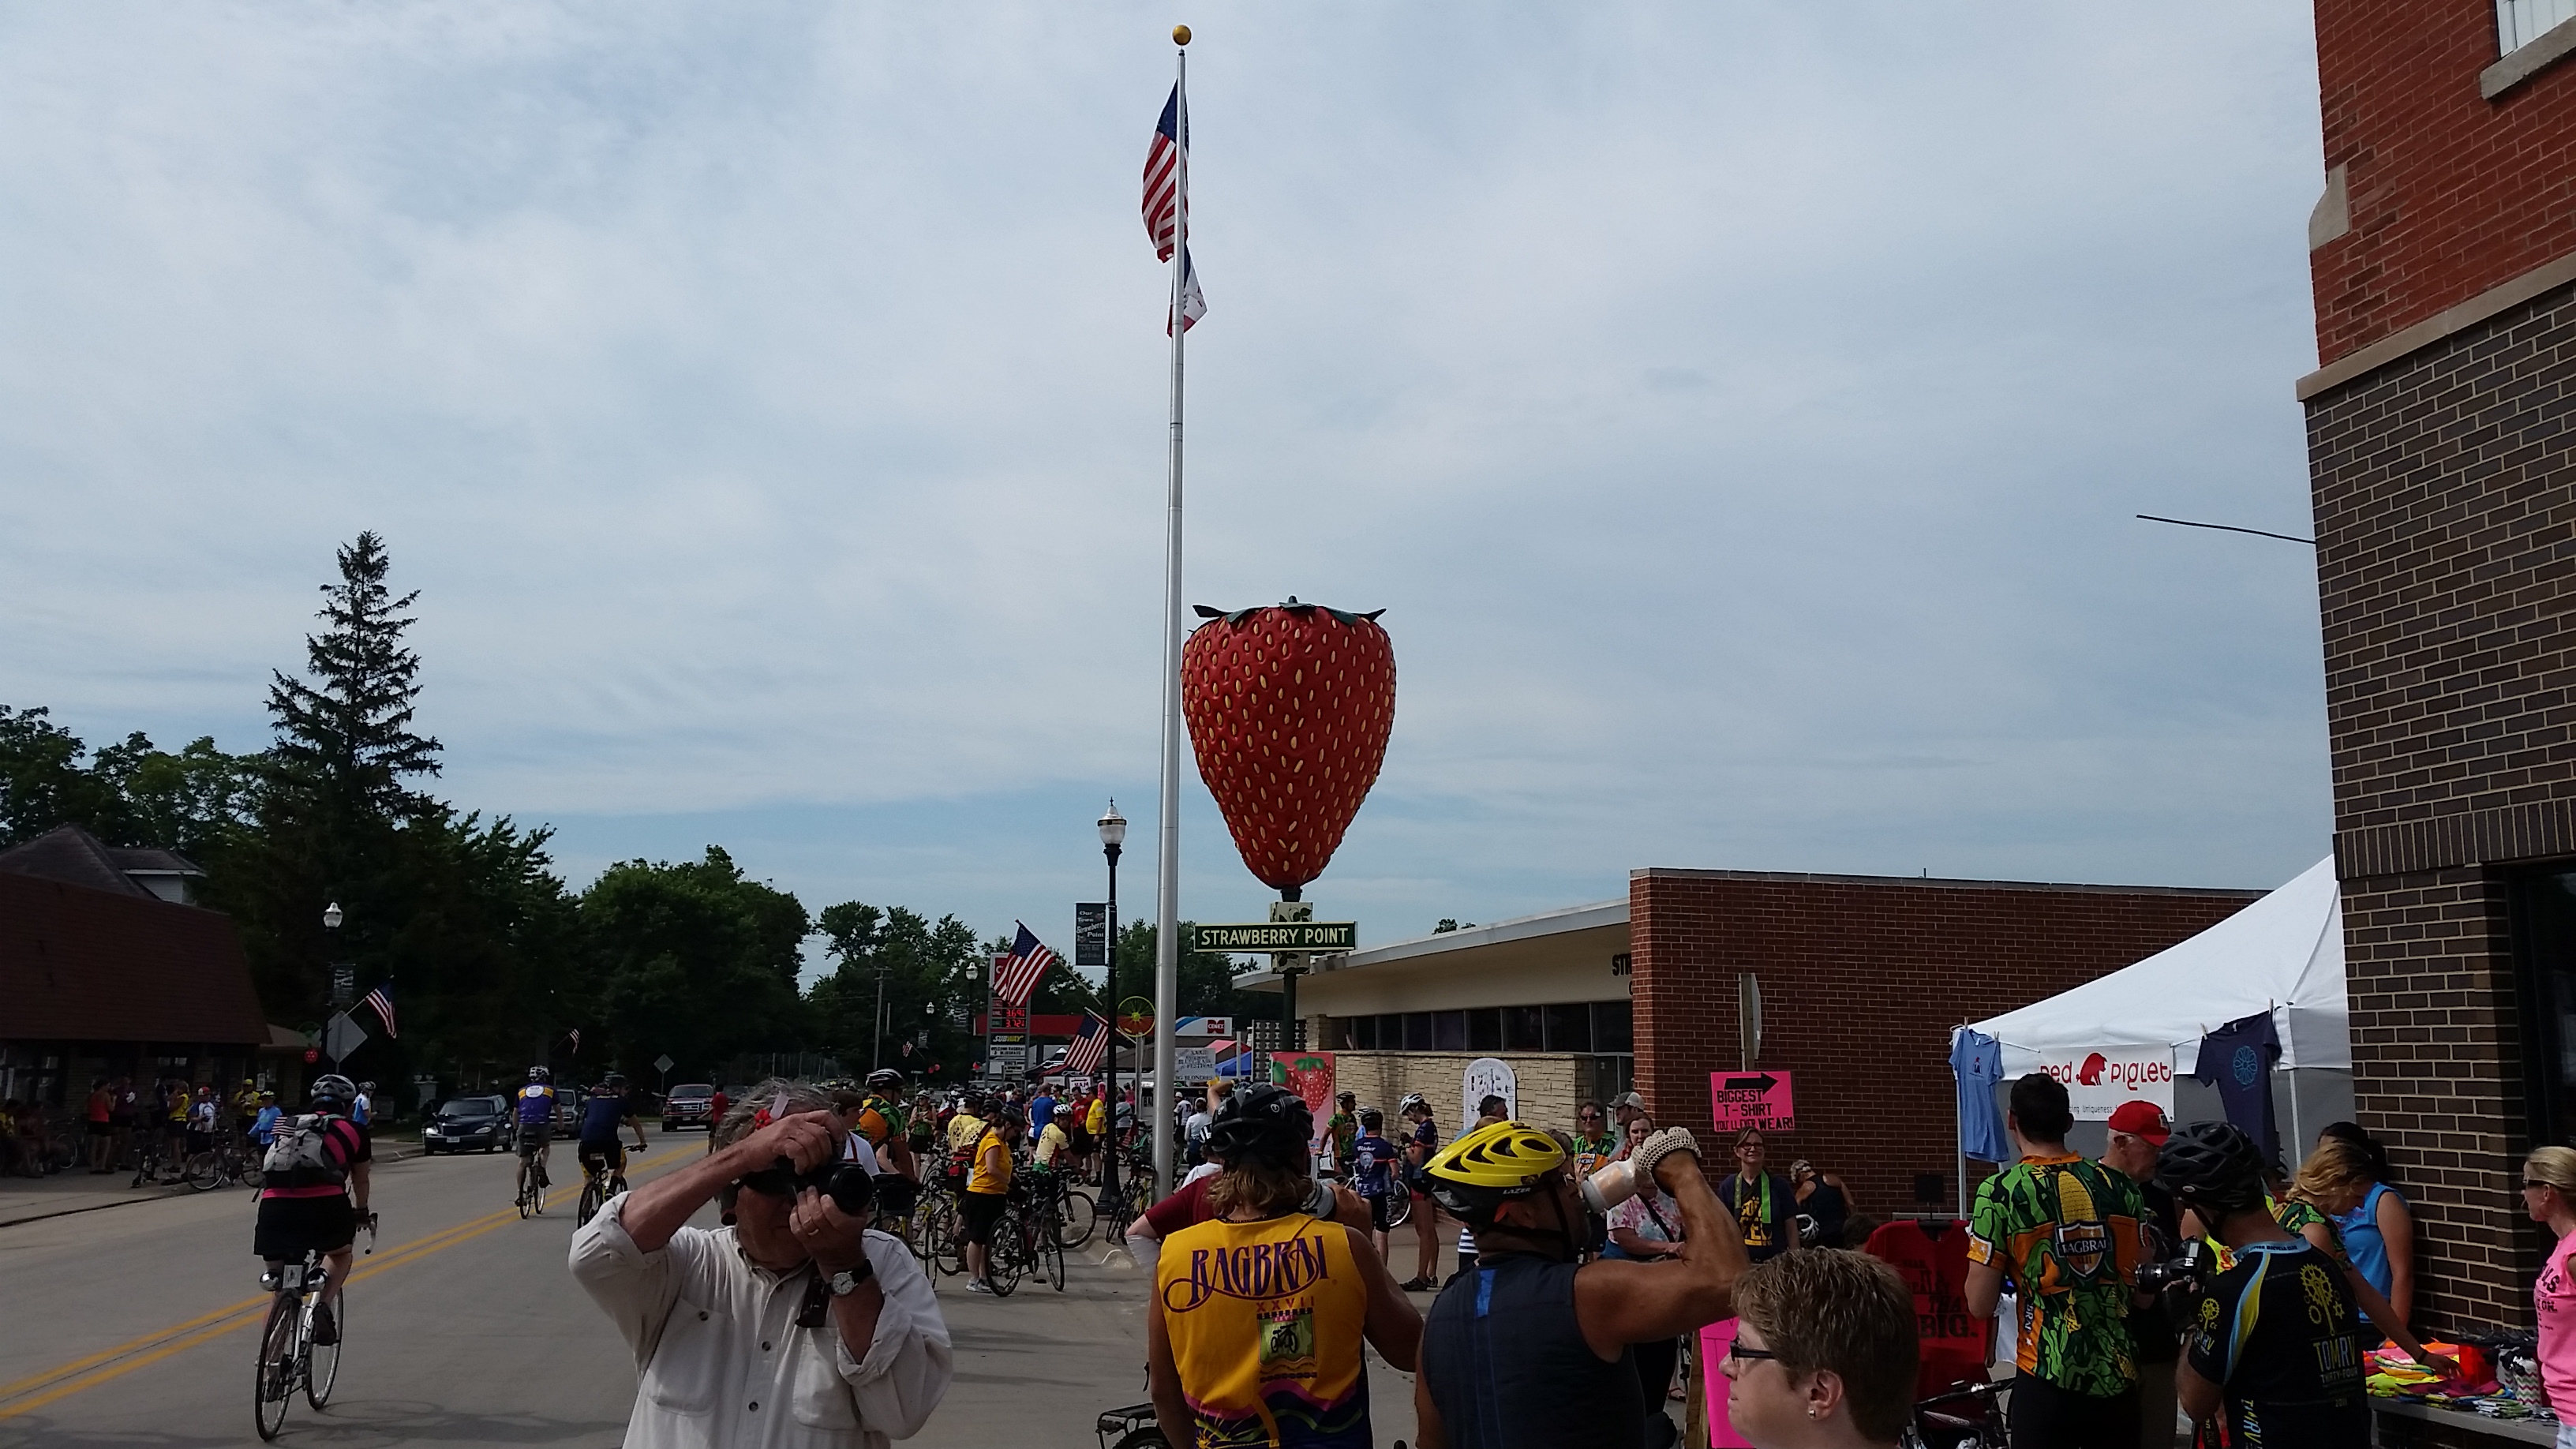
I saw a giant strawberry, in Strawberry Point.
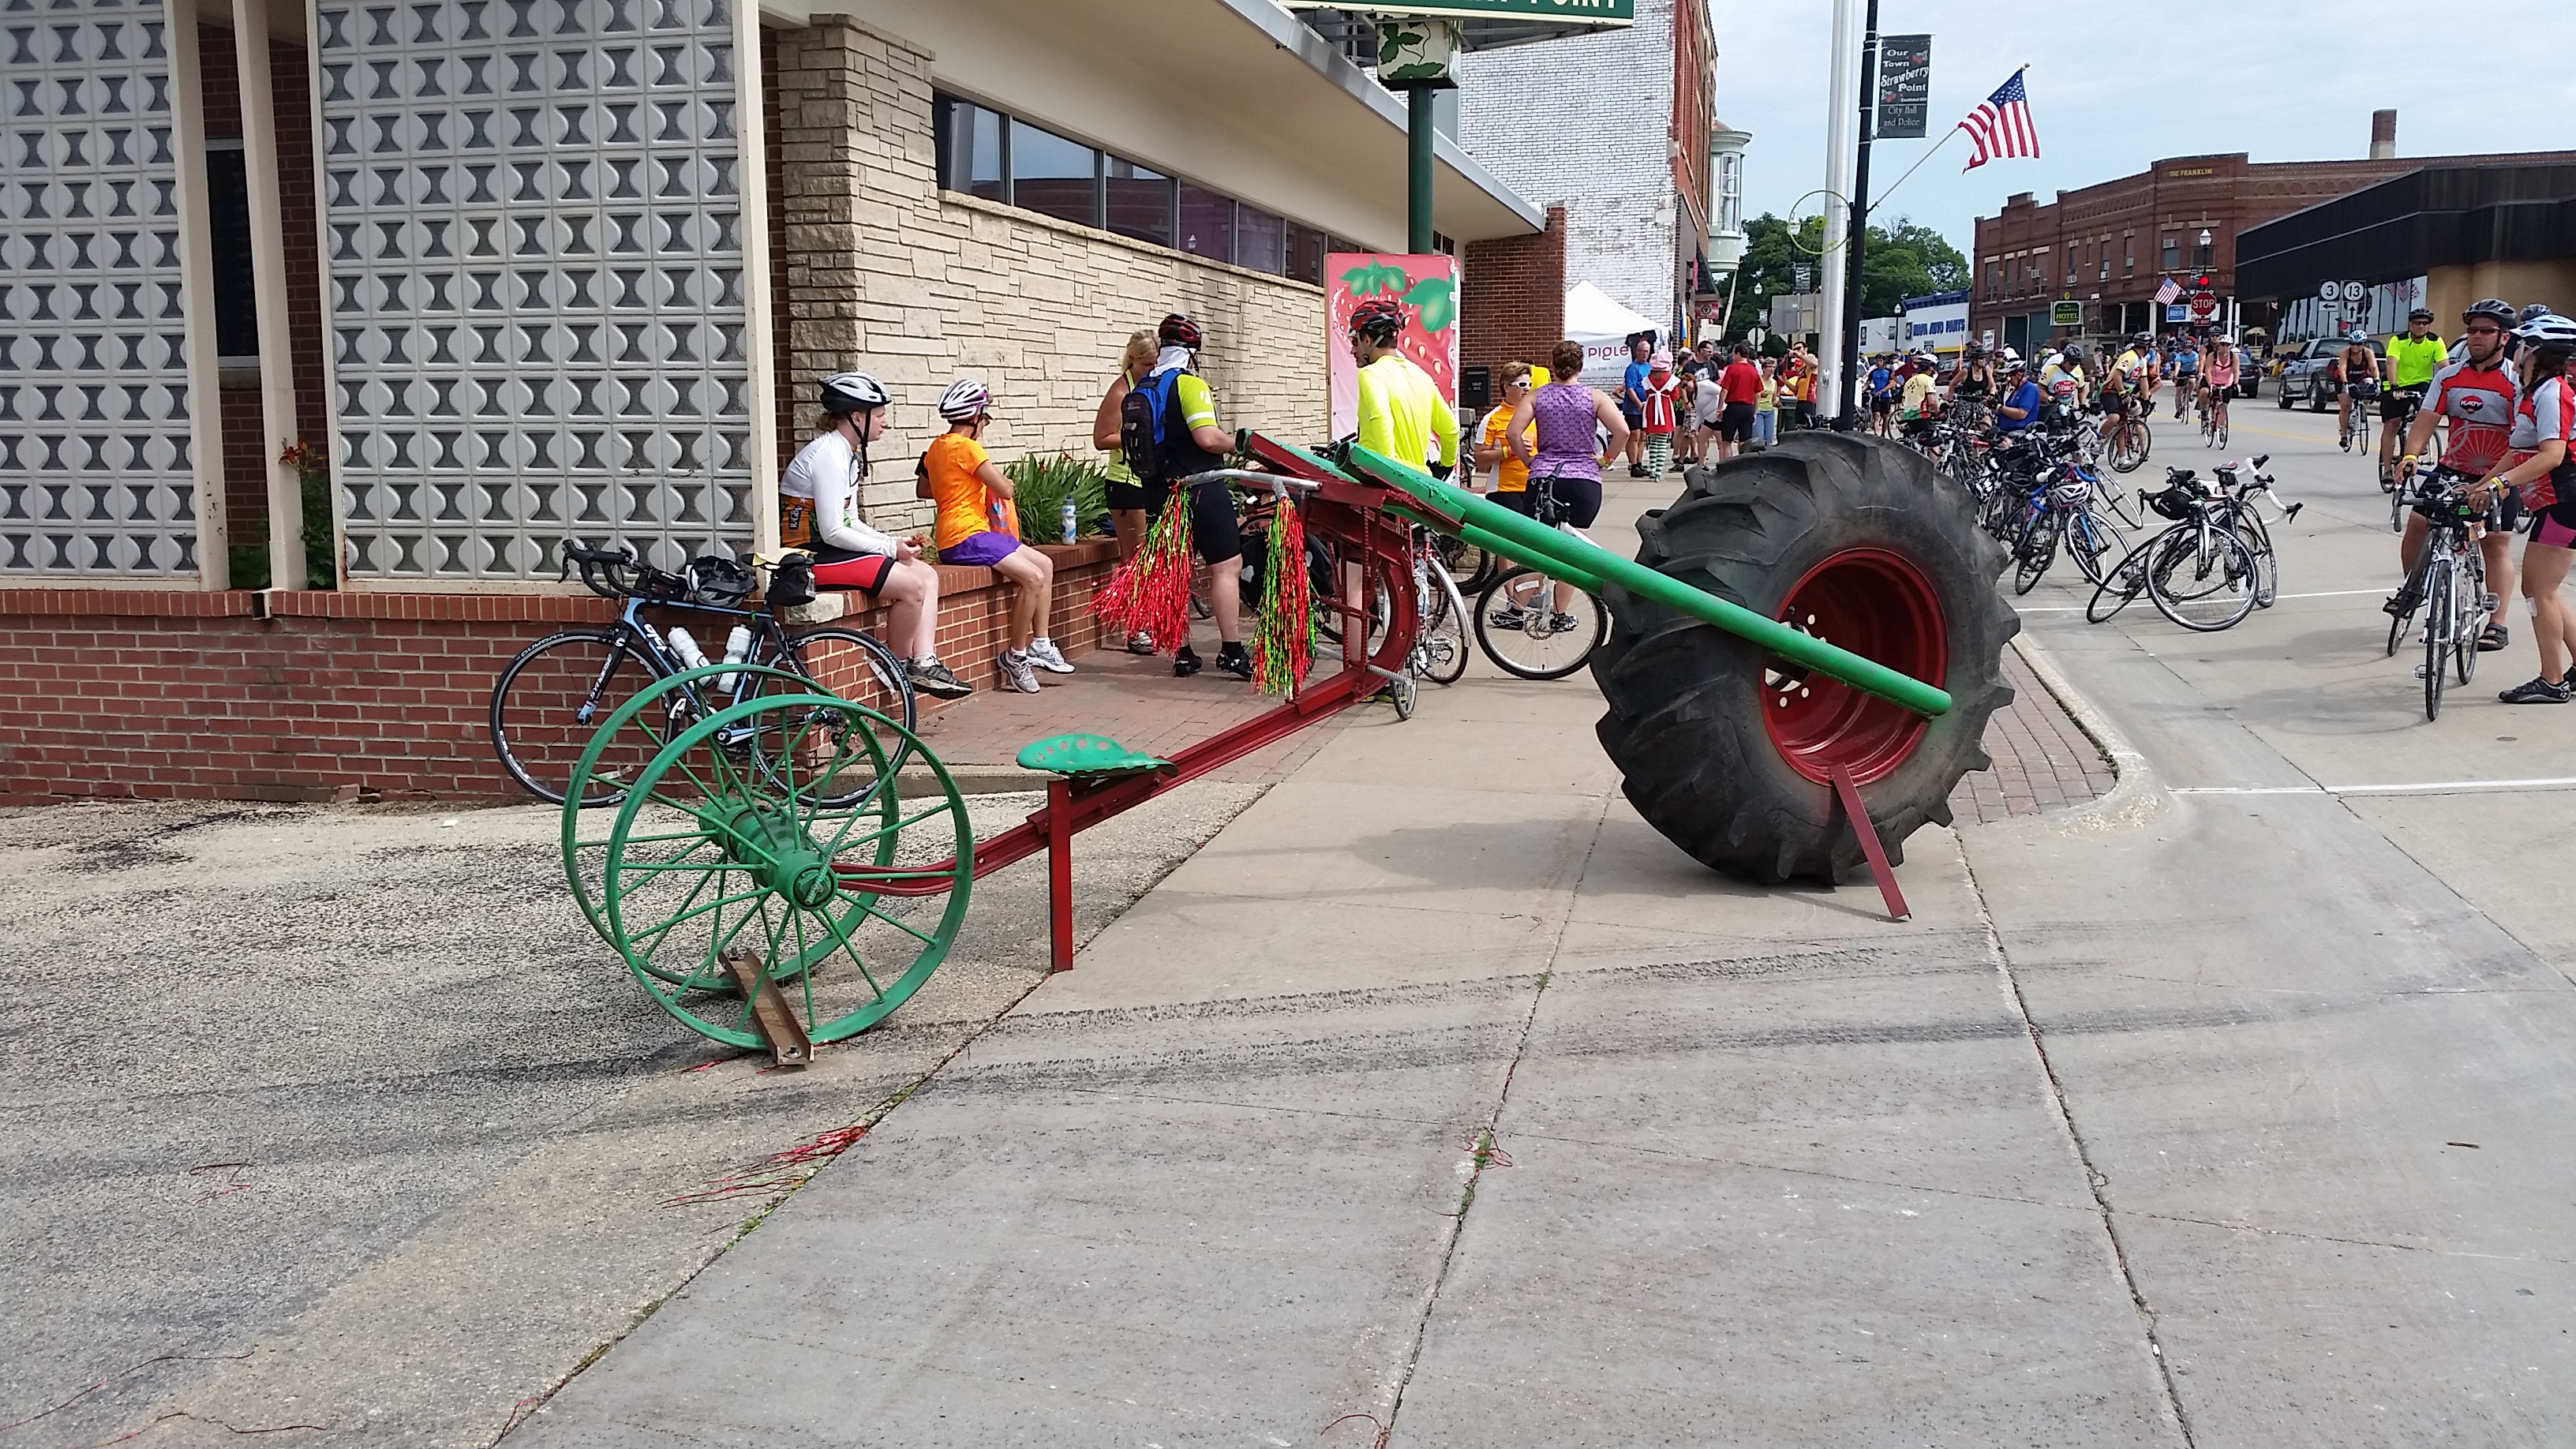
An Iowa farm bicycle.
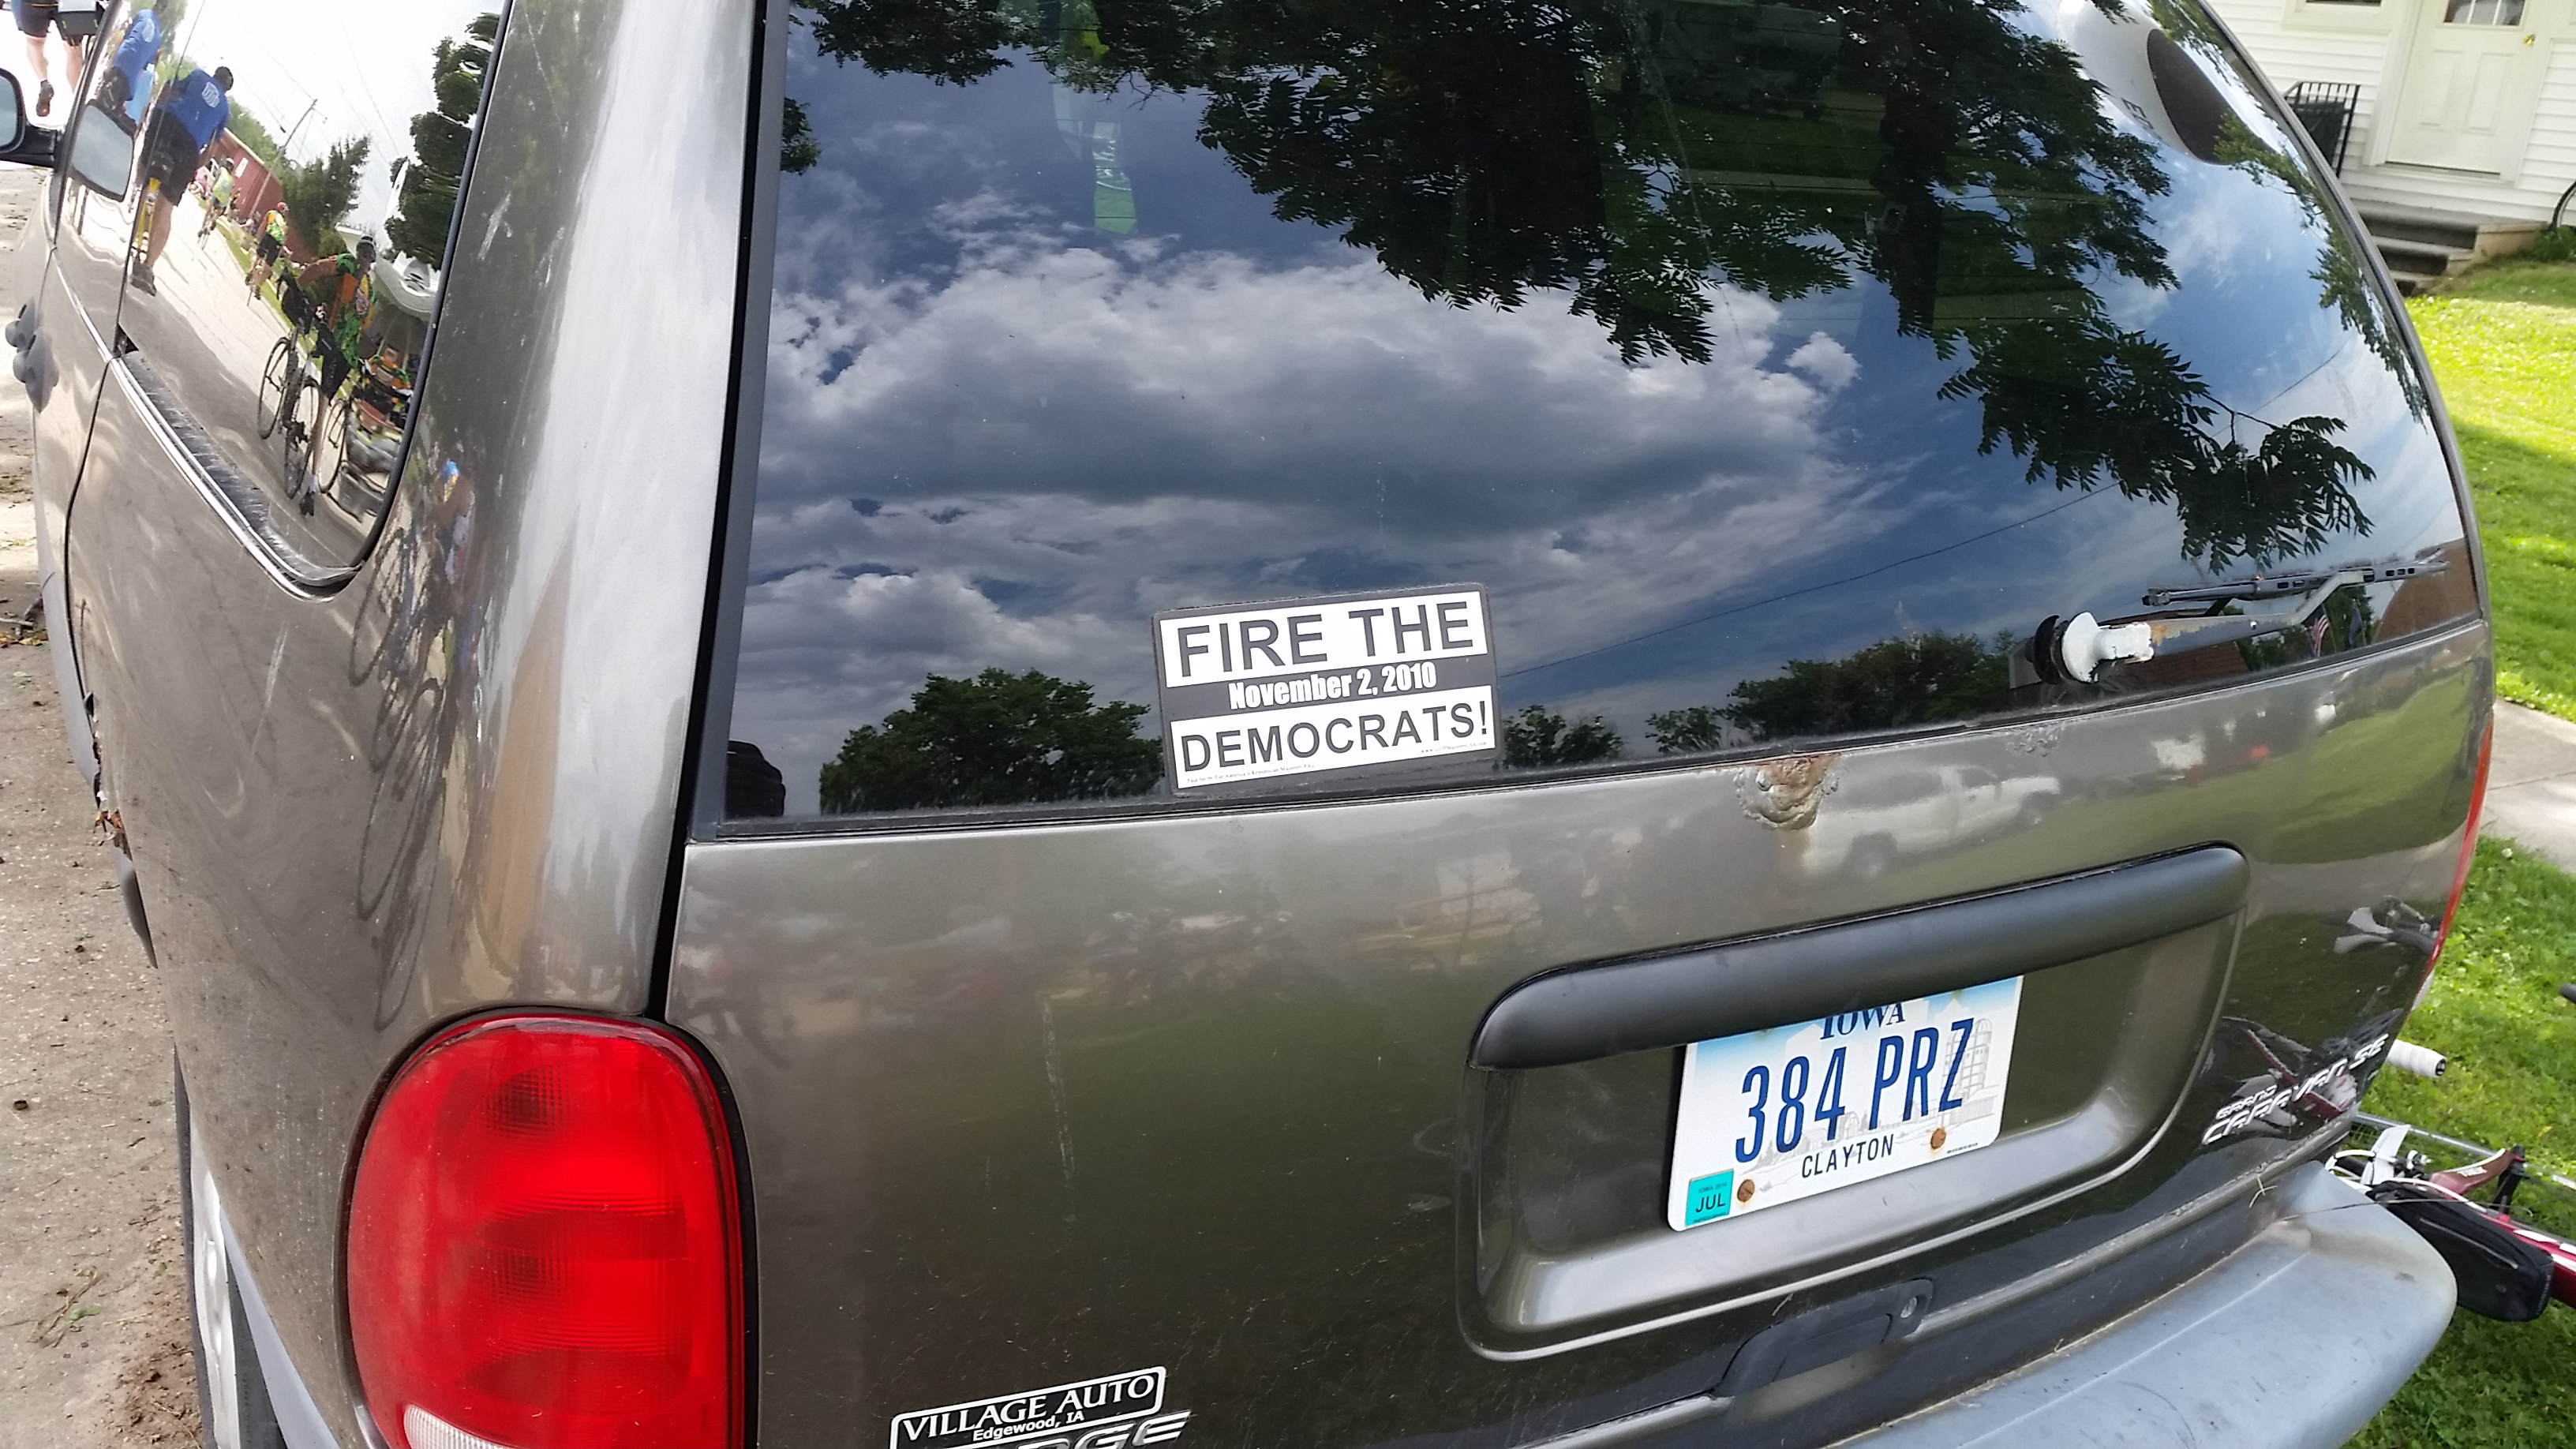
Some local political flavor.
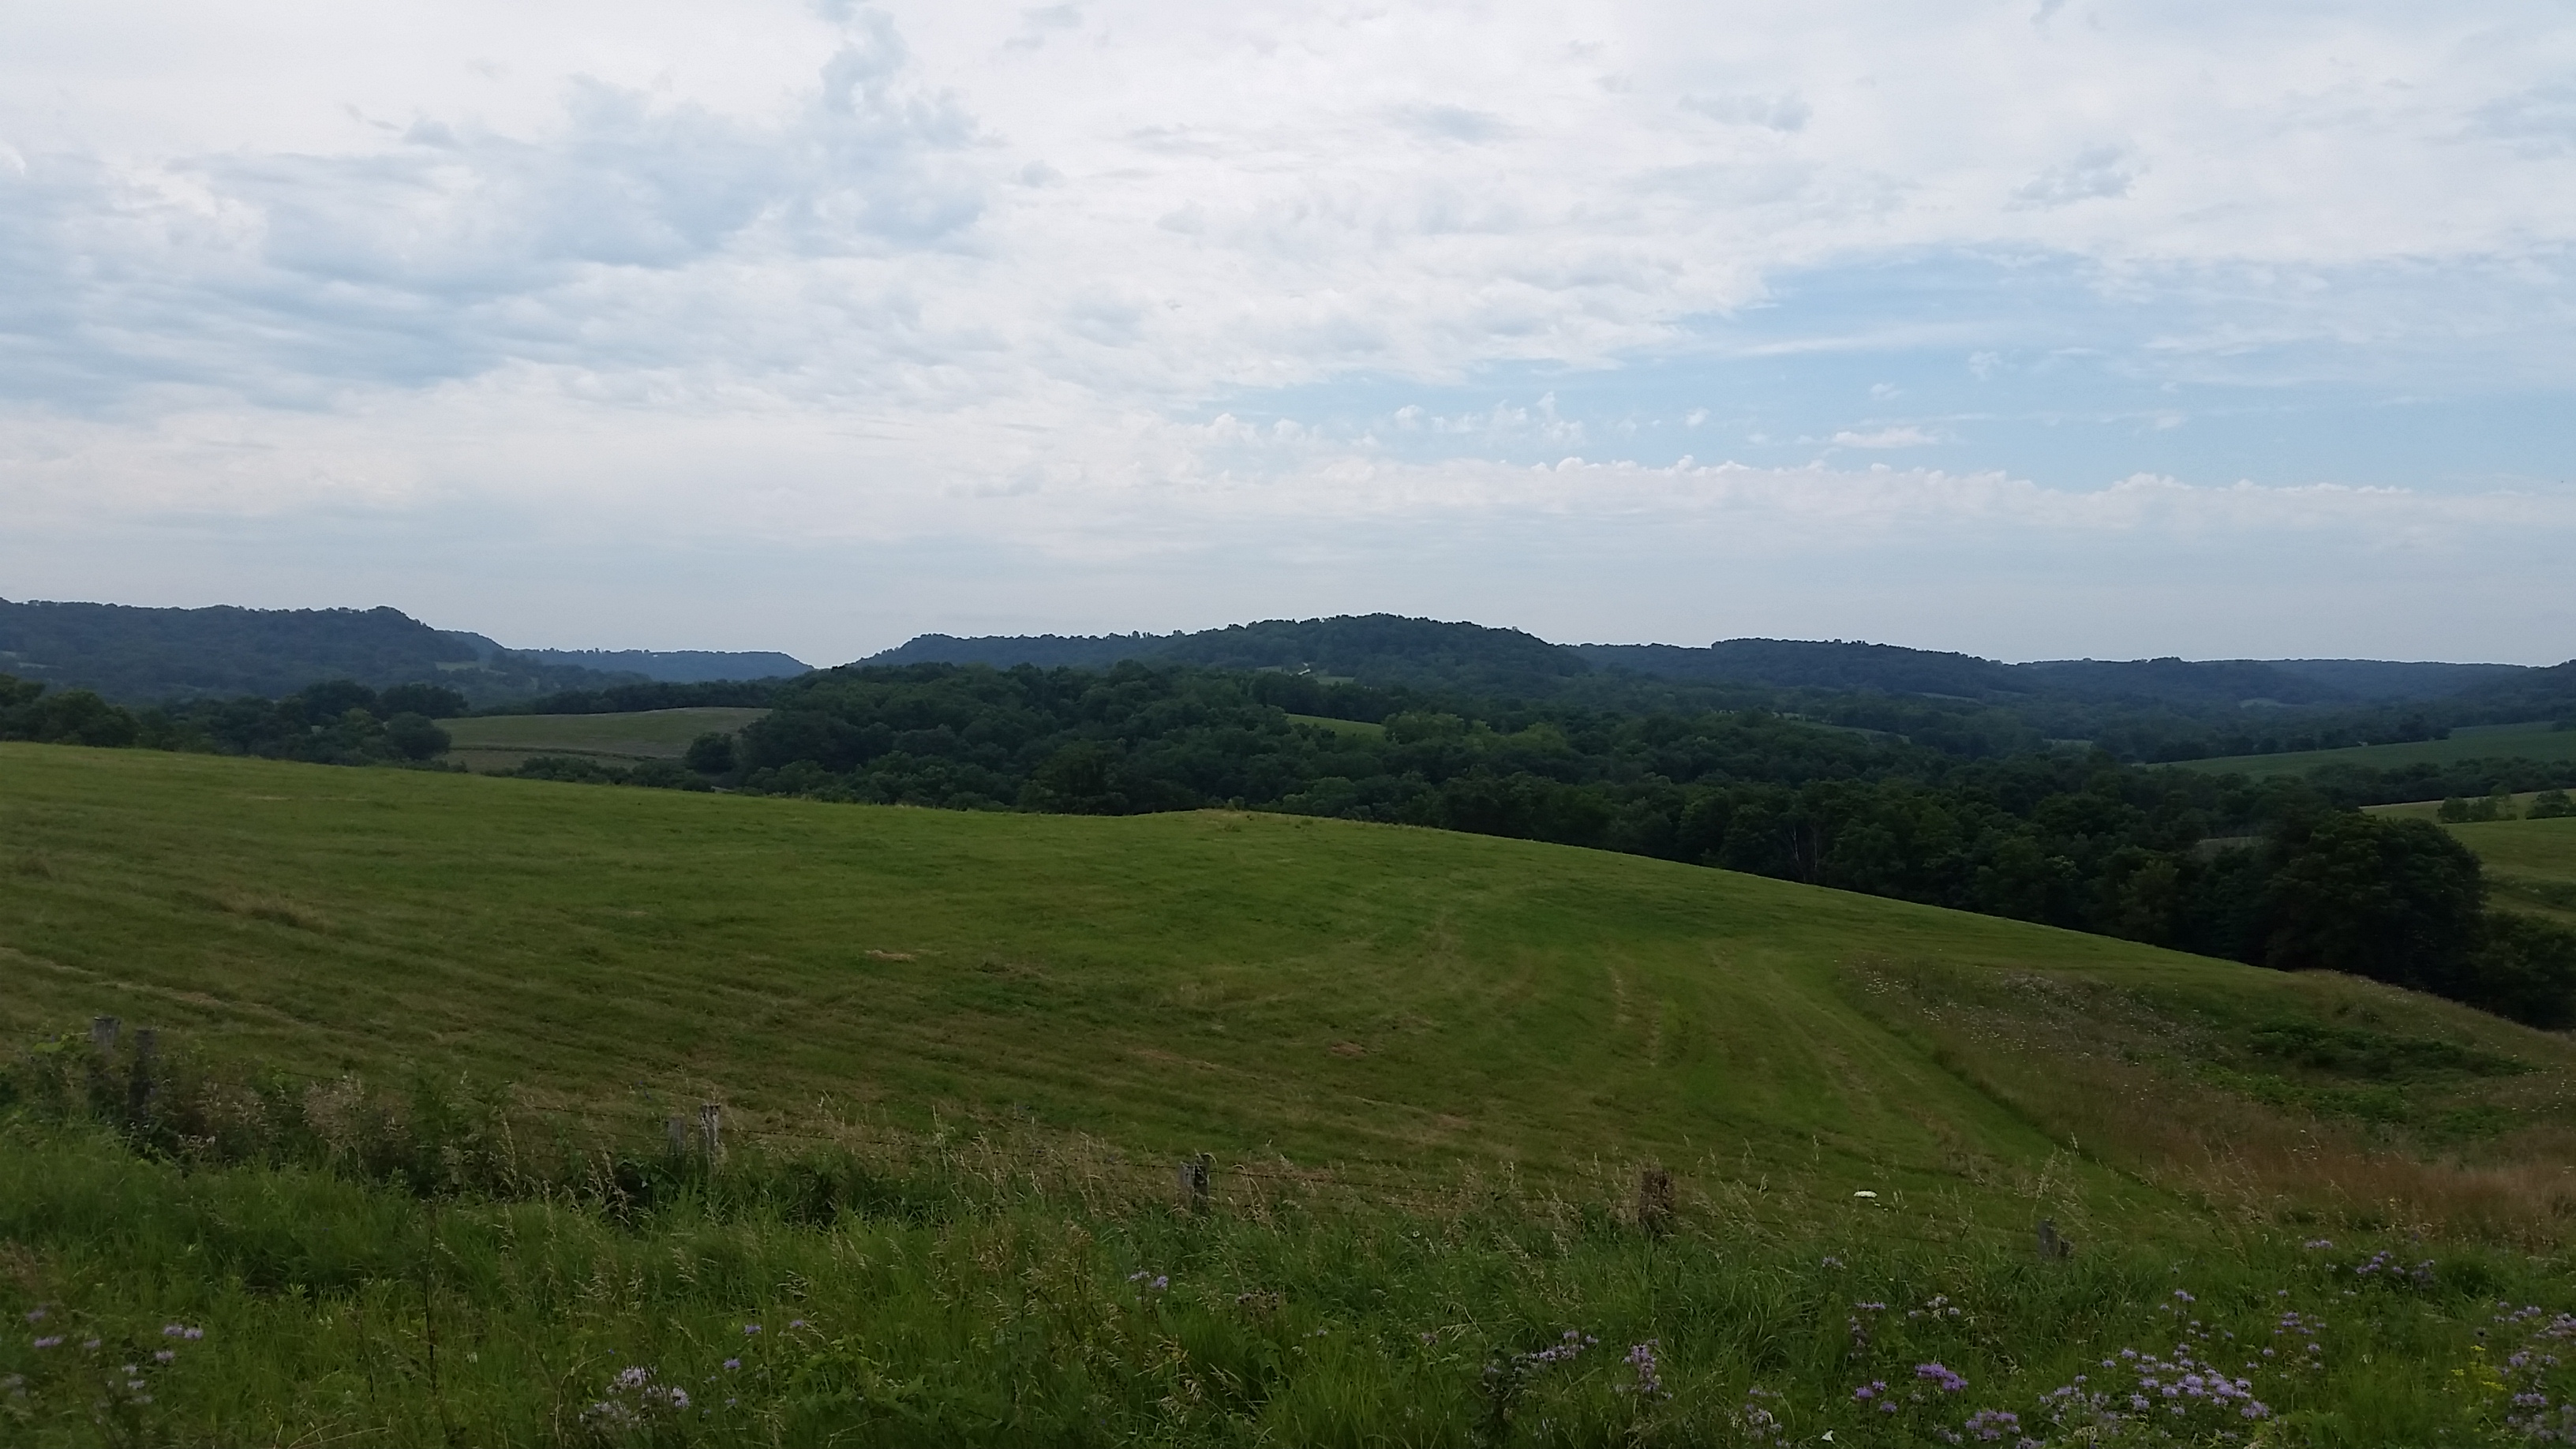
And a whole heap of gorgeous rolling hills…oh right Iowa has hills.
To the untrained eye that might not look very hilly…but glance over to the right there. See those ominous dips. Those are some big ass hills. There was 3k feet of climbing on this day, almost all of it in the last 5 miles. The climbs were not so bad…it was the downhills that nearly killed me. A fixed gear bicycle is great for riding in Boston, its relatively flat, not too much in the way of screaming madness inducing downhills…which is exactly what this part of Iowa comes standard with.
While screaming down the first of a series of three massive downhills a rather suicidal police officer informed me (while walking out into the middle of the street in front of hundreds of careening cyclists) that we could “slow down and take in the view.” So we did,with the help of the top layer of my brake pads, and some judicious swearing, we were not disappointed.

My aunt and uncle rode down the second hill with me and said that they were “afraid my legs would fly off and kill them both.” We hit 50 mph for about 20 seconds, which is about 19 seconds longer than I ever want to move my legs that fast ever again. I actually had to pull over and rest after that downhill, it crushed all the life out of me, but in a good way.
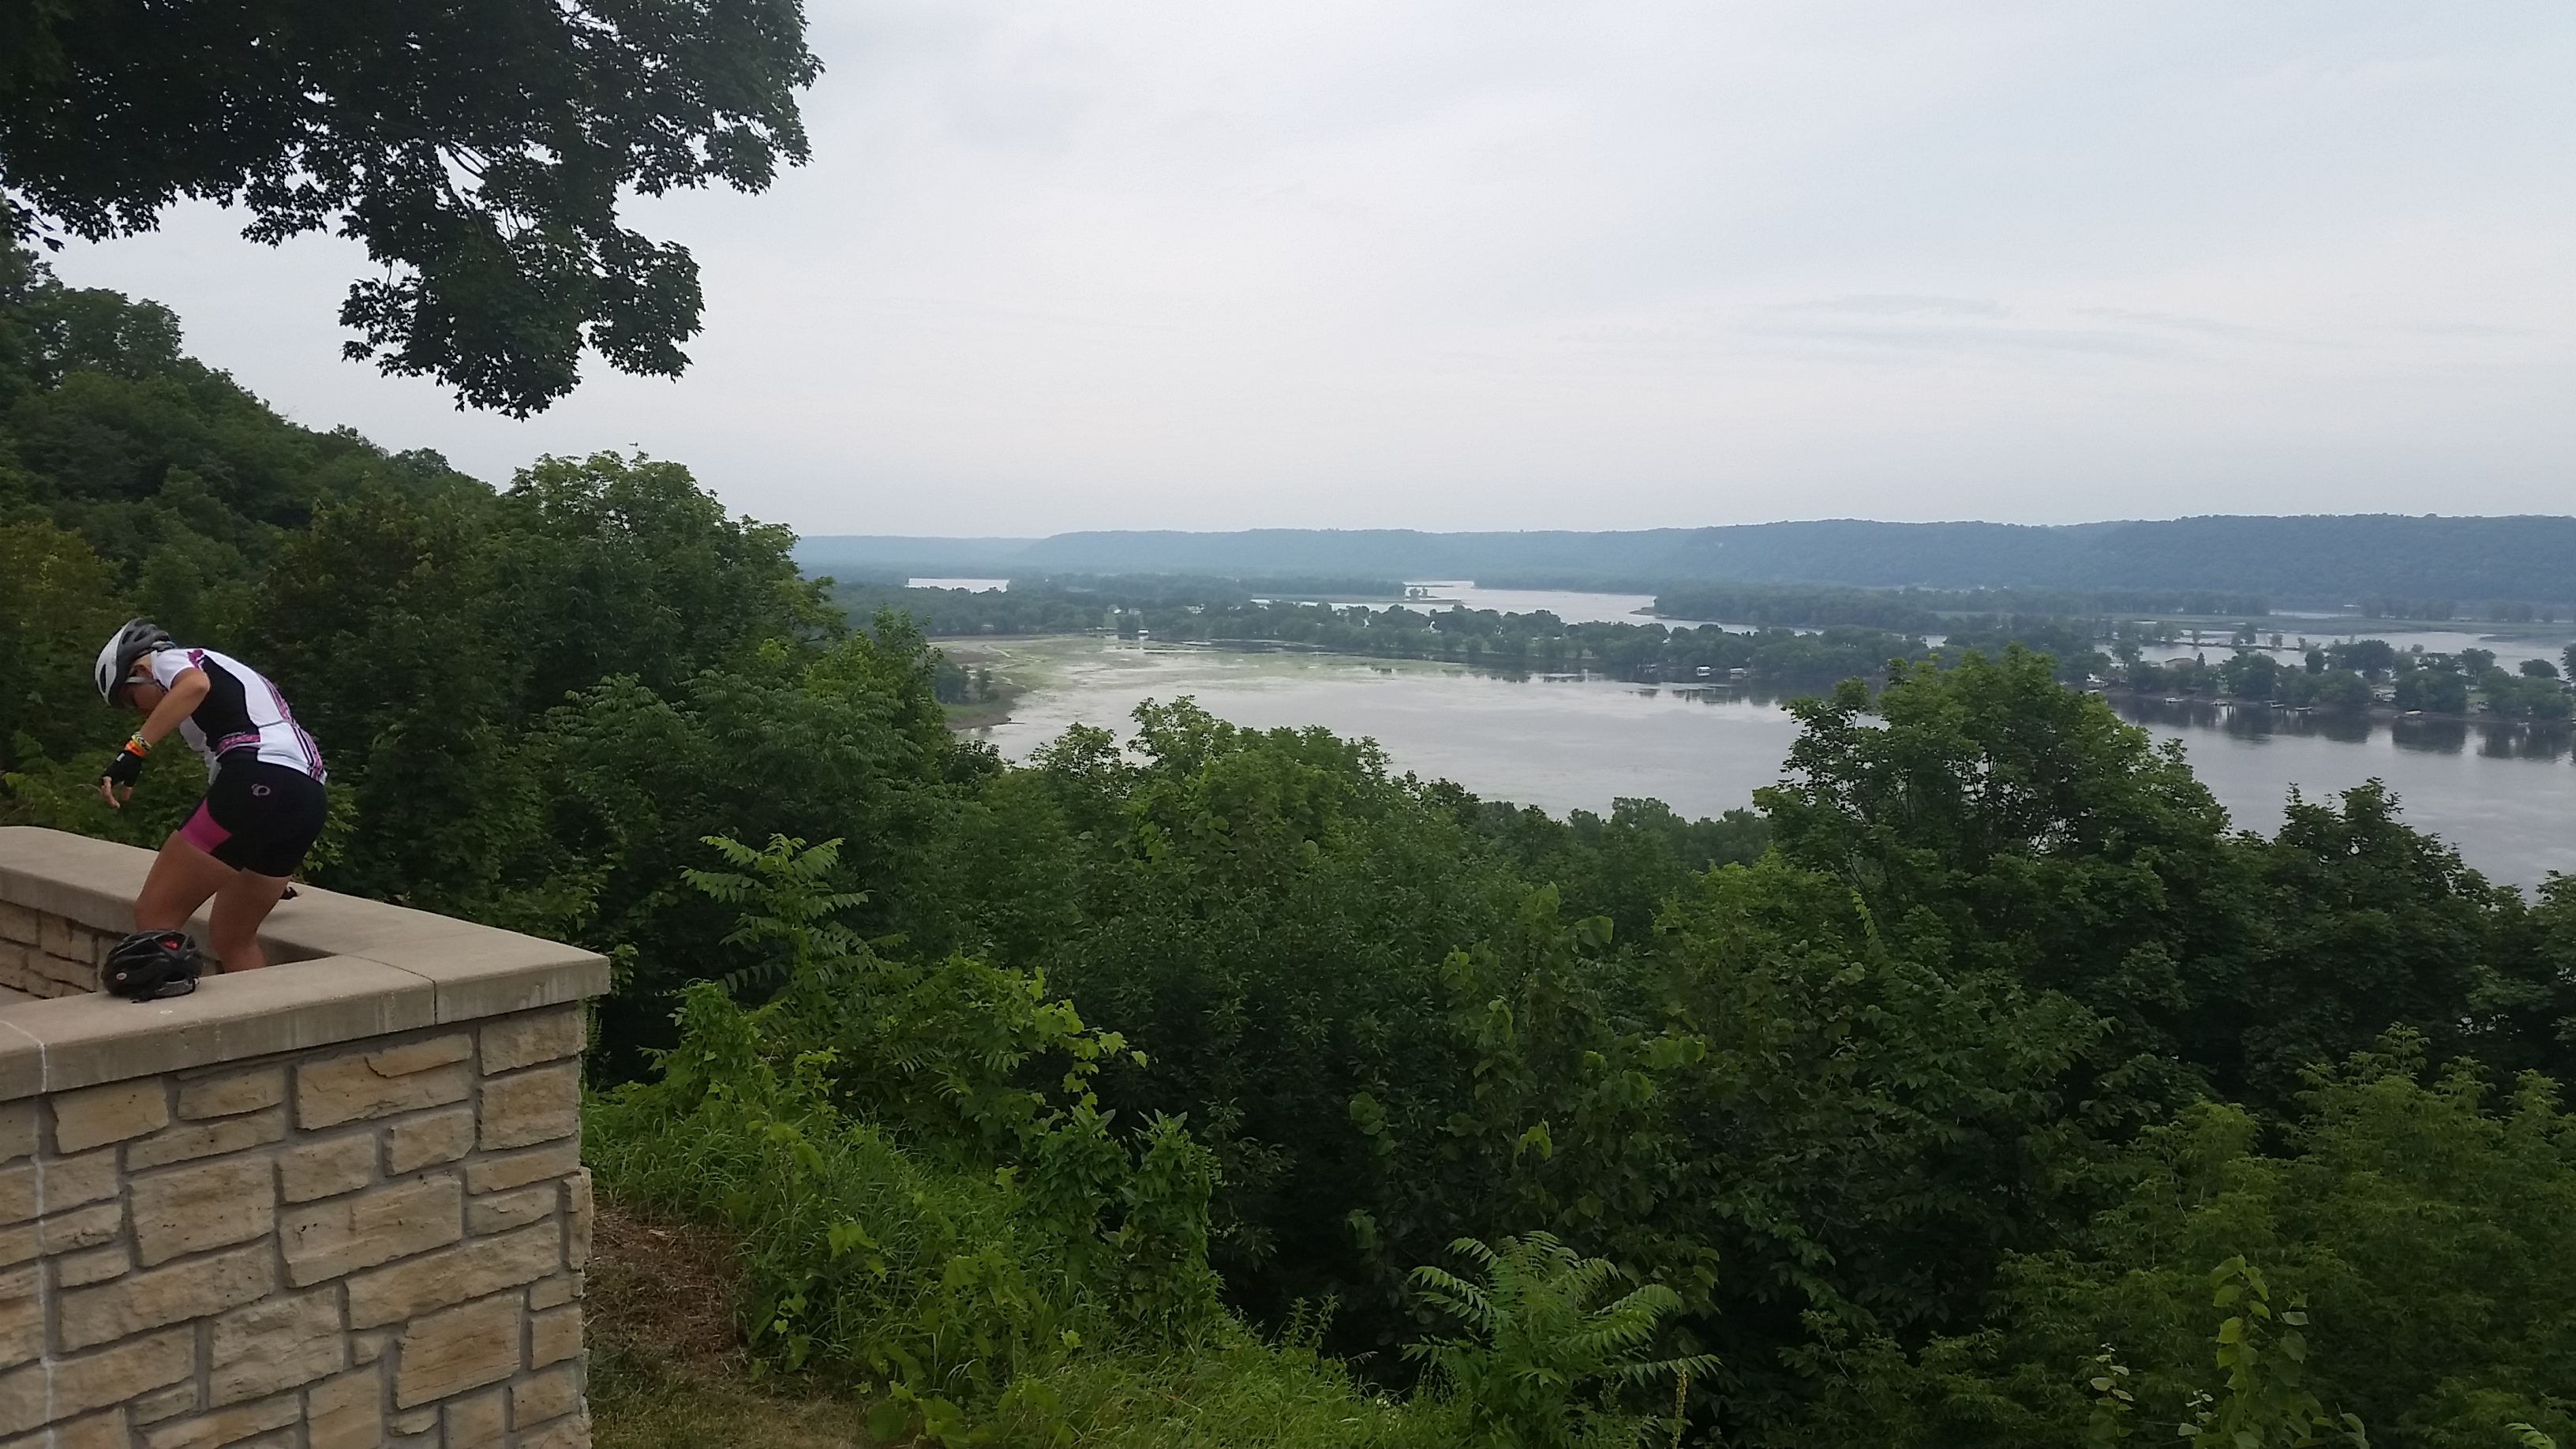
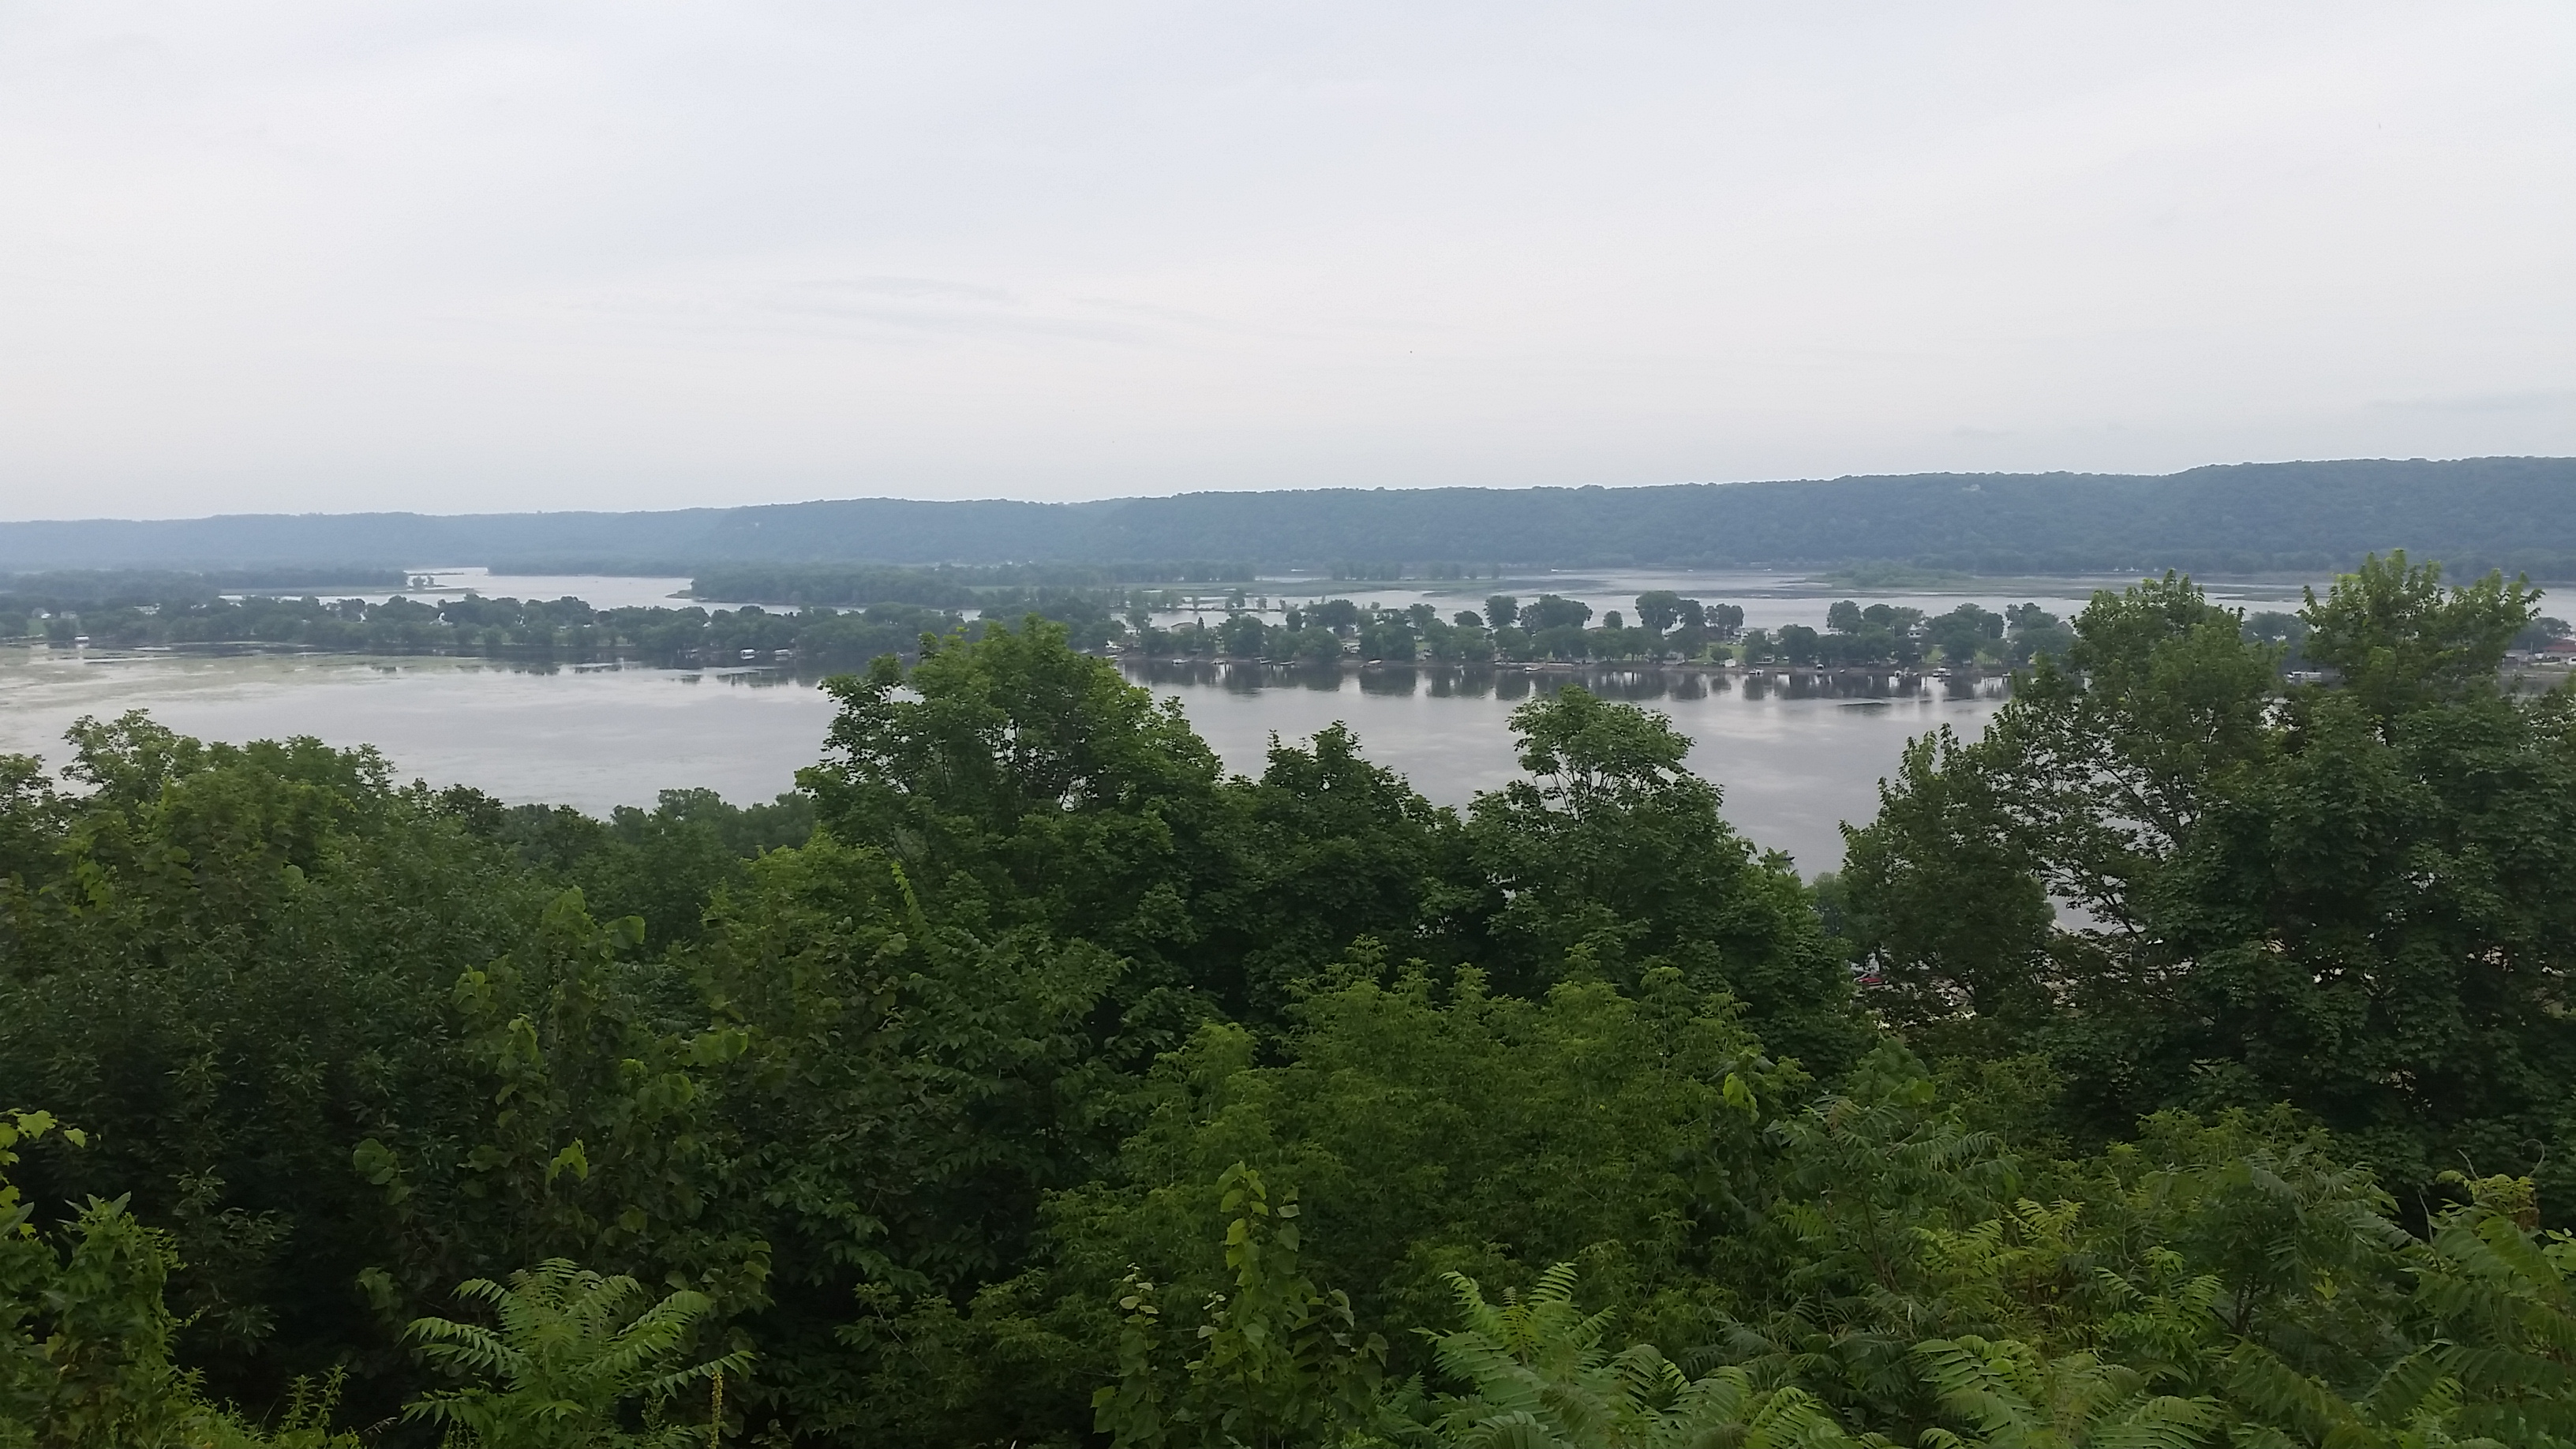
We made it to the mighty Mississippi, and dunked our front wheels into it, symbolically and figuratively completing our trek from river to river (Missouri to Mississippi) that marks the start and end of every RAGBRAI.
I stayed with some Iowa friends that night and was treated to the best in vegetarian Midwestern culinary tradition.
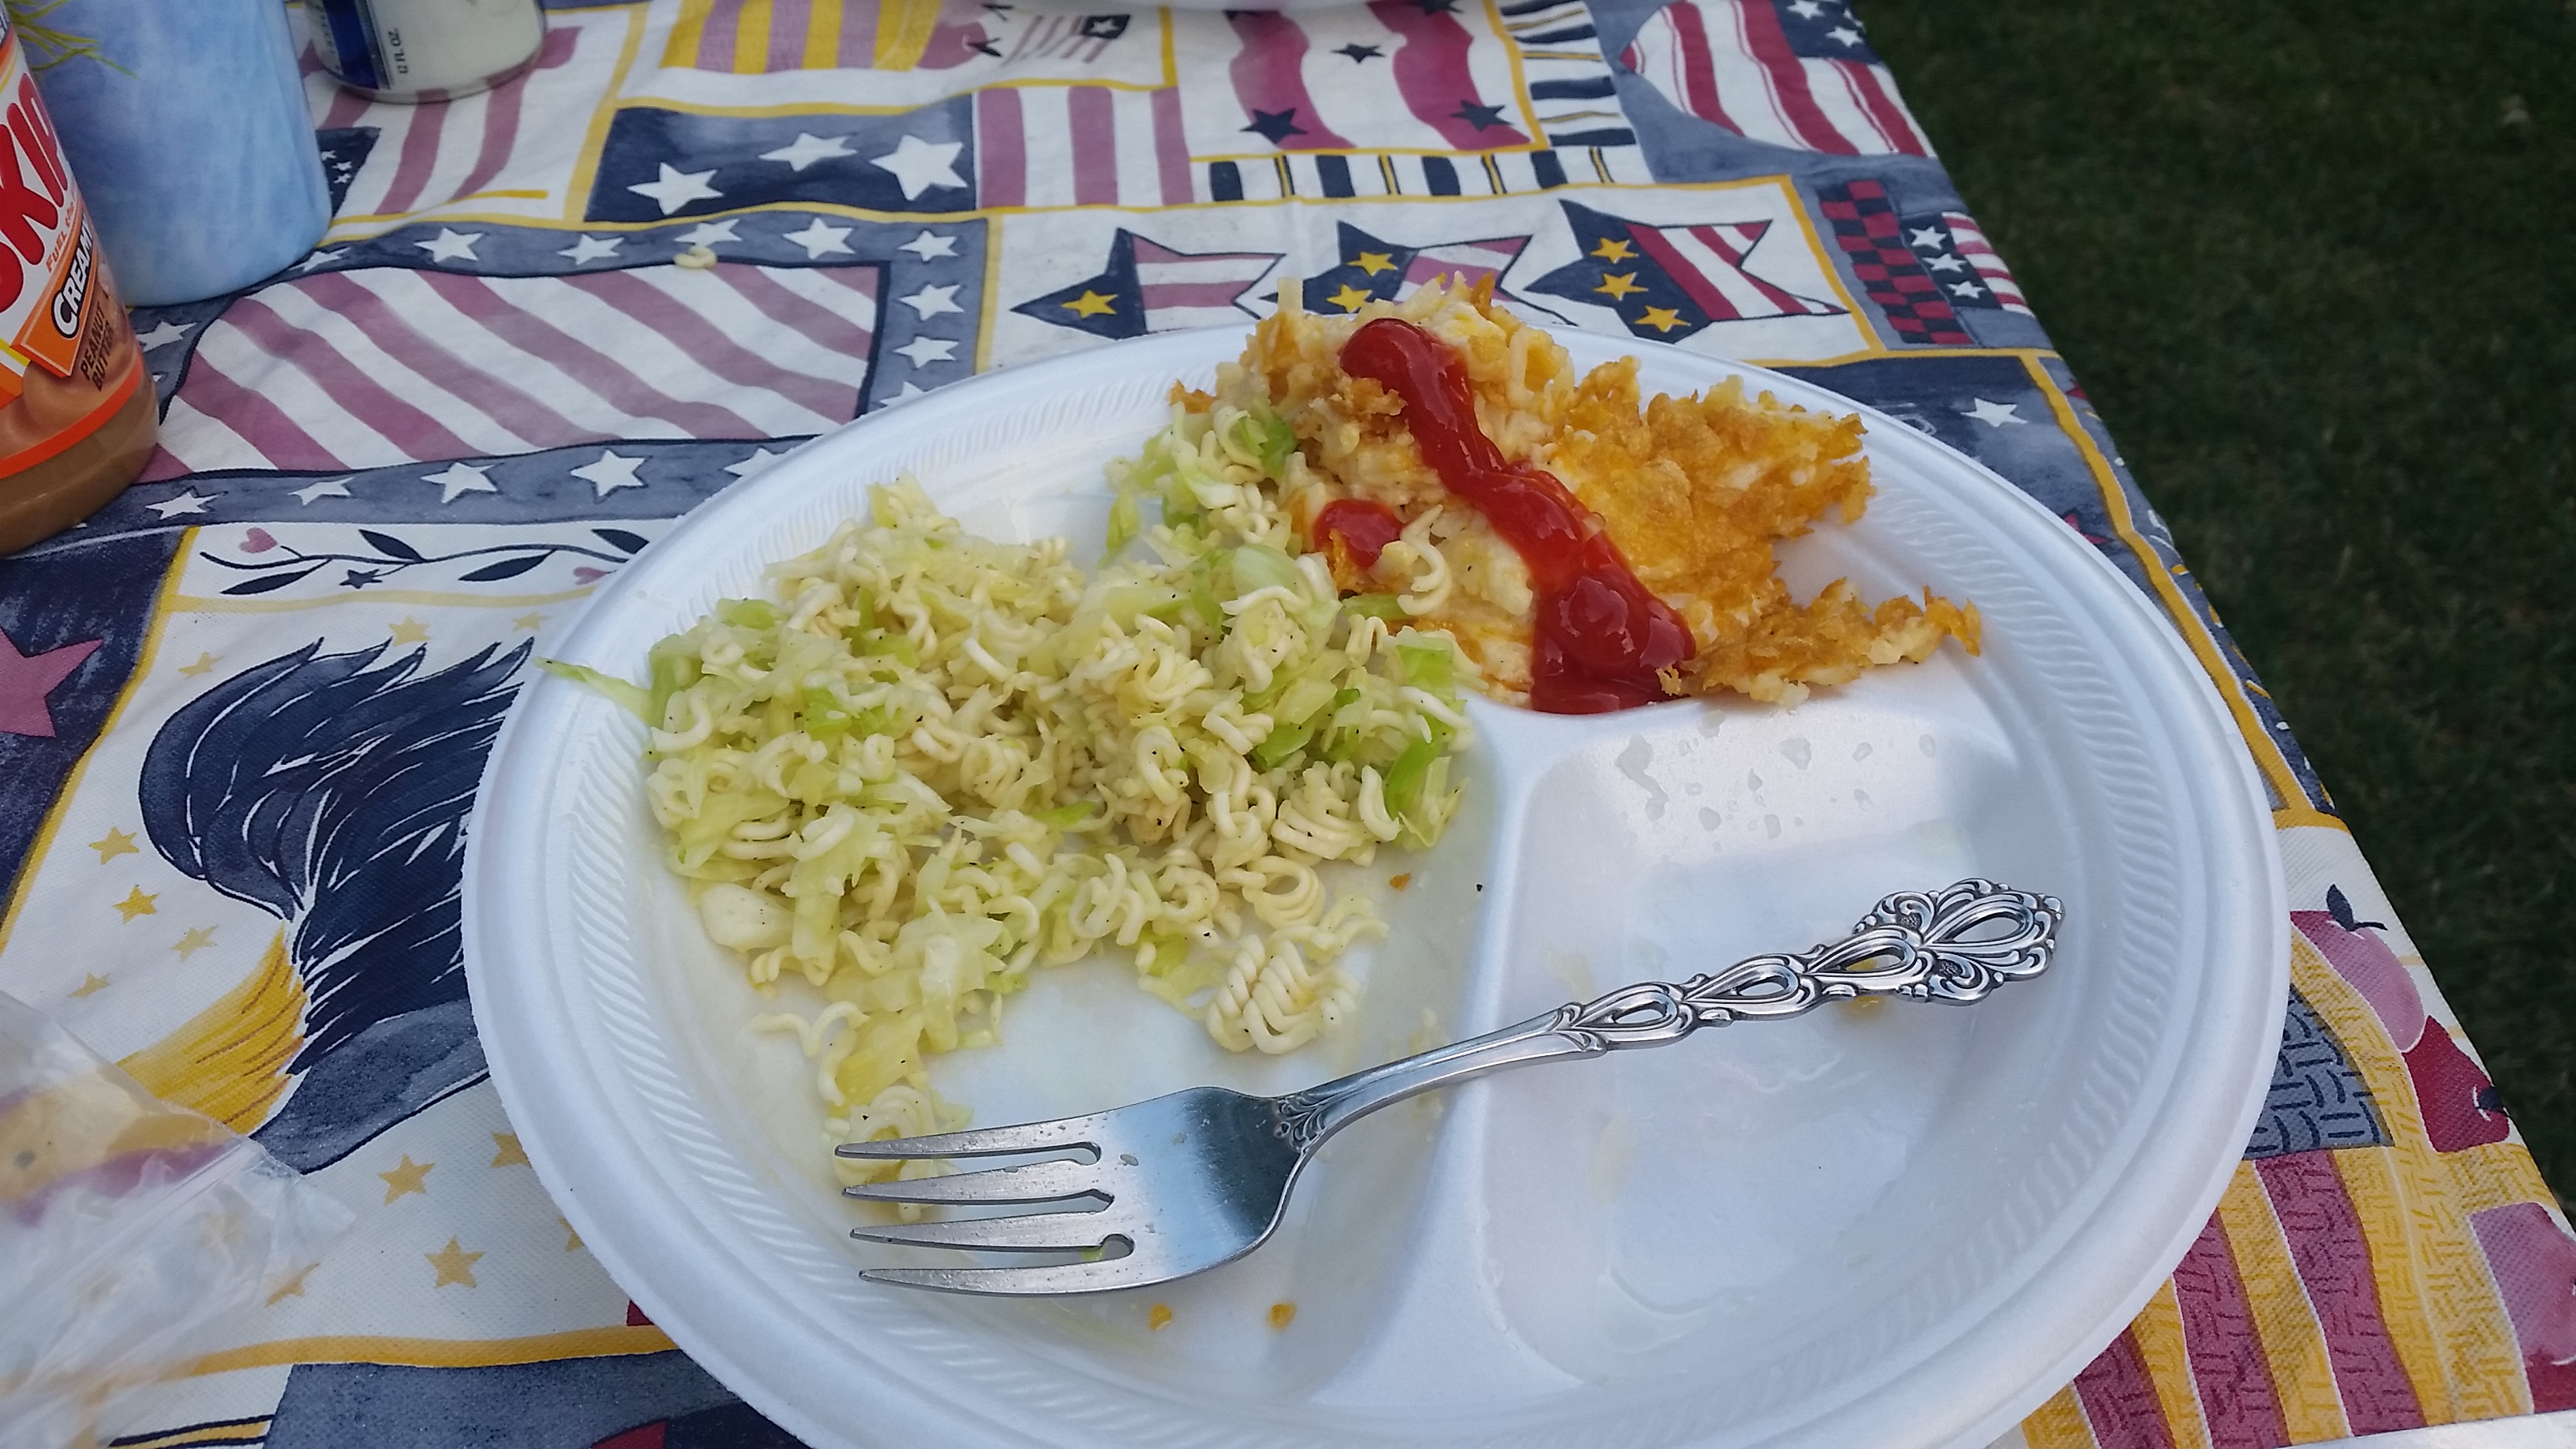 Ramen noodles with coleslaw, au gratin potatoes with corn flakes, and ketchup, honestly it was all pretty damn good, but its still hard to be a veggy in meat land.
Then it was asleep in a tent for one more night, up with the dawn to fly out of the tiniest airport I have ever seen (gates 1,2, and 3 all shared the same door), to a larger plane, to a bus, to a train to my own bed again. My poor bike only showed up a week later, having to suffer the indignity of traveling by UPS.
My fourth year in the corn was a memorable one, I am already planning for my 5th.
Add to Reddit. Posted in bostonbiker | 2 Comments »
Volunteer Parking Bikes At Fenway Then Get To Watch The Game!
Written by Boston Biker on Aug 12Did you know you can ride your bike to Red Sox Games? Did you know MassBike will vallet park them for you? Did you know you can volunteer to help park bikes and also get to watch the game! Not only that if you volunteer enough hours you will get a free membership to MassBike which gets you even more cool stuff!
From MassBike:
———————–

Did you park your bike with us at Fenway Park on July 19th or July 20th? If so you were one of the many who took advantage of the free Valet Bicycle Parking for Bike to the Ballpark. The launch of this program was a big hit, and we are extremely pleased to announce that MassBike is continuing to partner with the Boston Red Sox through our Valet Bicycle Parking service for #biketotheballpark.
Now through September, every Saturday and Sunday home game will offer this convenient, free way to arrive at the ballpark. Coast in, hand your bike to one of our trained staff, and enjoy some baseball. When you are done cheering on the Sox, come back, claim your bike, and ride away.
If you have tickets for this weekend’s August 2nd or August 3rd game, ride your bike and avoid the expensive parking lot down the road. After all, not only is it free to park your bike with us, the Valet Bicycle Parking offers the closest parking to Fenway during a game. In other words, if you Bike to the Ballpark this weekend, you can get the best parking and it costs nothing.
The MassBike free Valet Bicycle Parking is located by Gate D, at the corner of Yawkey Way and Van Ness Street. It is best to approach Fenway Park on your bike from the Boylston Street side of Fenway.
For any questions about Valet Bicycle Parking, please contact [email protected] or call 617-542-2453 (BIKE).
We’ll see you at the game!
And more here
———————————-
 |
| Bikes parked by MassBike staff and volunteers at Fenway Park |
We are so pleased to be working with the Red Sox by offering Valet Bicycle Parking at Fenway Park. Now, we need some enthusiastic volunteers to help us before the game. If you want to hang out at Fenway, support Massachusetts cyclists, and even get to see some of the game, please contact us today.
Volunteers help with setup, parking bikes, getting cyclists to the parking area, and ensuring a seamless and hassle-free experience for users. After your shift, you will get a special volunteer pass so you can catch some of the game.
We need immediate help for the upcoming games.
Saturday, August 16: 5:00 pm-7:00 pm
Sunday, August 17: 11:30 am-1:30 pm
During your shift, you’ll have the chance to take a break. No previous Bike Valet experience necessary – we will train you.
If you are interested, please email [email protected] for more information. If you can’t help out on the 16th and 17th, email [email protected]to ask about other Fenway Park Bike Valet opportunities.
Volunteers make up a huge part of our success, so we want to make volunteering with us even better. Anyone who volunteers ten hours of their time will automatically earn a MassBike membership.
Add to Reddit. Posted in advocacy, Commuting | Comments Off on Volunteer Parking Bikes At Fenway Then Get To Watch The Game!
Books By Bike!
Written by Boston Biker on Jul 09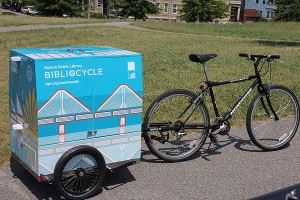
From BPL.org
Mayor Martin J. Walsh today announced the launch of the Boston Public Library’s Bibliocycle, and the re-launch of ReadBoston’s Storymobile, now in its nineteenth year. Both programs use a human-powered bicycle with an attached trailer to make their services mobile, and will be pedaling through Boston’s neighborhoods this summer.
“The Bibliocycle and Storymobile are innovative ways to reimagine libraries, and promote reading and learning across all generations,” said Mayor Walsh. “These services will keep kids reading through the summer and help to prevent summertime learning loss, while expanding library accessibility for adults.”
Boston Public Library’s Bibliocycle
The Bibliocycle is a partnership between the Boston Public Library (BPL) and Boston Bikes that will enable the library to take its free offerings to the streets in a friendly, active way. Features of the Bibliocycle program include library card sign up, book checkout, demonstrations of BPL’s digital resources, and help with reference questions. The mobile collection of up to 50 books includes new releases, bestsellers, cooking, gardening, picture books, and bike repair titles. The checkout limit is 10 items per person.
The Bibliocycle will travel to markets, fairs, and neighborhood events throughout the summer and fall to serve city residents, and the complete schedule can be found at bpl.org/community. On select dates, Boston Bikes team members will accompany librarians in order to provide bike and healthy living tips.
The Bibliocycle team is not equipped to handle fines and book returns, and patrons will need to visit one of BPL’s many brick-and-mortar locations to complete that type of transaction.
ReadBoston’s Storymobile
An annual summer treat for children in the city, the Storymobile aims to inspire a love for literacy at an early age. Children can enjoy storytelling at its finest, with books brought to life through tales and song. At the end of each session, every child receives a free, new book to take home.
ReadBoston Storymobiles will roll through the city’s neighborhoods weekdays from Monday, July 7, through Friday, August 15, to offer children in Boston a free and fun adventure at 78 sites each week. The Storymobile is a visual reminder that learning can happen anywhere, not just in the classroom. The program, which is most appropriate for children ages 3-8, is open to the public with convenient locations all over the city. No sign-up or registration is necessary.
A full schedule for the ReadBoston Storymobile is available here. For the latest updates on ReadBoston, visit their Facebook page at: www.facebook.com/ReadBoston. For questions about the program, please call617-918-5286.
###
About Boston Public Library
Boston Public Library has a Central Library, 24 branches, a map center, a business library, and a website filled with digital content and services. Established in 1848, the Boston Public Library has pioneered public library service in America. It was the first large free municipal library in the United States, the first public library to lend books, the first to have a branch library, and the first to have a children’s room. Each year, the Boston Public Library hosts thousands of programs and serves millions of people. All of its programs and exhibitions are free and open to the public. To learn more, visit bpl.org.
About Boston Bikes
Boston Bikes is part of Boston’s vision for a vibrant and healthy city that benefits all its citizens. It seeks to make Boston a world-class bicycling city by creating safe and inviting conditions for all residents and visitors. Boston Bikes focuses on improvements in all five universal bike planning areas: Engineering, Enforcement, Education, Encouragement, and Evaluation.
About ReadBoston
ReadBoston is the City’s only comprehensive early literacy program, reaching Boston’s children at all points in their day, all year long. It provides schools, after school programs, early childhood centers, summer programs, and families with the resources they need to set Boston’s children on the path to reading success.
This is awesome!
More from Bostoninno:
Boston Bikes is teaming up with the Boston Public Library to cycle mobile libraries into our neighborhoods. Aptly dubbed the Bibliocycle, the initiative is reminiscent of the City Hall to Go truck which provides communities with limited access to downtown a way of accessing municipal items.
For example, the Bibliocycle will allow new Bostonians the opportunity to sign up for a library card, to check-out books, to engage with digital offerings and have any reference questions answered.
…
It’ll carry up to 50 written works at a time and include a bevy of genres ranging from new releases and bestsellers to gardening tips and, of course, bike repair how-to’s.
…
The Storymobile, of course, is something that dates back 19 years to the thick of the Menino era which is essentially the same thing as the Bibliocycle but geared towards children.
As you’ll see courtesy of the July schedule below, the Bibliocycle will be rolling into farmer’s markets and learning centers throughout Boston. Here’s where you can catch up with it:
July
Wednesday, July 9, 11:00 a.m.-1:00 p.m.—Tierney Learning Center
Friday, July 11, 4:00-6:00 p.m.—Allston/Harvard Farmer’s Market
Monday, July 14, 1:00-3:00 p.m.—South Boston Farmer’s Market
Tuesday, July 15, 5:00-7:00 p.m.—Elma Lewis Playhouse in the Park
Wednesday, July 16, 9:30-11:30 a.m.—ParkArts at Mt. Pleasant Street Park
Thursday, July 17, 4:00-6:00 p.m.—Dudley Town Farmer’s Market
Saturday, July 19, 10:30 a.m.-12:30 p.m.—Roslindale Farmer’s Market Bike Day
Wednesday, July 23, 9:30-11:30 a.m.—ParkArts at Mt. Pleasant Street Park
Saturday, July 26, 10:00 a.m.-12:00 p.m.—Fields Corner Farmer’s Market
Thursday, July 31, 3:00-5:00 p.m.—Dudley Town Farmer’s MarketA couple things to note before you head down to one of these literary hot spots. Check-out is limited to 10 items per person, which is one fifth of its entire offering at a single time so choose wisely. Borrowed items must also be returned to a branch of the BPL and cannot be submitted to the Bibliocycle. And finally, pay any late fees you might’ve incurred at your local BPL branch as well.
This is a fine idea, and one I hope continues with other forms of city services, imagine if you could get a hunting licence by bike, or parking permits by bike (oh the irony), or any of a number of services that might be better served by having someone on a specialized cargo bike going into the community instead of making the community come to one location.
What service would you have provided by bicycle?
Add to Reddit. Posted in Bike Business, fun | Comments Off on Books By Bike!
Lexington Achieves Bronze Level Bike Award
Written by Boston Biker on Jun 03

Last week, the League of American Bicyclists released their list of Bicycle Friendly Communities for 2014, and named Lexington as Bronze Level winner. Lexington joins Arlington, Boston, Cambridge, Newton, Northampton, and Somerville as a Massachusetts Bicycle Friendly Communities, and brings the commonwealth’s total to seven.
According to Lexington Patch:
The application process was coordinated by Bicycle Advisory Committee chair Peggy Enders, who worked with Town staff and bicycle advocates over the winter to assemble the data needed as part of the comprehensive assessment process required of applicants.
“The application process was essentially an exercise in benchmarking Lexington’s accomplishments in becoming a more bike friendly community,” Enders said. “There are a number of areas where the town has accomplished a great deal and other areas where there is room for improvement. It would be wonderful to receive a higher level designation in the future; the bronze level award is a great start that demonstrates Lexington’s growing commitment to bicycles and those who ride them.”
The League of American Bicyclists’ Bicycle Friendly Community award recognizes cities and towns that have taken steps to improve conditions for bicycle transportation, and incentivizes communities to continue improving through technical assistance.
Congratulations, Lexington!
Add to Reddit. Posted in news | Comments Off on Lexington Achieves Bronze Level Bike Award
The Word On The Street
 Here is what people are saying
- Where bicycles are prohibited in Massachusetts August 16, 2023TweetThe main issue you will confront if you get into a dispute with police over bicycle prohibitions is whether the prohibition is supported by law. Often it is not. Example: the ramp from Commonwealth Avenue to Route 128 northbound and … Continue reading →jsallen
- Where bicycles are prohibited in Massachusetts August 16, 2023TweetThe main issue you will confront if you get into a dispute with police over bicycle prohibitions is whether the prohibition is supported by law. Often it is not. Example: the ramp from Commonwealth Avenue to Route 128 northbound and … Continue reading →jsallen
- It’s Finally Happening! 5th Annual Hot Cocoa Ride Feb 12! February 8, 2022... Continue reading →commonwheels
- It’s Finally Happening! 5th Annual Hot Cocoa Ride Feb 12! February 8, 2022... Continue reading →commonwheels
- Hello world! June 9, 2021Welcome to WordPress. This is your first post. Edit or delete it, then start writing! Continue reading →thecommunityspoke
- Run The Jewels Lead Free Pewter Hand Carved And Cast Pin Set January 3, 2021Made these lovely RTJ fist and gun pin set. Hand carved in wax, and then cast in lead free pewter. Because these are made by hand you can do fun things like add an extra small pin so that they sit just so (also means they have “customized” brass back plates to accommodate the extra […]Boston Biker
- My Work In The Wild: Feather Head Badge With Chris King Headset January 3, 2021One of my customers sent me this amazing picture of my feather badge installed on their (awesome!) bike. Check out Manofmultnomah (here and here), apparently Chris King took some interest in it as well. Want one of your own? Buy it here, or here... Continue reading →Boston Biker
- Boston’s Invitation to Improve Biking in Boston: Draw on Some Maps! December 14, 2020TweetSometimes, the best way to gather ideas and feedback is to let people draw on some maps. Last night, at the Bike Network Open House, pedallovers unveiled a draft for their upcoming plans for a more connected biking network infrastructure … Continue reading →greg
- Boston’s Invitation to Improve Biking in Boston: Draw on Some Maps! December 14, 2020TweetSometimes, the best way to gather ideas and feedback is to let people draw on some maps. Last night, at the Bike Network Open House, pedallovers unveiled a draft for their upcoming plans for a more connected biking network infrastructure … Continue reading →greg
- Boston’s Invitation to Improve Biking in Boston: Draw on Some Maps! December 14, 2020TweetSometimes, the best way to gather ideas and feedback is to let people draw on some maps. Last night, at the Bike Network Open House, pedallovers unveiled a draft for their upcoming plans for a more connected biking network infrastructure … Continue reading →greg

